Onboarding software cost in India can range from a relatively simple employee self-service tool to a full workforce platform covering KYC, approvals, attendance, branch deployment, payroll inputs, transfers, and exits. That difference in scope explains why two products described as “onboarding software” can have very different prices. For Indian companies, the right budget should therefore be based not only on employee count, but also on the onboarding workflow, statutory information captured, verification transactions, locations, integrations, security requirements, and the amount of customization required. If your onboarding workflow is more complex than a standard HRMS module can handle, see how we approached a similar build in our digital employee onboarding essentials guide.
How much does onboarding software cost in India?
Employee onboarding software in India can start at approximately ₹2,495–₹6,999 per month for HRMS plans covering up to 50 employees, based on publicly listed 2026 pricing from Indian HR software vendors. More complex enterprise products and custom-built onboarding applications are commonly quote-based.
For example, greytHR lists plans starting at ₹2,495 per month for 50 employees, Pocket HRMS starts at ₹2,995 per month for 50 employees, and factoHR lists paid plans from ₹4,999 to ₹6,999 per month for up to 50 employees. These are broader HRMS products that include onboarding rather than standalone onboarding-only applications.
The subscription price is only one part of the budget. Indian businesses should also account for implementation, data migration, KYC or bank-verification transactions, SMS/WhatsApp or OTP usage, integrations, training, support, customization, and applicable GST.
Key takeaways
Employee onboarding pricing in India varies substantially by product scope. Codoid’s employee onboarding solution is priced at ₹30 per employee per month, while broader HRMS platforms reviewed for this article start at roughly ₹2,500–₹7,000 per month for around 50 employees.
Employee count matters, but workflow complexity is often the larger cost driver once KYC, approvals, multi-location operations, attendance, shifts, payroll, or custom integrations are added.
Aadhaar, PAN, bank-account verification, OTPs, and communication APIs can introduce usage-based transaction costs in addition to the software licence.
Implementation costs can increase substantially when a company needs multiple legal entities, branches, role-based approvals, historical data migration, APIs, or custom mobile workflows.
For custom software, there is no meaningful fixed “per employee” rate. Clutch’s September 2026 data shows Indian custom software companies commonly listing rates of about US$25–$49 per hour, with project cost depending on scope and effort.
The best comparison is three-year total cost of ownership (TCO), not the vendor’s headline monthly price.
Employee onboarding software is a digital system that collects, validates, approves, stores, and manages the information and tasks required to bring a new employee into an organization.
A basic application might handle:
Employee details
Address information
Job and designation information
Document uploads
Policies and declarations
Approval status
Employee records
A more advanced onboarding platform may also include identity verification, bank verification, role-based approval workflows, employee deployment, branch assignment, attendance, shifts, leave, payroll inputs, transfers, reporting, and employee exit management.
Onboarding plus employee records, attendance, leave, payroll, performance and exit
4
Custom workforce platform
Automate company-specific operating processes
Bespoke onboarding, KYC, deployment, attendance, integrations, reporting and lifecycle workflows
The distinction matters for budgeting. A company needing only digital joining forms should not compare its requirements with the price of a complete enterprise HRMS. Conversely, a field-workforce company should not assume a low-cost onboarding module will automatically handle branch deployment, geo-attendance, shifts, approvals, and verification APIs.
Why does onboarding software cost vary so much?
The main reason is that “onboarding” describes a business process rather than a fixed software specification.
1. Number of employees
Many Indian HRMS products combine a base subscription with a per-employee charge. For example, greytHR’s FY2026 pricing lists ₹2,495 per month for its Essential plan including the first 50 employees and ₹45 for each additional employee. Its Growth plan lists ₹4,495 plus ₹85 per employee above 50.
Pocket HRMS similarly lists ₹2,995 per month for 50 employees plus ₹60 for each additional employee on Standard, and ₹4,495 plus ₹90 per additional employee on Professional.
Your pricing metric may therefore be:
Monthly subscription = base licence + additional employees + add-ons
Do not confuse total workforce size with new hires per month. Confirm exactly which population the vendor bills.
2. Features and modules
Collecting an employee’s name, address, and documents is considerably simpler than building a workflow that also performs:
KYC validation
Bank-account verification
Multi-level approvals
Location assignment
Shift scheduling
Geo-fenced attendance
Camera validation
Payroll inputs
Transfers
Exit processing
Advanced analytics
The additional modules affect both software licensing and implementation effort.
3. KYC and verification transactions
Indian onboarding frequently involves sensitive identity, employment, and financial information. The official EPFO Form 11, for example, includes previous-employment information and KYC fields covering bank account and IFSC details, Aadhaar and PAN where applicable.
If software also connects to external services to validate identity documents or bank accounts, those calls may carry a transaction fee. A platform processing 200 employees per month can therefore have a very different operating cost from one processing 20 even if both have the same number of HR administrators.
4. Locations, branches and organizational hierarchy
A single-office organization may need one workflow. A business operating across multiple states, regions, branches or customer sites may require:
Location hierarchy
Different approval authorities
Branch-specific employee rules
Different designations
Location-specific attendance
Transfers between sites
Local reports and dashboards
Each configurable dimension increases implementation and testing effort.
5. Integrations
Onboarding rarely operates completely independently. Common integrations include payroll, ERP/accounting applications, attendance systems, background-verification platforms, identity services, messaging gateways, Single Sign-On (SSO), document-signing systems and internal APIs.
Some vendors price APIs separately. For example, greytHR’s current calculator lists REST API access and SSO as add-ons in certain plans, while enterprise implementations may bundle them differently.
6. Customization
Configuration and customization are different. Changing an approval level or adding a configurable field is relatively straightforward. Building a new workflow, mobile feature, validation engine, dashboard or external API is development work.
Custom requirements can therefore move a project away from normal SaaS pricing and toward implementation or software-development pricing. Clutch’s September 2026 pricing data lists the typical hourly rate for custom software companies in India at roughly US$25–$49 per hour. That benchmark covers custom software generally, not employee onboarding specifically, so it should be used only as a development-cost reference.
Current employee onboarding and HRMS pricing examples in India
The table below provides a market reference rather than an industry-wide average. It includes Codoid’s employee onboarding solution at ₹30 per employee per month, alongside publicly listed HRMS pricing examples.
S. No
Vendor and plan
Published / stated starting price
Additional employee
Relevant scope
1
Codoid Employee Onboarding Solution
₹30 per employee/month
₹30 per employee/month
Employee onboarding, structured employee data collection, KYC workflows, document management, approval tracking and workforce onboarding capabilities
2
greytHR Essential
₹2,495/month for first 50
₹45/month
Core HR, leave, employee self-onboarding and exit
3
greytHR Growth
₹4,495/month for first 50
₹85/month
Adds advanced attendance, shifts and geo-related capabilities
4
Pocket HRMS Standard
₹2,995/month for 50, billed annually
₹60/month
HRIS, payroll, attendance, self-service and related HR functions
5
Pocket HRMS Professional
₹4,495/month for 50, billed annually
₹90/month
Adds geo-fencing, transfers, assets and exit
6
factoHR Core
₹4,999/month for 50
₹69/month
Employee onboarding, core HR, attendance, leave and payroll
7
factoHR Ultimate
₹6,999/month for 50
₹119/month
Wider HR suite and advanced capabilities
Pricing note: Codoid’s stated pricing is ₹30 per employee per month, which means a 50-employee organization would have a base software cost of approximately ₹1,500 per month, while 100 employees would cost approximately ₹3,000 per month, before any applicable taxes, custom implementation, third-party verification charges, integrations, or additional services.
The products in this table are not feature-equivalent. The comparison is intended to show the broad pricing approaches available in the Indian market rather than identify the lowest-priced product on a like-for-like basis. Codoid’s ₹30 rate is a provided commercial figure, while competitor figures should continue to be cited from their respective published pricing pages.
What onboarding features have the biggest impact on cost?
S. No
Capability
Relative cost impact
Why
1
Employee profile and forms
Low-medium
Data model, validation and user interface
2
Document uploads
Low-medium
Storage, permissions and document management
3
Configurable approvals
Medium
Workflow rules, roles and notifications
4
Aadhaar/PAN verification integration
Medium-high
API integration, security and transaction charges
5
Bank penny-drop verification
Medium-high
Financial verification API and per-transaction cost
6
SMS/OTP/WhatsApp communication
Medium
Integration plus usage charges
7
Multi-company/multi-branch hierarchy
Medium-high
More configuration, permissions and reporting
8
Dashboards and advanced reporting
Medium
Data modelling and analytics
9
Bulk employee migration
Medium
Mapping, validation and error processing
10
Mobile onboarding
Medium-high
Mobile development and device testing
11
Geo-fenced attendance
High
GPS, permissions, radius rules and exception handling
12
Camera/location attendance
High
Mobile capabilities and validation logic
13
Complex shifts and rosters
High
Scheduling rules and attendance calculations
14
Payroll/ERP/API integrations
High
Interface development and reconciliation
15
Custom workflow engine
High
Development, testing and long-term maintenance
A procurement team should therefore ask not simply, “How much is your employee onboarding software?” but “Which of our required workflows are included in that price?”
How should an Indian company calculate its onboarding software budget?
A useful budgeting formula is:
Annual onboarding software TCO = subscription or development cost + implementation + migration + transaction charges + integrations + infrastructure + support + training + applicable taxes
Step 1: Estimate the workforce and onboarding volume
Record:
Total active employees
Expected annual hires
Peak monthly onboarding volume
Number of HR/onboarding administrators
Number of managers or approvers
Number of branches and legal entities
This identifies the likely licence and transaction volumes.
Step 2: Separate must-have features from optional features
For an initial release, prioritize capabilities that directly control successful onboarding. For example:
Core scope: employee details, documents, approval, status tracking, user permissions and reports.
Extended scope: automated KYC, bank verification, geo-attendance, payroll integration, mobile applications, shift management and advanced analytics.
This separation prevents optional HRMS functionality from inflating an onboarding project unnecessarily.
Step 3: Calculate recurring transaction costs
Estimate:
Monthly verification expense = hires per month × verification transactions per hire × provider rate
Do the same for OTP, WhatsApp/SMS, background verification, electronic signatures and other pay-per-use APIs.
Step 4: Estimate implementation and migration
Implementation becomes more expensive when existing employee information is distributed across spreadsheets, payroll tools or multiple branch databases. Budget for:
Data mapping
Cleaning and deduplication
Trial migration
Validation
Production migration
Exception correction
Step 5: Price integrations separately
Ask for each integration to be quoted independently. That makes it easier to determine whether payroll integration, SSO, ERP synchronization or an external verification service belongs in phase one or can be deferred.
Step 6: Compare three-year TCO
A low subscription with expensive integrations and support can cost more over three years than a product with a higher licence but more functionality included. Compare the same cost categories across every proposal.
Worked example: what could onboarding software cost for 100 employees?
Consider an Indian company with 100 active employees that wants employee self-onboarding and core HR functionality. Using greytHR’s published FY2026 Essential formula: ₹2,495 + (50 additional employees × ₹45) = ₹4,745 per month. That equals ₹56,940 per year before applicable taxes.
If the company instead needs the Growth tier with advanced attendance and shift capabilities: ₹4,495 + (50 × ₹85) = ₹8,745 per month. That equals ₹104,940 per year before applicable taxes.
This is a worked example using one vendor’s published formula, not an average price or purchasing recommendation. Implementation, integrations and other services can still change the final amount.
For budgeting purposes, Indian buyers should also clarify tax. CBIC’s IT/ITES guidance states that IT services attract 18% GST; organizations should confirm the applicable treatment with their finance or tax team for the specific contract.
Anonymised case study: building onboarding for a multi-location field workforce
The following case study is based on an implemented employee onboarding and workforce application. All organization, customer, product and identifying information has been omitted.
Industry and operating context
The application supports a multi-client, branch-based field workforce environment in which employees can be assigned to different locations and operational areas. The underlying workflow includes client-to-branch-to-employee relationships, designations, onboarding limits, employee deployment, relievers, transfers, geo-based attendance and shifts.
This type of operation illustrates why onboarding software for field-intensive organizations can become considerably more complex than a standard digital joining form.
What was implemented?
1. Structured employee onboarding profiles
The application captures employee information in separate sections covering:
Basic information
Current and permanent address
Job information
Aadhaar and PAN details
Bank account and IFSC information
Education
Previous employment
Employee declarations
ESI-related information
Completion indicators help users track which sections are still outstanding before an onboarding request proceeds.
Pricing implication: more fields alone do not dramatically increase cost, but conditional validations, document management, configurable mandatory fields and approval logic do.
2. Approval and status workflows
Onboarding requests carry employee, designation, mobile, branch, zone and onboarding-status information. Authorized users can review requests and approve or reject them, while another view tracks Pending, Approved and Declined records and decline reasons.
Pricing implication: role-based workflow, rejection handling, notifications and auditability require more implementation than simple form submission.
3. KYC and verification reporting
The implementation includes reporting around Aadhaar, PAN and bank-account verification, including penny-drop-related data. The system also tracks service balances and estimated KYC processing capacity for integrated services.
Pricing implication: third-party verification introduces two separate costs, technical integration and ongoing transaction charges.
4. Multi-dimensional dashboards
Onboarding dashboards can be filtered by state, region, zone, organization, client, designation and date. They track total onboarding records along with completed, pending and declined statuses. Advanced views also provide KYC-status reporting.
Pricing implication: advanced dashboards require a clean data model and reporting layer. They become more expensive when data must be aggregated across multiple entities and integrations.
5. Branch, deployment and attendance configuration
The wider implementation supports branch-level workforce configuration, including location coordinates, attendance rules, camera or location validation, attendance radius and shifts. It also covers bulk shift uploads and supervisor-assisted attendance for employees who may not have individual device access.
Pricing implication: geo-location, camera integration, mobile device behaviour, shift rules and exception handling can turn an onboarding project into a much broader workforce-management system.
6. Workforce movement and lifecycle management
The application includes employee transfers, relievers, employee blocking and exit requests. Its bulk-upload facility can process Excel-based records and track success counts, defects and processing status.
Pricing implication: once onboarding is connected to the employee’s entire lifecycle, it should be scoped and budgeted more like an HRMS or workforce platform than a standalone onboarding form.
What does this implementation teach about onboarding software pricing?
The central lesson is that business process depth matters more than the number of screens. A workflow involving employee forms, KYC, approvals, multiple operational locations, field attendance, shifts, transfers, bulk processing and employee exits requires significantly more configuration, integration, testing and support than a conventional self-onboarding portal.
The source user guide documents functionality but does not contain verified before-and-after metrics such as time saved, onboarding error reduction, HR productivity improvement or ROI. Those results should therefore be measured before making quantitative case-study claims. Recommended metrics to begin collecting include:
Median time from onboarding initiation to approval
Percentage of onboarding records completed without manual correction
KYC rejection or rework rate
Average HR processing time per new employee
Percentage of employees completing onboarding without HR assistance
Number of verification transactions per successful onboarding
Cost per completed onboarding
Pending onboarding ageing
Approval turnaround time
Bulk-upload defect rate
These metrics can later turn a functional implementation story into a credible business case.
SaaS HRMS vs enterprise platform vs custom onboarding software
S. No
Factor
Standard SaaS HRMS
Enterprise HRMS
Custom onboarding/workforce application
1
Pricing
Published subscription is common
Usually quote-based
Project or dedicated-team pricing
2
Initial cost
Lowest
Medium-high
Usually highest
3
Deployment speed
Usually fastest
Medium
Depends on scope
4
Custom workflow
Limited-moderate
Moderate-high
Very high
5
Unique integrations
May require add-ons
Usually supported
Can be built specifically
6
Multi-location complexity
Plan-dependent
Strong
Designed around exact process
7
Maintenance
Vendor-managed
Vendor-managed
Vendor/internal development team
8
Best fit
Standard HR processes
Larger organizations
Distinctive or complex operating workflows
9
Cost predictability
High
Medium
Depends on scope control
10
Ownership/control
Limited
Limited-moderate
Highest when contract and architecture allow it
When is SaaS usually the better option?
Choose SaaS when most of your onboarding workflow matches standard HR processes and your competitive advantage does not depend on a custom workforce system.
When should a company consider custom software?
Custom development becomes more defensible when the organization has persistent requirements that standard HRMS products cannot handle cleanly, for example, unusual multi-client deployment rules, custom verification workflows, specialized field operations or deep integrations with internal systems.
Custom software should not be selected simply because standard software feels less flexible. The additional development, QA, security, maintenance and enhancement obligations must be justified. Our web app development services team can help scope whether a custom build is actually justified for your workflow.
Best practices for controlling onboarding software cost
Define the workflow before requesting quotations
Document every stage from employee creation to final approval. Vendors cannot give comparable estimates when each one is working from a different interpretation of “onboarding.”
Price transaction services separately
Request separate rates for identity verification, bank verification, messaging, electronic signing and background checks. This prevents variable expenses from disappearing inside an apparently low licence quote.
Pilot the most difficult branch, not the easiest one
If your workforce operates across locations, use a representative location with realistic shifts, approvals and exceptions. A successful pilot at the simplest office may hide problems that surface later.
Ask what happens when headcount changes
Clarify minimum licences, inactive employees, contractors, seasonal staff, archived employees and employees who exit midway through the billing period.
Control customization
Before approving a custom feature, ask whether the requirement can be handled through configuration or a process change. Every custom workflow becomes something that must be maintained and tested later.
Design for Indian privacy requirements
Employee onboarding systems process significant amounts of personal information. India’s DPDP Act and 2025 Rules are being brought into force on a phased basis. The notified Rules specify immediate commencement for some provisions, a one-year commencement period for Rule 4, and an 18-month period for many other operational rules. Organizations implementing systems in 2026 should therefore build privacy readiness into current architecture rather than waiting for every operational provision to commence.
That includes appropriate access controls, data minimisation, retention processes, auditability, security measures and mechanisms needed to support applicable data-principal rights when those obligations apply. Legal requirements should be validated against the organization’s specific processing activities.
Common onboarding software budgeting mistakes
S. No
Mistake
Why it happens
Budget impact
Better approach
1
Comparing only monthly licence prices
Pricing pages are easy to compare
Hidden implementation costs
Compare three-year TCO
2
Assuming onboarding includes KYC
“Onboarding” means different things to different vendors
Extra API and transaction charges
Create a feature-level requirements matrix
3
Ignoring data migration
Existing spreadsheets look simple
Cleanup and reconciliation effort
Audit source data before quotation
4
Over-customizing the first release
Every department requests its ideal workflow
Higher build and maintenance cost
Launch core workflow first
5
Forgetting additional employee rates
Buyer considers only base price
Cost rises with headcount
Model current and three-year workforce sizes
6
Ignoring locations/entities
HQ workflow is used for the estimate
Reconfiguration later
Include branches and legal entities in scope
7
Forgetting GST
Quote is reviewed before tax
Budget shortfall
Compare tax-exclusive and tax-inclusive totals
8
Treating integrations as “just an API”
Integration complexity is underestimated
Additional development and testing
Scope each interface individually
Why is my onboarding software quote much higher than the website price?
The website price normally represents a standard product configuration. Your quote may also include implementation, migration, additional modules, integrations, multi-company functionality, premium support, custom reports or higher employee volumes. Ask the vendor to separate subscription, implementation, add-ons and usage charges so that you can identify the difference.
Why does KYC make onboarding software more expensive?
KYC can add both integration and usage costs. The application must securely transmit data to a verification provider, handle the response, store appropriate status information, manage failures and provide reporting. The provider may also charge for each verification attempt. Therefore, budget against expected onboarding transactions rather than employee headcount alone.
Why does a custom onboarding application cost more upfront?
A custom application requires discovery, architecture, UI/UX design, software engineering, quality assurance, security work, deployment and ongoing maintenance. The advantage is flexibility. The disadvantage is that your organization effectively takes responsibility for a software product rather than merely configuring an existing one.
How do I compare two onboarding software quotations fairly?
Normalize both quotations into the same three-year cost model. Include:
Licences
Implementation
Additional employees
Integrations
Transaction charges
Migration
Support
Training
Upgrades
Taxes
Then compare feature coverage and contractual assumptions alongside cost.
Limitations and risks to consider
Pricing pages change, and vendors can modify plan inclusions, minimum commitments and commercial terms. Always request a current quotation before approving a budget.
Security and privacy requirements can also change implementation scope. This is especially relevant when onboarding applications store government identifiers, bank information and employment records.
For Aadhaar-related processes, organizations should review the current UIDAI legal and regulatory framework and ensure that any authentication or offline-verification approach is permitted for their specific use case. UIDAI maintains current authentication, verification, information-sharing and data-security regulations.
Finally, a custom application introduces product-maintenance risk. The initial development quotation should not be mistaken for lifetime cost. Hosting, monitoring, security updates, operating-system changes, integration maintenance and feature enhancements continue after launch.
Conclusion
Onboarding software cost in India should be evaluated as a total workflow cost rather than a licence price. For relatively standard requirements, publicly listed HRMS packages provide a useful starting benchmark of roughly ₹2,500-₹7,000 per month for around 50 employees. As requirements expand into KYC, multi-location operations, geo-attendance, shifts, custom approvals, integrations and employee lifecycle management, costs move beyond simple per-employee pricing and may require enterprise or custom development.
Before requesting quotations, document the complete onboarding journey, identify must-have integrations, estimate annual hiring and verification volumes, and calculate three-year TCO. That approach produces a budget that reflects how the system will actually operate, not merely what appears on a pricing page. Talk to our team if you’d like help scoping your own onboarding workflow and budget.
Not Sure What Your Onboarding Software Should Cost?
What is the average employee onboarding software cost in India?
There is no reliable single industry average because products have different scopes. Current public HRMS pricing shows plans containing onboarding starting around ₹2,495-₹6,999 per month for approximately 50 employees, while enterprise systems are often custom-priced. A company requiring KYC, geo-attendance, integrations or custom workflows should expect additional costs beyond the base subscription.
How much does onboarding software cost per employee?
Published incremental rates vary by vendor and plan. Among the Indian pricing examples reviewed for this article, additional-employee charges range from roughly ₹45 to ₹119 per employee per month. These figures are not directly comparable because each tier includes different functionality.
What are the hidden costs of employee onboarding software?
The most common costs outside the headline subscription are implementation, employee-data migration, customization, API integrations, KYC or bank-verification transactions, messaging charges, premium support, training and taxes. Multi-company deployments, custom mobile workflows and advanced attendance features can add further cost.
Does Aadhaar and PAN verification increase onboarding software cost?
Yes, when actual verification services are integrated. Collecting fields is relatively inexpensive; connecting the application to external verification systems requires development and may create per-transaction charges. The software must also handle verification results, errors, permissions, security and reporting appropriately.
Should a 50-employee Indian company buy or build onboarding software?
A standard HRMS is usually more economical when the company's processes are conventional. A custom build is worth evaluating when workflows are materially different from standard HR practices or when the software must integrate deeply with unique operational systems. Compare at least a three-year TCO before deciding.
How much should a 100-employee company budget?
Using one current published pricing formula as an example, greytHR Essential works out to ₹4,745 per month for 100 employees, while its Growth plan works out to ₹8,745 per month, before taxes. Other products use different base prices and feature bundles, so these numbers should be treated as examples rather than market averages.
Is GST charged on HR and onboarding software in India?
Software supplied as an IT service can attract GST. CBIC's IT/ITES FAQ states an 18% GST rate for IT services. Companies should confirm the correct GST treatment for their specific licence, implementation and service contract with their finance or tax adviser.
What are the most important features to include in an Indian employee onboarding system?
At minimum, look for structured employee records, document management, configurable mandatory fields, approval workflows, role-based access, status tracking, reports and secure data handling. Depending on the organization, Indian workflows may also require previous-employment information, bank details, payroll integration, statutory information, KYC verification, multi-location deployment and employee self-service.
In software development, Python is the most popular programming language today. It is easy to read and very flexible. Python also has many libraries that help developers get their work done. This makes Python a great choice for a variety of projects. You can use it to create many different types of apps, from web apps to mobile apps. Python plays an important role in the digital world. This guide will help you learn how to Develop Apps in Python. It has helpful tips and information for both new and experienced developers.
Key Highlights
Python is a great choice for making apps because it is flexible and has many libraries.
Frameworks like Kivy and BeeWare help Python support mobile app development. This means you can make apps that work on different platforms.
It’s important to know what Python can do well and where it may fall short. Picking the right framework is also vital in the development process.
To create successful apps, you should master Python libraries, create a user-friendly interface, and focus on strong security measures.
Python plays a key role in popular apps like Instagram, Spotify, and Pinterest. This shows it can handle tough tasks and serve many users.
Essential Tips for Developing Apps in Python
Building applications in Python successfully needs several skills and good choices. It goes beyond just writing code. You must choose the right tools. You also need to know what Python can actually achieve.
We begin by picking a framework that meets your project’s needs. After that, we look into Python’s many libraries. Next, we create easy-to-use interfaces and include good security features for your app. All these steps are important to build an application that works well and connects with users.
1. Choosing the Right Framework for Your Project
Navigating Python frameworks is usually the first step in app development. The framework you choose will depend on your project type. Are you building a web app, mobile app, or desktop application? If you are making a web app, Django is a great choice. It is strong and can handle more growth as you need it.
Flask has a simple design and gives developers more options. If you are building a mobile app, Kivy and BeeWare are good choices. Kivy is useful for making stylish apps with multi-touch features. BeeWare is better for creating apps that feel like they belong on different platforms, focusing on a native feel. You should think about your project needs and what each framework does best. This will help you start your app on the right foot.
2. Setting Up a Pythonic Development Environment
Creating a good development environment is like making a workspace for an artist. You need to have the right tools nearby. A well-organized Python development environment makes it easier to write code, fix problems, and work with others. This helps make the software development process smooth and efficient.
Start by picking a good IDE (Integrated Development Environment). Popular options are PyCharm and VS Code. These IDEs help you edit code, fix mistakes, and handle different versions of your code. A virtual environment gives your project a safe space. It prevents issues with different Python libraries and keeps your project running smoothly.
Example:
First, download and install VS Code. After this, add the Python extension.
Next, open your project folder. Create a file named app.py.
3. Mastering Python’s Libraries for App Development
Python is great for making apps. It has a wide range of libraries. These libraries help developers add features to their apps easily. This includes web scraping options. Developers don’t need to start from scratch. For apps that work with data, libraries like Pandas, NumPy, and SciPy are very useful. They help with data analysis and scientific computing tasks.
When we talk about machine learning, TensorFlow and PyTorch are key tools. They help developers add smart algorithms to their projects. For web development, there are libraries like Flask and Django. For game development, Pygame is a popular choice. If you need to work on image processing, Pillow is a good option. Knowing how to use these libraries allows developers to build strong and effective applications.
Example:
Using Pandas for Data:
import pandas as pd

data = {'Name': ['Alice', 'Bob'], 'Age': [25, 30]}
df = pd.DataFrame(data)
print(df)
Creating a Web App with Flask:
from flask import Flask

app = Flask(__name__)

@app.route('/')
def home():
return "Welcome to My Web App!"

if __name__ == '__main__':
app.run(debug=True)
4. Designing a User-Friendly Interface
In the app market, having a design that is easy to use can really impact success or failure. A good design links your code to the users. It should be simple to use and easy to navigate. A complicated or messy interface can turn users away, even if your app works well.
Start by planning how your app will look. Ensure that you can easily see the links between different screens or features. Pay careful attention to your choices of color, text style, and the layout of visual elements. A nice-looking design can make the user experience better. For mobile applications, remember the smaller screens. Focus on making it easy for people to touch and interact with the app.
In a time when data breaches are often in the news, adding strong security features to your app is very important. This protects user data and keeps their trust in your app. It also helps your app stay popular for a longer time. A single security flaw can cause big problems. It can expose sensitive information and damage your app’s reputation.
First, use strong methods to check who can access user accounts.
Also, secure sensitive data when it is sent and stored to prevent unauthorized access.
Make sure to keep your app’s features up-to-date to fix known problems.
Example:
Encrypting Passwords:
from werkzeug.security import generate_password_hash

password = "mypassword"
print(generate_password_hash(password))
Using Environment Variables:
import os
os.environ['SECRET_KEY'] = "mysecretkey"
print(os.environ.get('SECRET_KEY'))
The performance of an app is key to keeping users satisfied. When an app is slow or takes up too much energy, users may feel frustrated and decide to leave. Python is a flexible tool that supports asynchronous programming. However, it requires careful tweaks to ensure your app runs well. This is especially true for heavy mathematical calculations or large datasets.
Start by looking at your Python code to find any slow sections. Improve your loops, use better data structures, and reduce unnecessary tasks. Consider saving data that users check often to reduce database searches.
Example:
Caching Results:
from functools import lru_cache

@lru_cache(maxsize=10)
def square(n):
return n * n

print(square(4))
7. Ensuring Cross-Platform Compatibility
In today’s tech world, it is important to have your app work well on different devices. You want users to feel the same experience, whether they are using your app on a desktop, phone, or tablet. If your app does not work well on these platforms, you could lose many potential users.
Python can be very helpful for you. It has tools like Kivy and BeeWare. These tools make it easy to create open source apps for several systems. This includes Windows, MacOS, Linux, Android, and iOS. You can use the same code for all these platforms. However, keep in mind that you may need to tweak some things for each system to make everything run smoothly. A great example of an app you can build is Bridge Commander.
Example:
Using Kivy for Cross-Platform Apps:
from kivy.app import App
from kivy.uix.button import Button

class MyApp(App):
def build(self):
return Button(text='Hello!')

MyApp().run()
8. Debugging and Testing Your Python App
Debugging and testing are key parts of making software. This also applies to Python apps. These steps are all about finding and fixing mistakes. They help your app run well and provide a good experience for users. If your app has bugs, users might lose trust in it. This can harm your app’s reputation.
Python offers several methods to assist with fixing issues and checking your code. You can use debuggers to go through your code step by step. You can set breakpoints and look at the values of variables while your application is running. You should also create unit tests to ensure that each section of your application functions properly. Furthermore, use integration tests to verify that different sections of your application work well together.
Example:
Debugging in VS Code:
Add breakpoints in VS Code.
Press F5.
Step through your code.
Testing Code:
def add(a, b):
return a + b

assert add(2, 3) == 5
9. Deploying Your Python App Successfully
Deploying your Python app means it is moving from your development environment to the real world. This is when users can start to use your work. A smooth deployment is very important. It allows users to access your app easily without any issues. At this stage, you usually need to pick a good hosting provider, set up servers, and organize any databases or tools you need.
Cloud platforms such as AWS, Google Cloud, and Heroku help you deploy Python apps more easily. They offer environments and solutions that can expand based on your needs. If you are building web applications, choosing the right Python web framework, like Django or Flask, can significantly impact how your app is deployed.
Example:
Deploy to Heroku:
heroku create
git push heroku main
10. Maintaining and Updating Your App
The work of app development doesn’t stop when you launch it. It is a continuous process that needs regular attention. You must make updates and changes to match user needs and market trends. If an app doesn’t change, it might get pushed aside by competitors who keep improving. To keep users interested, it is key to fix problems, improve performance, and introduce new features.
Using a good version control system, such as Git, helps keep track of changes. It also makes teamwork better. Getting feedback from users through reviews, surveys, or analytics is useful. This feedback shows what areas need attention. For software engineers, having a mindset focused on constant improvement is key to making apps that will stand the test of time.
Example:
Use Git for Updates:
git commit -m "Fix bug"
git push origin main
Collect User Feedback:
Use simple surveys or app reviews to understand what users need next.
Understanding Python’s Role in Mobile App Development
Python may not be the top choice for mobile app development, particularly for Android apps. Still, it has made its mark in this space. It doesn’t try to replace native languages like Swift or Kotlin. Instead, Python is a good option, especially for development that works on multiple platforms.
Python helps developers create mobile apps using frameworks like Kivy and BeeWare. They can use one set of code for different systems. This way makes development easier and cheaper. It also keeps things the same across all platforms.
The Significance of Python in the Mobile Ecosystem
Python is starting to be used in mobile app development. This includes games like World of Tanks. This change is because Python has many libraries and frameworks made for this purpose. Its popularity is also noted by the TIOBE index. Even though Python is not usually a language for mobile platforms, tools like Kivy and BeeWare help to solve this issue.
These frameworks are like a bridge. They turn Python code into a format that mobile operating systems, like Android and iOS, can read. Kivy is useful because it is flexible. It helps developers create stunning and interactive mobile applications. BeeWare wants to give a native look and feel across different platforms. This makes apps feel more like native user interfaces. It does this by using UI elements that fit each specific platform.
Case Studies: Successful Python Mobile Apps
The effect of Python on mobile app development is shown well through real examples, especially in data science. These cases show how Python, when paired with other technologies, can create apps that draw in millions of active users and reach great financial success.
Take Instagram, for example. This huge photo and video-sharing platform has over a billion active users. It uses Python for its backend system and several Python app examples. Likewise, Spotify, the popular music streaming service, depends a lot on Python for data analysis and recommendation systems. This helps create personalized listening experiences for its large user base. These examples highlight how well Python can manage the needs of big applications in the mobile app world.
App
Category
Description
Instagram
Social Media
Leverages Python for its backend infrastructure and scalability
Spotify
Music Streaming
Uses Python for data analysis and recommendation algorithms
Pinterest
Content Sharing
Relies on Python and Django for handling substantial content loadss
Overcoming Challenges in Python App Development
Python is a good choice for making apps. However, you should also be aware of some challenges. A major issue is that Python relies on external frameworks, like Kivy and BeeWare. These frameworks allow Python to meet the unique requirements of mobile devices.
They can create problems too. You might face issues with performance. You may also have trouble accessing features that only work on some platforms. Plus, you need to ensure that your app runs on various versions of operating systems. To tackle these problems, you might have to ask for help from the community. Be prepared to learn about the specifics of each platform as well.
Handling Platform-Specific Limitations
While tools like Kivy and BeeWare make it easier to create mobile apps using Python, there are still some limits. Python does not have the same access to phone features as native languages like Swift for iOS or Kotlin for Android. This is especially true when you want to deploy on Google Play. Because of this, Python apps might not use all the features that native apps can.
These limits may happen when you try to use special hardware features. For example, this includes a device’s camera or Bluetooth. To fix these issues, you might need to write specific code for each platform. This code helps link your Python app to the native features you want to use.
Achieving Seamless Integration with APIs
In today’s app world, it’s common for apps to connect with other services. Many apps have features like social media sharing, cloud storage, and payment gateways. To make this work well, they need to use APIs effectively. Still, the integration process can be tricky. Problems can occur from differences in data formats, authentication methods, or API versions.
To handle these problems, read the API documentation closely. This helps you manage errors when you get unexpected responses. Using a modular approach makes it easier to update or change things in the future.
Conclusion
In conclusion, creating apps in Python requires careful planning and attention to detail. You need to choose the right framework. It is also important to set up a good development environment. Use Python’s libraries correctly. Design easy-to-use interfaces. Ensure strong security measures are in place. Focus on improving performance and make sure your app works on different platforms.
Debugging, testing, launching, maintaining, and updating your app are important steps in app development. Python is great for mobile app development because it can deal with many challenges. This includes challenges that come from using different programming languages. When you use Python for your app projects, you can take full advantage of its benefits in the ever-changing world of Python application development.
Frequently Asked Questions
What Makes Python Ideal for App Development?
Python is popular for app development because it is easy to read and understand. Its clear syntax helps developers write code quickly. It has many libraries that speed up the development process for command line applications. This makes Python a good choice for startups. These projects often need to get to market fast. This is especially true in the field of artificial intelligence.
Can Python Be Used for Both Android and iOS Apps?
Yes, you can use Python to make apps for both Android and iOS. This is possible because of tools like Kivy and BeeWare. These frameworks allow developers to build apps for different systems using only one set of Python code.
How Do I Start Learning Python for App Development?
There are many ways for you to learn. You can find online courses and interactive tutorials that help with Python app development. Joining the Python community is also a great idea. Working on simple projects will help you learn more. This way, you will get practice and strengthen your skills.
In today’s online world, people use different devices to open websites. These devices have various screen sizes and dimensions. Because of this, responsive web design is important. It plays a big role in web development and directly affects user experience. A website that can easily adjust to different screen sizes creates a friendly experience for everyone. This blog will share useful CSS tips and tricks for responsive design. These tips will help you create beautiful and responsive websites that work well on all types of devices and screen sizes. Additionally, if you’re looking for expert Software Development services, you can leverage these techniques to enhance your projects and ensure a seamless user experience across all platforms.
Key Highlights
Discover how web design changed from fixed layouts to fluid grids for responsive design.
Learn the main ideas like using relative units and good practices for responsive design.
Get to know CSS media queries so you can make designs that fit different screen sizes.
See how to use CSS rules based on the type of device using media queries.
Use CSS Flexbox and CSS Grid to make layouts that change for different devices.
Improve responsiveness by setting viewports for better scaling and using responsive typography techniques.
Understanding the Foundations of Responsive Design: CSS Tips and Tricks for Success
At its core, responsive web design wants to give a good view on any device. This means the website should be simple to read, navigate, and use. It does not matter if you are using a desktop, a tablet, or a mobile phone. We no longer have to make different websites for every device. Instead, responsive design allows us to create one website that smoothly adjusts to fit any screen size.
A key point in responsive web design is to use relative units like percentages and ems. This is better than using fixed size pixels. With this change, website elements can adjust their size based on the screen size. This means the website will look good on all devices. By applying CSS tips and tricks for responsive design, you can ensure that your website remains flexible and visually appealing across all screen sizes. Now, let’s take a closer look at the main rules of responsive design. These rules will help you create websites that are both attractive and functional.
The evolution from fixed layouts to fluid grids
Traditionally, web pages had fixed sizes. This caused some issues. A website made for one screen size often looked odd on another. However, web design has improved. Now, we use fluid grids. These grids work with relative units. This allows web page parts to resize smoothly. They also maintain their proportions on different screen sizes. This change helps create a good user experience on all devices.
Key principles of responsive web design
Responsive web design is about making websites work well on different screens and devices. It includes some key best practices. These practices help websites look good on small mobile phones and large desktop screens. A major part of this is using relative units like percentages and em values instead of fixed pixel values. This is very important for font size, width, and margins. With relative units, the layout can change according to screen size. This helps create a good user experience on any device.
Imagine you are reading a cool article on your phone. If the text is all cramped up, it is hard to read. This shows how important it is to change our designs for different screen sizes. We can use CSS media queries to help us with this.
Think of media queries as clever filters in your CSS styles. They let us use different styles depending on the device you use to view the website. For instance, we can set one style for big computer screens, one for tablets, and another for mobile phones. This helps make it easy to read and enjoy the content, no matter what device you have. CSS tips and tricks for responsive design make great use of media queries to ensure a seamless experience across various devices and screen sizes.
1. Use Relative Units Instead of Fixed Units
When you design for different screen sizes, don’t use fixed units like pixels (px) for width, height, and fonts. Use relative units instead. Good options are percentages (%), em, rem, and viewport units (vw, vh). These units help your design adapt based on the parent container or viewport. This gives your design more flexibility.
/* Using relative units */
.container {
width: 80%; /* 80% of the parent container */
}

h1 {
font-size: 3rem; /* Font size relative to root font size */
}
2. Master Media Queries
Media queries help you change styles based on screen width or type of device. Problems can happen when you do not adjust for different devices. With media queries, you can set up custom layouts for different screen sizes. For instance, you can use a column layout for desktops and change it to a single-column layout for mobile devices. By applying CSS tips and tricks for responsive design, media queries allow you to create websites that automatically adjust to provide the best user experience on any device.
/* Example of media queries */
@media (max-width: 768px) {
.container {
flex-direction: column; /* Stack items vertically on smaller screens */
}
}

@media (min-width: 769px) {
.container {
flex-direction: row; /* Display items side by side on larger screens */
}
}
3. Flexbox for Flexible Layouts
Flexbox is a strong tool for layouts in CSS. It helps you make flexible and responsive layouts without having to do tricky math or adjustments. You can simply change how items align and spread out based on the screen size.
/* Flexbox layout */
.container {
display: flex;
flex-wrap: wrap; /* Wrap items onto new lines when necessary */
}

.item {
flex: 1 1 300px; /* Each item will take up at least 300px but can grow */
}
4. Responsive Grid Layout
CSS Grid is great for making detailed grid layouts. You can create a grid that changes automatically with the screen size. By using auto-fill and minmax, you can set a minimum value for the grid items. This helps make sure your layout looks good on any screen size.
screen size.
/* Responsive grid using CSS Grid */
.container {
display: grid;
grid-template-columns: repeat(auto-fill, minmax(200px, 1fr)); /* Automatically fill columns based on available space */
gap: 20px;
}
5. Use Viewport Units (vw, vh)
Viewport units like vw (viewport width) and vh (viewport height) are great for sizing elements based on the viewport. For instance, you can use vh to set the height of a header. You can also use vw for font sizes that change with the screen size.
/* Example of viewport units */
header {
height: 10vh; /* Header height is 10% of the viewport height */
}

h1 {
font-size: 5vw; /* Font size is 5% of the viewport width */
}
6. Hide Elements on Small Screens
In some situations, you might want to hide specific elements on smaller screens. This is to help improve the user experience. You can do this by using the display: none property inside a media query.
/* Hide sidebar on small screens */
@media (max-width: 480px) {
.sidebar {
display: none;
}
}
7. Make Images Flexible
Images can mess up layouts on smaller screens if they are not responsive. To fix this, you should set the max-width to 100% and the height to auto. This way, images will scale properly and fit in their containers.
/* Responsive images */
img {
max-width: 100%; /* Ensures the image doesn't overflow its container */
height: auto; /* Maintains the aspect ratio */
}
8. Mobile-First Design
A mobile-first approach is all about designing for smaller screens first. After that, you add styles for larger screens by using media queries. This way, your website works well on mobile devices. It also helps to cut down on extra CSS for bigger screens.
To make sure your layout looks good on mobile devices, always add the viewport meta tag in your HTML. This tag controls the width of the viewport and the starting zoom level. It helps your design appear nice on any screen size.
<!-- Viewport meta tag for responsive design -->
<meta name="viewport" content="width=device-width, initial-scale=1.0">
10. Avoid Fixed Widths
Avoid using fixed width values, like width: 1000px, in your CSS. This practice can break your design on smaller screens. Instead, use flexible layouts such as flexbox or grid. These two options allow you to set relative widths. This way, the layout can change and fit different screen sizes.
Practical examples of Flexbox for dynamic content reflow
Flexbox is a useful tool for adjusting how content fits in a container. For instance, think about a navigation bar with menu items. With Flexbox, we can make these menu items turn into a dropdown on smaller screens. On larger screens, they can stay aligned and neat. This change helps improve the user experience for everyone. Using CSS tips and tricks for responsive design, Flexbox makes it easy to create flexible, responsive layouts that work seamlessly across various screen sizes.
Flexbox is a great tool for changing how content is laid out. It can be used in several ways. Flexbox helps us create flexible and responsive web design. This makes our designs work well on different screens.
Implementing CSS Grid for Advanced Responsive Layouts: CSS Tips and Tricks for Success
Flexbox is useful for basic layouts, whether in rows or in columns. CSS Grid takes it a step further with a two-dimensional grid. This means you can place elements from left to right and from top to bottom. You can picture it like a table in a spreadsheet. It helps you position and size content very precisely. This is where CSS Grid stands out.
CSS Grid is a great option for making complex layouts, similar to what you find in magazines. It handles different screen sizes very well. This means everything will look nice, no matter what device you are using.
Understanding the grid system and its application
CSS Grid is all about making a grid layout using CSS Grid Layout. You create rows and columns to shape a clear layout. Imagine a web design that has a header, a sidebar, a main content area, and a footer. With CSS Grid Layout, you can easily divide the web page into these sections. This makes the page look good. It also helps each section to fit nicely on different screen sizes. This method ensures the site works well for people using computers and phones, making it one of the best CSS tips and tricks for responsive design.
Designing complex layouts with CSS Grid
CSS Grid lets us create more than just simple layouts. We can build complex and responsive designs. It is easy to set up elements in a grid format. We can define areas in the grid and place content there. This helps make our layouts look good. We can also change how these elements appear on different screens. We do this with media queries. This feature ensures that our complex layouts work well on various devices. It is important to meet the needs of all the different devices that people use to view web content.
Enhancing Responsiveness with Viewport and Typography
Responsiveness is not only about how things look. We should consider how users interact with our content, too. The viewport and font can change how easily users navigate our website on any device. When a website changes to fit the screen, especially on mobile phones, it can improve the user experience a lot. By properly setting the viewport, we help our website adjust to different screen sizes. This prevents unusual zooming or scrolling sideways.
Font choice matters a lot for reading ease. It greatly affects how people feel about our content. To make it easy to read on different screen sizes, we should adjust font sizes and line heights. This keeps everything clear and easy to read.
Configuring the viewport for optimal scaling
The viewport is the part of a web page that people can see. It is very important for making websites responsive, especially on mobile devices. The viewport meta tag helps manage the width of the viewport and how this area is scaled. You can imagine it as a window through which users view the website on their devices. The scale section of the viewport meta tag determines how the website fits into the width of the viewport.
If we use the viewport meta tag set to width=device-width, initial-scale=1.0, it means the browser should adjust the viewport width to fit the device width. This helps to scale the content correctly. By doing this, we prevent the page from zooming in by default. Smaller devices often face this issue.
Responsive typography techniques for better readability
Responsive typography aims to make text easy to read on any screen size. It’s not just about picking font sizes. It involves changing typography to suit different devices. This helps improve the user experience. To achieve this, we consider font sizes, line heights, and letter spacing. We want text to be clear and nice-looking on both small screens and large displays.
A good way to change font size is to use relative units like em or rem instead of fixed pixels. Rem units depend on the font size of the parent element. This helps the font size adjust to the screen size. Media queries allow us to modify font sizes for different screen sizes. This is important for smaller screens, where text can appear too small or too big.
Conclusion
In conclusion, learning CSS for responsive design is very important today. You need to understand the basics. Knowing how to use media queries is also key. Tools like Flexbox and Grid help you create layouts that change easily. Making changes with viewport settings and font choices will boost user experience. If you use these CSS tips and tricks for responsive design, your website will look good and work well on different devices. This will make users happier and keep them engaged. Stay updated with the latest trends in responsive design to create attractive and friendly web experiences for your audience.
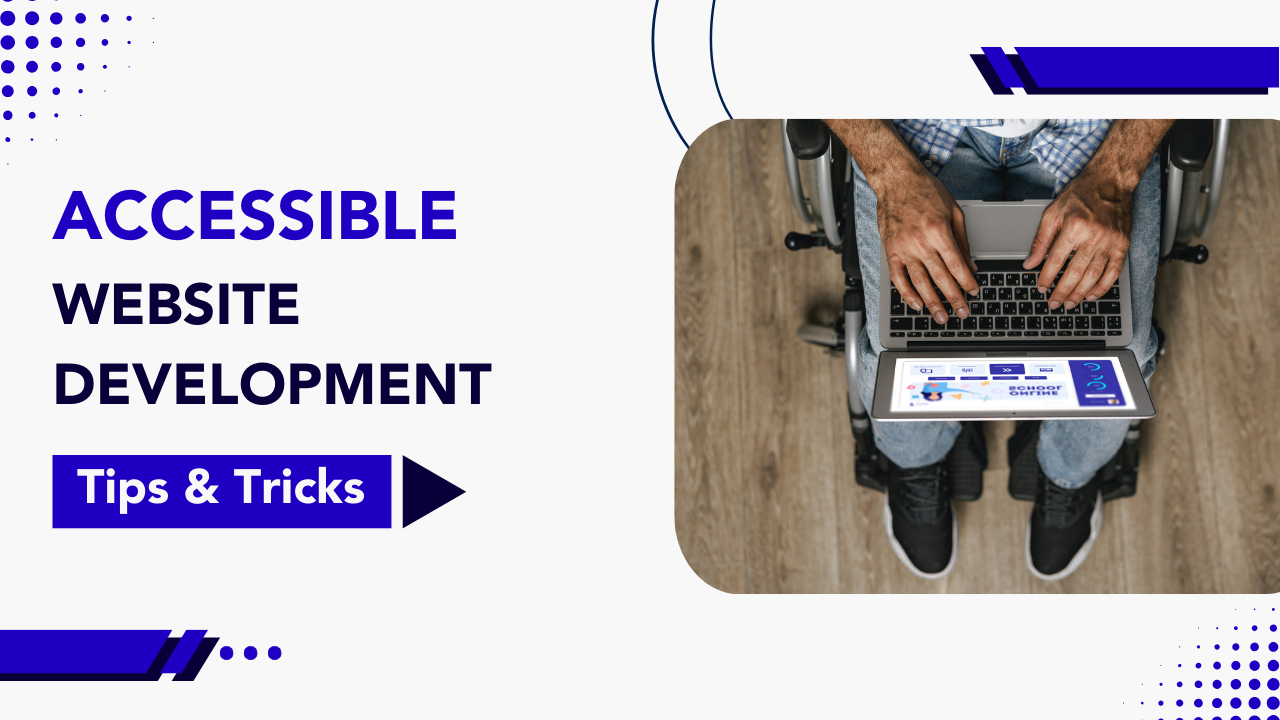
Creating an inclusive digital experience is key in our connected world. Accessible website development ensures that everyone, including people with different disabilities, can use your platform effectively. It is important not just to follow rules but also to improve the user experience. This approach helps you reach more people, enhances usability for all users, and demonstrates good corporate responsibility. Editor’s note: This guide shares tips and tricks for building accessible websites. It also discusses improving website accessibility with examples, rules, and best practices in Software Development.
What is an Accessible Website?
An accessible site is built so that people with disabilities can use it easily. It makes sure that all users, including those with disabilities, can navigate and interact with the site without any issues.
Vision problems such as low vision, blindness, or color blindness
Hearing problems like deafness or trouble hearing
Movement problems for example, having trouble using a mouse or keyboard
By using accessible website design, your site becomes open to everyone. This includes people who use assistive technologies, like screen readers and voice commands.
Why Accessibility in Web Development is Crucial
Accessibility in web development is essential for creating inclusive websites that everyone can use, including people with disabilities. It’s not just about following the law—it improves usability, boosts SEO, reaches a broader audience, and enhances your brand image. Here’s why accessibility should be a priority for every website.
Legal Compliance: Many countries have laws about web accessibility, like the ADA (Americans with Disabilities Act) and the European Accessibility Act. Not following these laws can lead to lawsuits.
Improved Usability: Features like easy navigation, captions, and keyboard shortcuts help everyone, not just those with disabilities.
Better SEO: Search engines like websites that are accessible. Using features like alt text for images and correct headings can help improve your search ranking.
Broader Audience: About 15% of people around the world have a disability. Making your website accessible can help you reach more users.
Enhanced Brand Reputation: Showing that you are inclusive can improve your company’s image and attract a variety of customers.
Web Design Accessibility Standards
To create a website that everyone can use, follow these clear standards. This will help you achieve a more accessible experience for all users, along with a detailed report on compliance and improvements needed.
Standard
Description
WCAG
Web Content Accessibility Guidelines (WCAG) set forth by the World Wide Web Consortium (W3C) offer standards at three levels: A, AA, AAA. Aim for AA compliance.
Section 508
U.S. federal law requiring accessibility for government-related websites.
EN 301 549
Accessibility standard for ICT products and services in the EU.
ADA
U.S. regulation ensuring digital accessibility under the Americans with Disabilities Act.
Following these standards makes sure that your website is correct and can be reached by everyone.
Accessible Website Development Tips and Tricks
1. Use Semantic HTML
Semantic HTML forms the backbone of accessibility:
Organize your website with the right tags like header, nav, main, and footer.
Use h1 to h6 for headings to keep a clear order.
Assistive technologies, such as screen readers, rely on good HTML to help with easy navigation.
2. Optimize Keyboard Navigation
Make sure everything works with just the keyboard.
Use tabindex and ARIA roles wisely to help with keyboard navigation.
Show focus clearly, like with a box or underline, for links, buttons, and form fields.
3. Provide Text Alternatives
Include clear alt text for images and infographics.
Provide captions and transcripts for video content.
Text alternatives help screen readers explain non-text items to users who cannot see.
4. Maintain Proper Color Contrast
Color contrast is vital for readability:
Make sure text has a contrast ratio of at least 4.5:1 for small text or 3:1 for large text.
Use tools like Contrast Checker to test contrast.
Don’t just use color to share information. Add icons or labels too.
5. Design for Screen Readers
Use ARIA roles, like role=”alert”, to give more context.
Make sure the reading order is logical by using the right heading levels, such as H1, H2, and so on.
Include skip links to let users avoid repeating content, like navigation menus.
6. Create Accessible Forms
Use
Give clear error messages and helper text for form entries.
Use fieldset and legend elements for related form fields to provide context.
7. Avoid Auto-Play Media
Let users control animations, audio, and video.
Make sure users can pause, stop, or change playback settings. This helps to avoid sensory overload.
8. Test Accessibility Regularly
Use tools like Axe, WAVE, or Lighthouse to check your site automatically.
Also, do manual testing with screen readers like NVDA or VoiceOver.
Try to follow user scenarios to find any possible issues.
A good example of an accessible website is BBC. It uses simple text and clear images.
Another example is the website for Stanford University. It has text that is easy to read.
A great resource for accessibility is WebAIM. They provide tips on making sites easier to use.
1. BBC Accessibility
The BBC website is very easy to access because it uses high-contrast text, has captioned videos, and lets you change text sizes.
Easy navigation makes it simple to use on any device.
2. GOV.UK
GOV.UK has keyboard navigation and big buttons to click.
The site follows WCAG AA rules. This makes it easy for many people to use.
3. Apple
Apple’s website gives strong support for screen readers and other ways to navigate.
Their product descriptions and support pages have alt text and designs that work well with voiceover.
These examples show that having an accessible website developement helps everyone. It makes content simple to find and easy to move around.
Do Websites Have to Be Accessible?
Yes, many places have laws that require websites to be accessible. Making your website accessible not only meets legal rules, but it also helps your brand and users in several ways:
Building a good image as a platform that includes and focuses on all users.
Steering clear of legal issues and money penalties by following the rules.
Attracting more people by making sure all users, including those with disabilities, feel included.
How to Ensure Accessibility in Web Development
1. Plan for Accessibility From the Start
Think about accessibility when you design. Don’t just add it later.
Involve users with disabilities in your UX design process.
2. Use Accessibility Tools
Tools such as Lighthouse, Axe, and WAVE can show problems and recommend solutions.
Plugins like Accessibility Insights for Chrome assist in development.
3. Involve Real Users
Test your website with people who use assistive technologies.
Gather feedback to find and fix usability issues.
4. Train Your Team
Teach developers, designers, and content creators about the best ways to make things accessible.
Make sure team members know about WCAG and other rules.
How to Ensure Accessibility in Web Development
1. Plan for Accessibility From the Start
Make accessibility a part of your design process from the start, not an afterthought.
Involve user personas who have disabilities when designing the user experience (UX).
2. Use Accessibility Tools
Tools such as Lighthouse, Axe, and WAVE can find problems and suggest solutions.
Plugins like Accessibility Insights for Chrome are useful during development.
3. Involve Real Users
Check how your website works for people who use assistive technologies.
Gather feedback to find and fix usability issues.
4. Train Your Team
Teach developers, designers, and content creators about good accessibility practices.
Make sure team members stay informed on WCAG and other standards.
Accessible Website Design Examples
These websites are great examples of good accessibility:
Website
Accessibility Features
Microsoft
High contrast modes, screen reader-friendly, and adaptable layouts.
W3C
Comprehensive adherence to WCAG and an accessible layout.
Dropbox
Keyboard-friendly navigation and focus indicators for interactive elements
Analyzing these easy-to-use websites can inspire your design process.
Common Mistakes to Avoid in Accessible Website Development
Relying Only on Automated Tools – Tools are useful, but they cannot find every accessibility issue.
Bad Form Design – Not labeling inputs well or not giving feedback messages makes it hard for users.
Forgetting Keyboard Users – A lot of users depend only on keyboards. Make sure they have a good experience.
Ignoring Changing Content – Use ARIA live regions to help screen readers understand updates that change.
Difficult Navigation – Don’t use too many nested menus or complicated site designs that make it hard to walk through.
Benefits of Accessible Website Development
Inclusivity: Making things accessible gives equal access for all users.
SEO Improvements: Things like structured headings and alt text help improve search rankings.
Broader Reach: About 1 billion people around the world have some kind of disability.
Enhanced Usability: Accessibility tools like captions and easy layouts are good for everyone.
Conclusion
Creating a good accessible website development is about more than just meeting technical needs. It shows that you care about inclusion and making things better for users. To build a site that helps more people, follow web design accessibility standards. Look at examples of accessible websites for ideas. Always test your site, add accessibility from the beginning, and stick to best practices. This will help make sure your site is easy to use and meets the needs of everyone.
Accessibility is more than just following rules. It is about helping users connect with your content easily. Begin now to make your website easy for everyone to use and enjoy.
Frequently Asked Questions
What are the most important accessibility features to include in a website?
Key accessibility features include providing alt text for meaningful images, ensuring users with visual impairments can navigate everything using just the keyboard, having enough color contrast, and offering descriptive alternative text as text alternatives for multimedia content. These features make it easier for everyone, especially screen reader users, to use websites.
How often should accessibility testing be conducted?
Regular testing is important! You should always include accessibility testing when you update your website. This is especially important when you add or change content. Editor's note: By doing this often, you will stay updated with new web standards and accessibility rules.
Can small businesses afford web accessibility measures?
Yes! Small businesses can improve in many affordable ways. Simple actions can make a big difference. Using high contrast and ample color contrast ratio is important. Writing clear alt text is also helpful. A color contrast checker can make sure the contrast levels are good. It's vital to ensure keyboard navigation is working properly. These steps can boost accessibility and help people using assistive technologies.
What legal standards apply to web accessibility in the United States?
In the United States, there's good news for web accessibility laws. The Americans with Disabilities Act (ADA) and the Rehabilitation Act (Section 508) set legal standards. These rules help ensure that people with disabilities get equal access to public accommodations, including websites. Organizations like the American Civil Liberties Union support these efforts.
In today’s digital world, leveraging the best Third Party Integration Service is critical for businesses and software development. These services help streamline operations, enhance user experiences, and promote growth. By incorporating external APIs and tools, businesses and developers can implement robust features such as payment gateways, customer relationship management (CRM), and analytics tools without building everything from scratch. Including third-party solutions in a minimum viable product (MVP) significantly enhances its functionality and accelerates development timelines. However, utilizing Third Party Integration Service in software development can introduce challenges that require extra setup time and effort.
This guide highlights the importance of Third Party Integration Service, explains the common challenges businesses face, and offers practical solutions to ensure seamless, secure, and scalable integrations.
What Are Third-Party Integration Services?
Third Party Integration Service enables businesses to connect their systems with external tools, software, or APIs. This integration facilitates access to advanced features that would otherwise be too complex or costly to develop internally. For example, payment processors like Stripe, marketing automation platforms like HubSpot, and data analytics services such as Google Analytics are all easily integrated using a Third Party Integration Service.
Key Benefits of Third Party Integration Service
Third-party integration services offer numerous advantages that can significantly enhance a business’s efficiency and growth. By seamlessly incorporating external tools and APIs into your software, you can unlock a wide range of benefits that improve both operations and user experiences. Below are some key benefits of utilizing third-party integrations in your business or software development:
Faster Deployment: Rapidly add new features without lengthy development cycles.
Cost Efficiency: Reduce costs by outsourcing specialized functions to trusted providers.
Improved User Experience: Enable real-time updates, secure transactions, and other advanced functionalities.
Scalability: Adapt to changing business needs with flexible integration options.
Focus on Core Competencies: Reallocate internal resources to focus on strategic priorities.
Third-party integration services can help a lot. Still, they can be tricky to use. It is important to face these challenges to ensure an effective integration process. This is key for
1. Addressing Compatibility Issues
Different frameworks, APIs, and protocols exist.
These differences can occur between your system and outside services.
These challenges may impact how well systems connect.
Understanding these differences is key.
By doing this, you can find solutions and ensure everything runs smoothly.
Solution:
Check for any gaps before you integrate.
Use tools like Zapier, Workato, or MuleSoft to solve technical problems.
Pick APIs that have good documentation and support for developers.
2. Mitigating Data Security Risks
Sharing sensitive data with other systems can be a problem.
It can make the data more at risk.
Solution:
Choose vendors that follow industry rules like ISO 27001, SOC 2, and GDPR.
Keep data safe by encrypting it during transfer and storage. This prevents unauthorized access.
Use tokenization to mask sensitive data. This will reduce the risk.
3. Optimizing Performance
Slow response times or downtime of the API can damage key business processes.
Solution:
Use caching to store data you access often. This makes things faster.
Check how well third-party APIs work. You can use tools like Datadog, New Relic, or Postman for this.
Create backup plans. This helps keep services running even if there are outages.
4. Avoiding Vendor Lock-In
One service provider can reduce your flexibility.
When you have just one choice, it is tougher to switch to a different provider.
Solution:
Make modular systems to keep third-party services apart from main systems.
Choose vendors that follow open standards to help with compatibility.
Regularly check out other providers to widen your choices.
5. Reducing Maintenance Burdens
Regular updates or changes to features can disrupt workflows.
Solution:
Watch vendor roadmaps and prepare for changes ahead.
Establish automation for integration testing to find issues early after updates.
Maintain clear documentation of setups to simplify updates.
6. Simplifying Testing
A major issue is that it is difficult to get into third-party systems.
This makes full testing hard.
Solution:
Use sandbox environments from vendors to practice real-world scenarios.
Automate repeated test cases using tools like Selenium or Postman.
Enable detailed logging for API calls. This can assist in troubleshooting and debugging effectively.
Best Practices for Third Party Integration Service
To ensure a smooth and effective third party integration process, it’s essential to follow key best practices that focus on reliability, security, and scalability. These practices help businesses maximize the value of external services while maintaining control over their systems and data. Below are some critical steps to consider when integrating third-party solutions into your infrastructure:
Vendor Evaluation: Assess vendor reliability, scalability, and security compliance.
Middleware Solutions: Simplify integrations with tools like MuleSoft, Zapier, or Workato.
Performance Monitoring: Use tools like APImetrics for real-time tracking and optimization.
Scalable Design: Ensure systems can handle future growth.
Detailed Documentation: Maintain updated API endpoints and workflows to ease maintenance.
Robust Security: Implement role-based access controls, regular penetration tests, and adhere to regulations like GDPR or HIPAA.
Comparison Table: In-House Development vs. Third-Party Integration Services
Aspect
In-House Development
Third-Party Integration Services
Time-to-Market
Slow due to extensive development cycles
Fast with ready-to-use APIs and services
Cost
High due to development and maintenance expenses, costing thousands of dollars over time
Lower with subscription-based pricing models. This is good news for companies looking to cut costs
Flexibility
High control but requires significant effort for updates
Flexible but dependent on vendor capabilities
Scalability
Limited by internal resources and expertise
Scalable with external infrastructure support
Maintenance
Requires dedicated internal resource
Handled by the third-party provider
Conclusion
Third Party Integration Service is pivotal for businesses aiming to scale and reduce costs. Whether integrating payment gateways, CRMs, or marketing tools, these services help address compatibility, security, and maintenance challenges. By adopting middleware solutions, monitoring tools, and best practices, businesses can achieve seamless and secure integrations.
Act today to build a robust integration strategy with Third Party Integration Service. This ensures operational efficiency and exceptional user experiences that drive success.
Frequently Asked Questions
Why should I use Third Party Integration Services in my business?
Using Third Party Integration Services can help streamline operations, reduce development time, lower costs, and improve the overall user experience. It allows businesses to leverage specialized features such as secure payment processing or data analytics without developing them internally.
What are the key benefits of Third Party Integration Services?
Faster Deployment: Quickly add new features with pre-built APIs.
Cost Efficiency: Save money by outsourcing specialized functions.
Improved User Experience: Provide real-time updates and secure transactions.
Scalability: Easily adapt to growing business needs.
Focus on Core Competencies: Redirect internal resources to strategic areas.
How can I mitigate compatibility issues when integrating third-party services?
You can solve compatibility problems by checking for gaps before integrating, using middleware tools like Zapier or MuleSoft, and choosing third-party APIs that provide clear documentation and developer support.
How can I optimize the performance of third-party APIs?
Optimize API performance by using caching, monitoring third-party APIs with tools like Datadog or New Relic, and setting up backup plans to ensure continued service during outages.
The code review process is crucial in Software Development, guided by a checklist to ensure the software is high quality and meets standards. During the review, one or more team members examine the source code closely, looking for defects and verifying that it follows coding guidelines. This practice improves the entire codebase by catching bugs and security issues early, leading to more reliable software. Code reviews also ensure that best practices are followed, making the code easier to maintain. Additionally, they foster teamwork and provide learning opportunities for developers, which strengthens the overall quality of the software.
Key Highlights
Code reviews are key for keeping code quality high. They help find bugs early and ensure consistency in software development.
They build a team feel where people work together, share knowledge, and always improve.
Good code reviews have clear goals. They give helpful feedback and use both tools and checks.
Some common problems include gaps in communication and different opinions on code quality. But with open talk and best practices, we can lessen these issues.
When done well, code reviews can save time and resources in the long run. They cut down on mistakes and make the code easier to manage.
Understanding Code Reviews
A code review happens when developers, who didn’t write the code, look over a developer’s code. The aim is to find mistakes, weak spots, or issues that either a senior developer or the original coder may have missed. These problems can be minor, like typos and syntax mistakes, or more serious issues, such as logic errors and security risks.
This process is very useful. It provides a new view of the code. It also helps to spot any areas the original developer may have overlooked. Code reviews are an excellent way to make sure that the code follows best practices and coding standards. This is important for the future support and growth of the software.
Why Code Reviews Matter
1. Improves Code Quality
Code reviews help find issues, inefficiencies, and mistakes before using the code in production. This leads to better tooling strategies. When someone else checks the code, the whole team can maintain high standards. This supports them in creating cleaner and more reliable software.
2. Enhances Collaboration
Code reviews help build a sense of teamwork. In this process, team members can share their knowledge, learn from each other, and keep up with coding rules and best practices.
3. Promotes Knowledge Sharing
Reviewing code helps team members understand different parts of the codebase. This practice reduces the need to depend on a single developer. It also makes it easier when there are changes in the team.
4. Ensures Consistency
Through code reviews, teams can stick to style guides and main ideas. This makes the codebase more consistent. A consistent codebase is also easier to maintain.
5. Encourages Mentorship
Junior developers can learn a lot from senior team members during reviews. They can pick up new ideas on how to code better and find solutions to problems.
Best Practices for Effective Code Reviews
1. Establish Clear Guidelines
Use simple and clear names for variables and functions.
Keep indentation and spacing the same throughout your code.
Add comments to explain what your code does.
Use version control to keep track of code changes.
Stick to the frameworks and libraries you agreed to use.
Code that is easy to read
Steps that are clear and correct
Rules of coding are followed
Strong error checks and management of tricky situations
Having clear rules makes everything simple. It helps people understand what they can expect.
2. Keep Reviews Focused
Keep reviews short and clear.
Break reviews into smaller, simple sections.
When reviewing smaller pull requests (PRs), each change gets the attention it deserves.
3. Automate What You Can
Use tools like linters and static analysis tools.
These tools help find easy problems such as format issues, syntax mistakes, or missing semicolons.
This helps reviewers focus on the more complex parts of the code.
4. Foster a Positive Environment
Share useful thoughts, not just list errors.
Highlight the strong points and ways to improve the code.
Instead of: “This is wrong, do it this way.”
Say: “This way works, but have you thought about this option? It could be better.”
5. Review with Context
Before you start, make sure you understand why the code changes are necessary. It’s helpful to ask the developer for a brief overview. You can also add a description in the pull request to provide some background information.
6. Don’t Overlook Tests
Ensure the code changes include enough test cases.
Code reviews are a good time to see if the
7. Set Reasonable Timelines
Delays in reviews can slow down development. It is important to set clear goals for how quickly code reviews should happen. This helps to keep the work going.
Tips for Reviewers
Look at the Bigger Picture: Don’t get caught up in small issues. Notice how things work, the design, and the standards to follow.
Ask Questions: If something is unclear to you, ask for more details. This helps everyone learn and improve.
Give Useful Feedback: Offer clear suggestions to improve things instead of vague comments.
Be Respectful: Write reviews in a kind and professional way. Everyone has a different style of coding. We all want to improve together.
Tips for Developers Submitting Code
Test Before Submitting: Check that your code runs well, is neat, and is fully tested before asking for a review.
Add Descriptions: Share context and details about your updates in the pull request. Explain why you made the changes, how you did it, and any trade-offs you considered.
Address Feedback Promptly: Respond to feedback quickly. Make any needed updates to keep everything running smoothly.
Use Smaller Commits: Break your changes into smaller pieces. This makes it easier for others to review them.
In conclusion, good code review practices are very important in software development. They help improve code quality, security, and reliability. Code reviews let developers share knowledge and learn from each other. This helps build teamwork and growth in groups. It is essential to fix issues like communication problems and different views on code quality. By doing so, code reviews will be more effective. To get better, we should follow best practices. This means having clear goals, using both automatic tools and manual checks, and encouraging helpful feedback. Regular and fair code reviews can support not only our current project but also our future success in software development.
Frequently Asked Questions
What is the ideal frequency for code reviews?
The best time for peer review varies based on your team's style and what they like. Some teams enjoy doing reviews right away by using pair programming. In this method, programmers work together to improve the code. This method is similar to what Cisco uses. Other teams like to have reviews several times a week. The important thing is to be consistent. When you are consistent, you can spot problems early.
How can teams ensure unbiased code reviews?
To make peer reviews fair, we should encourage open talk. It’s important for all team members to feel safe when giving and taking feedback. You can use the right tools to keep identities private during the first reviews. This way, we can have fairer evaluations for everyone.
Can automated tools replace manual code reviews?
Automated tools can help find common mistakes and keep a consistent style. But they cannot take the place of a person’s careful checks. This is very important for tricky logic, design choices, unique features, and edge cases that these tools might overlook.
What are the benefits of code reviews?
Code reviews are very important in the software development process. They help with quality assurance in several ways. First, they improve code quality. Code reviews help find defects early. This allows for careful checks on every piece of code. Also, they let developers share knowledge. This sharing makes the code easier to maintain too.