
by admin | Jun 2, 2016 | 2016, Fixed |
This is our first blog post on Ruby Cucumber automation testing and as an automation testing services company, we would like to share basic and advanced techniques of automation testing with software testing & quality assurance communities.
In this article, we will show you how to create a feature file and implementation code using RubyMine. Before following up the below steps, make sure you have already configured RubyMine
Step1-Create Empty Ruby Project
File->New Project
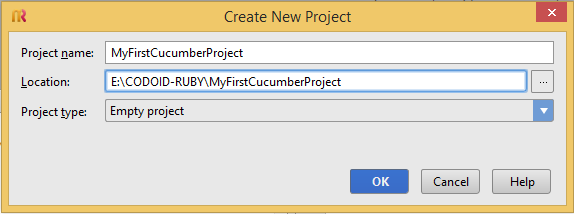
Step2-Create Gem file
Select project directory, right click and click New->File
Create Gem file with the following Gem details as shown below.
Note: These Gem details will be published in our next article.
source 'https://rubygems.org/'
gem 'cucumber', '1.2.1'
gem 'rspec', '2.10.0'
gem 'ffi', '1.3.1'
gem 'watir-webdriver', '0.7.0'
gem 'watir'
gem 'selenium-webdriver'
gem 'headless', '0.2.2'
gem 'titleize', '1.2.1'
gem 'json', '1.7.7'
gem 'gherkin', '<= 2.11.6'
gem 'syntax'
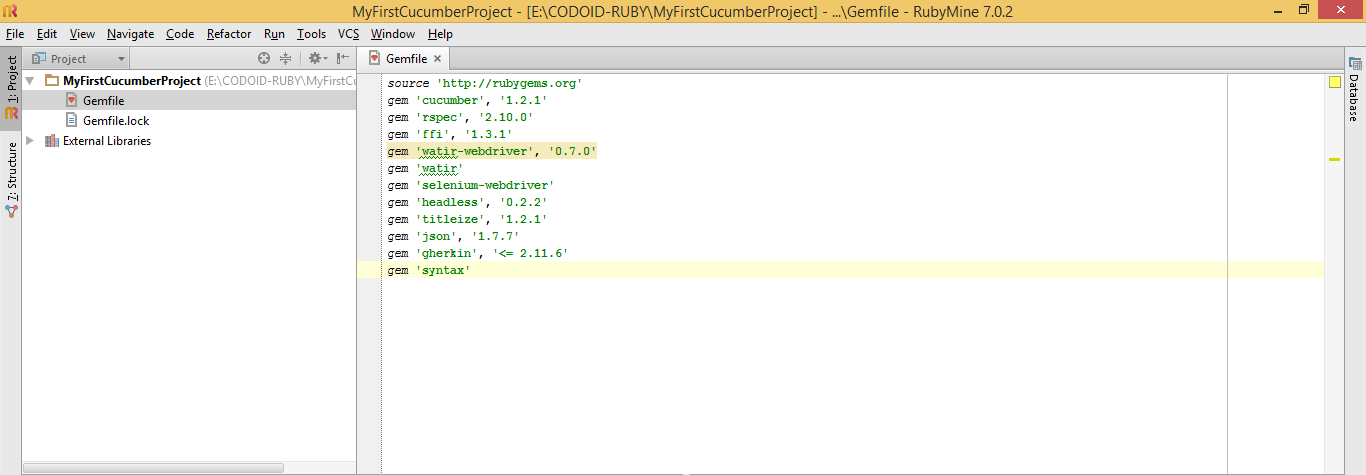
Step3-Directory Structure
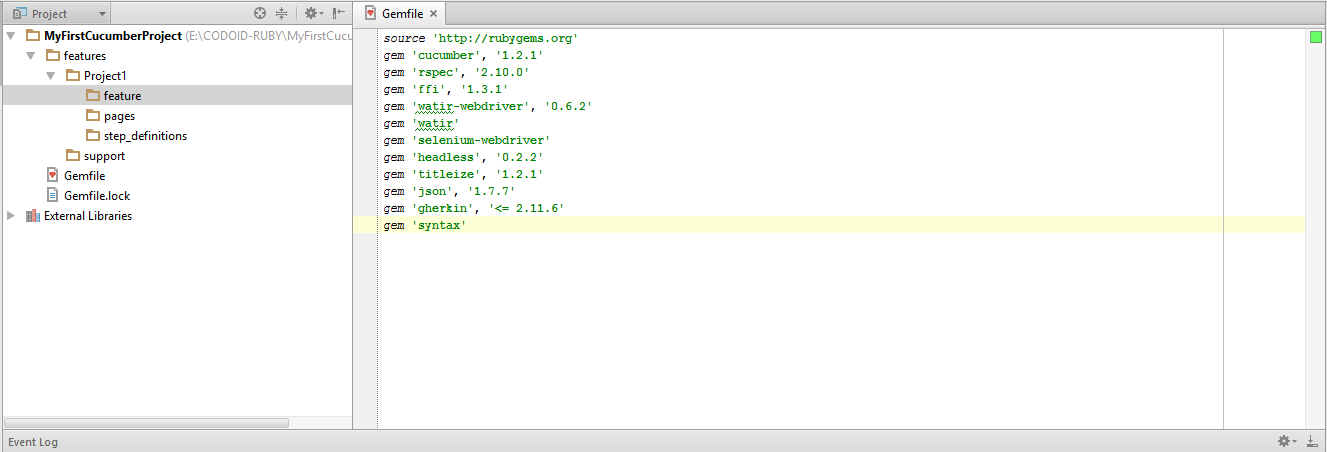
Create sub folders as shown below
—>features
————->Project1
——————->feature
——————->pages
——————->step_definitions
————->Support
Step4-Create Shared Driver
Create SharedDriver.rb inside Support folder with the following code.
require 'rubygems'
require 'rspec'
require 'watir-webdriver'

include Selenium

#Creating Remote WebDriver
browser = Watir::Browser.new(:remote, :url => "http://SauceUsername:[email protected]:80/wd/hub",
                              :desired_capabilities => WebDriver::Remote::Capabilities.firefox)
#If you want to run it locally, use Watir::Browser.new :firefox

Before do
  @browser = browser
end

Step5-Create Feature file
Create sample.feature file inside feature folder with the below steps
Feature: Sample Feature

  Scenario: Sample Scenario
    Given I launch https://codoid.com
    And I click on Login tab
    And I enter username
    And I enter password
    When I click Login button
    Then I see Home page

Step6-Create Step Definitions
Create Step Definitions with pending steps
Given(/^I launch http://www.codoid.com$/) do
  pending
end

And(/^I click on Login tab$/) do
  pending
end

And(/^I enter username$/) do
  pending
end

And(/^I enter password$/) do
  pending
end

When(/^I click Login button$/) do
  pending
end

Then(/^I see Home page$/) do
  pending
end

Step7-Create Page Object
class LoginPage
  attr_accessor :loginTab,:txtUsername,:txtPassword,:btnLogin

  def initialize(browser)
    @browser = browser
    @loginTab    = @browser.a(:text => "Login")
    @txtUsername = @browser.text_field(:id => "userId")
    @txtPassword = @browser.text_field(:id => "password")
    @btnLogin      = @browser.element(:id => "log_in_button")
  end

  def visit
    @browser.goto "https://codoid.com"
  end

  def clickLoginTab()
    @loginTab.click
  end

  def enterUsername(username)
    @txtUsername.set username
  end

  def enterPassword(password)
    @txtPassword.set password
  end

  def clickLoginButton
    @btnLogin.click
  end

  def verifyHomePageHeader()
    @browser.element(:text => "Dashboard").wait_until_present
  end
end
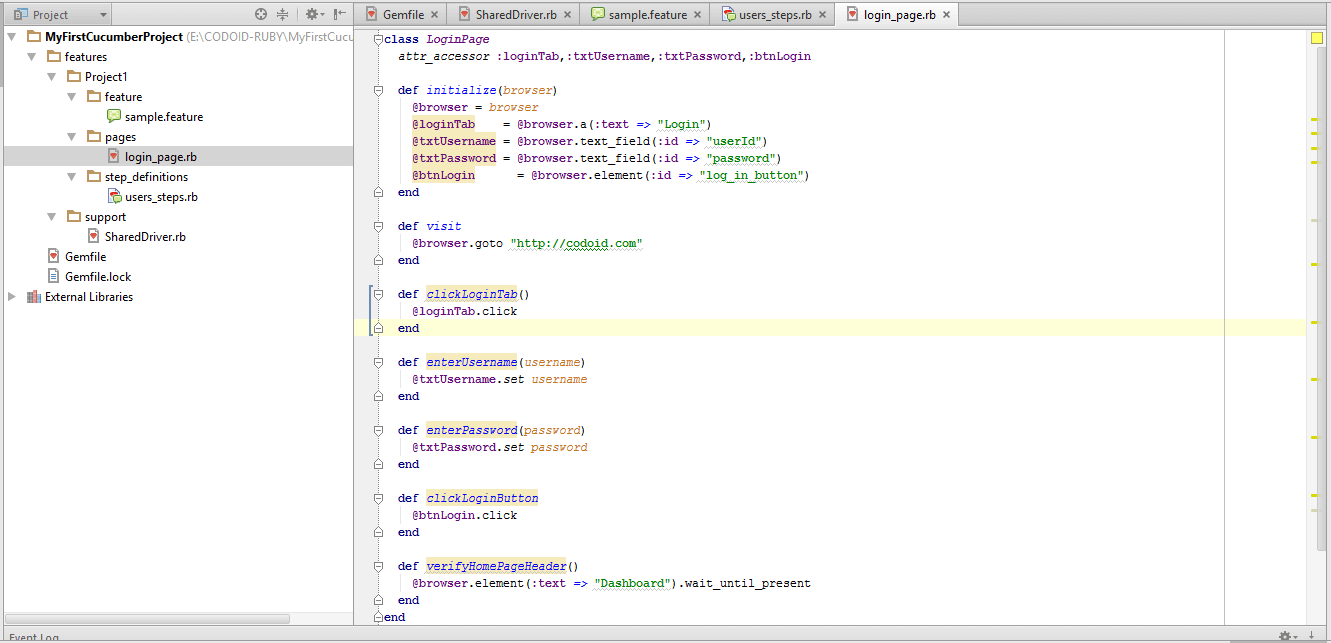
Step8-Call Page Methods in Step Definitions
Given(/^I launch http://www.codoid.com$/) do
  @LoginPage = LoginPage.new(@browser)
  @LoginPage.visit
end

And(/^I click on Login tab$/) do
  @LoginPage.clickLoginTab
end

And(/^I enter username$/) do
  @LoginPage.enterUsername("xxxxxxx")
end

And(/^I enter password$/) do
  @LoginPage.enterPassword("yyyyyyy")
end

When(/^I click Login button$/) do
  @LoginPage.clickLoginButton
end

Then(/^I see Home page$/) do
  @LoginPage.verifyHomePageHeader
end
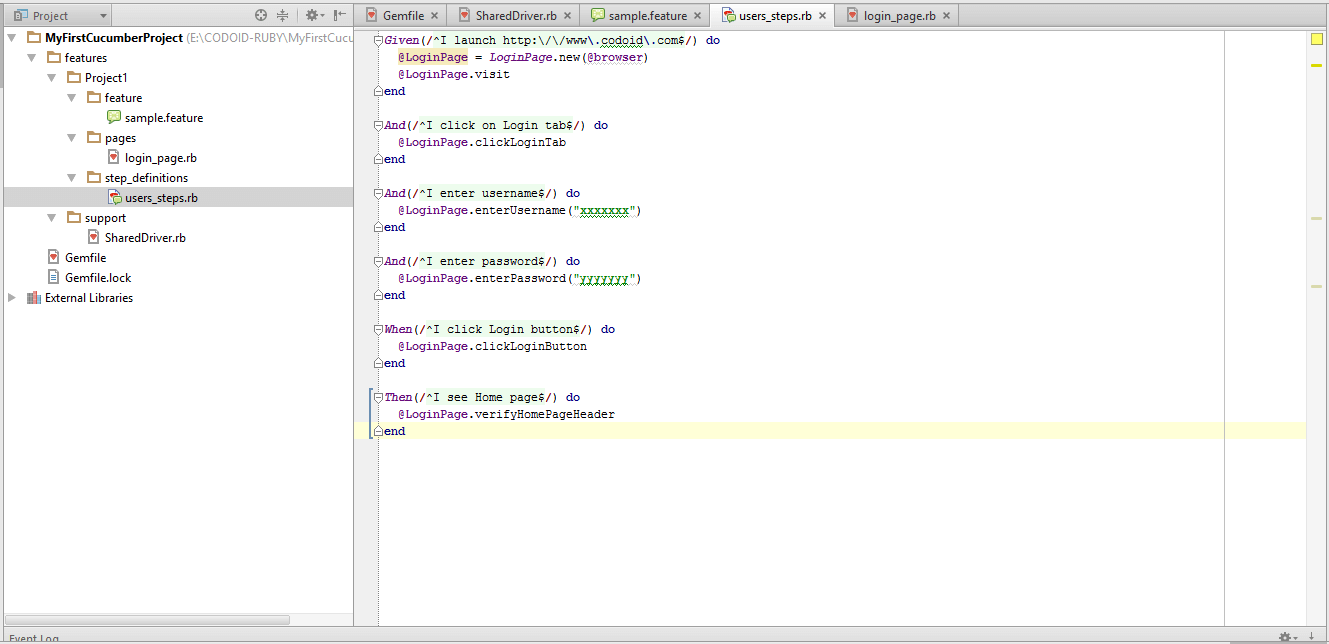
Step9-Create cucumber.yml file
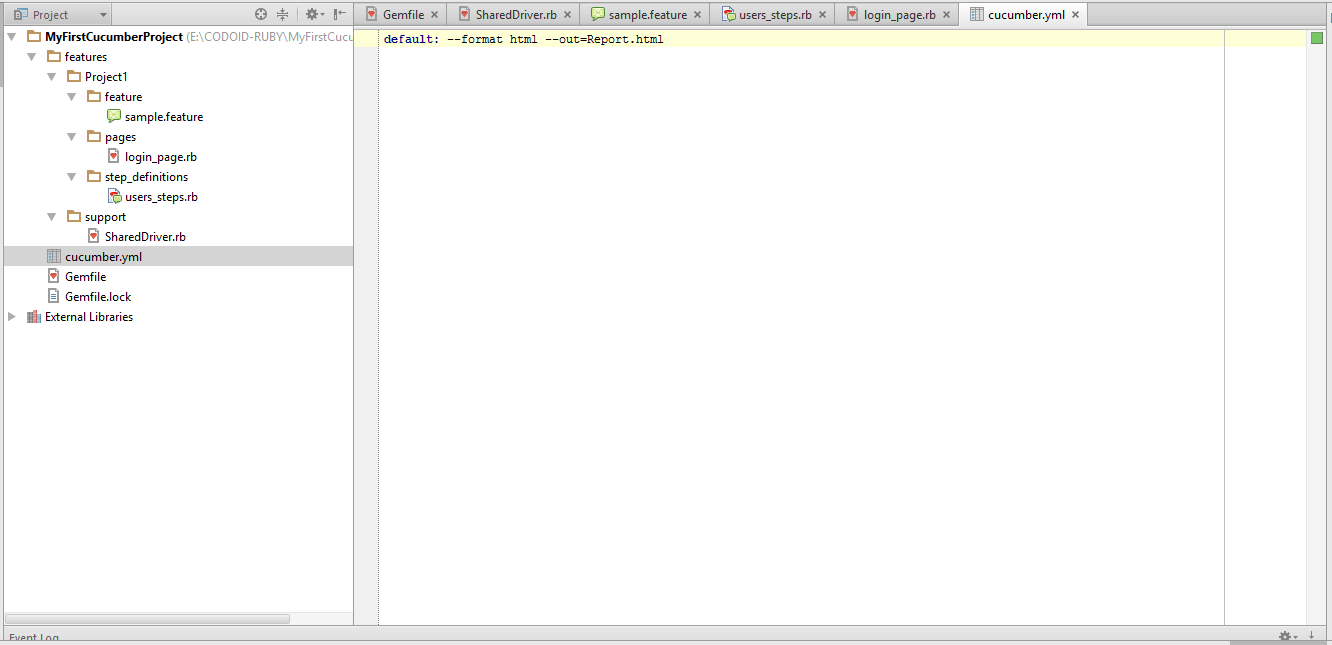
Create cucumber.yml file inside project directory as shown below
default: --format html --out=Report.html
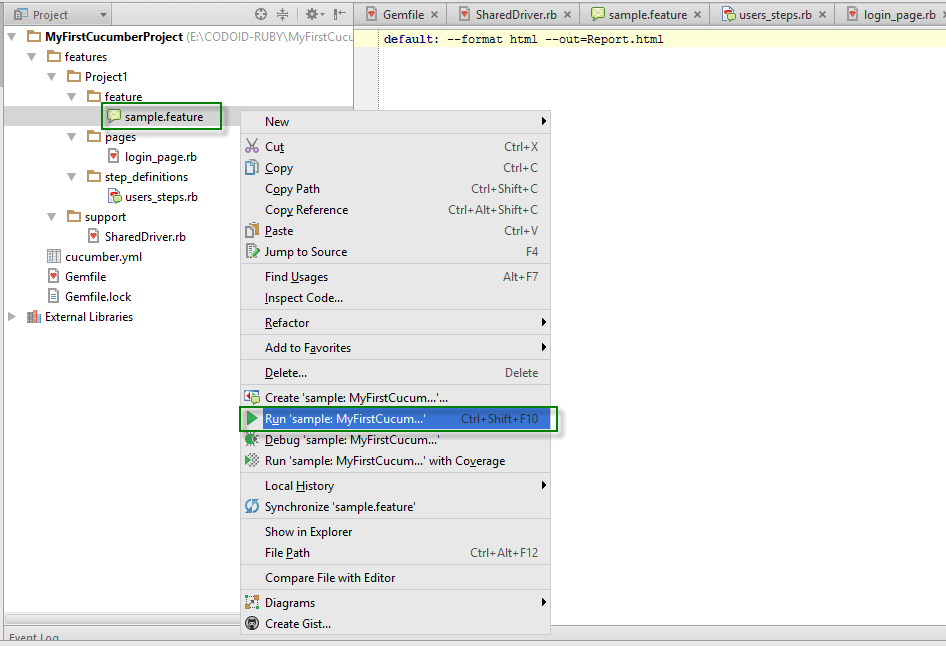
Step10-Run the feature file
Once execution is done, open the report file
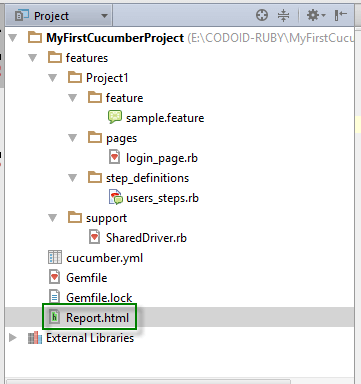
You will see the report as shown below

In the subsequent articles, we will share more topics and advanced techniques. Stay tuned!
by admin | Jun 1, 2016 | 2016 |
This article is not related to Ruby-Cucumber. We are going to show you how to configure and code Sikuli in Ruby. Rukuli is the gem for Sikuli implementation in Ruby. Let’s jump into the snippets.
Requirements
SikuliX 1.0.1 (Install sikuli-java.jar (option 4) via sikuli-setup.jar)
JRuby is a high performance, stable, fully threaded Java implementation of the Ruby programming language.
Configure Sikuli Jar
Create SIKULIX_HOME environment variable and set the path of the Sikuli jar file
Install Rukuli Gem
gem install rukuli
Once the Gem installation and configurations are done, try the below snippets with expected images.
Wait for an image
 require 'java'
 require 'rukuli'
 screen=Rukuli::Screen.new
 #Argument1: Image Path Argument2: Wait Time Argument3: similarity score
 region=screen.wait("C:image1.png", 10,0.7)
Click on image
 require 'java'
 require 'rukuli'
 screen=Rukuli::Screen.new
 #Argument1: Image Path
 screen.click("C:image2.png")
Click on centre of an image
  require 'java'
  require 'rukuli'
  screen=Rukuli::Screen.new
  region=screen.wait("C:image2.png", 10,0.7)
  screen.click(region.x+(region.width/2),region.y+(region.height/2))
Double click on centre of an image
  require 'java'
  require 'rukuli'
  screen=Rukuli::Screen.new
  region=screen.wait("C:image3.png", 10,0.7)
  screen.double_click(region.x+(region.width/2),region.y+(region.height/2))
Type text on an image
   require 'java'
   require 'rukuli'
   screen=Rukuli::Screen.new
   region=screen.wait("C:image4.png", 10,0.7)
   screen.click(region.x+(region.width/2),region.y+(region.height/2))
   screen.type("Sample Text")
by admin | Mar 10, 2016 | 2016 |
You can send sequence of characters and keyboard keys in ‘SendKeys’ method. And it is possible to give more sequence of keys and strings with ‘,’ delimited.
The below snippet shows how to press ‘Ctrl+G’ keys combination in an object.
Code
WebElement txtGoogle=firefox.findElement(By.name("q"));
txtGoogle.sendKeys(Keys.CONTROL,"G");
by admin | Mar 10, 2016 | 2016 |
In this blog post, we would like to show you a snippet for ExpectedConditions.numberOfWindowsToBe method.
NumberOfWindowsToBe is a new method in ExpectedConditions class and introduced in Selenium 2.48; it waits until the expected windows count matches with actual WebDriver windows count.
WebDriver driver=new FirefoxDriver();
WebDriverWait wait=new WebDriverWait(driver,10);
driver.get("http://google.com");

driver.findElement(By.linkText("Google")).click();

wait.until(ExpectedConditions.numberOfWindowsToBe(2));
by admin | Mar 10, 2016 | 2016 |
In our previous blog post, we published how to create/setup a Ruby-Cucumber project with a sample script. Now we are going to show you how to create a page with Page Object gem.
We, at Codoid are handling multiple software automation testing projects using various automation testing tools and frameworks, but working with Ruby-cucumber along with Page Object gem is unique and wonderful experience.
Let’s move on to topic.
Step Definition
Given(/^I launch (.*) url$/) do |url|
  on(LoginPage).navigate_to url
end

And(/^I click on Login tab$/) do
  on(LoginPage).click_login_tab
end

And(/^I enter username$/) do
  on(LoginPage).enter_username("xxxxxxxxxxx")
end

And(/^I enter password$/) do
  on(LoginPage).enter_password("yyyyyyyyyyy")
end

When(/^I click Login button$/) do
  on(LoginPage).click_login_button
end

Then(/^I see Home page$/) do
  on(LoginPage).verify_home_page_header
end
Page
class LoginPage
  include PageObject

  link(:lnk_login_tab, :text => 'Login')
  text_field(:txt_username, :id => 'userId')
  text_field(:txt_password, :id => 'password')
  button(:btn_login, :id => 'log_in_button')
  div(:elmnt_dashboard, :text => 'Dashboard')

  def click_login_tab()
    #Click Login tab in Codoid.com-Automation Testing Company
    lnk_login_tab
  end

  def enter_username(username)
    #Enter Username
    self.txt_username=username
  end

  def enter_password(password)
    #Enter Password
    self.txt_password=password
  end

  def click_login_button
    #Click Login button
    btn_login
  end

  def verify_home_page_header()
    #Wait for Home page after login
    elmnt_dashboard_element.when_visible
  end
end
Feel free to contact us, if you have any questions/suggestions.
by admin | Mar 10, 2016 | 2016 |
This article explains how to maximize a browser window using HTML DOM. Actually, it is not maxmizing the browser, it resizes browser to the size what we get from maximize.
Code
Dim oPage,inScreenWidth,inScreenHeight

Set oPage=Browser("name:=Google").Page("title:=Google")

'Getting Screen Width
inScreenWidth=oPage.Object.parentWindow.screen.width

'Getting Screen Height
inScreenHeight=oPage.Object.parentWindow.screen.height

'Moving Browser to (0,0) position
oPage.Object.parentWindow.moveTo 0, 0

'Resizing Window using resizeTo method with Screen Width and Screen Height values
oPage.Object.parentWindow.resizeTo inScreenWidth,inScreenHeight


