
by admin | Apr 13, 2021 | Selenium Testing, Fixed, Blog, Latest Post |
In every interview, there is that one common question that an automation tester would face, and that question is, ‘What is the use of Selenium WebDriver Event Listener?’. So in this blog article, we are going to precisely answer that question for you. In addition to that, once you have read this article, you will be in a position to use Selenium WebDriver Event Listener effectively to its full potential.
Selenium WebDriver is a Web Browser automation framework, and everyone is aware of that. Let’s say you want to capture a screenshot after a test case execution, you can write Selenium’s screen capturing snippet inside the testing framework’s ‘afterEach’ hook method. For example, if you want to capture a screenshot before/after every element click. You would have to write a screen capture snippet right after every click action which is not only a cumbersome task to do, but it is also a waste of valuable time. But you can make this process so much easier than this by making use of Selenium Event Listener. By using Selenium Event Listener, you can write the screenshot snippet inside the ‘beforeClickOn’ or ‘afterClickOn’ method.
Selenium has an interface called the ‘WebDriverEventListener’, which has 27 methods. All these methods are event listeners for Selenium WebDriver’s important actions. Let’s not leave any stone unturned and explore them one by one.
Implement WebDriver Event Listener Methods
First and foremost, you would have to create a class that implements the listener methods. Once that is done, you can create a concrete class for the WebDriverEventListener interface as shown below.
import org.openqa.selenium.support.events.WebDriverEventListener;

public class MyListener implements WebDriverEventListener {

}
As soon as you have created the class, your IDE will ask you to implement the listener methods. Once you accept the implementation, your class will have all the 27 methods.
import org.openqa.selenium.By;
import org.openqa.selenium.OutputType;
import org.openqa.selenium.WebDriver;
import org.openqa.selenium.WebElement;
import org.openqa.selenium.support.events.WebDriverEventListener;

public class MyListener implements WebDriverEventListener {

    @Override
    public void beforeAlertAccept(WebDriver driver) {

    }

    @Override
    public void afterAlertAccept(WebDriver driver) {

    }

    @Override
    public void afterAlertDismiss(WebDriver driver) {

    }

    @Override
    public void beforeAlertDismiss(WebDriver driver) {

    }

    @Override
    public void beforeNavigateTo(String url, WebDriver driver) {

    }

    @Override
    public void afterNavigateTo(String url, WebDriver driver) {

    }

    @Override
    public void beforeNavigateBack(WebDriver driver) {

    }

    @Override
    public void afterNavigateBack(WebDriver driver) {

    }

    @Override
    public void beforeNavigateForward(WebDriver driver) {

    }

    @Override
    public void afterNavigateForward(WebDriver driver) {

    }

    @Override
    public void beforeNavigateRefresh(WebDriver driver) {

    }

    @Override
    public void afterNavigateRefresh(WebDriver driver) {

    }

    @Override
    public void beforeFindBy(By by, WebElement element, WebDriver driver) {

    }

    @Override
    public void afterFindBy(By by, WebElement element, WebDriver driver) {

    }

    @Override
    public void beforeClickOn(WebElement element, WebDriver driver) {

    }

    @Override
    public void afterClickOn(WebElement element, WebDriver driver) {

    }

    @Override
    public void beforeChangeValueOf(WebElement element, WebDriver driver, CharSequence[] keysToSend) {

    }

    @Override
    public void afterChangeValueOf(WebElement element, WebDriver driver, CharSequence[] keysToSend) {

    }

    @Override
    public void beforeScript(String script, WebDriver driver) {

    }

    @Override
    public void afterScript(String script, WebDriver driver) {

    }

    @Override
    public void beforeSwitchToWindow(String windowName, WebDriver driver) {

    }

    @Override
    public void afterSwitchToWindow(String windowName, WebDriver driver) {

    }

    @Override
    public void onException(Throwable throwable, WebDriver driver) {

    }

    @Override
    public <X> void beforeGetScreenshotAs(OutputType<X> target) {

    }

    @Override
    public <X> void afterGetScreenshotAs(OutputType<X> target, X screenshot) {

    }

    @Override
    public void beforeGetText(WebElement element, WebDriver driver) {

    }

    @Override
    public void afterGetText(WebElement element, WebDriver driver, String text) {

    }
}
Attaching EventListener with WebDriver
Now that the event listener class has been created, your next task would be to attach the web driver instance with the event listener, and that can be easily done by following the method shown below.
WebDriver driver = new ChromeDriver();

driver.get(“http”://codoid.com);

EventFiringWebDriver eventHandler = new EventFiringWebDriver(driver);

MyListener listener = new MyListener();

eventHandler.register(listener);
The real value of the WebDriver Event Listener comes from your idea and purpose. If you don’t have a purpose to use it, then implementing Event Listener is simply a waste of time. So, make sure to put in some time and thought before you go straight ahead and start things up. In the upcoming sections, as a test automation company, we have shared how we have effectively used Selenium WebDriver Event Listener for our automation testing projects. Let’s take a look at it beginning from ‘onException’.
onException
When you are in a situation that requires you to run a test suite multiple times, there are chances of getting some failures because of the script or application issues. Selenium has 33 common exceptions. If you manage to capture all these exceptions which are thrown during automated test suite execution, it will be extremely useful for auditing purpose. Let’s say you want to know which Selenium exception was triggered the most often in the past three weeks. When you have the exception history & metrics in hand, you can understand whether the automated test suite is stable enough or if it needs any minor tweaks.
Capturing Selenium Exceptions in the ‘onException’ method is pretty easy. But the question here is, ‘How can you store the exceptions for future reference?’. Well, the solution is easy too, as you can use Sentry to store the exceptions. If you are fairly new to Sentry or unaware of how to configure it in your framework, don’t be worried, we’ve got you covered. All you have to do is follow the steps that are listed below to easily configure Sentry in your test automation framework.
Step 1
Add the Sentry maven dependency in POM.xml
<dependency>
            <groupId>io.sentry</groupId>
            <artifactId>sentry</artifactId>
            <version>4.3.0</version>
</dependency>
Step 2
Sign-up in Sentry and create a project.
Step 3
Once the Sentry project is created, you will get the below code which needs to be integrated with your test suite.
Sentry.init(options -> {
            options.setDsn("https://2323.ingest.sentry.io/2323);
});
Note: Each project has its own DSN. So make sure to copy the above snippet from your project and not from here.
Step 4
Create a constructer in the Listener class and add Sentry config inside the constructer.
public class MyListener implements WebDriverEventListener {

    public MyListener(){
        Sentry.init(options -> {
            options.setDsn("https://2323.ingest.sentry.io/2323);
	});
    }
}
Step 5
Now ingest the exceptions in the Sentry from the ‘onException’ method.
@Override
    public void onException(Throwable throwable, WebDriver driver) {
        Sentry.captureException(throwable);
}
afterFindBy
Nowadays, setting up a test automation framework is fairly simple. If you are using JVM-Cucumber & Selenium WebDriver, then the framework setup is pretty much straightforward in all aspects. You need to write Scenarios in the Gherkin format, implement a step definition for each Gherkin step using Page Object, and finally integrate the other required components.
In order to produce a robust test automation suite, you would need the following:
- A simple and concrete framework
- A Stable Environment
- A Skilled Team
- A team that follows good Object Locating Techniques
The first three requirements are default elements that every test automation suite must-have. When you have a truly skilled Automation Testing Team, then it is pretty much a given fact that they will follow good object locating techniques. However, you just can’t have the same team members for a longer period. So it is vital to ensure the scripting standards and object locating strategies even with the new team members to maintain the robustness of your test automation suite.
As a QA company, we use peer review and pair scripting sessions to ensure the test automation’s scripting quality and its robustness. However, it is a tedious task to review locators for each object. What we do in the afterFindBy method is, use regular expression and search sub-string logics to verify if the XPaths & CSS Selectors have met the standards that have been set.
beforeClickOn
The ‘beforeClickOn’ method comes in handy when you need to take screenshots of every click action for a workflow. Let’s say someone from your team wants to know what and all buttons/links/objects were clicked in an E2E test. Inside the ‘beforeClickOn’ method, you can access the driver instance and save the screenshot in a PDF file.
When you implement the ‘beforeClickOn’ method, make sure to create a config variable to decide whether you would need a screenshot before every click action or not. Another useful aspect is that, instead of saving the page screenshots before clicking, you can store WebElement screenshots and compare them with the excepted images. When you perform visual testing, you can catch if the CSS Styles are not applied for the Web Elements which is also a major advantage.
Conclusion
We hope you have enjoyed reading this blog article and that it will positively impact your efficiency. Now it is time for you to try and implement Selenium WebDriver Event Listener for any of these ideas in your project and see the results for yourself. If you would like to recommend any other ideas that will help improve the existing methods, please feel free to head over to the comments section share your valuable thoughts. Test Automation Services is one of the core services of Codoid. Our team is always ready to explore new implementations using Selenium & Appium. Subscribe to our blog so that you never miss out on our highly useful automation testing blog articles that will help you be at the top of your game.

by admin | Apr 6, 2021 | Automation Testing, Fixed, Blog, Latest Post |
Automation testing using JavaScript has been gaining popularity in recent days making a blog about the best JavaScript Testing Frameworks available the need of the hour. A conversation between business analysts, developers, and testers about a feature will become specifications. After that, the developers & testers convert the specs into automated acceptance tests. Automated tests help the team to drive the feature development as passing acceptance tests prove the fact that the agreed feature has been developed as expected.
To convert specifications into automated acceptance tests, devs & QAs should use the same programming language. Let’s say your team is using JavaScript for development and Java for automation testing. In this case, you won’t be able to enable effective collaboration between the developers & testers which is a big concern. Analysts & developers can capture acceptance criteria effectively. However, testers are good at adding edge cases making them invaluable as well. That is why everyone’s involvement right from the beginning is vital with common tools, frameworks, and language.
In this blog article, we have listed the best JavaScript Testing Frameworks which are widely used for writing unit tests and acceptance tests.
Jasmine
When developers focus more on components than features, they don’t add value to the business. Writing tests in plain English helps your team focus on the business goals and Jasmine is one of the best testing frameworks to make it possible. Using Jasmine you can write meaningful tests which can be understood by everyone in the team and help the developers to write higher quality code more efficiently.
Jasmine has support for Node.JS, RUBY, and Python. If you want to run the tests on a Web Browser instead of running them in interpreter/programming engine, then you can go for Jasmine Standalone. Now let’s find out how to use Jasmine in Node.JS beginning right from its installation.
Installation:
To install Jasmine, run the below npm command.
npm install jasmine —save-dev
Initialization
To set up Jasmine in a Node.JS project, you need spec files and jasmine.json (Configuration file). You can add these files manually. However, we have an npx command to initialize Jasmine in your project and it has been listed below
After running the above command, you can find the ‘spec’ folder and ‘jasmine.json’ file under the spec->support folder.
Add Jasmine in package.json
Now, you need to inform your node project that you are using Jasmine for testing. Open package.json and update the ‘test’ value as ‘jasmine’ as shown below.
{
  "name": "jasmine-sample",
  "version": "1.0.0",
  "description": "",
  "main": "index.js",
  "scripts": {
    "test": "jasmine"
  },
  "author": "",
  "license": "ISC",
  "devDependencies": {
    "jasmine": "^3.7.0"
  }
}
Describe
In order to group related test cases like how we group scenarios in a feature file in Cucumber, you need to create a JavaScript file and write a ‘describe’ function as shown below.
describe("User Management", ()=>{

})
In the above function, it is a placeholder to add ‘User Management’ related test cases.
Specs
Specs are your test cases. You need to write specs inside the ‘describe’ function as shown below.
describe("User Management", ()=>{

    it("should signup",()=>{

    })

    it("should login", ()=>{

    })
})
As we mentioned earlier, everyone in the team should understand what is the purpose of each test. When naming a test case for unit & acceptance tests, you need to describe what you are expecting. However, it is a cumbersome task for a developer to focus on names. If there are a rule and a standard which come from the testing framework, then the team members will be able to stick to the business goals and focus on achieving them instead of concentrating only on the code components.
That is why the Jasmine framework has the ‘it’ function and the first argument starts with ‘should’. When a test case says ‘It should do something’, the developer will focus on that something throughout the development which is exactly what we want.
How is a spec pass or fail determined? You can have multiple assertion lines inside a spec and even if one of those assertions fails, the spec will be marked as ‘Fail’.
Assertions
Jasmine has an in-built assertion function which is called ‘expect’. Expect function has one argument which takes the actual value. You can also chain the assertion using Matcher functions.
expect(“my string”).toMatch(/string$/) – Expect the actual value to match a regular expression.
expect(bigObject).toEqual( “foo”: ‘bar’, ‘baz’ ) – Expect the actual value to be equal to the expected value using deep equality comparison.
expect(thing).toBe(realThing) – Expect the actual value to be === to the expected value.
Configurations
Jasmine has a total of five configurations in the jasmine.json file. Let’s take a look at the purpose of each of these configurations one by one.
“specdir” – A directory path where you have the specs in the current project directory.
“specfiles” – You can include & exclude spec file paths with regular expression.
“helpers” – Before the test execution commences, you may need some supporting files that should be executed. The helpers config is the placeholder to mention the supporting JS files.
“stopSpecOnExpectationFailure” – This is a boolean config. If the value is true, then the spec execution will be stopped when the first assertion is failed.
“random” – Run the specs in random order.
Advantages of Jasmine
- You can customize the Jasmine report.
- It has a very strong community that supports the users.
- You can even create your own Matchers.
- It is extremely simple and easy to use making it the choice of many developers and testers mainly for its simplicity.
Jest
Jest is also a popular JavaScript Testing framework that works with Node.JS, React, Angular, Vue, Babel, TypeScript, and more. Jest was developed by Facebook and so it runs thousands of tests for Facebook on a daily basis. Apart from Facebook, there are many other prominent companies that also use Jest. So let’s see what makes Jest one of the best JavaScript Testing Frameworks and how you can implement it in your project. Let’s begin with its installation process.
Installation
You can easily install Jest by making use of the below code,
npm install --save-dev jest
Add Jasmine in package.json
Update scripts>test node as ‘jest’ in Package.json as shown below.
{
  "name": "jest-sample",
  "version": "1.0.0",
  "description": "",
  "main": "index.js",
  "scripts": {
    "test": "jest"
  },
  "keywords": [],
  "author": "",
  "license": "ISC",
  "devDependencies": {
    "jest": "^26.6.3"
  }
}
Configuration
No configuration is required to write or run Jest tests. However, every testing framework has its own configuration file. To create a config file, you can run the below command.
Once you run the above command, Jest will ask you a few questions to create the config file.
Migrating from Jasmine to Jest
If you are planning to migrate from Jasmine to Jest, then we’ve got some good news for you as Jest is compatible with Jasmine tests. This makes the migration far less complicated. However, if you want to do a code-level migration, you can use third-party jest-codemods for the best results.
Assertions
In order to write assertions elegantly in a test, you would definitely need sophisticated Matchers. Jest has a lot of compressive matchers that you could use. However, we have listed some of the commonly used Matchers below.
test('two plus two is four', () => {
  expect(2 + 2).toBe(4);
});
test('object assignment', () => {
  const data = {one: 1};
  data['two'] = 2;
  expect(data).toEqual({one: 1, two: 2});
});
test('null', () => {
  const n = null;
  expect(n).toBeNull();
  expect(n).toBeDefined();
  expect(n).not.toBeUndefined();
  expect(n).not.toBeTruthy();
  expect(n).toBeFalsy();
});
Snapshot Testing
Your Acceptance Tests test the application under test by performing actions on the UI. However, it never validates whether the UI is rendered as same as before and if the CSS styles are applied correctly or not. Jest has a feature to address this issue (i.e. Visual Regression Testing). Using Jest, you can capture snapshots and compare them with the expected snapshot thereby creating a huge advantage if that is your primary need.
Advantages
If you want to run your tests in parallel, then Jest is your go-to testing framework. Jest has numerous assertion functions. In terms of ease of adoption, simplicity, support, and documentation, Jest is hands down the clear winner.
Mocha
Mocha is a JavaScript Testing framework only for Nod.JS. Mocha doesn’t have an in-built assertion library. However, it allows you to use the following libraries such as should.js, chai, expect.js, better-assert, and unexpected for assertions. You can execute tests in two modes (Serial & Parallel).
Conclusion
Jest and Jasmine are the best JavaScript Testing frameworks. However, most of the engineers are comfortable with Jasmine over Jest. As an automation testing company, we use Jasmine for Protractor automation testing. Jasmine is the default testing framework for Protractor. Our suggestion is not final and it shouldn’t influence your framework decision.
Jest has many sophisticated features such as Configuring Visual Testing (i.e. Snapshot Testing) which is not as easy to do in Jasmine. However, in Jest, it is pretty straightforward. Apart from that, test creation and assertions are similar in both these frameworks. If you feel Jest is suitable for your project, please go ahead.
by admin | Mar 29, 2021 | Automation Testing, Fixed, Blog, Latest Post |
Even the smallest hiccups like package installation errors can be a bane to your productivity. In this blog article, we have listed some of the basic npm commands which are used by developers and software testers regularly to resolve package installation errors and to even upgrade existing npm packages. As a software testing company, we are experts in automation testing services using Protractor & Jasmine frameworks.
For one to manage npm packages effectively, one should be aware of the most common npm commands. So let’s get the ball rolling with a few basic commands that have been categorized by their purpose.
Package Installation
To install a package in your current project using npm commands, you can make use of either of the codes given below:
npm install package-name -s
or
Use the code given below to install a package under Development dependencies in your current project by using npm commands:
npm install package-name —save-dev
You can install a package globally using npm commands if a package dependency is not for the project by using the below code:
npm install package-name -g
Install a specific package version
Sometimes you might find yourself to be in a situation where you need to install a specific package version rather than the most latest version. But when you run the npm install command, it will only install the latest version of a package. The solution is easy, as you can install a specific package version by simply using the version number in the installation command as shown below.
npm install package-name@version-number
Finding Outdated Packages
When the dependency list grows, it is a cumbersome job to find the outdated packages in a project. However, npm can make your job easy as it has a command to find the packages which can be upgraded.
When you run the above command, it will list the outdated packages from which you can find the version that you are looking for.
Clear npm Cache using npm commands
When a package installation doesn’t go as expected, it may be because of an npm cache issue. One best option would be to clear the cache and then execute the installation command again.
Before clearing the npm cache, make sure to check how many cache entries are available by using the below code.
Now you can clear the npm cache by using the below command.
Audit Packages
Using vulnerable npm packages can make your project less secure. So it is crucial to perform a security check for all the available project packages. You can do so by running the below command.
Once the audit has run, it will list the vulnerable packages which are supposed to be removed to make your packages more secure.
Installing Minor & Patch Releases
When you run the npm install command, it will install the packages which are mentioned in the package.json file. The npm install command can be used to install only the missing packages. But if you are looking to install recent minor versions using the npm install command, you have to prefix the caret (^) symbol before the package version in package.json. To install patch releases, you have to prefix the Tilde (~) symbol.
Conclusion
Auditing packages & removing unused packages periodically will help avoid catastrophic failures when deploying code in a production environment. Node.js is a memory-efficient environment. When an automation test suite runs for a longer duration, you should optimize it by improving the script and using good packages.
QA automation testers who are starting automation test scripting using JavaScript & Node.js will find these basic npm commands very helpful. Being an automation testing company, we use Protractor, Selenium WebDriver, and Jasmine frameworks for web apps automation testing, and therefore in the subsequent blog articles, we will be publishing more on Protractor and automation test scripting using JavaScript & Node.js. So make sure to keep an eye on our website so that you don’t miss out on the upcoming blogs.

by admin | Dec 28, 2020 | Mobile App Testing, Fixed, Blog |
Using iOS, you can develop mobile apps. iOS development strongly follows the Model-View-Controller designs pattern, which separates data from visual objects. As a mobile app tester, if you are familiar with some basics of iOS development concepts, you will understand the importance of testing the iOS apps on real devices using different orientations. There are two UI frameworks available for iOS app development. One is UIKit, and the next one is SwiftUI. In iOS 13, SwiftUI was introduced. So any mobile apps which are developed using SwiftUI don’t work on older versions of iOS.
If you are participating in any discussions related to SwiftUI development, bring this drawback to the table as a discussion point. If your team is developing a brand new app and are not worried about older version compatibility, then SwiftUI framework is an excellent choice.
In this blog article, you will learn iOS App Testing approach.
App Types
Using iOS, you can develop six different types of apps.
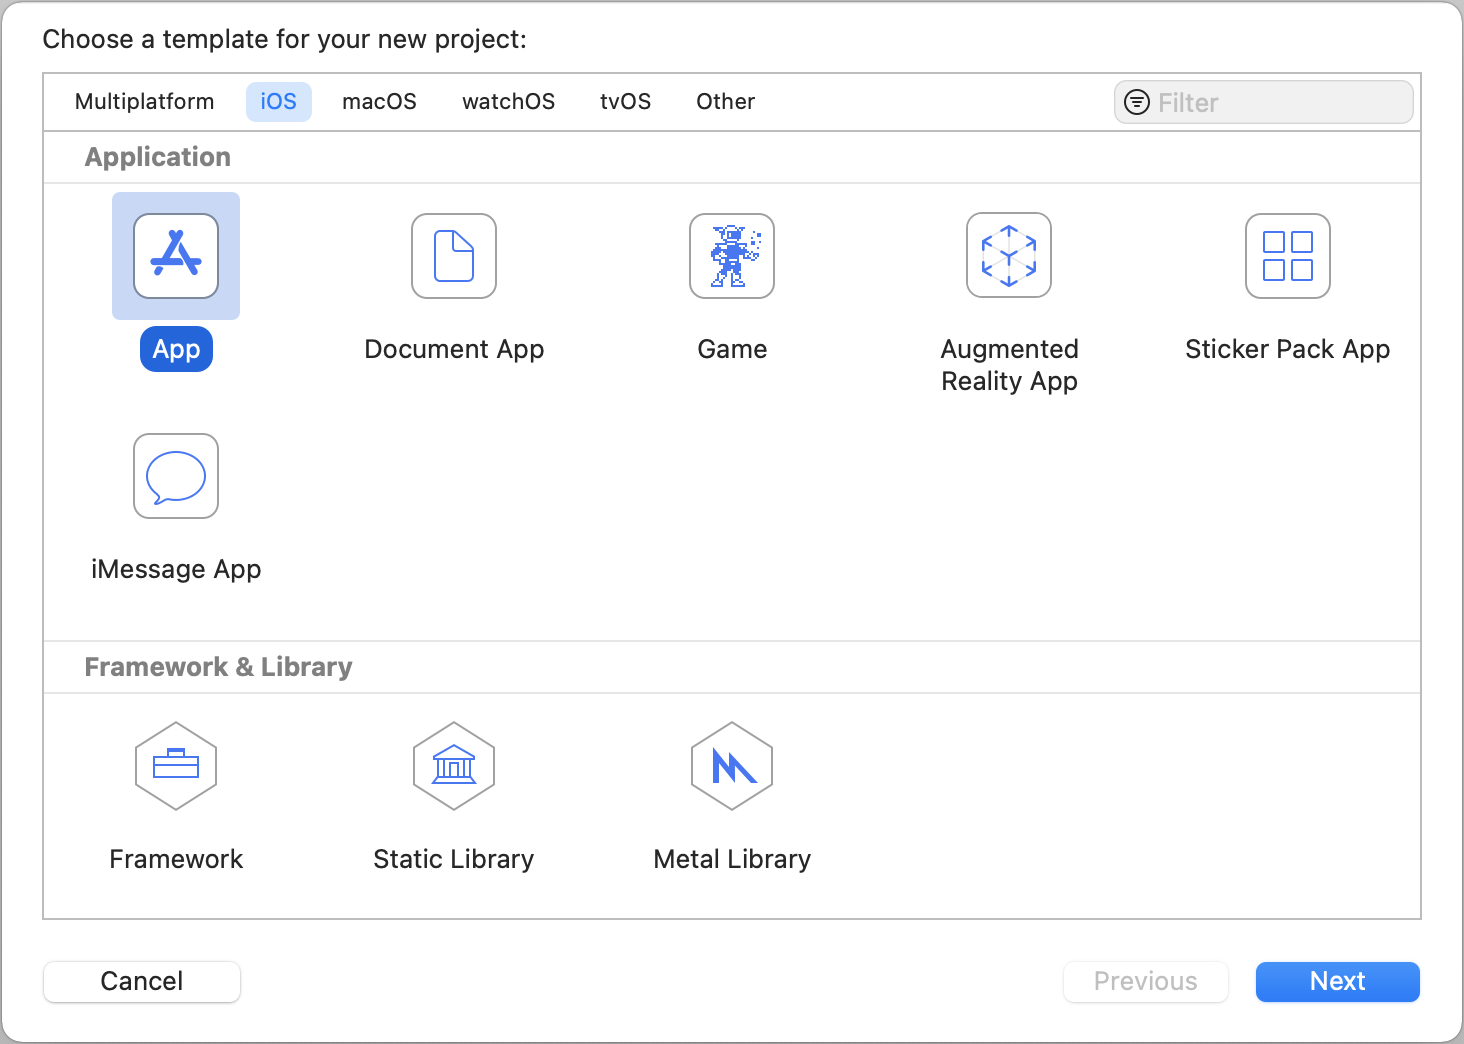
Default App – This is the widely used iOS app type. As we mentioned before, you can select either ‘Storyboard’ or ‘SwiftUI’ for the app interface. However, now, you can use the Document App option to create file management apps.
Game – In this app type, XCode will add the appropriate gaming kits for game app development.
Default App – This is the widely used iOS app type. As we mentioned before, you can select either ‘Storyboard’ or ‘SwiftUI’ for the app interface.
Augmented Reality App – You can create Augmented Reality Apps using RealityKit, SceneKit, SpriteKit, and MetalKit. RealityKit & SceneKit are used for 3D content. SpriteKit is for 2D content.
StickerApp & iMessage App – Message framework was introduced in iOS 10. Developing a Sticker App is easy. There is no coding involved. You can also create your own Standalone iMessage app.
Distributing App for Testing
The developed mobile apps can be distributed for testing before releasing in AppStore. To build the apps for testing purpose, you need to ask the mobile app developers to sign the mobile app for your device.
Once you get the build for testing, first check the content and images because users will easily spot the content issues. Let’s say the images in your app are broken. It will spoil your app’s reputation drastically.
If your team has decided to remove any old functionalities from the mobile app, make sure it does not impact the users when they upgrade. Before retiring any features from your mobile product, analyze the usage of the functionality and its importance. Sometimes app upgrading may lead to dissatisfaction.
After deployment in AppStore, use your device and install the app. Checking the download experience of a new version using Persona will help find bugs & new features for your app.
If your app supports multiple languages, then test the translation and other locale details.
Testing on Real Devices
As a mobile app testing company, we highly recommend testing mobile apps on Real Devices. Mobile developers use simulators or live preview to check the designs and functionalities during development. Deploying on a simulator is an easy job for a developer. Now, SwiftUI supports live preview for different device combinations.
Checking the designs and functionalities on real devices during development will slow-down the progress. Once the app is ready for testing, it should be tested on real devices.
Simulators use your computer’s network. So it does not mimic real-world network conditions. Sometimes, your apps may crash due to memory problems. Simulators run on Mac. So your app will not crash on simulators.
If your app connects with Bluetooth or Camera or IoT devices, then testing on a real device is a must.
iOS App Automation Testing
Executing a regression test suite manually on multiple devices is a tiresome task for a mobile app tester, and it is error-prone. So automating manual testing eases mobile app testing. Appium is the idle choice for mobile app automation testing.
To run your automated test scripts on real devices using Appium, you need the following tools.
HomeBrew – HomeBrew helps you to install and manage the required packages for Appium setup.
Xcode IDE – WebDriver agent app needs to be built and installed on your devices along with AUT (App Under Test). To build the WebDriver agent app, you need Xcode IDE.
NPM – Node.js package manager is required to install Appium. If you would like to install Appium using the Desktop app, you can try directly instead of trying the command line installation.
Appium Node Package – As an automation testing company, we use the Appium Node package instead of Appium Desktop App. If you are a novice mobile app tester, use the Appium Desktop app to learn mobile app automation testing.
Carthage – Carthage is a package that helps you to resolve framework dependencies. Before building the WebDriver agent app, Carthage needs to be installed because Carthage will resolve the dependency issues in the WebDriver Agent XCode project.
Once the WebDriver Agent app is installed successfully on the real device, you can execute Appium scripts.
Testing on Cloud Platforms
Managing mobile devices locally for testing purpose is an overhead cost for your team. For mobile app testing projects, we use BrowserStack App Live to test a mobile app on Cloud Real Devices.
You have the below advantages if you use Cloud Test Platform to test mobile apps.
Battery Charging – Let’s say you have 50+ mobile devices for testing. Before commencing the testing, you need to plug-in the charger for each device to have sufficient battery power during testing. If you test it on Cloud Real-devices, you need to bother about Battery Power. Everything will be taken care by the cloud vendor.
Video Recording – When you perform testing on the local device, you need to record and save the screen-cast as a piece of evidence. The cloud platforms will record your testing sessions automatically. You need to spend your time recording the test session.
Network Simulation – If you want to test your mobile app on low Internet Bandwidth, then you will have to set up a router to configure a low bandwidth Wi-Fi network. A tool like BrowserStack has a feature to launch the real device on various network conditions.
Orientation Testing
iOS has four orientation types. Based on how the user is holding the phone, the appropriate interface orientation of the apps will be changed.
The default selected orientations for an iOS app are Portrait, Landscape Left, and Landscape Right. Let’s take Facebook mobile app as an example. It has been set for only Portrait orientation. Landscape Left and Right are locked for Facebook mobile app.
There is another orientation available. That is Upside Down. It works only for the iPad. It means the iPad supports all four orientations.
It is always good to test orientation related test cases using real devices. Even with cloud real devices, we cannot 100% guarantee how the orientation works.
While testing the mobile app, change the mobile device orientation and see how the app is reacting.
UI Testing
- Test whether the user can fill the forms quickly.
- Check the buttons or clickable items are large enough.
- You are testing a mobile app. So the screens will be smaller. Ensure the smaller objects are separated enough to avoid accidental clicks.
- Try all the applicable gestures on UI objects.
Menu Touring
As soon as you get the build for testing, walk-through all the menus and dialog boxes in your mobile app.
Unit Testing
Unit Testing is for developers. iOS provides a Unit testing bundle to add tests to your mobile app code-base. When you have comprehensive unit tests, it will reduce the number of bugs. If your developers are following the Test Driven Development model, then you will know the importance of Unit tests and their benefits. Writing tests first and building the app to make the tests pass helps your developers to have a clear understanding of the features of functionalities that are being implemented.
Writing tests for everything will slow-down your development process. Let’s say there is a change in functionality. You will have to update the test and code. It is a time-consuming effort. However, the process helps you to build a reliable app with fewer bugs.
Performance Testing
Conducting performance testing only for Mobile App APIs is not sufficient. The poorly managed main thread may lead to unresponsive for user inputs. When a mobile app is performing poorly, the rating of the app will come down drastically.
Sometimes memory leaks can be detected only when the app is used for a longer duration. You can also use Appium scripts and execute them for longer hours to unearth memory leaks.
Some iOS apps may take time to draw UI screens. In automation test scripts, you can set the excepted screen loading time. So, the scripts will fail if the screens are loading more than the expected load time.
If your app has Tables, then test those screens to find performance issues. Users may notice the lag when the tables are scrolled if there is a performance issue.
You can use JMeter and Gatling performance testing tools to conduct performance testing from API stand-point. Involve multiple testers and ask them to use real devices to test the core functionalities simultaneously.
Monitoring mobile app crashes using crash reporting tools provide great inputs for mobile testers and developers. When new features are added to your mobile product, monitor app crashes because new functionalities may cause unexpected crashes at the initial stage.
App Security & Privacy
If your app needs device-related permissions from the user, then mention why the user needs to grant the permissions in the app description.
Check all possible data leaks to prevent data breaches.
Usability Testing
If the user does not like your app immediately after installing, he/she may never revisit. As a mobile app tester, you need to make sure the app adds value to the user.
Common Usability Issues
Multiple Steps – If your app has a lengthy registration or form filling, your users will be frustrated.
Scrolling – Your user should get the required information within the screen limit. However, it is not possible for all the scenarios. It would be great if never-scrolling is avoided.
Navigation – Great apps need proper navigation. Users will never consume your app if the app navigation is confusing.
Auto-Filling – If the app is an interesting one and users use daily, it needs to leverage the auto-filling feature. Because your app users will hate to type the same data again and again.
Unresponsive for Inputs – If a mobile screen is unresponsive for inputs or gestures, your users will be annoyed. Make sure no screen is unresponsive. If the screen is used for loading purpose, then display the relevant content to educate the users.
Conclusion
Before releasing an iOS app, you need to test it on multiple devices. Testing the app only from functional testing stand-point will never address the real-world issues. Test both functional and non-functional areas. Insufficient testing will allow users to experience the buggy app.
Once a mobile app’s reputation is lost due to bugs, it is hard to regain.
App quality starts from coding. If the unit testing covers all the code components, then it will reduce the number of bugs. Mobile app testing service is one of the core testing services of Codoid.
Web Applications has only a few browser combinations. However, mobile apps need to be tested on different OS, platforms, and versions. To release an app quickly, it needs to be tested quickly. Testing the same scenarios manually on multiple devices needs more testers and time. Automate all your regression test cases to speed-up the testing.
Automate all your regression test cases to speed-up the testing. Automation testing is not error-prone. Your team will get confidence if the regression testing is taken care of by automation testing.
Codoid is a software testing company. We have tested more than 1000+ mobile apps. All our mobile app testers are expertise in both manual and automation testing. We have our in-house mobile app testing lab, which contains 70+ mobile devices. Contact us for your mobile app testing needs.
by admin | Dec 24, 2020 | Mobile App Testing, Fixed, Blog |
You can find many blog articles and YouTube videos that demonstrate Appium iOS setup. However, in this blog article, you will learn about each installation step and its importance. Many automation testers follow Appium iOS installation steps blindly and install the required software without knowing its details and usage.
HomeBrew Installation:
HomeBrew is an open-source package manager for macOS. If you have HomeBrew, then it will ease Node and Carthage installations. We will discuss more Node and Carthage later. HomeBrew installation is straight-forward. Visit https://brew.sh/ website for more details.
Node Installation:
In order to install Appium node package, you need Node Package manager. Using brew install command, you can install Node package manager. Once npm is installed, you can verify the installation using node -v command.
XCode IDE:
To run your mobile test automation scripts on real iOS devices, you need to build and install webDriver agent app in your device. To build web driver agent app, you need XCode. You can install XCode from AppStore.
Appium Installation
If you have already installed npm, then installing Appium is a cake-walk. Use the following command to install Appium.
You can also install Appium Desktop instead of node package. As an automation testing company, use Appium node package to automate iOS app test automation. It is up to your flexibility.
Carthage Installation:
Carthage is required to install dependencies of WebDriver agent Xcode project. Once Appium is installed, you can find WebDriver agent project in node_modules folder. Previously, the WebDriver agent project was not shipped along with Appium package. Now, you can find it in the following folder.
/usr/local/lib/nodemodules/appium/nodemodules/appium-webdriveragent
Build WebDriver Agent project:
Goto appium-webdriveragent and run the following command.
mkdir -p Resources/WebDriverAgent.bundle
./Scripts/bootstrap.sh -d
The above commands will install the required dependencies of WebDriver Agent project using Carthage.
Now, open the WebDriver agent project in Xcode, connect your device and build the project. If the build is successful, you can see the WebDriver agent app on your phone.
Conclusion:
Appium Setup for iOS is not a simple task if you are a novice mobile app automation tester. However, If you follow all the steps one-by-one carefully, you can succeed in the first attempt.
Don’t worry if the installation didn’t go well. Just roll-back all the installation and try again from the beginning. Building WebDriver agent is a crucial step in Appium iOS setup. As a mobile app testing company, we use Appium for Android and iOS apps automation testing. Appium setup for iOS is a one-time activity. However, if you are familiar with the required tools and packages, you can recollect the installation steps in the future.
We hope you have learned the details of Appium iOS setup. After following up the installation steps from any YouTube videos, just go through this article to better understand. In the subsequent blog articles, we will be publishing more topics on Appium iOS automation testing.

by admin | Dec 10, 2020 | Automation Testing, Fixed, Blog |
Nowadays, Knowledge of Continuous Integration tools is a must-have skill for an automation tester. Continuous Integration (CI) and Continuous Delivery are automated approaches to produce applications effectively & reliably. The process of Continuous Integration is set up through a pipeline. Each step has its own rules and conditions.
Suppose a test automation engineer wants to configure automated scripts that validate the functionalities before & after deployment. In that case, he/she should be familiar with the continuous integration tool used by your project team.
Some project teams use separate code repositories for automation testing. Suppose you have the automation test scripts in the application code repository. In that case, everyone in the group can utilize the automated test suite, and as an automation tester, you will also understand how the code is flowing in the pipeline.
In this blog, we have listed the most popular Continuous Integration Tools.
Jenkins
Jenkins is the widely used Continuous Integration tool. Since it is an open-source tool and easy to use, everyone loves it. If you are looking for Jenkins Enterprise support, you can approach CloudBees, the company which created Jenkins. The power of Jenkins is it has over 1500+ plugins.
If Jenkins’ base functionalities don’t satisfy your needs, you can search for suitable plugins to accomplish the intended setup.
Nowadays, in every automation tester’s profile, Jenkins is mentioned as one of the technical skills.
Bamboo
Bamboo is a commercial CI tool. If your team is a fan of Atlassian products and wants a close integration with Jira, Bamboo is right. You can add free & commercial plugins from Atlassian Marketplace.
Bamboo allows you to configure pipelines using Web UI or spec files. The supported file formats for spec file configurations are YAML and Java.
TeamCity
TeamCity is one of the products from JetBrains. You can use up to 100 builds and three agents from the free license. The advantage of TeamCity is it allows you to view and configure pipelines from JetBrains IDE and Visual Studio.
You can purchase more agents when the need arises and configure pipelines in XML or Kotlin files.
GoCD
GoCD is a free and open-source continuous integration tool. GoCD allows you to configure pipelines in XML, JSON, and YAML formats.
Travis CI
Travis CI is free for open-source projects. If your open-source code is in Github and is looking for a useful CI tool, Travis will be the go-to choice. Travis CI allows you to extend its capability with third-party applications, clients, tools, and libraries.
Codeship
CodeShip is a cloud-based CI tool. It comes in two plans – CodeShip Basic and CodeShip Pro. You can configure pipelines on Web UI in a basic plan, and the tasks will be run on reconfigured Docker containers. If you want customized containers to run the tasks and YAML file based configurations, you will have to go for the CodeShip Pro plan.
Codeship Basic plan is free up to 100 builds per month with unlimited user access. The pro plan’s pricing is calculated based on the number of builds and VMs you will use.
CircleCI
CicleCI uses a variety of Docker containers. For mobile app development, CircleCI provides images to build & test Android applications. In the free plan, you will get 1000 build minutes per month with one container.
In Conclusion
As one of the leading software testing companies, we have used various CI tools to execute automation test suites. However, for building the freeware products developed by Codoid, we use the Jenkins CI tool.
In this blog article, you have just learned necessary information about the popular Continuous Integration tools. When you go through the pipeline details on the CI tool, you will know the importance of the automation test scripts and their use.


