Web accessibility is no longer something teams can afford to overlook; it has become a fundamental requirement for any digital experience. Millions of users rely on assistive technologies such as screen readers, alternative input devices, and voice navigation. Consequently, ensuring digital inclusivity is not just a technical enhancement; rather, it is a responsibility that every developer, tester, product manager, and engineering leader must take seriously. Additionally, accessibility risks extend beyond usability. Non-compliant websites can face legal exposure, lose customers, and damage their brand reputation. Therefore, building accessible experiences from the ground up is both a strategic and ethical imperative.Fortunately, accessibility testing does not have to be overwhelming. This is where Google Lighthouse accessibility audits come into play.
Lighthouse makes accessibility evaluation significantly easier by providing automated, WCAG-aligned audits directly within Chrome. With minimal setup, teams can quickly run assessments, uncover common accessibility gaps, and receive actionable guidance on how to fix them. Even better, Lighthouse offers structured scoring, easy-to-read reports, and deep code-level insights that help teams move steadily toward compliance.
In this comprehensive guide, we will walk through everything you need to know about Lighthouse accessibility testing. Not only will we explain how Lighthouse works, but we will also explore how to run audits, how to understand your score, how to fix issues, and how to integrate Lighthouse into your development and testing workflow. Moreover, we will compare Lighthouse with other accessibility tools, helping your QA and development teams adopt a well-rounded accessibility strategy. Ultimately, this guide ensures you can transform Lighthouse’s recommendations into real, meaningful improvements that benefit all users.
Getting Started with Lighthouse Accessibility Testing
To begin, Lighthouse is a built-in auditing tool available directly in Chrome DevTools. Because no installation is needed when using Chrome DevTools, Lighthouse becomes extremely convenient for beginners, testers, and developers who want quick accessibility insights. Lighthouse evaluates several categories: accessibility, performance, SEO, and best practices, although in this guide, we focus primarily on the Lighthouse accessibility dimension.
Furthermore, teams can run tests in either Desktop or Mobile mode. This flexibility ensures that accessibility issues specific to device size or interaction patterns are identified. Lighthouse’s accessibility engine audits webpages against automated WCAG-based rules and then generates a score between 0 and 100. Each issue Lighthouse identifies includes explanations, code snippets, impacted elements, and recommended solutions, making it easier to translate findings into improvements.
In addition to browser-based evaluations, Lighthouse can also be executed automatically through CI/CD pipelines using Lighthouse CI. Consequently, teams can incorporate accessibility testing into their continuous development lifecycle and catch issues early before they reach production.
Setting Up Lighthouse in Chrome and Other Browsers
Lighthouse is already built into Chrome DevTools, but you can also install it as an extension if you prefer a quick, one-click workflow.
How to Install the Lighthouse Extension in Chrome
Open the Chrome Web Store and search for “Lighthouse.”
Select the Lighthouse extension.
Click Add to Chrome.
Confirm by selecting Add Extension.
Although Lighthouse works seamlessly in Chrome, setup and support vary across other browsers:
Microsoft Edge includes Lighthouse directly inside DevTools under the “Audits” or “Lighthouse” tab.
Firefox uses the Gecko engine and therefore does not support Lighthouse, as it relies on Chrome-specific APIs.
Brave and Opera (both Chromium-based) support Lighthouse in DevTools or via the Chrome extension, following the same steps as Chrome.
On Mac, the installation and usage steps for all Chromium-based browsers (Chrome, Edge, Brave, Opera) are the same as on Windows.
This flexibility allows teams to run Lighthouse accessibility audits in environments they prefer, although Chrome continues to provide the most reliable and complete experience.
Running Your First Lighthouse Accessibility Audit
Once Lighthouse is set up, running your first accessibility audit becomes incredibly straightforward.
Steps to Run a Lighthouse Accessibility Audit
Open the webpage you want to test in Google Chrome.
Right-click anywhere on the page and select Inspect, or press F12.
Navigate to the Lighthouse panel.
Select the Accessibility checkbox under Categories.
Choose your testing mode:
Desktop (PSI Frontend—pagespeed.web.dev)
Mobile (Lighthouse Viewer—googlechrome.github.io)
Click Analyze Page Load.
Lighthouse will then scan your page and generate a comprehensive report. This report becomes your baseline accessibility health score and provides structured groupings of passed, failed, and not-applicable audits. Consequently, you gain immediate visibility into where your website stands in terms of accessibility compliance.
Key Accessibility Checks Performed by Lighthouse
Lighthouse evaluates accessibility using automated rules referencing WCAG guidelines. Although automated audits do not replace manual testing, they are extremely effective at catching frequent and high-impact accessibility barriers.
High-Impact Accessibility Checks Include:
Color contrast verification
Correct ARIA roles and attributes
Descriptive and meaningful alt text for images
Keyboard navigability
Proper heading hierarchy (H1–H6)
Form field labels
Focusable interactive elements
Clear and accessible button/link names
Common Accessibility Issues Detected in Lighthouse Reports
During testing, Lighthouse often highlights issues that developers frequently overlook. These include structural, semantic, and interactive problems that meaningfully impact accessibility.
Typical Issues Identified:
Missing list markup
Insufficient color contrast between text and background
Incorrect heading hierarchy
Missing or incorrect H1 tag
Invalid or unpermitted ARIA attributes
Missing alt text on images
Interactive elements that cannot be accessed using a keyboard
Unlabeled or confusing form fields
Focusable elements that are ARIA-hidden
Because Lighthouse provides code references for each issue, teams can resolve them quickly and systematically.
Interpreting Your Lighthouse Accessibility Score
Lighthouse scores reflect the number of accessibility audits your page passes. The rating ranges from 0 to 100, with higher scores indicating better compliance.
The results are grouped into
Passes
Not Applicable
Failed Audits
While Lighthouse audits are aligned with many WCAG 2.1 rules, they only cover checks that can be automated. Thus, manual validation such as keyboard-only testing, screen reader exploration, and logical reading order verification remains essential.
What To Do After Receiving a Low Score
Review the failed audits.
Prioritize the highest-impact issues first (e.g., contrast, labels, ARIA errors).
Address code-level problems such as missing alt attributes or incorrect roles.
Re-run Lighthouse to validate improvements.
Conduct manual accessibility testing for completeness.
Lighthouse is a starting point, not a full accessibility certification. Nevertheless, it remains an invaluable tool in identifying issues early and guiding remediation efforts.
Improving Website Accessibility Using Lighthouse Insights
One of Lighthouse’s strengths is that it offers actionable, specific recommendations alongside each failing audit.
Typical Recommendations Include:
Add meaningful alt text to images.
Ensure buttons and links have descriptive, accessible names.
Increase contrast ratios for text and UI components.
Add labels and clear instructions to form fields.
Remove invalid or redundant ARIA attributes.
Correct heading structure (e.g., start with H1, maintain sequential order).
Because Lighthouse provides “Learn More” links to relevant Google documentation, developers and testers can quickly understand both the reasoning behind each issue and the steps for remediation.
Integrating Lighthouse Findings Into Your Workflow
To maximize the value of Lighthouse, teams should integrate it directly into development, testing, and CI/CD processes.
Recommended Workflow Strategies
Run Lighthouse audits during development.
Include accessibility checks in code reviews.
Automate Lighthouse accessibility tests using Lighthouse CI.
Establish a baseline accessibility score (e.g., always maintain >90).
Use Lighthouse reports to guide UX improvements and compliance tracking.
By integrating accessibility checks early and continuously, teams avoid bottlenecks that arise when accessibility issues are caught too late in the development cycle. In turn, accessibility becomes ingrained in your engineering culture rather than an afterthought.
Comparing Lighthouse to Other Accessibility Tools
Although Lighthouse is powerful, it is primarily designed for quick automated audits. Therefore, it is important to compare it with alternative accessibility testing tools.
Evaluates accessibility along with performance, SEO, and best practices
Other Tools (Axe, WAVE, Tenon, and Accessibility Insights) Offer:
More extensive rule sets
Better support for manual testing
Deeper contrast analysis
Assistive-technology compatibility checks
Thus, Lighthouse acts as an excellent first step, while other platforms provide more comprehensive accessibility verification.
Coverage of Guidelines and Standards
Although Lighthouse checks many WCAG 2.0/2.1 items, it does not evaluate every accessibility requirement.
Lighthouse Does Not Check:
Logical reading order
Complex keyboard trap scenarios
Dynamic content announcements
Screen reader usability
Video captioning
Semantic meaning or contextual clarity
Therefore, for complete accessibility compliance, Lighthouse should always be combined with manual testing and additional accessibility tools.
Summary Comparison Table
Sno
Area
Lighthouse
Other Tools (Axe, WAVE, etc.)
1
Ease of use
Extremely easy; built into Chrome
Easy, but external tools or extensions
2
Automation
Strong automated WCAG checks
Strong automated and semi-automated checks
3
Manual testing support
Limited
Extensive
4
Rule depth
Moderate
High
5
CI/CD integration
Yes (Lighthouse CI)
Yes
6
Best for
Quick audits, early dev checks
Full accessibility compliance strategies
Example
Imagine a team launching a new marketing landing page. On the surface, the page looks visually appealing, but Lighthouse immediately highlights several accessibility issues:
Insufficient contrast in primary buttons
Missing alt text for decorative images
Incorrect heading order (H3 used before H1)
A form with unlabeled input fields
By following Lighthouse’s recommendations, the team fixes these issues within minutes. As a result, they improve screen reader compatibility, enhance readability, and comply more closely with WCAG standards. This example shows how Lighthouse helps catch hidden accessibility problems before they become costly.
Conclusion
Lighthouse accessibility testing is one of the fastest and most accessible ways for teams to improve their website’s inclusiveness. With its automated checks, intuitive interface, and actionable recommendations, Lighthouse empowers developers, testers, and product teams to identify accessibility gaps early and effectively. Nevertheless, Lighthouse should be viewed as one essential component of a broader accessibility strategy. To reach full WCAG compliance, teams must combine Lighthouse with manual testing, screen reader evaluation, and deeper diagnostic tools like Axe or Accessibility Insights.
By integrating Lighthouse accessibility audits into your everyday workflow, you create digital experiences that are not only visually appealing and high performing but also usable by all users regardless of ability. Now is the perfect time to strengthen your accessibility process and move toward truly inclusive design.
Frequently Asked Questions
What is Lighthouse accessibility?
Lighthouse accessibility refers to the automated accessibility audits provided by Google Lighthouse. It checks your website against WCAG-based rules and highlights issues such as low contrast, missing alt text, heading errors, ARIA problems, and keyboard accessibility gaps.
Is Lighthouse enough for full WCAG compliance?
No. Lighthouse covers only automated checks. Manual testing such as keyboard-only navigation, screen reader testing, and logical reading order review is still required for full WCAG compliance.
Where can I run Lighthouse accessibility audits?
You can run Lighthouse in Chrome DevTools, Edge DevTools, Brave, Opera, and through Lighthouse CI. Firefox does not support Lighthouse due to its Gecko engine.
How accurate are Lighthouse accessibility scores?
Lighthouse scores are reliable for automated checks. However, they should be viewed as a starting point. Some accessibility issues cannot be detected automatically.
What common issues does Lighthouse detect?
Lighthouse commonly finds low color contrast, missing alt text, incorrect headings, invalid ARIA attributes, unlabeled form fields, and non-focusable interactive elements.
Does Lighthouse check keyboard accessibility?
Yes, Lighthouse flags elements that cannot be accessed with a keyboard. However, it does not detect complex keyboard traps or custom components that require manual verification.
Can Lighthouse audit mobile accessibility?
Yes. Lighthouse lets you run audits in Desktop mode and Mobile mode, helping you evaluate accessibility across different device types.
Improve your website’s accessibility with ease. Get a Lighthouse accessibility review and expert recommendations to boost compliance and user experience.
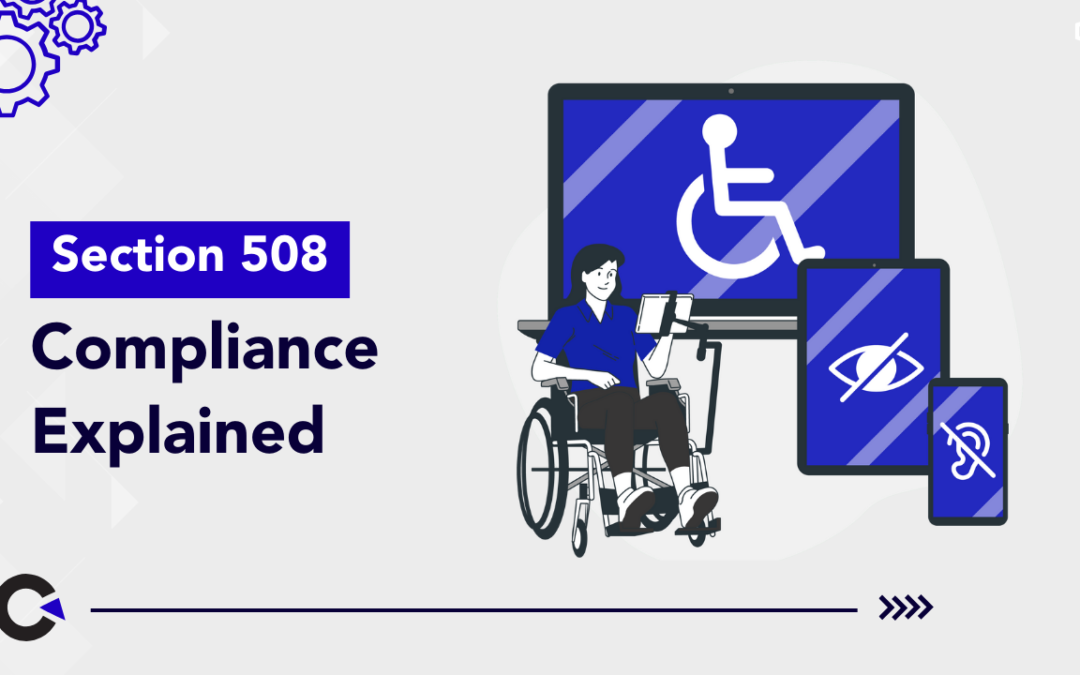
As federal agencies and their technology partners increasingly rely on digital tools to deliver services, the importance of accessibility has never been greater. Section 508 of the Rehabilitation Act requires federal organizations and any vendors developing technology for them to ensure equal access to information and communication technologies (ICT) for people with disabilities. This includes everything from websites and mobile apps to PDFs, training videos, kiosks, and enterprise applications. Because accessibility is now an essential expectation rather than a nice-to-have, teams must verify that their digital products work for users with a wide range of abilities. This is where Accessibility Testing becomes crucial. It helps ensure that people who rely on assistive technologies such as screen readers, magnifiers, voice navigation tools, or switch devices can navigate, understand, and use digital content without barriers.
However, many teams still find Section 508 and accessibility requirements overwhelming. They may be unsure which standards apply, which tools to use, or how to identify issues that automated scans alone cannot detect. Accessibility also requires collaboration across design, development, QA, procurement, and management, making it necessary to embed accessibility into every stage of the digital lifecycle rather than treating it as a last-minute task. Fortunately, Section 508 compliance becomes far more manageable with a clear, structured approach. This guide explains what the standards require, how to test effectively, and how to build a sustainable accessibility process that supports long-term digital inclusiveness.
Section 508 of the Rehabilitation Act requires federal agencies and organizations working with them to ensure that their electronic and information technology (EIT) is accessible to people with disabilities. This includes users with visual, auditory, cognitive, neurological, or mobility impairments. The standard ensures that digital content is perceivable, operable, understandable, and robust, four core principles borrowed from WCAG.
The 2018 “Section 508 Refresh” aligned U.S. federal accessibility requirements with WCAG 2.0 Level A and AA, though many organizations now aim for WCAG 2.1 or 2.2 for better future readiness.
What Section 508 Compliance Covers (Expanded)
Websites and web applications: This includes all public-facing sites, intranet portals, login-based dashboards, and SaaS tools used by federal employees or citizens. Each must provide accessible navigation, content, forms, and interactive elements.
PDFs and digital documents: Common formats like PDF, Word, PowerPoint, and Excel must include tagging, correct reading order, accessible tables, alt text for images, and proper structured headings.
Software applications: Desktop, mobile, and enterprise software must support keyboard navigation, screen reader compatibility, logical focus order, and textual equivalents for all visual elements.
Multimedia content: Videos, webinars, animations, and audio recordings must include synchronized captions, transcripts, and audio descriptions where needed.
Hardware and kiosks: Physical devices such as kiosks, ATMs, and digital signage must provide tactile access, audio output, clear instructions, and predictable controls designed for users with diverse abilities.
Why Test for Section 508 Compliance?
Testing for Section 508 compliance is essential not only for meeting legal requirements but also for enhancing digital experiences for all users. Below are expanded explanations of the key reasons:
1. Prevent legal challenges and costly litigation
Ensuring accessibility early in development reduces the risk of complaints, investigations, and remediation orders that can delay launches and strain budgets. Compliance minimizes organizational risk and demonstrates a proactive commitment to inclusion.
2. Improve user experience for people with disabilities
Accessible design ensures that users with visual, auditory, cognitive, or mobility impairments can fully interact with digital tools. For instance, alt text helps blind users understand images, while keyboard operability allows people who cannot use a mouse to navigate interfaces effectively.
3. Enhance usability and SEO for all users
Many accessibility improvements, such as structured headings, descriptive link labels, or optimized keyboard navigation, benefit everyone, including users on mobile devices, people multitasking, or those with temporary impairments.
4. Reach broader audiences
Accessible content allows organizations to serve a more diverse population. This is particularly important for public-sector organizations that interact with millions of citizens, including elderly users and people with varying abilities.
5. Ensure consistent user-centered design
Accessibility encourages design practices that emphasize clarity, simplicity, and reliability, qualities that improve overall digital experience and reduce friction for all users.
Key Components of Section 508 Testing
1. Automated Accessibility Testing
Automated tools quickly scan large volumes of pages and documents to detect common accessibility barriers. While they do not catch every issue, they help teams identify recurring patterns and reduce the manual testing workload.
What automated tools typically detect:
Missing alt text: Tools flag images without alternative text that screen reader users rely on to understand visual content. Automation highlights both missing and suspiciously short alt text for further review.
Low color contrast: Automated tests measure whether text meets WCAG contrast ratios. Poor contrast makes reading difficult for users with low vision or color vision deficiencies.
Invalid HTML markup: Errors like missing end tags or duplicated IDs can confuse assistive technologies and disrupt navigation for screen reader users.
Improper heading structure: Tools can detect skipped levels or illogical heading orders, which disrupt comprehension and navigation for AT users.
ARIA misuse: Automation identifies incorrect use of ARIA attributes that may mislead assistive technologies or create inconsistent user experiences.
Automated testing is fast and broad, making it an ideal first layer of accessibility evaluation. However, it must be paired with manual and assistive technology testing to ensure full Section 508 compliance.
2. Manual Accessibility Testing
Manual testing validates whether digital tools align with WCAG, Section 508, and real-world usability expectations. Because automation catches only a portion of accessibility issues, manual reviewers fill the gaps.
What manual testing includes:
Keyboard-only navigation: Testers verify that every interactive element, including buttons, menus, forms, and pop-ups, can be accessed and activated using only the keyboard. This ensures users who cannot use a mouse can fully navigate the interface.
Logical reading order: Manual testers confirm that content flows in a sensible order across different screen sizes and orientations. This is essential for both visual comprehension and screen reader accuracy.
Screen reader compatibility: Reviewers check whether labels, instructions, headings, and interactive components are announced properly by tools like NVDA, JAWS, and VoiceOver.
Proper link descriptions and form labels: Manual testing ensures that links make sense out of context and form fields have clear labels, so users with disabilities understand the purpose of each control.
Manual testing is especially important for dynamic, custom, or interactive components like modals, dropdowns, and complex form areas where automated tests fall short.
3. Assistive Technology (AT) Testing
AT testing verifies whether digital content works effectively with the tools many people with disabilities rely on.
Tools used for AT testing:
Screen readers: These tools convert digital text into speech or Braille output. Testing ensures that all elements, menus, images, and form controls are accessible and properly announced.
Screen magnifiers: Magnifiers help users with low vision enlarge content. Testers check whether interfaces remain usable and readable when magnified.
Voice navigation tools: Systems like Dragon NaturallySpeaking allow users to control computers using voice commands, so interfaces must respond to verbal actions clearly and consistently.
Switch devices: These tools support users with limited mobility by enabling navigation with single-switch inputs. AT testing ensures interfaces do not require complex physical actions.
AT testing is critical because it reveals how real users interact with digital products, exposing barriers that automation and manual review alone may overlook.
4. Document Accessibility Testing
Digital documents are among the most overlooked areas of Section 508 compliance. Many PDFs and Microsoft Office files remain inaccessible due to formatting issues.
Document accessibility requirements (expanded):
Tags and proper structure: Documents must include semantic tags for headings, paragraphs, lists, and tables so screen readers can interpret them correctly.
Accessible tables and lists: Tables require clear header rows and properly associated cells, and lists must use correct structural markup to convey hierarchy.
Descriptive image alt text: Images that convey meaning must include descriptions that allow users with visual impairments to understand their purpose.
Correct reading order: The reading order must match the visual order so screen readers present content logically.
Bookmarks: Long PDFs require bookmarks to help users navigate large amounts of information quickly and efficiently.
Accessible form fields: Interactive forms need labels, instructions, and error messages that work seamlessly with assistive technologies.
OCR for scanned documents: Any scanned image of text must be converted into searchable, selectable text to ensure users with visual disabilities can read it.
5. Manual Keyboard Navigation Testing
Keyboard accessibility is a core requirement of Section 508 compliance. Many users rely solely on keyboards or assistive alternatives for navigation.
Key focus areas (expanded):
Logical tab order: The tab sequence should follow the natural reading order from left to right and top to bottom so users can predict where focus will move next.
Visible focus indicators: As users tab through controls, the active element must always remain visually identifiable with clear outlines or highlights.
No keyboard traps: Users must never become stuck on any interactive component. They should always be able to move forward, backward, or exit a component easily.
Keyboard support for interactive elements: Components like dropdowns, sliders, modals, and pop-ups must support keyboard interactions, such as arrow keys, Escape, and Enter.
Complete form support: Every field, checkbox, and button must be accessible without a mouse, ensuring smooth form completion for users of all abilities.
Screen readers translate digital content into speech or Braille for users who are blind or have low vision.
Tools commonly used:
NVDA (Windows, free) – A popular, community-supported screen reader ideal for testing web content.
JAWS (Windows, commercial) – Widely used in professional and government settings; essential for ensuring compatibility.
VoiceOver (Mac/iOS) – Built into Apple devices and used by millions of mobile users.
TalkBack (Android) – Android’s native screen reader for mobile accessibility.
ChromeVox (Chromebook) – A useful option for ChromeOS-based environments.
What to test:
Proper reading order: Ensures content reads logically and predictably.
Correct labeling of links and controls: Allows users to understand exactly what each element does.
Logical heading structure: Helps users jump between sections efficiently.
Accessible alternative text: Provides meaningful descriptions of images, icons, and visual components.
Accurate ARIA roles: Ensures that interactive elements announce correctly and do not create confusion.
Clear error messages: Users must receive understandable explanations and guidance when mistakes occur in forms.
7. Multimedia Accessibility Testing
Multimedia content must support multiple types of disabilities, especially hearing and visual impairments.
Requirements include:
Closed captions: Provide text for spoken content so users who are deaf or hard of hearing can understand the material.
Audio descriptions: Narrate key visual events for videos where visual context is essential.
Transcripts: Offer a text-based alternative for audio or video content.
Accessible controls: Players must support keyboard navigation, screen reader labels, and clear visual focus indicators.
Synchronized captioning for webinars: Live content must include accurate, real-time captioning to ensure equity.
8. Mobile & Responsive Accessibility Testing
Mobile accessibility extends Section 508 requirements to apps and responsive websites.
Areas to test:
Touch target size: Buttons and controls must be large enough to activate without precision.
Orientation flexibility: Users should be able to navigate in both portrait and landscape modes.
Zoom support: Content should reflow when zoomed without causing horizontal scrolling.
Compatibility with screen readers and switch access: Ensures full usability for mobile AT users.
Logical focus order: Mobile interfaces must maintain predictable navigation patterns as layouts change.
Best Practices for Sustainable Section 508 Compliance (Expanded)
Train all development, procurement, and management teams: Ongoing accessibility education ensures everyone understands requirements and can implement them consistently across projects.
Involve users with disabilities in testing: Direct feedback from real users reveals barriers that automated and manual tests might miss.
Use both automated and manual testing: A hybrid approach provides accuracy, speed, and depth across diverse content types.
Stay updated with evolving standards: Accessibility guidelines and tools evolve each year, so teams must remain current to maintain compliance.
Maintain an Accessibility Conformance Report (ACR) using VPAT: This formal documentation demonstrates compliance, supports procurement, and helps agencies evaluate digital products.
Establish internal accessibility policies: Clear guidelines ensure consistent implementation and define roles, responsibilities, and expectations.
Assign accessibility owners and remediation timelines: Accountability accelerates fixes and maintains long-term accessibility maturity.
Conclusion
Section 508 compliance testing is essential for organizations developing or providing technology for federal use. By expanding testing beyond simple automated scans and incorporating manual evaluation, assistive technology testing, accessible document creation, mobile support, and strong organizational processes, you can create inclusive digital experiences that meet legal standards and serve all users effectively. With a structured approach, continuous improvement, and the right tools, your organization can remain compliant while delivering high-quality, future-ready digital solutions across every platform.
Ensure your digital products meet Section 508 standards and deliver accessible experiences for every user. Get expert support from our accessibility specialists today.
Section 508 is a U.S. federal requirement ensuring that all electronic and information technology (EIT) used by government agencies is accessible to people with disabilities. This includes websites, software, PDFs, multimedia, hardware, and digital services.
2. Who must follow Section 508 requirements?
All federal agencies must comply, along with any vendors, contractors, or organizations providing digital products or services to the U.S. government. If your business sells software, web tools, or digital content to government clients, Section 508 applies to you.
3. What is Accessibility Testing in Section 508?
Accessibility Testing evaluates whether digital content can be used by people with visual, auditory, cognitive, or mobility impairments. It includes automated scanning, manual checks, assistive technology testing (screen readers, magnifiers, voice tools), and document accessibility validation.
4. What is the difference between Section 508 and WCAG?
Section 508 is a legal requirement in the U.S., while WCAG is an international accessibility standard. The Section 508 Refresh aligned most requirements with WCAG 2.0 Level A and AA, meaning WCAG success criteria form the basis of 508 compliance.
5. How do I test if my website is Section 508 compliant?
A full evaluation includes:
Automated scans for quick issue detection
Manual testing for keyboard navigation, structure, and labeling
Screen reader and assistive technology testing
Document accessibility checks (PDFs, Word, PowerPoint)
Reviewing WCAG criteria and creating a VPAT or ACR report
What tools are used for Section 508 testing?
Popular tools include Axe, WAVE, Lighthouse, ARC Toolkit, JAWS, NVDA, VoiceOver, TalkBack, PAC 2021 (PDF testing), and color contrast analyzers. Most organizations use a mix of automated and manual tools to cover different requirement types.
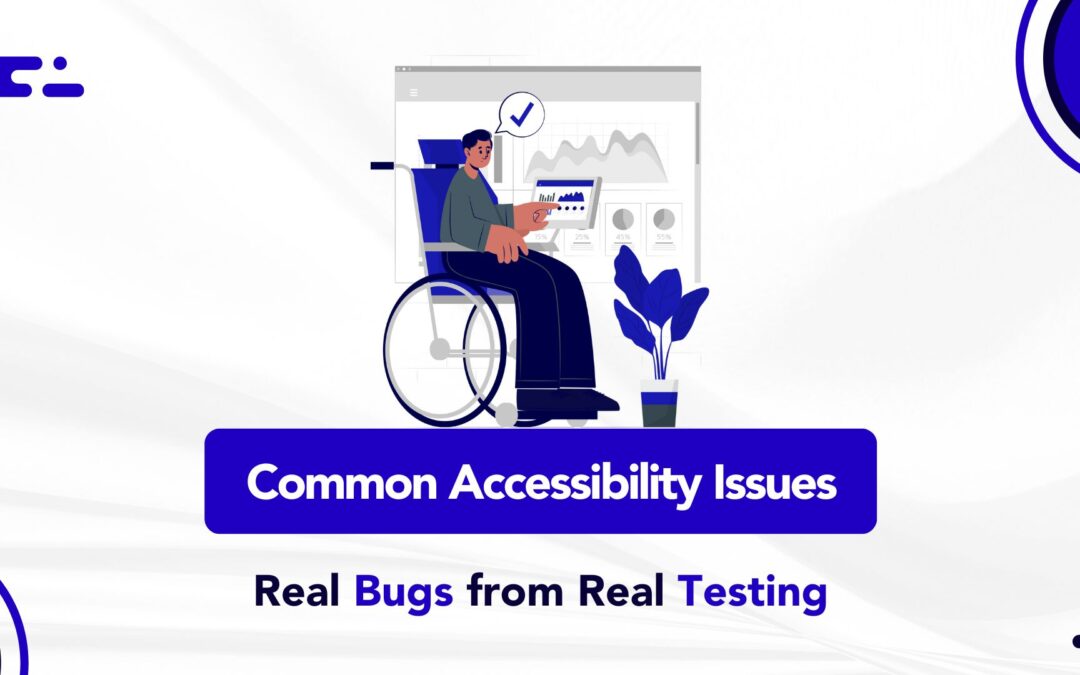
Ensuring accessibility is not just a compliance requirement but a responsibility. According to the World Health Organization (WHO), over 1 in 6 people globally live with some form of disability. These users often rely on assistive technologies like screen readers, keyboard navigation, and transcripts to access digital content. Unfortunately, many websites and applications fall short due to basic accessibility oversights. Accessibility testing plays a crucial role in identifying and addressing these issues early. Addressing common accessibility issues not only helps you meet standards like WCAG, ADA, and Section 508, but also improves overall user experience and SEO. A more inclusive web means broader reach, higher engagement, and ultimately, greater impact. Through this article, we explore common accessibility issues found in real-world projects. These are not theoretical examples; they’re based on actual bugs discovered during rigorous testing. Let’s dive into the practical breakdown of accessibility concerns grouped by content type.
Accessible videos ensure inclusion for users with hearing or visual impairments.
Bug 20: Missing Transcript
Actual: No transcript provided for the video.
Expected: Include transcript button or inline text.
Impact: Hearing-impaired users miss information.
Tip: Provide transcripts alongside or beneath video.
Bug 21: No Audio Description
Actual: Important visuals not described.
Expected: Include described audio track or written version.
Impact: Visually impaired users lose context.
Tip: Use tools like YouDescribe for enhanced narration.
7. Color Contrast Issues (CCA)
Contrast ensures readability for users with low vision or color blindness.
Bug 22: Poor Contrast for Text
Actual: Ratio is 1.9:1 instead of the required 4.5:1.
Expected: Maintain minimum contrast for normal text.
Impact: Text becomes unreadable.
Tip: Use tools like Contrast Checker to verify.
Bug 23: Low Contrast in Charts
Actual: Graph fails the 3:1 non-text contrast rule.
Expected: Ensure clarity in visuals using patterns or textures.
Impact: Data becomes inaccessible.
Tip: Avoid using color alone to differentiate data points.
Bug 24: Color Alone Used to Convey Info
Actual: No labels, only color cues.
Expected: Add text labels or icons.
Impact: Colorblind users are excluded.
Tip: Pair color with shape or label.
8. Scroll Bar Issues
Horizontal scroll bars can break the user experience, especially on mobile.
Bug 25: Horizontal Scroll at 100% Zoom
Actual: Page scrolls sideways unnecessarily.
Expected: Content should be fully viewable without horizontal scroll.
Impact: Frustrating on small screens or for users with mobility impairments.
Tip: Use responsive design techniques and test at various zoom levels.
Conclusion
Accessibility is not a one-time fix but a continuous journey. By proactively identifying and resolving these common accessibility issues, you can enhance the usability and inclusiveness of your digital products. Remember, designing for accessibility not only benefits users with disabilities but also improves the experience for everyone. Incorporating accessibility into your development and testing workflow ensures legal compliance, better SEO, and greater user satisfaction. Start today by auditing your website or application and addressing the bugs outlined above.
Frequently Asked Questions
What are common accessibility issues in websites?
They include missing alt texts, improper heading levels, broken links, insufficient color contrast, and missing video transcripts.
Why is accessibility important in web development?
It ensures inclusivity for users with disabilities, improves SEO, and helps meet legal standards like WCAG and ADA.
How do I test for accessibility issues?
You can use tools like axe, WAVE, Lighthouse, and screen readers along with manual QA testing.
What is color contrast ratio?
It measures the difference in luminance between foreground text and its background. A higher ratio improves readability.
Are accessibility fixes expensive?
Not fixing them is more expensive. Early-stage remediation is cost-effective and avoids legal complications.
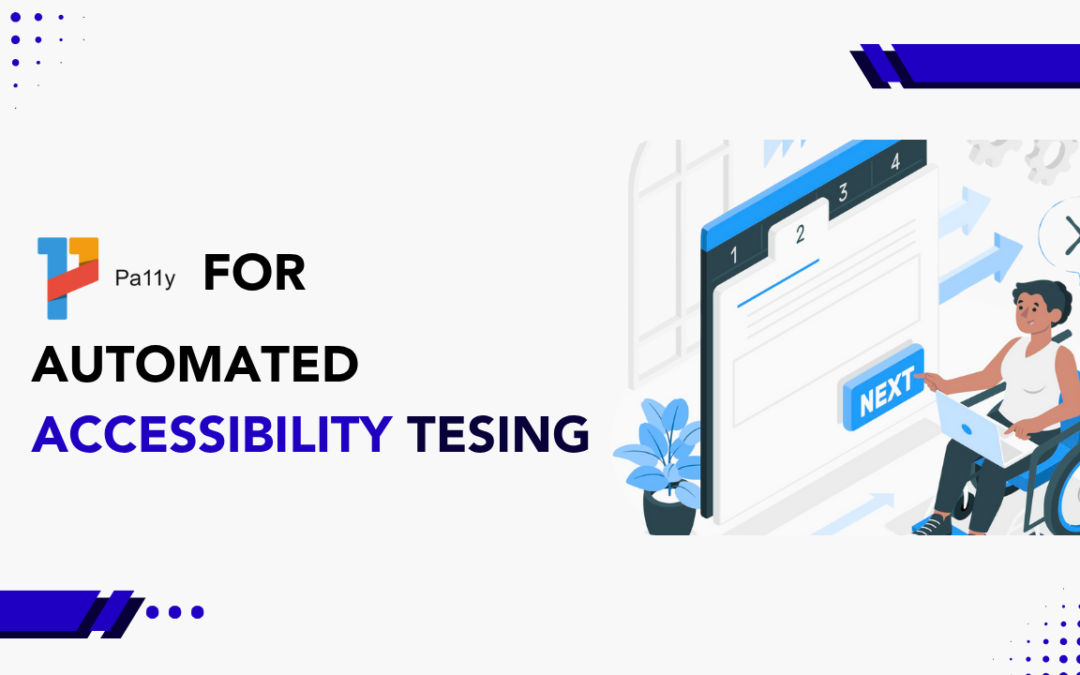
In an increasingly digital world, accessibility is no longer a luxury or an afterthought it is a necessity. More than one billion people, or about 15% of the global population, live with some form of disability. These disabilities range from visual and auditory impairments to motor and cognitive challenges, each presenting unique obstacles to interacting with online content. Without thoughtful design and proactive accessibility measures, websites and applications risk alienating a substantial portion of users. Accessibility is not only about inclusivity but also about legal compliance. Global regulations, such as the Americans with Disabilities Act (ADA), Section 508, and the Web Content Accessibility Guidelines (WCAG), mandate that digital properties be accessible to individuals with disabilities. Beyond compliance, accessible websites also benefit from broader audiences, improved SEO rankings, and enhanced user experience for everyone. While manual accessibility audits are invaluable, they can be time-consuming and costly. This is where automated accessibility testing plays an essential role. By identifying common accessibility issues early in the development lifecycle, automation reduces manual effort, accelerates remediation, and fosters a culture of accessibility from the outset. One of the most reliable and widely-used tools for automated testing is pa11y .
This guide offers a step-by-step walkthrough of how to leverage pa11y for automated accessibility testing, ensuring that your web projects are accessible, compliant, and user-friendly.
Pa11y (pronounced “pally”) is a powerful, open-source tool specifically designed for automated accessibility testing. It simplifies the process of detecting accessibility violations on web pages and provides actionable reports based on internationally recognized standards such as WCAG 2.0, WCAG 2.1, and Section 508.
Developed with flexibility and ease of integration in mind, pa11y can be used both manually through a command-line interface and automatically in CI/CD pipelines for continuous accessibility validation. It supports multiple output formats, making it easy to generate reports in JSON, CSV, or HTML, depending on your project requirements. Additionally, pa11y allows customization of test parameters, letting you adjust timeouts, exclude specific elements from scans, and even interact with dynamic content.
Despite its automated prowess, pa11y is not a replacement for manual accessibility audits. Rather, it serves as an efficient first line of defense, catching up to 50% of common accessibility issues before manual reviews begin. Used strategically, pa11y can significantly reduce the workload on manual auditors and streamline compliance efforts.
Setting Up Pa11y for Automated Accessibility Testing
Before diving into testing, you need to install and configure pa11y properly. Thankfully, the setup process is straightforward and requires only a few basic steps.
To install Pa11y globally using npm (Node Package Manager), run the following command:
npm install -g pa11y pa11y-ci
This installation will make both pa11y and pa11y-ci available system-wide. While pa11y is ideal for individual, manual tests, pa11y-ci is specifically designed for automated testing within continuous integration environments.
Once installation is complete, verify it by checking the version:
pa11y --version
Creating a Configuration File
For repeatable and consistent testing, it’s advisable to create a .pa11yci configuration file. This file outlines the standards and settings Pa11y will use during testing.
This configuration sets the standard to WCAG 2.1 Level AA, imposes a timeout of 30 seconds for loading, adds a 2-second wait time to ensure dynamic content has fully rendered, and excludes distracting elements like ads and chat widgets from the analysis. Tailoring these options helps you focus your tests on meaningful content, reducing false positives and ensuring more accurate results.
With pa11y installed and configured, you’re ready to begin testing.
Running Your First Automated Accessibility Test with Pa11y
Testing with Pa11y is designed to be both simple and powerful. You can perform a basic scan by running:
pa11y https://your-site.com
This command will analyze the specified URL against the configured standards and output any violations directly in your terminal.
For larger projects involving multiple pages or more complex requirements, using pa11y-ci in conjunction with your .pa11yci file allows batch testing:
pa11y-ci --config .pa11yci
Pa11y also supports additional features like screen capture for visual documentation:
pa11y https://your-site.com --screen-capture
This command captures a screenshot of the page during testing, which is invaluable for visually verifying issues.
The ease of initiating a test with Pa11y is one of its greatest strengths. Within seconds, you’ll have a detailed, actionable report highlighting issues such as missing alt text, improper heading structure, low contrast ratios, and more.
Key Areas to Focus On During Automated Accessibility Testing
Automated accessibility testing with Pa11y can cover a broad range of compliance checks, but focusing on key areas ensures a more effective audit.
Validating Page Structure and Navigation
A proper heading hierarchy is crucial for screen reader navigation. Headings should follow a logical order (H1, H2, H3, etc.) without skipping levels. Pa11y can help you identify pages where headings are misused or missing entirely.
In addition to headings, confirm that your site provides skip navigation links. These allow users to bypass repetitive content and go straight to the main content area, dramatically improving keyboard navigation efficiency.
For these checks, run:
pa11y https://your-site.com --viewport-width 1440
Testing with an adjusted viewport ensures that layout changes, like responsive design shifts, don’t introduce hidden accessibility barriers.
Ensuring Text Readability and Scalability
Text must be easily resizable up to 200% without breaking the layout or hiding content. Pa11y can flag text-related issues, though manual checks are still recommended for verifying font choices and testing text-to-speech compatibility.
allows you to focus on structural issues first before tackling visual concerns like color contrast manually.
Testing Multimedia Content Accessibility
For websites containing video or audio content, accessibility compliance extends beyond page structure. Captions, transcripts, and audio descriptions are critical for making media accessible.
Pa11y can simulate interactions such as playing a video to validate the availability of controls:
This approach ensures that dynamic content is evaluated under realistic user conditions.
Verifying Interactive Elements
Forms, quizzes, and other interactive elements often present significant accessibility challenges. Common issues include unlabeled input fields, inaccessible error messages, and improper focus management.
You can automate the testing of these elements with Pa11y:
pa11y https://your-site.com/form --actions "set field #name to John" "click element #submit"
Pa11y’s ability to simulate user inputs and interactions adds significant depth to your automated accessibility testing efforts.
Advanced Testing Techniques with Pa11y
To achieve even deeper insights, Pa11y offers advanced testing capabilities, including the simulation of different user conditions.
Simulating Color Blindness
Color accessibility remains one of the most critical and commonly overlooked aspects of web design. Pa11y allows simulation of different color profiles to detect issues that could affect users with color vision deficiencies:
This technique ensures that large websites are thoroughly evaluated without manual intervention at each step.
Integrating Pa11y into CI/CD Pipelines for Continuous Accessibility
One of Pa11y’s most powerful features is its ease of integration into CI/CD pipelines. Incorporating accessibility checks into your deployment workflow ensures that accessibility remains a priority throughout the software development lifecycle.
By adding a Pa11y step to your CI/CD pipeline configuration (e.g., in Jenkins, CircleCI, GitHub Actions), you can automate checks like this:
pa11y-ci --config .pa11yci
Any new code or feature must pass accessibility tests before moving to production, preventing regressions and promoting a culture of accessibility-first development.
Although automated accessibility testing with Pa11y covers a wide range of issues, it cannot detect every potential barrier. Automation is excellent at identifying technical problems like missing form labels or improper heading structure, but some issues require human judgment.
For example, while Pa11y can confirm the presence of alternative text on images, it cannot assess whether the alt text is meaningful or appropriate. Similarly, evaluating whether interactive elements provide intuitive keyboard navigation or whether the visual hierarchy of the page makes sense to a user cannot be fully automated.
Therefore, manual testing such as navigating a website with a screen reader (like NVDA or VoiceOver) or using keyboard-only navigation is still an essential part of a comprehensive accessibility strategy.
Addressing Special Considerations for eLearning and Complex Content
When it comes to testing specialized digital content, such as eLearning platforms, the complexity of accessibility requirements increases. Websites designed for learning must not only ensure basic navigation and text readability but also make interactive components, multimedia, and complex mathematical content accessible to a wide audience.
Testing eLearning Content with Pa11y
eLearning platforms often contain paginated content, multimedia lessons, quizzes, and even mathematical formulas. Here’s how to methodically test them using Pa11y.
First, ensure that the page structure, including logical headings and navigational elements, supports assistive technologies like screen readers. Logical reading order and skip navigation links are crucial for users who rely on keyboard navigation.
To automate tests for multiple chapters or sections, you can use a simple JavaScript script like the one below:
This ensures that every page is consistently checked against accessibility standards without requiring manual intervention for each chapter.
Testing Multimedia Components
Many eLearning platforms use videos and animations to engage users. However, accessibility for these elements demands captions, audio descriptions, and transcripts to cater to users with visual or auditory impairments. Pa11y can simulate user actions such as playing videos to test if necessary controls and accessibility features are in place:
Yet, some accessibility verifications, like ensuring captions are accurate or that the audio description captures the necessary context, must still be manually checked, as automated tools cannot fully assess qualitative aspects.
Testing Mathematical and Scientific Content
Websites offering scientific or mathematical content often use MathML or other markup languages to represent complex equations. Automated testing can highlight missing accessibility attributes, but manual validation is required to ensure the alternative text descriptions are meaningful and that the semantic markup remains intact even when zoomed or read aloud by screen readers.
However, an evaluator must still ensure that alternative text conveys the correct scientific meaning a critical aspect, especially in educational contexts.
Recommended Testing Workflow: Combining Automated and Manual Methods
To create a truly robust accessibility testing strategy, it’s best to integrate both automated and manual processes. Here’s a recommended workflow that ensures comprehensive coverage:
Initial Automated Scan: Begin with a Pa11y automated scan across all primary web pages or application flows. This first pass identifies low-hanging issues like missing form labels, inadequate ARIA attributes, or improper heading structures.
Manual Verification of Key Pages: Select key pages for manual review. Use screen readers such as NVDA, VoiceOver, or JAWS to assess logical reading order and alternative text accuracy. Keyboard navigation testing ensures that all interactive elements can be accessed without a mouse.
Interactive Element Testing: Pay particular attention to forms, quizzes, or navigation menus. Verify that error messages are clear, focus management is handled correctly, and that users can interact seamlessly using assistive technologies.
Remediation of Detected Issues: Address all flagged issues and retest to confirm that fixes are effective.
Regression Testing: After each deployment or major update, perform regression testing using Pa11y to catch any new or reintroduced accessibility issues.
Continuous Monitoring: Integrate Pa11y scans into your CI/CD pipeline to automate regular checks and prevent accessibility regressions over time.
This balanced approach ensures early issue detection and ongoing compliance, reducing the risk of accessibility debt an accumulation of issues that becomes harder and costlier to fix over time.
Integrating Automated Accessibility Testing in LMS Platforms
Learning Management Systems (LMS) such as Moodle or Blackboard often present additional challenges because of their complexity and interactive content formats like SCORM packages. Pa11y’s flexible testing capabilities extend to these environments as well.
For instance, SCORM packages can be uploaded and tested for accessibility compliance using the following Pa11y command:
pa11y --file-upload /path/to/scorm.zip --file-type zip
Additionally, since many LMS interfaces embed content within iframes, Pa11y can be configured to bypass cross-origin restrictions:
Testing LMS platforms systematically ensures that online education is inclusive and accessible to all learners, regardless of their physical or cognitive abilities.
Common Accessibility Issues Detected by Pa11y
During automated scans, Pa11y frequently identifies recurring issues that compromise accessibility. These include:
Missing Form Labels: Forms without labels prevent screen reader users from understanding the function of input fields.
Insufficient Color Contrast: Low contrast between text and background can make content unreadable for users with visual impairments.
Missing ARIA Attributes: ARIA (Accessible Rich Internet Applications) attributes help assistive technologies interpret dynamic content correctly.
Improper Heading Structure: Skipping heading levels (e.g., jumping from H1 to H4) disrupts the logical flow for users relying on screen readers.
Keyboard Navigation Blockers: Elements that are inaccessible through keyboard navigation can create barriers for users unable to use a mouse.
By catching these issues early, developers can prioritize fixes that make the biggest difference for accessibility.
Manual Testing Checklist: Enhancing What Automation Can’t Detect
While Pa11y’s automated testing is powerful, there are limitations that only human judgment can address. A manual testing checklist ensures complete accessibility coverage:
Screen Reader Testing: Navigate the website using screen readers like NVDA (Windows) or VoiceOver (Mac/iOS) to ensure a logical reading order and accurate alternative text for images and diagrams.
Keyboard Navigation: Tab through every interactive element on the page to ensure all features are reachable and focus states are visibly clear.
Zoom and Magnification: Test the site at 200% zoom to ensure that the layout remains usable and that text scales properly without breaking.
Cognitive Testing: Evaluate the clarity of instructions, the consistency of layouts, and the manageability of content chunks to cater to users with cognitive impairments.
These manual checks uncover user experience flaws that automated tools can’t identify, ensuring that the digital product is genuinely inclusive.
Limitations of Automated Accessibility Testing
Despite its numerous benefits, automated accessibility testing is not foolproof. Tools like Pa11y are excellent at highlighting technical violations of accessibility standards, but they fall short in areas requiring subjective evaluation. Pa11y cannot:
Assess the relevance or descriptiveness of alternative text.
Determine if the color scheme provides enough context or emotional cues.
Evaluate the logical grouping of related form fields.
Analyze the simplicity and clarity of written content.
Detect issues in complex dynamic interactions that require human cognitive interpretation.
These limitations underscore the necessity of combining automated testing with thorough manual verification to achieve comprehensive accessibility.
Pa11y’s Key Features: Why It’s Indispensable
Pa11y’s popularity among accessibility professionals stems from several key features:
WCAG 2.0/2.1 and Section 508 Compliance Checks: Covers the most critical accessibility standards.
CI/CD Pipeline Integration: Supports DevOps best practices by making accessibility a part of the continuous delivery process.
Customizable Rule Sets: Tailor checks to meet specific project or organizational needs.
Multiple Output Formats: Generate reports in JSON, CSV, or HTML formats for diverse stakeholder requirements.
Screen Reader Compatibility Verification: Basic validation to ensure that screen readers can interpret the page structure accurately.
Pa11y strikes a balance between depth and usability, making it an essential tool in any accessibility testing toolkit.
Conclusion: Building Truly Accessible Digital Experiences with Pa11y
In today’s digital economy, accessibility isn’t optional it’s essential. With the growing emphasis on inclusivity and stringent legal requirements, automated accessibility testing has become a non-negotiable part of the software development lifecycle. Pa11y offers a powerful and flexible platform for detecting and resolving many common accessibility issues. However, the best results come when automation is complemented by manual testing. Automated tools efficiently identify low-hanging compliance issues, while manual methods capture the nuanced aspects of user experience that machines cannot assess.
By integrating Pa11y into your workflow and following a rigorous, hybrid testing strategy, you can create digital products that not only comply with standards but also provide meaningful, seamless experiences for all users. Accessibility is no longer a checklist it’s a mindset. Start today, and build websites and applications that are welcoming, usable, and inclusive for everyone.
Frequently Asked Questions
What is Pa11y used for?
Pa11y is a tool for automated accessibility testing, helping developers and testers ensure their websites meet WCAG and Section 508 standards.
Does Pa11y replace manual testing?
No. Pa11y automates many accessibility checks but must be supplemented with manual audits for complete coverage.
Can Pa11y be integrated into CI/CD pipelines?
Yes, Pa11y is designed for easy integration into CI/CD pipelines for continuous accessibility monitoring.
Is Pa11y free?
Yes, Pa11y is an open-source, free-to-use tool.
What are Pa11y's limitations?
Pa11y can't evaluate cognitive accessibility, image alt-text accuracy, or advanced ARIA dynamic interactions. Manual testing is required for full accessibility.
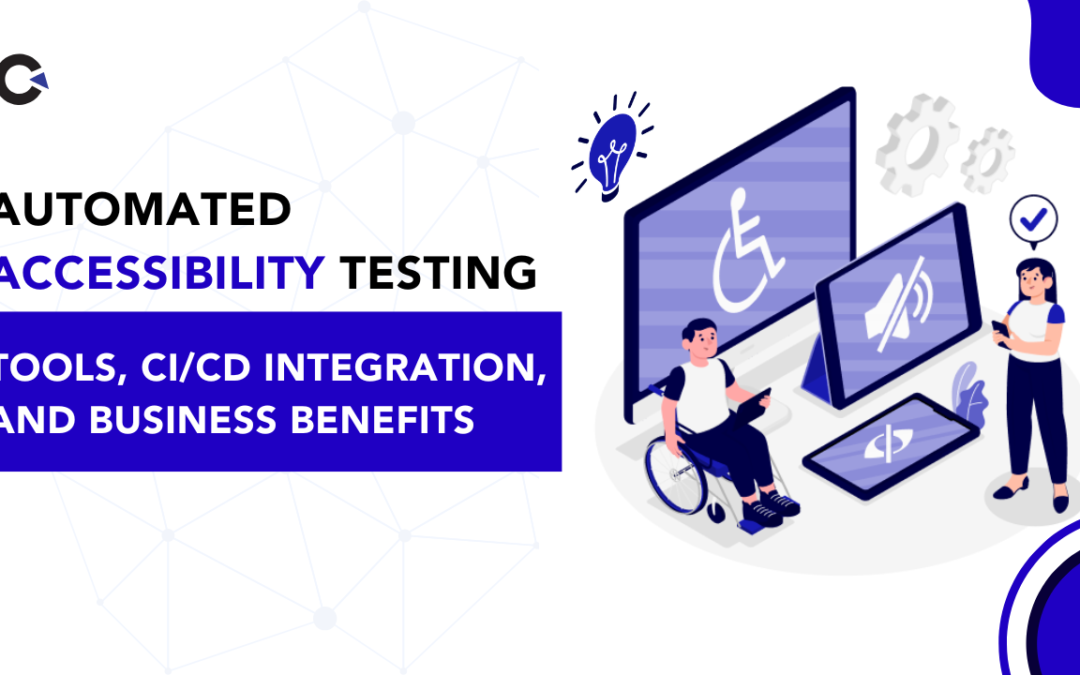
Almost every site has accessibility problems. Recent large-scale scans of the world’s most-visited pages revealed that more than 94 percent failed at least one WCAG success criterion. At the same time, digital-accessibility lawsuits in the United States exceeded 4,600 last year, most aimed squarely at websites. With an estimated 1.3 billion people living with disabilities, accessibility is no longer optional; it is a core quality attribute that also improves SEO and overall user experience.This is where accessibility testing, especially automated accessibility testing enters the picture. Because it can be embedded directly into the development pipeline, issues are surfaced early, legal exposure is lowered, and development teams move faster with fewer surprises.
What Is Automated Accessibility Testing?
At its core, automated accessibility testing is performed by software that scans code, rendered pages, or entire sites for patterns that violate standards such as WCAG 2.1, Section 508, and ARIA authoring requirements. While manual testing relies on human judgment, automated testing excels at detecting objective failures like missing alternative text, incorrect heading order, or low colour contrast within seconds. The result is rapid feedback, consistent enforcement, and scalable coverage across thousands of pages.
Key Standards in Focus
To understand what these automated tools are looking for, it’s important to know the standards they’re built around:
WCAG 2.1
Published by the W3C, the Web Content Accessibility Guidelines define the success criteria most organisations target (levels A and AA). They cover four pillars: perceptibility, operability, understandability, and robustness.
Section 508
A U.S. federal requirement harmonised with WCAG in 2018. Any software or digital service procured by federal agencies must comply with this mandate.
ARIA
Accessible Rich Internet Applications (ARIA) attributes provide semantic clues when native HTML elements are unavailable. They’re powerful but if applied incorrectly, they can reduce accessibility making automated checks critical.
Tool Deep Dive: How Automated Scanners Work
Let’s explore how leading tools operate and what makes them effective in real-world CI/CD pipelines:
axe-core
During a scan, a JavaScript rules engine is injected into the page’s Document Object Model. Each element is evaluated against WCAG-based rules, and any violation is returned as a JSON object containing the selector path, rule ID, severity, and remediation guidance.
In CI/CD, the scan is triggered with a command such as npx axe-cli, executed inside GitHub Actions or Jenkins containers. Front-end teams can also embed the library in unit tests using jest-axe, so non-compliant components cause test failures before code is merged. A typical output lists issues such as colour-contrast failures or missing alternative text, enabling rapid fixes.
Pa11y and pa11y-ci
This open-source CLI tool launches headless Chromium, loads a specified URL, and runs the HTML-CS API ruleset. Results are printed in Markdown or JSON, and a configuration file allows error thresholds to be enforced—for example, failing the pipeline if more than five serious errors appear.
In practice, a job runs pa11y-ci immediately after the build step, crawling multiple pages in one execution and blocking releases when limits are exceeded.
Google Lighthouse
Lighthouse employs the Chrome DevTools Protocol to render the target page, apply network and CPU throttling to simulate real-world conditions, and then execute audits across performance, PWA, SEO, and accessibility.
The accessibility portion reuses an embedded version of axe-core. A command such as lighthouse https://example.com –accessibility –output html can be placed in Docker or Node scripts. The resulting HTML report assigns a 0–100 score and groups findings under headings like “Names & Labels,” “Contrast,” and “ARIA.”
WAVE (Web Accessibility Evaluation)
A browser extension that injects an overlay of icons directly onto the rendered page. The underlying engine parses HTML and styles, classifying errors, alerts, and structural information.
Although primarily manual, the WAVE Evaluation API can be scripted for nightly sweeps that generate JSON reports. Developers appreciate the immediate, visual feedback—every icon links to an explanation of the problem.
Tenon
A cloud-hosted service that exposes a REST endpoint accepting either raw HTML or a URL. Internally, Tenon runs its rule engine and returns a JSON array containing priority levels, code snippets, and mapped WCAG criteria.
Dashboards help visualise historical trends, while budgets (for example, “no more than ten new serious errors”) gate automated deployments. Build servers call the API with an authentication token, and webhooks post results to Slack or Teams.
ARC Toolkit
Injected into Chrome DevTools, ARC Toolkit executes multiple rule engines—axe among them—while displaying the DOM tree, ARIA relationships, and heading structure.
Interactive filters highlight keyboard tab order and contrast ratios. QA engineers use the extension during exploratory sessions, capture screenshots, and attach findings to defect tickets.
Accessibility Insights for Web
Two modes are provided. FastPass runs a lightweight axe-based check, whereas Assessment guides manual evaluation step by step.
The associated CLI can be scripted, so team pipelines in Azure DevOps often run FastPass automatically. Reports display pass/fail status and export issues to CSV for further triage.
jest-axe (unit-test library)
Component libraries rendered in JSDOM are scanned by axe right inside unit tests. When a violation is detected, the Jest runner fails and lists each rule ID and selector.
This approach stops accessibility regressions at the earliest stage—before the UI is even visible in a browser.
Under-the-Hood Sequence
So how do these tools actually work? Here’s a breakdown of the core workflow:
DOM Construction – A real or headless browser renders the page so computed styles, ARIA attributes, and shadow DOM are available.
Rule Engine Execution – Each node is compared against rule definitions, such as “images require non-empty alt text unless marked decorative.”
Violation Aggregation – Failures are collected with metadata: selector path, severity, linked WCAG criterion, and suggested fix.
Reporting – CLI tools print console tables, APIs return JSON, and extensions overlay icons; many also support SARIF for GitHub Security dashboards.
Threshold Enforcement – In CI contexts, scripts compare violation counts to budgets, fail builds when a limit is breached, or block pull-request merges.
Integrating Accessibility into CI/CD
Automated scans are most effective when placed in the same pipeline as unit tests and linters. A well-integrated workflow typically includes:
Pre-Commit Hooks – Tools like jest-axe or eslint-plugin-jsx-a11y stop obvious problems before code is pushed.
Pull-Request Checks – Executions of axe-core or Pa11y run against preview URLs; GitHub Checks annotate diffs with issues.
Nightly Crawls – A scheduled job in Jenkins or Azure DevOps uses Pa11y or Tenon to crawl the staging site and publish trend dashboards.
Release Gates – Lighthouse scores or Tenon budgets decide whether deployment proceeds to production.
Actionable Data – Reports pinpoint root causes and track trends.
What Automation Cannot Catch
Despite its strengths, automated testing can’t replace human judgment. It cannot evaluate:
Correctness of alternative-text descriptions
Logical keyboard focus order for complex widgets
Meaningful error-message wording
Visual clarity at 200 percent zoom or higher
Cognitive load and overall user comprehension
That’s why a hybrid approach—combining automation with manual screen reader testing and usability sessions—is still essential.
Expert Tips for Maximising ROI
To make the most of your automated setup, consider these best practices:
Budget Critical Violations – Fail builds only on errors that block non-visual usage; warn on minor alerts.
Component-Level Testing – Run jest-axe inside Storybook or unit tests to stop issues early.
Colour-Contrast Tokenisation – Codify design-system colour pairs; run contrast checks on tokens to prevent future failures.
Use ARIA Sparingly – Prefer native HTML controls; use ARIA only when necessary.
Educate the Team – Make passing accessibility checks part of the Definition of Done.
Quick Checklist Before Shipping
Axe or Pa11y executed in CI on every commit
Lighthouse accessibility score ≥ 90
All images include accurate, concise alt text
Interactive controls are keyboard-operable
Colour contrast meets WCAG AA
Manual screen-reader pass confirms flow and announcements
Conclusion
Accessibility isn’t just about checking a compliance box it’s about creating better digital experiences for everyone. Automated accessibility testing allows teams to deliver accessible software at scale, catch problems early, and ship confidently. But true inclusivity goes beyond what automation can catch. Pair your tools with manual evaluations to ensure your application works seamlessly for users with real-world needs. By embedding accessibility into every stage of your SDLC, you not only meet standards you exceed expectations.
Frequently Asked Questions
What is the most reliable automated tool?
Tools built on axe-core enjoy broad industry support and frequent rule updates. However, combining axe with complementary scanners such as Lighthouse and Pa11y yields higher coverage.
Can automation replace manual audits?
No. Automated scanners typically catch 30–40 percent of WCAG failures. Manual reviews remain indispensable for context, usability, and assistive-technology verification.
Why is accessibility testing important?
Accessibility testing ensures your digital product is usable by everyone, including people with disabilities. It also reduces legal risk, improves SEO, and enhances the overall user experience.
Is accessibility testing required by law?
In many countries, yes. Laws like the ADA (U.S.), EN 301 549 (EU), and AODA (Canada) mandate digital accessibility for certain organizations.
What are the benefits of automating accessibility testing in CI/CD pipelines?
It saves time, enforces consistency, and helps development teams catch regressions before they reach production, reducing last-minute fixes and compliance risk.
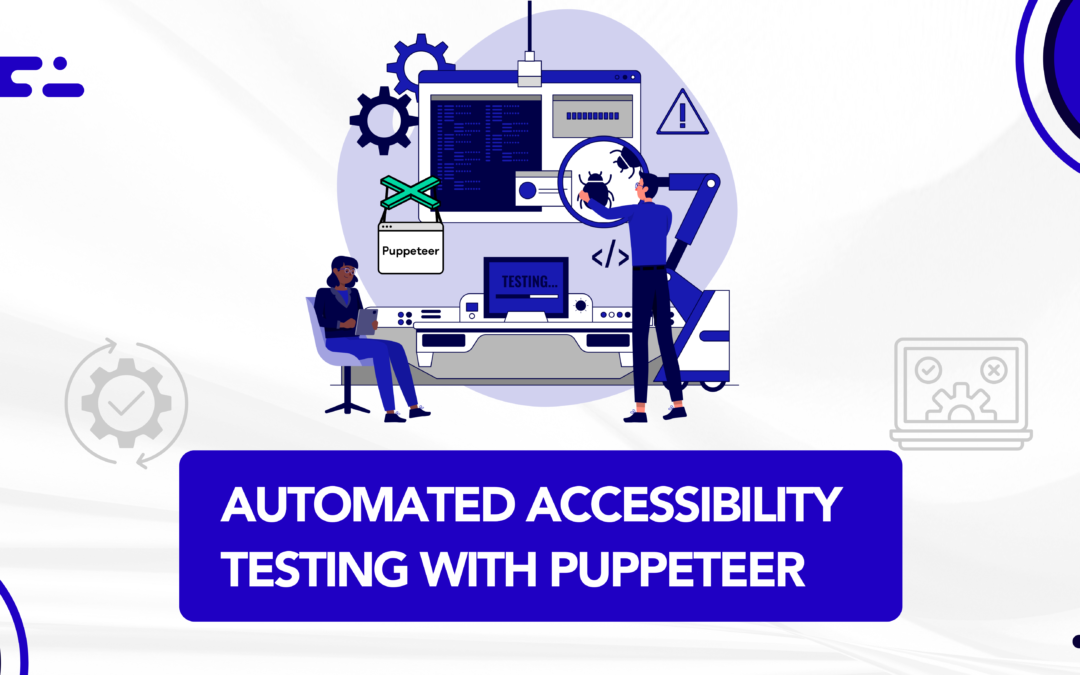
As digital products become essential to daily life, accessibility is more critical than ever. Accessibility testing ensures that websites and applications are usable by everyone, including people with vision, hearing, motor, or cognitive impairments. While manual accessibility reviews are important, relying solely on them is inefficient for modern development cycles. This is where automated accessibility testing comes in empowering teams to detect and fix accessibility issues early and consistently. In this blog, we’ll explore automated accessibility testing and how you can leverage Puppeteer a browser automation tool to perform smart, customized accessibility checks.
Automated accessibility testing uses software tools to evaluate websites and applications against standards like WCAG 2.1/2.2, ADA Title III, and Section 508. These tools quickly identify missing alt texts, ARIA role issues, keyboard traps, and more, allowing teams to fix issues before they escalate.
Note: While automation catches many technical issues, real-world usability testing still requires human intervention.
Why Automated Accessibility Testing Matters
Early Defect Detection: Catch issues during development.
Compliance Assurance: Stay legally compliant.
Faster Development: Avoid late-stage fixes.
Cost Efficiency: Reduces remediation costs.
Wider Audience Reach: Serve all users better.
Understanding Accessibility Testing Foundations
Accessibility testing analyzes the Accessibility Tree generated by the browser, which depends on:
Puppeteer is a Node.js library developed by the Chrome team. It provides a high-level API to control Chrome or Chromium through the DevTools Protocol, enabling you to script browser interactions with ease.
Puppeteer allows you to:
Open web pages programmatically
Perform actions like clicks, form submissions, scrolling
Capture screenshots, PDFs
Monitor network activities
Emulate devices or user behaviors
Perform accessibility audits
It supports both:
Headless Mode (invisible browser, faster, ideal for CI/CD)
Headful Mode (visible browser, great for debugging)
Because Puppeteer interacts with a real browser instance, it is highly suited for dynamic, JavaScript-heavy websites — making it perfect for accessibility automation.
Why Puppeteer + axe-core for Accessibility?
Real Browser Context: Tests fully rendered pages.
Customizable Audits: Configure scans and exclusions.
Integration Friendly: Easy CI/CD integration.
Enhanced Accuracy: Captures real-world behavior better than static analyzers.
Setting Up Puppeteer Accessibility Testing
Step 1: Initialize the Project
mkdir a11y-testing-puppeteer
cd a11y-testing-puppeteer
npm init -y
When you run the above script, you’ll see a console output similar to this:
Browser Open..
Waiting 13 seconds...
Accessibility Violations: 4

Help: Landmarks should have a unique role or role/label/title (i.e. accessible name) combination (landmark-unique)
Impact: moderate
Help URL: https://dequeuniversity.com/rules/axe/4.10/landmark-unique?application-axeAPI
Tags: ['cat.semantics', 'best-practice']
Affected Nodes: 1
HTML Nodes: <nav data-testid-"level1-navigation-container" id="main-navigation-container" class="sc-2f092172-9 brnBHYZ">

Help: Elements must have sufficient color contrast (color-contrast)
Impact: serious
Help URL: https://dequeuniversity.com/rules/axe/4.1/color-contrast
Tags: [ 'wcag2aa', 'wcag143' ]
Affected Nodes: 2
HTML Node: <a href="/news" class="menu-link">News</a>

Help: Form elements must have labels (label)
Impact: serious
Help URL: https://dequeuniversity.com/rules/axe/4.1/label
Tags: [ 'wcag2a', 'wcag412' ]
Affected Nodes: 1
HTML Node: <input type="text" id="search" />

...

Browser closed.
Each violation includes:
Rule description (with ID)
Impact level (minor, moderate, serious, critical)
Helpful links for remediation
Affected HTML snippets
This actionable report helps prioritize fixes and maintain accessibility standards efficiently.
Best Practices for Puppeteer Accessibility Automation
Use headful mode during development, headless mode for automation.
Always wait for full page load (networkidle2).
Exclude hidden elements globally to avoid noise.
Capture and log outputs properly for CI integration.
Conclusion
Automated accessibility testing empowers developers to build more inclusive, legally compliant, and user-friendly websites and applications. Puppeteer combined with axe-core enables fast, scalable accessibility audits during development. Adopting accessibility automation early leads to better products, happier users, and fewer legal risks. Start today — make accessibility a core part of your development workflow!
Frequently Asked Questions
Why is automated accessibility testing important?
Automated accessibility testing is important because it ensures digital products are usable by people with disabilities, supports legal compliance, improves SEO rankings, and helps teams catch accessibility issues early during development.
How accurate is automated accessibility testing compared to manual audits?
Automated accessibility testing can detect about 30% to 50% of common accessibility issues such as missing alt attributes, ARIA misuses, and keyboard focus problems. However, manual audits are essential for verifying user experience, contextual understanding, and visual design accessibility that automated tools cannot accurately evaluate.
What are common mistakes when automating accessibility tests?
Common mistakes include:
-Running tests before the page is fully loaded.
-Ignoring hidden elements without proper configuration.
-Failing to test dynamically added content like modals or popups.
-Relying solely on automation without follow-up manual reviews.
Proper timing, configuration, and combined manual validation are critical for success.
Can I automate accessibility testing in CI/CD pipelines using Puppeteer?
Absolutely. Puppeteer-based accessibility scripts can be integrated into popular CI/CD tools like GitHub Actions, GitLab CI, Jenkins, or Azure DevOps. You can configure pipelines to run accessibility audits after deployments or build steps, and even fail builds if critical accessibility violations are detected.
Is it possible to generate accessibility reports in HTML or JSON format using Puppeteer?
Yes, when combining Puppeteer with axe-core, you can capture the audit results as structured JSON data. This data can then be processed into readable HTML reports using reporting libraries or custom scripts, making it easy to review violations across multiple builds.