Lighthouse is a great open-source and automated web page quality improvement tool. It is primarily used to perform audits for performance, accessibility, progressive web apps, SEO, and other factors. Its functionality doesn’t end there as the audits will provide you with very useful suggestions and act as a guide to improving the page you audited. Be it a public page or a page that requires authentication, you will have no trouble using it. As a leading performance testing company, we have found Lighthouse to be an instrumental tool in ensuring the sites we test are optimized. So in this Lighthouse Tutorial, we will be seeing how it can be run it using Chrome DevTools, the command line, and as a Node module. We will also be taking a deep dive into the reports and seeing how to share them. So let’s get started.
The List of Lighthouse Processes:
Using the Chrome DevTools, you’ll be able to audit authentication-required pages and read reports without having to put in too much effort.
You can use shell scripts to automate your Lighthouse runs by using Command Prompt.
Lighthouse can be integrated into your continuous integration system in the form of a node module with ease.
You can also use a web interface to run Lighthouse and link to reports without having to install anything at all.
Lighthouse Tutorial to Run it in Chrome DevTools
Since Google Chrome is the most popular browser, you might already have it installed in your system. But if you don’t, make sure to install it. As any URL on the web can be audited, let’s take a look at the steps to generate a report.
1. First up, open Google Chrome and navigate to the URL you’d like to audit.
2. Once the page has been loaded, open Chrome DevTools.
3. Click on the ‘Lighthouse’ tab.
You will get a view of the page you’re looking to audit on the left and the Lighthouse-powered Chrome DevTools panel on the right.
4. You’ll see a list of audit categories as shown in the image. Check and make sure all the categories are enabled.
5. You can create a report in under a minute by just clicking on the ‘Generate report’ option. Once you do that, you’ll see a report as shown in the below image.
Lighthouse Tutorial to Run it using the Node command-line tool
Download & install the latest Node version that has Long-Term Support and then install Lighthouse using the following command.
npm install -g lighthouse
The -g flag here installs it as a global module.
You can use the following two commands to run an audit and to see all the options,
To run an audit:
lighthouse <url>
To see all the options:
lighthouse --help
Lighthouse Tutorial to Run it with a Chrome Extension
Download the Lighthouse Chrome Extension from the Chrome Webstore, and go to the page you want to audit in Chrome.
1. If you see the Lighthouse icon beside the Chrome address bar, you can click on it to enable the extension.
2. If you don’t, you can click on the extensions button to find the Lighthouse extension. So, the Lighthouse menu expands once you click on it.
3. Once you click on the ‘Generate report’ option, Lighthouse will perform the audit on the page that is currently open and then shows the report in a new tab.
How to Run PageSpeed Insights?
Using PageSpeed Insights with Lighthouse is quite simple. You just have to follow these steps:
Now that we have seen how to generate the Lighthouse report in 3 different ways and seen how to obtain the PageSpeed Insights in this Lighthouse Tutorial, it’s time to explore the various aspects of the report one would have to know about. Then only the user will be able to comprehend the report and take the required action.
Performance Score
Visiting a slow-loading website is definitely an excruciating task that no one will enjoy. So, using the performance score, we will be able to identify how quickly a website or app loads and how quickly the users will be able to access or view the content on the page. There are six-speed metrics that will be used to calculate this score.
First Contentful Paint
Imagine yourself opening a webpage. As soon as you click on the button, you would expect the page to navigate to the page you want to go to and start showing the content. So, this metric indicates the time it takes for the first text or image to become visible for the users.
First Meaningful Paint
Likewise, a barely loaded page that takes a lot of time to load the important contents of the page is also not a good sign. Hence as the name suggests, this metric indicates the time taken for the meaningful part of a page to be loaded.
Speed Index
So the speed index is a uniform metric that establishes how quickly the content of a page loads.
Time to Interactive
Just because the user is able to see the content, doesn’t mean the site is ready to be used. As soon as the users see the content, they will assume the page is ready and try to interact with it. But if the page takes a long time for it to be interactive, then the user will definitely get annoyed. So this metric reveals how much time is taken by the webpage and its content to become fully interactive for the user.
First CPU Idle
This metric is also very similar to the previous metric we saw. It differs majorly by what we mean when saying the site has to become interactive in the previous metric. For a page to be considered fully reactive, it has to respond to user interactions within 50 milliseconds. First CPU Idle differs as it reveals the time it has taken for the majority of the UI elements to work and not the time it takes for all UI elements to work. There is a reason why it is seen as a different metric as well. Ultimately, this metric returns the time it takes for the page’s main thread activity to become low enough to accept the inputs that have to be processed.
Estimated Input Latency
The latency approximates how long an app or webpage takes to react to user inputs during the 5-second window that has the maximum computational page load. The fact to keep in mind here is that if the latency is over 50ms, users might perceive the app or website to be very slow.
Make sure to review the suggestions shown in Lighthouse as it will be helpful in reducing load times easily.
Accessibility Score
The Accessibility score helps us understand how accessible the website is to people with disabilities such as vision impairment, hearing disabilities, and other physical or cognitive conditions. If we were to take the example of a visually impaired user, then the user would use a screen reader to access the content. But for the screen reader to work properly, proper heading tags are a must in the content. The alt text for visuals and proper texts explaining the buttons and hyperlinks are also important. So such will be reviewed for this score.
Best Practices Score
The Best Practices aspect primarily revolves around the security levels of the webpage. Lighthouse tests a total of 16 practices and all of them are focused on safety and modern web development standards. You can get a good score here if there are no issues in JavaScript libraries, establish secure database connections, check insecure commands, and so on.
SEO Score
So we’ve seen how fast the page loads, how inclusive it is by checking accessibility, and see if it is secure enough to provide the best user experience. But SEO is also one important action that we have to look into. The reason is that without proper SEO, the webpage itself will not be able to reach your intended audience. So though the above enhancements are important, it is very important for us to make the site appear in the search results.
Lighthouse Tutorial to Share & View reports online
Once the reports have been generated, it is also possible to view and share the reports using the Lighthouse viewer. The report’s JSON is actually needed to use Lighthouse viewer. So let’s see what has to be done to get the report as a JSON file.
Share reports as JSON
Depending on the Lighthouse workflow you’re using, the below steps describe how to get the JSON output.
1. Click on the ‘Tool’ menu once the report has been generated.
2. Choose Save as JSON or HTML.
To view the report data:
1. Open the Lighthouse Viewer in Google Chrome.
2. You can click anywhere on the Viewer to open the file navigator using which you can select the JSON file. You can even drag the JSON file onto the viewer.
Lighthouse Features
There is a lot for web developers to benefit from following Lighthouse’s advice. Here are a couple of Lighthouse features that can enhance that experience with customization options.
Stack Packs
Today’s developers have the option to use various technologies like CMS, JavaScript frameworks, and so on while developing web pages. The best part of Lighthouse is that it can now provide more relevant and actionable advice suggestions based on the tools used. So this makes the first customization option as you’ll receive suggestions that go beyond the general recommendations.
Lighthouse Plugins
Lighthouse Plugins are the second customizability option that enables community domain experts to cater to their specific needs. For example, Lighthouse can create new audits by using the data it collects. Here, a Lighthouse plugin will act as a node module that implements a set of checks that Lighthouse will run and then add as a new category to the report.
We hope you have a clear picture of what Lighthouse is and what it is capable of as well after reading this Lighthouse Tutorial. Since Lighthouse is an open-source project that welcomes contributions, you could look into the issue tracker and find possible bugs or even analyze audits to see how it can be improved. So make sure to keep an eye on the issues tracker as it is a great place to discuss audit metrics, new audit ideas, and so on.
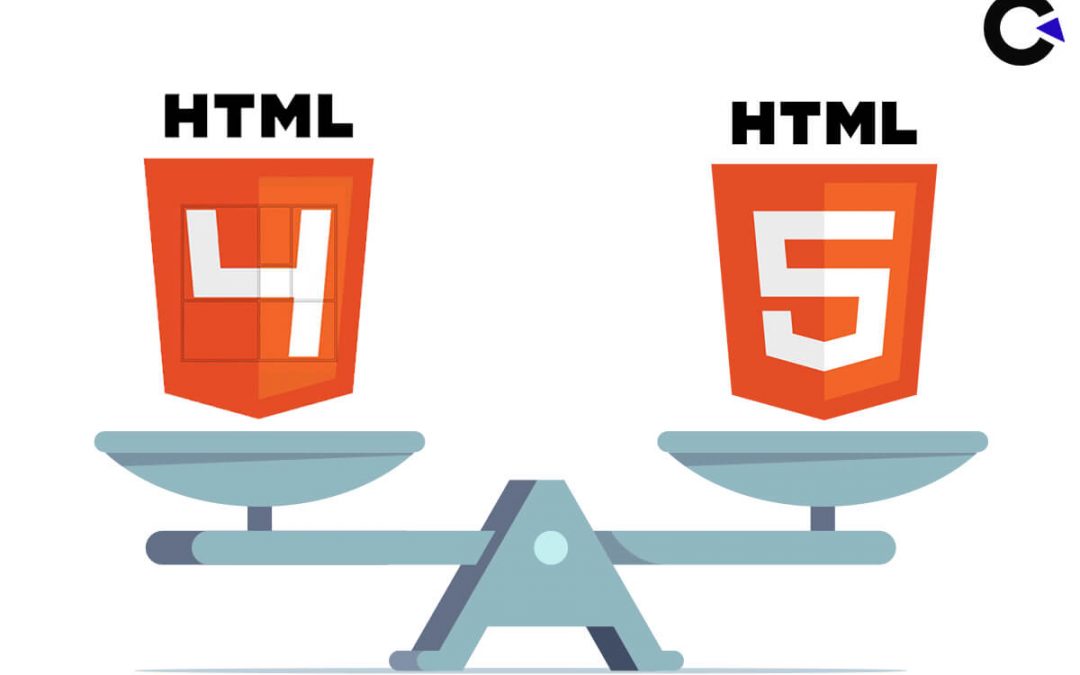
HTML, expanded as HyperText Markup Language is used to define the structure of the content in a webpage. HTML has its origins dating back to 1980 and its first version was officially launched in 1993. Since HTML5 is the most recent version, we will be discussing the key differences and upgrades that were introduced in HTML5. We will be able to understand the advantages that HTML5 has to offer when we pit HTML vs HTML5. We will also be exploring the history of HTML to see how it has transformed over the years.
If in case you don’t know how HTML works, it actually has a series of elements/syntax which you can use to structure and present the different parts of the content like heading text, paragraph text, bullet points, images, and so on. So it basically instructs the browser how to display the text, image, and other elements of a webpage. HTML is now being used with CSS (Cascading Style Sheet) and JavaScript to make the browser more dynamic. As one of the leading Software Testing companies in the industry, we believe that a good understanding of HTML will definitely come to use one day.
HTML’s History
As stated earlier, the beginning of HTML traces all the way back to 1980. Physicist Tim Berners-Lee, a specialist at CERN (European Organization for Nuclear Research) proposed a new “hypertext” framework that can be used for sharing reports and documents. Ultimately, Tim Berners-Lee got together with renowned frameworks engineer Robert Cailliau to introduce the triumphant proposition called the World Wide Web (W3).
HTML 1.0
The main proper report of HTML was distributed in 1991 under the name ‘HTML Tags’. It is considered a PC relic in today’s world. Though this move was made in 1991, the initial authority proposition to change HTML into a standard was made in 1993 by the IETF (Internet Engineering Task Force). The first version of HTML is regarded as HTML 1.0 and it had 18 elements.
HTML 2.0
HTML did not boom immediately and it also lacked a lot of basic features such as changing the font, including images & tables, and so on. So in 1995, IETF arranged for a gathering to create the HTML 2.0 norm that retained all the elements from HTML 1.0 and added a few features as well. This is the last set of HTML guidelines that were distributed by IETF.
HTML 3.2
The HTML guidelines started getting distributed by another standard association called W3C (World Wide Web Consortium) instead of IETF from 1996. So on January 14, 1997, the HTML 3.2 variant was distributed by the W3C. It introduced a lot of great features like Java applets, text streams around pictures, and so on.
HTML 4.0
HTML 4.0 (A revised variant of the first distribution of December 18, 1997) was distributed on April 24, 1998. It came with significant additions like CSS templates, the ability to remember little projects or scripts for the sites, working on the openness of the planned pages, complex tables, and upgrades in the structure. A rather update came in the form of HTML 4.0.1 on December 24, 1999. It was a modification and update of the HTML 4.0 form, so it didn’t address a lot of critical aspects.
HTML 5.0
With the distribution of HTML 4.0.1, the normalization movement of HTML halted as the W3C zeroed in on the improvement of the XHTML standard. So in 2004, organizations like Apple, Mozilla, and Opera expressed their anxiety about the absence of W3C’s interest in HTML and decided to arrange another affiliation called the WHATWG (Web Hypertext Application Technology Working Group). Owing to the strength of the organization that made up WHATWG, W3C came back to the normalizing movement of HTML and distributed the initial HTML 5.0 drafts in March 2007 and the first authority draft on January 22, 2008. Corresponding to its movement with HTML, W3C also proceeded with the normalization of XHTML, a high-level adaptation of HTML.
HTML vs HTML5
HTML5 is no longer just a website builder, it has evolved to become an entire application builder on its own. Unlike older versions of HTML, which only allowed you to create primarily static sites that needed to be spiced up with CSS and JavaScript, HTML5 is much more dynamic and includes multimedia elements.
Audio and Video Tags
With the introduction of
Games & Interactive Media
Browsers can display interactive 3D graphics using the computer’s own graphic processor. The need for any extra software or plugin to run games or any interactive media in web browsers also has been eliminated.
Data Storage
HTML employed cookies to store temporary data. Whereas, HTML5 utilizes web SQL databases, web storage, and application cache for storing the data offline. Since it became possible to store the data on the user’s device, certain app functionalities will work properly even without having an active internet connection.
Vector Graphics
We were only able to add vector graphics in HTML by VML, Flash, Silverlight, and other such technologies. But HTML5 introduced the ‘svg’ tag that enables us to include vector graphics directly.
Mobile-Friendly
The ability of HTML5 to generate better forms, the elimination of the flash player dependency, and general improvements like the introduction of the header, footer, and nav that adds the much-needed structure to the website make HTML5 a more mobile-friendly option in this HTML vs HTML5 comparison.
Cross-platform support
Since HTML5 can be used for deployment across various platforms, it acts as a huge time and money saver during the development phase.
Drag and Drop
HTML5 made it possible for the objects on the page to move according to the user’s cursor movement. So HTML5 was also able to enable drag and drop effects that HTML lacked.
Font Options
The look of the webpages also greatly improved with HTML5 supporting more fonts that can be displayed in a wide array of colors and with different effects as well.
Character Encoding
The introduction of the charset attribute meant that the character encoding process which was long and complicated in HTML got simplified in HTML5.
Geolocation
It was not possible to track the geolocation of a user with HTML. But since HTML5 allows JavaScript to run in the browser, a user’s geolocation can be easily tracked using the JS GeoLocation API. So that’s another major win for HTML5 in this HTML vs HTML5 comparison.
Ping
In addition to that, the ping attribute that came in HTML5 makes it possible for a list of URLs to be notified if and when a user clicks on a particular hyperlink. So the geolocation tracking and such features make HTML5 more resourceful when it comes to tracking and monitoring usage.
Disadvantages of HTML5:
Now that we have seen the HTML vs HTML5 comparison, let’s explore the few downsides that need improvement.
Since HTML5 requires modern browsers to access it, users utilizing old versions of the browser will face issues while accessing a website. There are also browser compatibility issues. So users might get unnecessarily frustrated with the website though there are no issues.
The language is always a work in progress and so you would have to be constantly following for any changes that might cause issues to your site. Though we can benefit from improvements, practically it might work as a threat.
Since media licensing is an issue in HTML5, it cannot produce dynamic outputs. Though we can embed audio files, graphics, interactivities, and videos, we will not be able to use HD videos and rich visuals that will make us miss Adobe Flash.
The security elements offered are also very limited.
Conclusion
Despite the few advantages, there is no denying the fact that HTML5 is very easy to use in comparison to HTML all thanks to the simple syntaxes. A few HTML tags were even removed completely in the update and a few tags were changed to a different syntax. For example, ‘dir’ was changed to ‘ul’. We hope you had a good time reading our HTML vs HTML5 comparison and learned the key differences between the two as well. As one of the top QA companies, we will be constantly updating a lot of useful information through our blogs. So make sure to stay tuned to this space for more.
If you have been wondering if it is possible to perform mobile app testing on all mobile devices (Android & iOS) without purchasing them, the answer is yes, it is very much possible to do that. There are even a couple of options to do so as well. You can either opt for cloud-based solutions to access real devices or use simulators and emulators to mimic a device. Each of these options does have its own advantage and disadvantages, but as a leading mobile app testing company, we always prefer to use cloud-based solutions to get the best results. So in this blog, we will be listing the various cloud-based mobile app testing solutions you can use to test an app on all devices without purchasing them and explore the scope of emulators and simulators. Let’s get started.
Prioritization is the key to having an effective testing mobile app testing strategy. Your objective shouldn’t be to just test your application on every available device out there as it is not smart to do so. There is nothing wrong with being thorough, but you shouldn’t waste your time and resources on obsolete devices or devices that will not be used by your intended audience. With that said, let’s first explore cloud-based solutions.
Cloud-Based Mobile App Testing Solutions
BrowserStack
pCloudy
Sauce Labs
AWS Device Farm
SeeTest.io
Perfecto
Kobiton
Firebase Test Lab
Though this list has been mentioned in a random order, BrowserStack is undoubtedly the best choice from these options. BrowserStack keeps adding new devices instantaneously and they stand out from the crowd with their helpful blogs and tech support that can guide you through the entire mobile app testing process. But if you do feel like you want to check out all the other tools before making a choice, make sure to visit our Cloud Testing Platforms blog as we have discussed these tools individually.
Emulators
Though emulators are open-source options, they are not as effective as cloud-based solutions. They are also not easy to use as you would have to download and install the emulators for each and every device you want to test. Since emulators just mimic devices, they are also not that reliable to use. So the only possible scenarios where emulators would be effective would be when it is used during the early stages of development or for simple tests.
Now that you know the ways you can test the mobile app without buying new devices, make sure to go through our Mobile App Testing Checklist and its Peculiarities blog.
The Alternative Solution
If at all you feel overwhelmed by all these options and think you will not be able to handle the task on your own, do not fret. You can always outsource the tasks to a leading Mobile App Testing Service Company like us. We have been able to extend our mobile app testing services to large firms, start-ups, and even independent developers. The scale of the project has never been an area of concern. If you compromise on your testing, the chances of your app succeeding in the market becomes very slim. So we hope you now have a clear understanding of all the various options you can employ to get your app tested effectively.
Not many know that there is a lot of difference between Quality Assurance and Software Testing. Though they both contribute towards better software quality, they differ in terms of goal, approach, and so on. To put it in simple terms, software testing is the process of finding bugs that already exist in the software. Whereas, Quality Assurance is the process of preventing the creation of such bugs and future problems. So we would first perform software testing to find all the bugs, then with the available data, we will be able to perform quality control to achieve quality assurance. As a leading QA company, we have been able to successfully test products and provide quality assurance to many of our clients. So in this blog, we will be focusing on the core differences between QA and Software testing and explore why Quality Assurance is important.
The Differences between QA and Software Testing
Quality Assurance is much broader in scope as covers every process, policy, tool, guideline, training, workflow, etc. that a team will need to meet with their quality objectives. So software testing is basically a sub-branch of the quality assurance process. Now let’s take a look at the tabulated version of the key differences between QA and Software Testing.
S. No
Software Testing
Quality Assurance
1
The Primary Objective Is To Make The Application Bug-Free.
The Primary Objective Is To Make The Application Meet The Stakeholder’s Expectations.
2
Performed Once The Code Has Been Written.
Involved In Every Step Of The Development Process.
3
Checks Or Validates The Behavior Of The Application.
Improves The Application’s Quality Using Various Methods, Tools, Policies, Etc.
4
It Is Reactive In Nature As It Is A Corrective Action.
It Is Proactive In Nature As It Is A Preventive Action.
5
Focused On The Product.
Focused On The Process.
6
Developers Or Testers Perform The Tests.
Quality Assurance Activities Are Followed By All. (Stakeholders, Business Analysts, Developers, And Testers)
The Importance of Quality Assurance
We know for a fact that lack of bugs alone doesn’t make a quality product. If we were to go by an analogy, we can consider a dish that has been cooked in accordance with the given recipe & procedure. But what if there was something wrong with the recipe or the cooking process itself? The consumer still may not like the food though everything went according to plan. Likewise, an end-user might not feel satisfied with your product though it is bug-free.
Moreover, believing that the software being developed will have zero errors is a fallacy. Since we are aware of the obvious result, is it not wiser to follow quality assurance methods to minimize the effects of any quality issues later down the pipeline? It is impossible for the software tester who receives the code with the bugs to have any control over the development process. So the more attention and effort you put into quality assurance, the easier it gets while testing a product.
So it is evident that creating a successful product without either of these two is not possible. Though companies might have an internal team for executing basic tests, it will not be enough. A dedicated QA team will be mandatory as we all know that quality cannot be tested into a product. If there are any doubts regarding the team’s expansion, one can always outsource their QA needs to one of the best outsourcing companies such as us to get the job done without breaking a sweat while still staying on budget. We hope you are now clear of the various differences between QA and software testing
Object locating technique is one of the fundamental when it comes to automation testing. If we test the application manually, we would interact with various objects or elements like links, buttons, radio buttons, lists, text boxes, sliders, and so on. So for us to mimic an actual user, the automation tool would also have to perform the same actions, and locating the objects that have to interact with is the first goal. Once the object is located, we can perform the desired actions like clicking on it, entering text, and so on. Selenium is one of the prominent automation testing tools and it uses the concept of ‘Locators’ to identify the elements/objects. So let’s take a look at the Different XPath Methods in Selenium as they are the building blocks of any Selenium automation script.
Steps to find elements in DOM:-
Before we head over to explore the Different XPath Methods in Selenium, let’s also look into a few basics like the ways to find elements in DOM and the different locators that exist in Selenium.
1. First and foremost, you have to open the website that you want to automate. Once it has loaded, click on the ‘F12’ key to open DevTools. As shown in the below image, click on the inspect icon to enable it and then click on the element you want to inspect.
2. There are also other ways to open the developer’s tools. You can either click on the ‘Menu’ option in the browser, click on ‘More Tools’ under that, and then click on the ‘Developer tools’ option that is shown.
3. If not you can just right-click on the element you want to inspect and click on the ‘Inspect’ option to locate the element.
Different Types of Locators in Selenium:-
Now that we know the ways to open Developer tools in our browser, let’s take a look at the different types of locators that can be used to identify the various web elements.
ID
Name
LinkText
Partial LinkText
CSS Selector
Xpath
ID Locator:-
ID is the first choice for many testers as it is one of the safest and fastest locators that can be used to find the location of an element. What makes ID so effective is that it is unique for each element on the web page, making it easily identifiable. IDs are mostly account numbers, university roll numbers, usernames, passwords, and so on as they will be unique.
Name Locator:-
If you want to locate an element that doesn’t have too many elements with similar names, you could use the name locator as it is also an effective way to locate an element. If we take a form to be an example, you might have various text fields and one submit button. So locating text fields using the names can be hard. But since there is only one submit button you will be able to locate it without much confusion. If at all there are two or more elements with the same name attribute, then the first element with the value of the name attribute will be returned. If at all there are no elements that have a matching name attribute, then a NoSuchElementException will be raised.
LinkText:-
Of the Different Types of Locators in Selenium, there are two locators that can be used to locate hyperlinks on a webpage. So let’s say you want to verify if a link is working correctly on a page. You can make use of linkText to locate that hyperlink by using the exact match of the string.
Partial LinkText:-
The main distinction from the LinkText in Selenium to the Partial LinkText is that it doesn’t investigate the specific match of the string. So it will even be able to identify fractional matches. This will come in handy when you have to search hyperlinks that have a high text length.
CSS Selector:-
What if you have to locate complex elements on the page? The CSS selector will be the best choice for you. The only downside with CSS identification is that it is not supported by all browsers. But it may not be a huge concern as it is supported by all the widely used browsers like Google Chrome, Mozilla Firefox, Safari, Opera, and so on.
Xpath:-
XPath stands for XML path language. It is based on the tree model of XML documents and provides the ability to navigate around the tree by selecting nodes using a variety of criteria. Though XPath locators are reliable, they are slower in comparison to the CSS Selectors. XPath is also supported by all the major web browsers. Now, let’s take a look at the different XPath methods and their syntaxes.
The Different XPath Methods in Selenium:-
basic xpath – To select a node based on the attribute,
Syntax:
//tagname[@attribute =' value']
contains – We can use partial text to find an element,
Syntax:
//tagname[contains(@attribute,'value')]
using OR – The element will be located if any one condition or both conditions are true.
Syntax:
//tagname[@attribute='value' or @attribute ='value']
using AND – The element will be located only if both the conditions are true,
Syntax:
//tagname[@attribute='value' and @attribute ='value']
starts-with – This can be used in a webpage where the attribute value changes on refreshing the page or due to dynamic operation on the page as it will locate the element with the starting text alone,
Syntax:
//tagname[starts-with(@attribute,'value')]
text() – It is an inbuilt function used to locate the element based on the text of the element,
Syntax:
//tagname[text()='text']
axes – Can be used to locate elements that are more complex and dynamic by following various methods like following, parent, child, and so on.
Locating Techniques:-
Knowing the Different XPath Methods in Selenium is the first step, but employing them in an effective manner to get the job done is the key. As a leading automation testing company, we make use of some of the best locating techniques that have made our job easy. So let’s explore them now.
1) To find an element using the last and position keywords
//input[@type='text'][position()=1 or position()=last()]
We can get the first and last element inside a div tag using the position and last keywords.
2) To locate an element with the keyword count
//div[count(./input)=2]
We can locate an element by the count of another element. In this example, we have located the div tag by the count of its child input tags (i.e.) 2.
3) To identify an element with the parent keyword
//input[@id='name_id']/parent::div
Since we can locate an element with the element of the “parent” keyword, we have located the div tag which is the parent of the input tag.
4) To locate an element with the following- sibling keyword
//input/following-sibling::input[@name='Gender']
In this example, we have three input tags under a parent tag div. If you want to locate only one input tag among the three tags, we can use the following-sibling keyword to do so.
5) To identify with a single class attribute
Consider a situation where there are 4 input tags and that one input tag has a class attribute. In this case, if all the other elements for the input tags are the same, we can locate the element with the help of the Class attribute.
//div[@class='content_2']//input[@class]
6) Odd & Even Rows in a Table
We can even locate the elements in an odd and even row of a table by using the below commands. It will work like a filter as we will get all the elements in the even/odd rows as the result.
ODD ==> table[id=table1] td:nth-child(2n+1)
Even ==> table[id=table1] td:nth-child(2n+2)
7) List of elements in a table
If you’re looking to locate a list of elements in a table by sorting them in ascending or descending orders, we can use the below technique.
//table[@id='table1']//td[3]
8) The Indexing Technique
If you want to select an element inside the table, you can use this indexing technique to locate the particular element.
We have used an example where all the elements that have a price that is less than or equal to 2 are located.
//item[price >= 2]/price
10) To verify if a checkbox has been checked or not
Say you want to pick out elements that have not yet been checked in a list of elements, you can use the below technique to isolate the type of elements you want.
 input#good:checked
      input#good:not(:checked)
	Here, input - tag name, good - id
Conclusion
We hope you found this blog to be informative as knowing the Different XPath Methods in Selenium is one of the must-know basics of automation testing. As a leading QA company, we are always keen on the knowledge and the positive mindset that is required to create swift solutions to big problems. So gaining an in-depth understanding of the various techniques will play an instrumental role in your growth as an automation test engineer. If you are not clear, then you will have a tough time figuring out quick solutions for your automation needs.
Making a career choice is no easy task, you should know if you’re on the right path by exploring various options, you should then clear any and all misconceptions you might have in the role by taking a deep dive. Following this, you’ll have to check the various skills you’ll need, the certifications to work for and so much more. As a leading software testing company, we know what makes great software testers. So assuming you have checked other options and have made a job in software testing a viable option, we will be exploring all the avenues you’ll need to focus on to become a successful software tester. We will start by introducing you to the role of a software tester so that you will not have any fallacies about the job.
Who are Software Testers?
Software Testers, also known as QA Professionals play an integral part in ensuring the quality of the software in various parts of the software development cycle. The process of ensuring quality involves creating defined expectations that the software is expected to meet and then testing it to see if the said expectations are met. It can either be done manually or by using automation. Software testing doesn’t just require people with an eye for the details as quality goes beyond what meets the eye. Quality should be ingrained in the software tester’s mindset that doesn’t just stop issues but also prevents them from occurring by encouraging the team to follow the best practices.
Quality is such a huge deal as no user would be interested to use buggy software though it has the best features. The software will fail if the team fails to nail to user experience. So software testing isn’t just about detecting bugs, it is about ensuring smooth performance and a great user experience. So let’s take a look at the various skills you will be needing to accomplish this objective.
Skills of a Software Tester
Be it any job, you will need both technical and non-technical skills to excel at it. We will not be compartmentalizing skills based on specific methods of testing as we always believe it is important for a tester to have comprehensive knowledge across all the methods and approaches. If you find this list overwhelming, please keep in mind that these are the skills you will be needing not to just get started. So you can get better at it in the due course time.
Technical Skills Required for Software Tester
Domain Knowledge
Remember how we mentioned there will be defined expectations for the application to meet with? So technically you would have to understand such expectations of the stakeholders and the end-users to create test cases that will define what has to be tested and how it has to be tested. You can’t use one type of test in all scenarios, right? So you would have to learn the different types of testing like performance testing, smoke testing, regression testing, etc., and know when to use what type of testing. Once all this is ready, you must also be in a position to execute these test cases, determine the result of the tests and create test reports. Our Software Testing Tutorial for Beginners is a great blog you can ready to learn such skills. In addition to that, you must familiarize yourself with software development approaches like agile.
Coding
Since software testers would have to understand what the code means when testing an application, it goes without saying that programming is a must-have skill for testers. In addition to that, it is important to improve your coding skills to implement automation to perform repetitive tasks as the need for automation is on the rise to keep up with the demand for quality software. Apart from being able to read and comprehend the code, you must have a high level of understanding of the widely used programming languages. You must also have a stronghold in the basics such as the fundamentals of object-oriented programming, architectures, algorithms, and so on.
Linux Commands
Though Windows and macOS are the most commonly used operating systems for regular use, you should have a basic understanding of Linux commands as the deployment of applications like databases, web services, Docker, Kubernetes, and application servers are deployed on machines running on Linux.
Databases and SQL
Nowadays applications tend to have large chunks of data in their back-end using databases. Since software testing is about ensuring overall quality, it is vital for software testers to have ample knowledge about databases like MYSQL or Oracle. So if you have the task of validating the data in the databases, you should be able to create SQL queries to verify if the data is stored properly or not.
Tool Knowledge
Just like how to test execution requires effort, test management also requires a lot of effort. Using the appropriate tools can reduce the required effort in storing test cases, bug tracking, and so on. So make sure you have awareness and as many hands-on experiences with the tools that can be helpful. As a pioneer in the industry, we have curated lists of the best test management tools and the top 10 automation testing tools every tester must know about. Make sure to visit that blog to find what tools will be best suited for the various requirements.
Certifications
There is a lot a candidate can claim in their resume, and certifications can add a lot of value to your application and help you stand apart from the crowd. Developing all the above-mentioned skills should be the primary objective as there will be no use for you if you decide to get certified just for the sake of getting certified. There are various free certifications that can help you get started and a lot of paid certifications that will help you gain more recognition. So make sure to visit our blog to learn more about the best QA testing certifications that we have mentioned below.
ISTQB – Foundation Level
CAST – Certified Associate In Software Testing
CSTE — Certified Software Test Engineer
CTM — Certified Test Manager
CSSBB — Six Sigma Black Belt Certification
ISTQB – Advanced & Expert Level
It is a comprehensive list of the certifications you should focus on for your career growth and not a starter kit. You could also use platforms like Coursera and Udemy to get a lot of useful certifications.
Non-Technical Skills Needed by a Software Tester
Passion is the very first non-technical aspect that you should be strong in and we have already covered that in the earlier part of this blog. So now let’s take a look at the other non-technical skills you would have to work on.
Attention to Detail
Oversight is never an acceptable option when it comes to software testing as one small oversight issue can create a ripple effect of serious issues down the lane. Stopping assumptions is the first step towards avoiding oversight. You can even improve such skills on a daily basis with the help of memory games, puzzles, and brain teasers.
Curiosity
The moment you make assumptions out of the equation, there will be a natural spur of curiosity in your brain. This curiosity will play a major role in helping you find bugs that could go undetected when following conventional methods. For example, if we take a look at exploratory testing, it definitely relies heavily on the tester’s intuition, creativity, and willingness to test new waters.
Problem-Solving Skills
Once you find a bug, you should never analyze it on a surface level, you should be able to identify the root cause of the issues. Such an approach will help you test better. Having an analytical and problem-solving mindset will also help you compartmentalize the software into smaller units and make the entire process more effective.
Organizational & Communication skills
Being well organized is definitely a must-have skill for all jobs. Even with regards to software testing, having all the data in a well-organized manner will definitely aid and boost your analytical skills. Plus, if the tester fails to use clear and comprehensible statements while creating test artifacts like test cases, test plans, test strategies, bug reports, and so on. The entire development process will see setbacks. Plus, as a software tester, you must be able to retrieve all such documents in a snap as you will never know when you will need them.
Flexibility and Team working skills
The communication skills should extend towards making yourself a team player as well. If you work in an agile environment, you would have to work in tandem with other teams as well. So make sure you show flexibility in internal aspects like willingness to perform any kind of testing. One should never stay within the comfort zone if one wants to improve and grow. Likewise, have a unified vision when working with other teams. There will be no point in playing the blame game with the developers once something bad happens.
Holistic
Yes, concentrating on something deeply is definitely a good sign to get effective results. But at the same time, you shouldn’t focus on just one or two aspects completely and lose track of the other parts of the application. If that happens, you might even miss the most straightforward bugs. So make sure your work is holistic in terms of coverage.
Conclusion
We hope you found all of this information to be useful. As stated earlier, don’t feel overwhelmed with the many skills you would need to become successful in your journey. As a leading QA company, we always make sure to implement a boot camp training session for all our new recruits by using the discussed skills as the base. We have found it to be very beneficial and hopefully, you will too.


")

")