Beginners Guide to Basic Git Commands with Examples
Since multiple developers have to work together to develop a working product, the collaboration between them becomes the key to achieving success. That is what makes Git one of the most important tools that every developer must know to use effectively as it eases the version control workflow. Git enables developers to collaborate by making it possible to merge multiple people’s code changes into a single source and also track the changes being made. So, whether you write code only for you to see or to work in a team, Git will come in handy to handle everything from small to large projects with speed and efficiency. Being a leading software development company, we will be explaining the basic Git commands with examples, and why you need to start using it from this Guide.
Git: Introduction
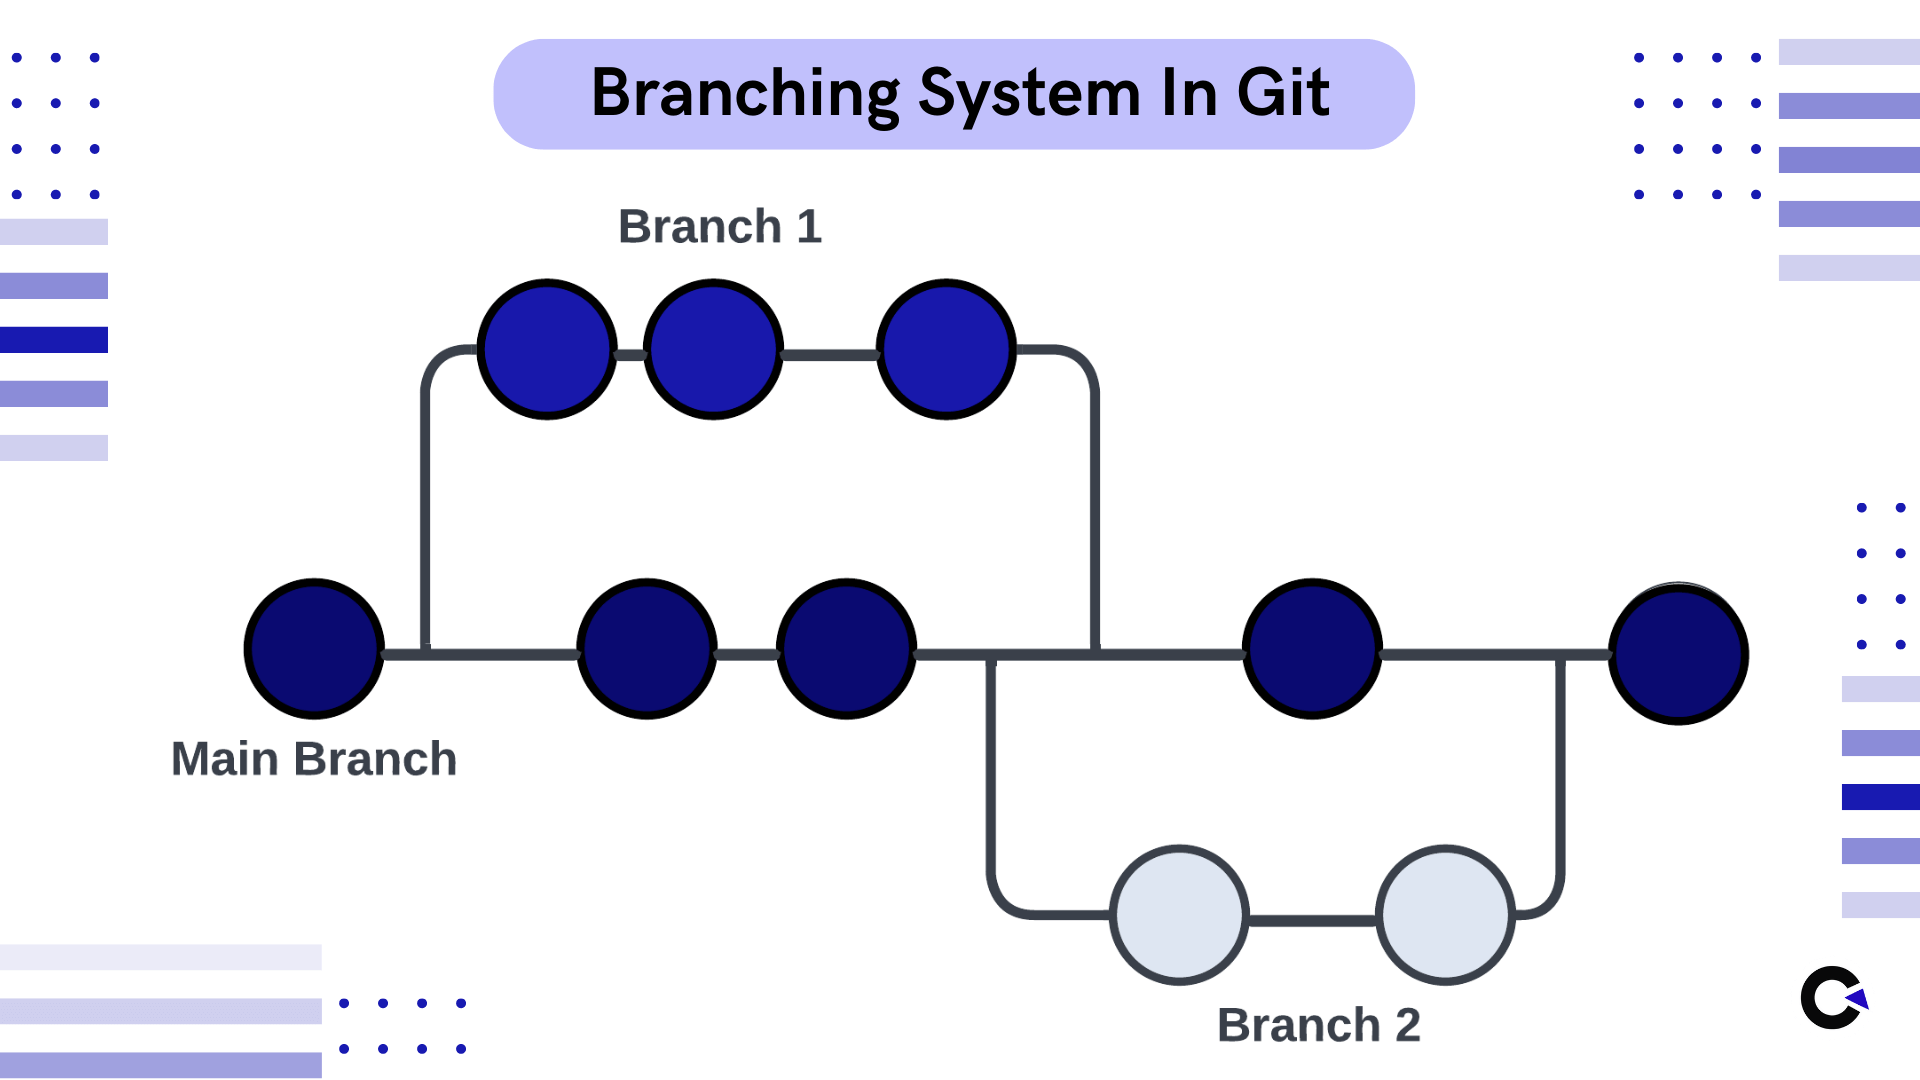
Git is open-source software that works on the principles of a Distributed Version Control System. A version control system helps the development team manage the source code over time, tracks every modification made by each collaborator, and merges it into a single source. Git makes use of a branching system to achieve this collaboration. You can create sub-branches for you to work on and another branch for another developer to work on. You can also branch it according to the features that are being developed as well. So once a feature or a piece of code is ready to be added to the main code, you can merge it with the main branch as shown below.
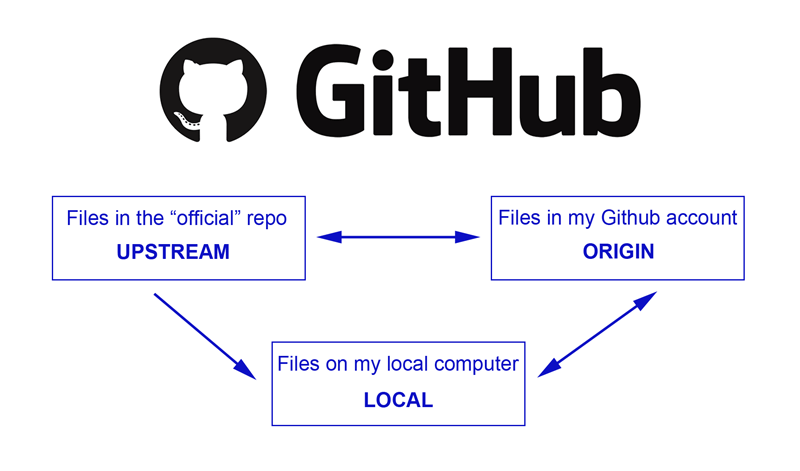
Git is not limited to just local codes on a computer, it also has a cloud storage option called GitHub where you can store your projects in. So if you have made any new changes to the code, your team will be able to access the updated code and clone the project from this cloud, and start working with the updated code. There is no need to worry about security as only people with the user id and token will be allowed to access and make changes in the code. With Git several developers can work on the same project side by side and use git commands like commit, push, and pull so that neither of the updated code is lost.
Example
To understand this better, let’s take the case of Google sheets whose functional mechanism is very similar to that of Git, it allows multiple users to work on it at the same time, records all the changes made, and creates multiple versions of the same sheet in case we want to revert to an older version.
Before we proceed to see the basic Git commands with examples, it is important to learn about the different states of files in Git.
State of Files in Git:
Primary, there are three components for every Git project and they are
- Git directory – This contains the history of all the files along with their changes.
- Working tree – It contains the project’s current status, along with any modifications made to them.
- Staging area – Contains modifications that will be included in the next commit.
Every file in the working directory is of two file types, tracked and untracked.
Untracked files:
Any new file that gets added to Git and was not in the previous commit can be called an untracked file. In the below example, untrackedfile.txt is a file that is newly created but not yet staged, so it becomes an untracked file.

Tracked files:
The files which Git identifies to have been in the previous commit are known as tracked files. It is further subdivided into 3 states and each file will remain in one of these 3 states and switch between them.
1. Modified files
A file in a modified state means that there has been some modification such as editing, deleting, or even adding code to that file. These files exist in the repository, but the changes made to it are not yet staged (not yet done) These changes will only be included in the remote git when we commit.

In the above image, firstFile.txt is a file created using the previous commit and becomes a modified file once the changes are complete.
2. Staging:
A staging state file can be a modified file that the user had not included in the previous commit but will be included in the next commit. It can also be a newly added file that needs to be committed.

3. Committed Files:
As the name suggests, any file that has been stored in the directory is called a committed file.
Basic GIT Commands with examples:
Now that we have seen all the foundations you’ll need to know to understand and use the commands in Git, let’s take a look at a few basic GIT commands with examples. Though there are hundreds of Git commands, only a few are very important when you are getting started with Git.
1. Git init
Initializing a Git repository in your local machine is one of the first things you’ll need to do and this command will help you do it.
Usage: git init
Example:
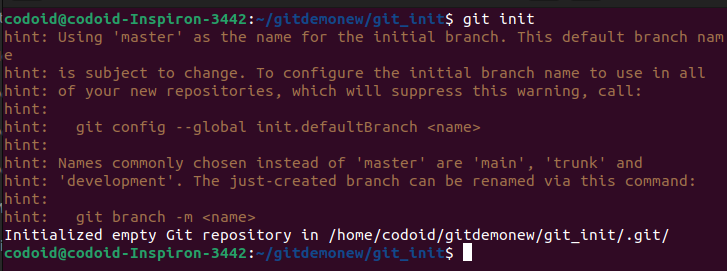
In the above image, a project folder named gettingStartedWithGit is created and initialized with git.
2. Git clone
If there is an existing repository that you would like to make changes to, you can create a clone of it and download it using this command.
Usage: git clone
Clicking on that Clone or download button gives you a clone URL.

3. Git add
This is a basic Git command that you can use to stage all your files once they are ready.
Usage: git add.
4. Git status
If you would like to see the changes made in your repositories, you can use this command to see the staged changes and the untracked files.
Usage: git status
Example:
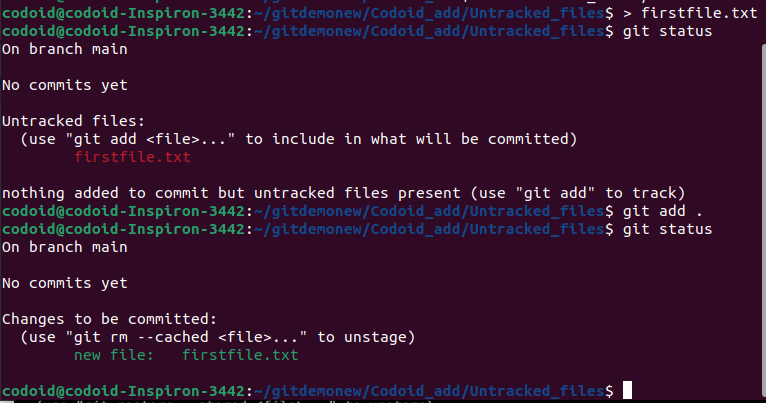
In the above example, we have a file called firstfile.txt that we will be adding. For explanation purposes, we will first check the status of the files using the git status command. We can see that there are no commits and that firstfile.txt is an untracked file. But once we have used the git add command, we can see that the firstfile.txt file has now been staged.
5. Git commit
As seen earlier, there is both a local and remote repository for Git. So if you would like to commit the changes you have made thus far in your local repository, you can use this command. The text that comes after -m is the comment, and you can use it to ensure you add some useful information about the commit for better understanding.
Usage: git commit -m “some useful message about the commit”
6. Git push
Push is also similar to the commit command, but the main difference is that the pushes the changes you have made in your local repository to the remote repository.
Usage: git push origin
Example:

In this example, we have first made the commit and then pushed the same to the remote repository.
Note: If you don’t have a remote repository, create one repository (a.k.a project) on GitHub.

Click the Clone or download button and copy the repository URL that appears and use it in the command as shown below.
git remote add origin <paste the copied URL>
The above command only helps you to connect to the remote repository. You can then use the git push origin
7. Git pull
Since only the remote repository is updated with the push command, this command can be used to sync the local repository with the remote repository. It will pull the content from the remote repository and update the local repository.
Usage: git pull origin master
Example:
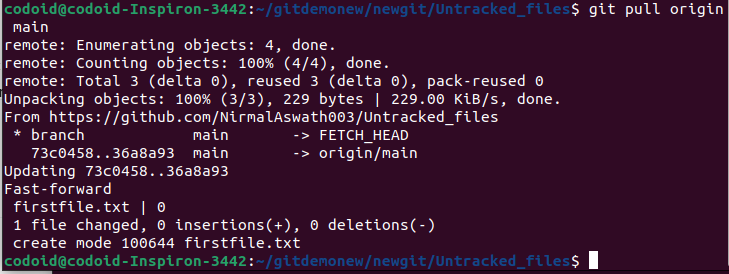
8. Git log
Being able to view the history of changes made by collaborators working on the same project will be crucial and this command helps you do just that.
Usage: git log
Example:
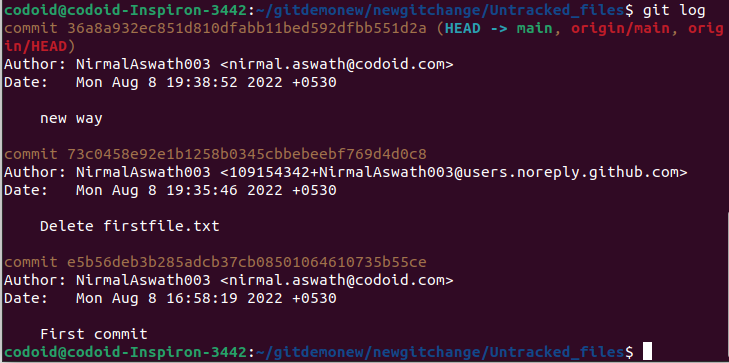
9. Git branch
You can even view the list of branches that are available in your repository and also identify the branch you are currently working on by using this command.
Usage: git branch
Example:

We can see that there are currently two branches (feature-one & main)
Creating a new branch
Though there are more than 2 ways to create a branch in Git, let’s take a look at the 2 commonly used git commands that have their own use case.
#1. git branch <branch-name>
If you need to create a new branch but stay in the source branch you are already working in, you can use this command.
Example:


We have added a new branch called new_branch and have verified it as well.
#2. git checkout -b <branch-name>
But if you wish to create a new branch from your source branch and move to that newly created branch, you can use this command directly instead of using two different commands to move to the new branch. Or if you wish to create a new branch and shift to a different branch, you can do that too.
Git checkout
When working with multiple branches, you’ll definitely have to switch between them often. So you can use this command to achieve that.
Usage: git checkout

The above image shows the switch from the new branch-using-checkout branch to the main branch.
10. Git merge
The entire purpose of creating a branch is to have a separate line of development and finally merge it into the main branch. So you can use the merge command to merge your changes from one branch to another.
Usage: git merge
Example:
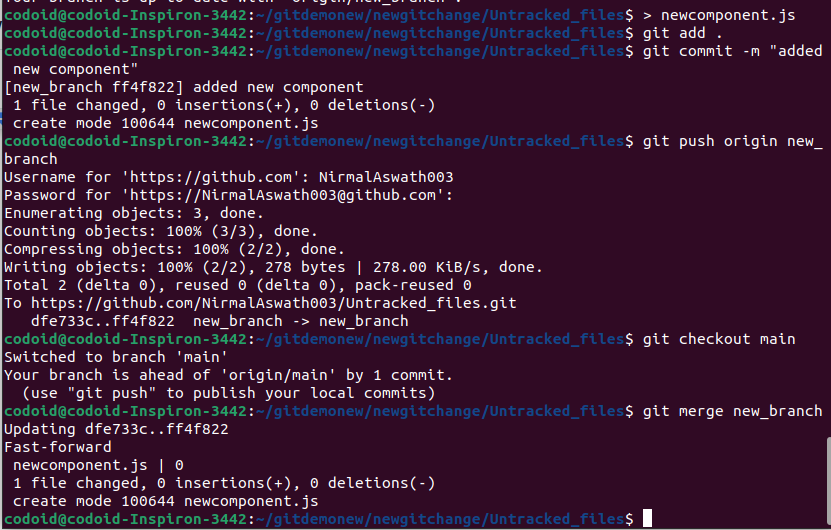
The above image merges the changes from the new_branch branch to the master branch.
11. Git stash
As the name suggests, you can store the changes you are making to the code locally instead of making changes to the actual file in the local repository. So you can work on something else and come back to your working file without any issues. The changes you make will be applied only when you use the correct command. Now let’s look at the Basic Git Commands with Examples to perform these stash operations
Usage: git stash -u
Example:

It saves your changes and -u is added to the stash of untracked files.
git stash list
Like how you can view all the branches in your repository, you can also use this basic git command to view the list of stash changes.

The format here is stash@{n} where n, the numeric value represents different stashes. As we add more stashes, it’ll progress upwards from 0.
git stash pop/apply

You can use either of these commands to apply the changes that are stored in the stash. Using apply will implement the changes and keep the files in the stash. Whereas pop will apply the changes and delete the stash files.
If there are multiple stash files and you wish the apply a specific stash file, you can use the git stash apply stash@{n} command.
12. Git fetch
This command is to fetch data such as branches, tags, etc from the remote repository without updating it directly in the local branch. So you will be able to see what changes are available to update your local repository.
Usage : git fetch origin
Conclusion
As we have discussed the Basic Git Commands with examples, we hope you now have a clear understanding of what Git is, how important it is, and how to start using it for your coding as well. With a distributed architecture, Git is designed to perform with a sense of security, and flexibility when collaborating with fellow developers. In addition to being distributed, when compared to many other alternatives, Git’s raw performance characteristics are robust, and your source code certainly has an authentic content history.

