by Charlotte Johnson | Jan 8, 2025 | Automation Testing, Blog, Latest Post |
In software testing, especially when it comes to Automation Testing, browser automation is very important. Many developers and testers enjoy using tools like Selenium and Playwright. This blog post will focus on the Selenium to Playwright Migration Guide, highlighting the best practices for making the switch. It will explain why you may want to migrate, the steps to do it, and the key differences to keep in mind.
Key Highlights
- Playwright works better and faster than Selenium. This is mainly because it uses browser contexts and has a more native way to automate tasks.
- Switching from Selenium to Playwright can improve how efficiently you test. It has features like built-in waits, better support for modern web technology, and simpler test scripts.
- You can see Playwright is better than Selenium, especially in handling networks. It can authenticate proxies using headers, something Selenium does not offer.
- You can’t directly convert from Selenium to Playwright. The switch needs a manual process. You must understand how the two frameworks are different, map out the commands, and learn the Playwright’s interaction methods.
- Since Playwright is newer, teams used to Selenium might need to learn it first. It’s important to evaluate your project needs and resources before deciding to make the switch.
Understanding Selenium and Playwright
Before we discuss why and how migration occurs, it’s important to understand what each framework means. Here’s a simple comparison:
What is Selenium?
Selenium is a well-known tool for software testing. It has been a key player in this area for several years. This open-source framework allows you to write test cases in several programming languages, such as Java, Ruby, Perl, Python, and C#.
One of the best things about it is that it supports many browsers. It works with Chrome, Firefox, Safari, Internet Explorer, and Edge. This makes Selenium very good for testing on different platforms.
Developers like Selenium because it works directly with web browsers. It can mimic a user by taking actions and checking how web pages react.
What is Playwright?
Playwright is a new tool for browser automation. It has become popular quickly because it has modern features and strong performance. Made by Microsoft, this framework is based on NodeJS. It can handle complex web applications easily with just one codebase. People enjoy using Playwright because it has a simple API. It works with several programming languages such as JavaScript, Python, Java, and .NET C#. It also works well with popular testing tools and CI/CD systems. Plus, it supports both headless and visible browser testing.
Why Migrate from Selenium to Playwright?
Playwright, created by Microsoft, has many benefits compared to Selenium. This is why it is a popular option for web automation today.
- Faster Execution: Playwright runs in one process. This helps with better synchronization, making test execution quicker.
- Support for Multiple Browsers: Playwright works with Chromium, Firefox, and WebKit right away.
- Built-In Features: It comes with advanced features like tracing, auto-waiting, network interception, and headless mode.
- Ease of Setup: Setting up the Playwright is simple. Its setup makes testing easier.
- Modern APIs: Playwright has cleaner and more intuitive APIs for handling modern web elements. This includes shadow DOMs and iframes.
Key Differences Between Selenium and Playwright
| S.No |
Feature |
Selenium |
Playwright |
| 1 |
Language Support |
Java, Python, JavaScript, C#, Ruby |
JavaScript/TypeScript, Python, C#, Java |
| 2 |
Browser Support |
Multi-browser (needs WebDriver for each) |
Multi-browser with built-in support, including a versatile app option |
| 3 |
Execution Speed |
Moderate (uses WebDriver protocol |
Faster (direct browser control) |
| 4 |
Auto-Waiting |
Limited |
Built-in, waits for elements automatically |
| 5 |
Shadow DOM Support |
Requires additional configuration |
Built-in support |
| 6 |
Built-In Test Runner |
None |
Built-in test runner |
Ease of Use and Learning Curve
Playwright gives users a great experience, especially for developers who are good at modern JavaScript. Its simple and clear API means you will write less extra code than with Selenium test scripts. However, since the API is different, if you know Selenium, you will have to learn some new things about user interactions. You will need to get familiar with Playwright’s syntax and its asynchronous style, which needs understanding of JavaScript’s async/await pattern. Even though there is a learning curve at first, Playwright helps you create test scripts that are cleaner and easier to maintain. This will make it easier to keep your tests updated over time.
Preparing for Migration: What You Need to Know
Before you switch from Selenium to Playwright, here are a few important things to keep in mind:
Prerequisites and System Requirements
Before you can use Playwright, you must set it up the right way:
- Node.js: Playwright runs on Node.js, so you need to have it on your computer. You can read the simple installation steps on Playwright’s website for different operating systems.
- Code Editor: You can choose any text editor you like. But, using an IDE like Visual Studio Code can make your work easier. It has useful tools like IntelliSense, which helps with coding and debugging.
- Browser: Playwright works with Chromium, Firefox, and WebKit. When you set it up, it will install the required browser files. You can also run tests in headless mode. This means you can run tests without needing a visible browser window.
Assessing Your Current Selenium Setup
Before you switch, take some time to look at your current Selenium test suite and test data. Think about what work is needed for the change. Refer to a Selenium to Playwright Migration Guide to help assess your testing environment. Check the languages you are using, how hard your tests are, and if you have any links to other tools or workflows. If you are using a specific Selenium framework like WebDriverIO or Protractor, you may need to make significant changes to work with Playwright’s API.
Steps for Selenium to Playwright Migration
1. Install Playwright
- Install Playwright in your project folder.
- Use the package manager you like best.
For JavaScript/TypeScript:
For Python:
pip install playwright
python -m playwright install
For Java:
mvn dependency:playwright
For C#:
dotnet add package Microsoft.Playwright
2. Initialize a New Playwright Project
Set up your Playwright testing area. This is for JavaScript and TypeScript.
npx playwright@latest init
This sets up a simple structure with settings files and sample tests.
3. Rewrite Selenium Tests in Playwright
Selenium Code Example:
from selenium import webdriver

# Open browser
driver = webdriver.Chrome()
driver.get("https://example.com")

# Interact with elements
search_box = driver.find_element("name", "q")
search_box.send_keys("Selenium")
search_box.submit()

# Validate
assert "Selenium" in driver.title

# Close browser
driver.quit()
Equivalent Playwright Code:
from playwright.sync_api import sync_playwright

with sync_playwright() as p:
# Launch browser
browser = p.chromium.launch(headless=False)
page = browser.new_page()

# Navigate to URL
page.goto("https://example.com")

# Interact with elements
page.fill("input[name='q']", "Playwright")
page.press("input[name='q']", "Enter")

# Validate
assert "Playwright" in page.title()

# Close browser
browser.close()
4. Map Selenium APIs to Playwright APIs
Here’s how often used Selenium methods compare to Playwright APIs:
| Action |
Selenium API |
Playwright API |
| Launch Browser |
webdriver.Chrome() |
chromium.launch() |
| Open URL |
driver.get(url) |
page.goto(url) |
| Find Element |
find_element(By.ID, “id”) |
page.locator(“#id”) |
| Click Element |
element.click() |
locator.click() |
| Type Text |
element.send_keys(“text”) |
locator.fill(“text”) |
| Wait for Element |
WebDriverWait(driver, timeout).until() |
locator.wait_for() |
| Take Screenshot |
driver.save_screenshot(“file.png”) |
page.screenshot(path=”file.png”) |
| Close Browser |
driver.quit() |
browser.close() |
5. Replace Explicit Waits with Playwright’s Auto-Waiting
Selenium often needs clear waits to manage changing content.
from selenium.webdriver.common.by import By
from selenium.webdriver.support.ui import WebDriverWait
from selenium.webdriver.support import expected_conditions as EC

element = WebDriverWait(driver, 10).until(
EC.presence_of_element_located((By.ID, "example")))
Playwright automatically waits for elements to show up.
page.locator("#example").click()
6. Use Playwright’s Test Runner for Enhanced Testing
Playwright has a test runner that is built-in. This runner comes with fixtures, tracing, and the ability to run tests in parallel. Here is an example of a Playwright test using the runner:
const { test, expect } = require('@playwright/test');

test('Example test', async ({ page }) => {
await page.goto('https://example.com');
await page.fill('input[name="q"]', 'Playwright');
await page.press('input[name="q"]', 'Enter');
await expect(page).toHaveTitle(/Playwright/);
});
Run the test with:
7. Leverage Advanced Playwright Features
- Tracing: Debug test failures by capturing traces:
const { test } = require('@playwright/test');

test('Trace Example', async ({ page }) => {
await page.tracing.start({ screenshots: true, snapshots: true });
await page.goto('https://example.com');
await page.tracing.stop({ path: 'trace.zip' });
});
- Network Interception: Mock API responses easily:
await page.route('https://api.example.com/data', route =>
route.fulfill({ status: 200, body: JSON.stringify({ key: 'value' }) })
);
Conclusion
In conclusion, moving from Selenium to Playwright can give you better performance and speed. It is also easier to use. By referring to a comprehensive Selenium to Playwright Migration Guide, you can learn about the differences between these tools and prepare for the change. This will make your testing processes smoother. Use the step-by-step guide to help you migrate easily. Playwright has advanced capabilities and is a powerful tool for developers. Stay on top of automated testing by switching to Playwright. This will help you enjoy its benefits for reliable testing. If you are thinking about making the move to Playwright, follow our detailed Selenium to Playwright Migration Guide to make your transition easy and successful.
Frequently Asked Questions
-
Can Playwright Fully Replace Selenium in All Aspects?
While Playwright offers many benefits, it cannot replace Selenium in every case. If your project uses Internet Explorer, Playwright does not support it by default. You may also need Selenium to test on mobile devices where Playwright has some limits. Selenium has a well-known system and is popular in the software industry. This makes it a better choice for some projects. It is very important to look closely at what your project needs. Consider things like test execution speed, support for different browsers, and how well it works with the tools you already have before deciding to switch.
-
by Anika Chakraborty | Dec 11, 2024 | Automation Testing, Blog, Latest Post |
In today’s fast-paced tech world, it’s key to get software delivery correct. Azure DevOps services can help with this. They offer tools that simplify development and integrate seamlessly with Automation Testing practices. This blog post focuses on Azure DevOps pipelines. Azure Pipelines is a vital part of Azure DevOps. It helps with continuous integration, continuous delivery (CI/CD), and ensures smooth implementation of automation testing for better code quality and efficiency.
Key Highlights
- Make Software Delivery Easier: Azure DevOps pipeline tools help you automate how you build, test, and deploy software. This saves you time and makes development easier.
- Increase Efficiency with CI/CD: You can use continuous integration and continuous delivery to send out code faster. This cuts down on errors and helps everyone work better together.
- Use the Power of the Cloud: With Azure, you have the flexibility and scalability to create strong Azure DevOps pipelines for any size project.
- Personalize Your Workflow: You can change your pipelines to fit your project’s needs. Link different tools and services for a customized automation process.
- Stay Up-to-Date: Keep enjoying what Azure DevOps offers. You will always have access to the newest features, updates, and a helpful community.
Understanding Azure DevOps
Before we make pipelines, let’s talk about some important things. Azure DevOps is a tool that helps development teams work well together. They can plan tasks, save their code in a version control system like Git, and handle builds and releases. A key feature of this tool is Azure DevOps pipelines. This service works with all major languages. It helps automate the stages of building, testing, and deploying your code projects.
In an Azure DevOps organization, you can create several projects. Each project comes with its own tools and services, like Azure Pipelines. This helps keep work organized. It also allows teams to collaborate better on software development projects.
The Role of Azure DevOps in CI/CD
Azure DevOps is crucial for continuous integration and continuous delivery. Continuous integration (CI) happens when code builds and tests itself on its own whenever a change happens in the version control system. This regular testing spots errors early. It helps prevent big issues and keeps the code stable.
With Azure DevOps pipelines, you can make build pipelines that allow access control. These pipelines get the newest code version from your repository. They will compile the code, run tests, and prepare artifacts for deployment. This process helps you have better visibility into what is happening.
Continuous delivery (CD) moves this process ahead. It automatically sends the build artifacts to different locations like staging or production. Azure DevOps helps make this smooth with release pipelines. These pipelines make sure that your app is deployed safely in various environments.
Using CI/CD with Azure DevOps helps companies release software more quickly. It also makes the code better and cuts down the time needed to add new features and updates.
Key Components of Azure DevOps Pipelines
Azure Pipelines has different parts to help automate tasks. The first part is agents. Agents are the machines that run jobs in your pipelines. There are two types of agents in Azure DevOps pipelines. You can use Microsoft-hosted agents. These come with a ready-to-use environment and default settings. Alternatively, you can select self-hosted agents. This choice gives you more control over how things work and the runtime features.
Jobs help you set up steps that run on an agent. A step is a specific task, like compiling code, running tests, or setting up deployments. You can use many ready-made tasks. You can also make your tasks using scripts and command-line tools. Pipelines are divided into stages. Each stage groups jobs smartly. For example, a pipeline could have stages for building, testing, and deployment. This simple setup makes complex workflows easier to handle. It also helps you read and maintain your work better.
Getting Started with Azure DevOps
Start your journey with Azure DevOps by signing up for a free account. After you register, visit the Azure DevOps portal. There, you can create your organization easily. You can also adjust this space to suit your team’s needs. Set access levels and start setting up your project.
You can begin a new project now. This area will hold all your repositories, pipelines, and other key areas for managing your software development process.
Setting Up Your Azure DevOps Account
To use Azure DevOps services, you can make a free account on the Azure DevOps website. If you prefer to manage it on your own systems, you can select Azure DevOps Server for an on-premises option. When you set up your account, you will need to create an organization. You can also build your team structures and set permissions for access.
After you set up your organization, you can create a new Azure DevOps pipeline. It’s simple to do because of a friendly interface that connects to your source code repository. You can choose a pipeline template and change the settings and steps as you wish. Azure Pipelines works well with your app code, whether it’s in Azure Repos, GitHub, Bitbucket, or other popular platforms.
You can choose from many ready-to-use templates for popular languages and frameworks. If you like, you can begin with a simple Azure DevOps pipeline. You also have the option to create your own YAML configuration. This will help you change your CI/CD setups to meet the needs of your projects.
Navigating the Azure DevOps Environment
The Azure DevOps interface is simple to use. This helps new users learn fast. Your dashboard shows your projects. It also displays recent actions and key details. You can adjust your dashboards. This allows team members to focus on the insights that matter most for their work.
Azure DevOps helps teams work together easily. You can allow different team members to access what they need. This way, everyone can complete their tasks while keeping the project safe. It is important to check and update permissions often. Doing this helps you meet the changing needs of your team and project.
Microsoft frequently provides security updates and adds new features. This helps keep your Azure DevOps environment safe and up to date. Make sure to read the release notes. They show you how to use the new tools to make your Azure DevOps pipeline workflows better.
Preparing for Your First Pipeline
Before you start building your first Azure DevOps pipeline, make sure you are ready. You will need a code repository on sites like GitHub, Azure Repos, or Bitbucket. It’s also good to know some simple YAML syntax. This knowledge will help you create a simple example for setting up the tasks and structure of your pipeline definition.
Step-by-Step Guide to Creating Your Pipeline
It’s easy to build your pipeline. First, we will show you how it is set up. Next, we will help you connect to your source control. After that, we will guide you in setting up triggers for automatic builds. With Azure’s simple platform and our clear instructions, you will have a strong pipeline ready in no time.
These steps will help you understand the basics. As you learn, you can explore some advanced choices.
1. Prepare Your Test Project
Ensure that your test project is ready for automated testing. This could be a unit test project, integration test, or UI tests (like Selenium or Playwright).
- For .NET projects: Use a test framework like MSTest, NUnit, or xUnit.
- For Java projects: Use JUnit or TestNG.
- For Node.js projects: Use frameworks like Mocha, Jasmine, or Jest.
2. Create a New Pipeline in Azure DevOps
- Go to your Azure DevOps organization and project.
- Navigate to Pipelines from the left menu.
- Click on Create Pipeline.
- Choose the repository where your code is stored (GitHub, Azure Repos, etc.).
- Select a pipeline template (for example, you can select a template for the technology you’re using like .NET, Node.js, etc.).
- Click Continue to proceed to the pipeline editing page.
3. Configure Your Pipeline for Testing
You’ll need to define a pipeline YAML file or use the classic editor. Here’s an example of how to run tests using the YAML-based pipeline.
Example: For a Java Maven Cucumber Project
trigger:
  branches:
    include:
      - main

pool:
  name: AgentPoolName  # Name of the agent pool
  demands:
    - Agent.Name -equals <<AgentName>>  # Specify the exact agent by its name

Steps:
  # Step 1: Clean the Maven project
  - script: |
      mvn clean
    displayName: Clean the Maven Project

  # Step 2: Compile and Run Maven tests
  - script: |
      mvn test -Drunner=testrunner -Denv=QA [email protected]
    displayName: Run Maven Tests
Explanation:
Step 1: Clean the Maven Project
This Maven command removes all the files generated by the previous builds (like compiled classes, JAR files, logs, etc.) in the target directory. It ensures a clean environment for the next build process.
Step 2: Compile and Run Maven Tests
This command compiles the test code and executes the unit and integration tests in the project.
Note: Before starting the execution, ensure that the agent is running and displayed as Online.
- Go to Azure DevOps:li
- Open your Azure DevOps portal.
- Navigate to Agent Pools:
- From the left-hand side, click on Project settings (located at the bottom left).
- Under the Pipelines section, select Agent Pools.
- Verify the Agent:
- In the Agent Pools section, locate and open the LocalAgentPool.
- Check the list of agents associated with the pool.
- Ensure that the agent you added appears in the list with a status of Online.
4. Publish Test Results
In the YAML above, the PublishTestResults task is included to publish the results to the pipeline interface. This will show you test results in the Azure DevOps portal after the pipeline run.
Here’s an example of the task for different test frameworks:
- For Allure Report, able to generate the Allure report in Azure DevOps.
- For NUnit or MSTest, you’ll typically publish *.xml test result files as well.
Step 1: Generate Allure Report
 - script: |
      allure generate allure-results --clean
    displayName: Generate Allure Report
    condition: succeededOrFailed()
This will mark the pipeline run as failed if any test fails.
Explanation: Generate and Open Allure Report
Generates an Allure report from the test results stored in the allure-results directory and to view test execution results.
5. Set up Continuous Integration (CI) Triggers
To run the pipeline automatically on every commit, make sure to configure your pipeline’s trigger:
trigger:
  branches:
    include:
      - main
This will trigger the pipeline to run for any changes pushed to the main branch.
6. Run the Pipeline
Once you’ve defined your pipeline, save and run it. Azure DevOps will automatically run the build and execute the automated tests. You can monitor the progress and see the results in the Pipelines section of your Azure DevOps project.
7. View Test Results
After the pipeline completes, navigate to the Tests tab in the pipeline run. Here, you’ll find a detailed view of your test results, including passed, failed, and skipped tests.
- If your tests have been configured to publish results, you’ll see a summary of the tests.
- You can also download the detailed test logs or check the console output of the pipeline run.
Enhancing Your Pipeline
As you learn the basics, check out the different options in Azure DevOps. They can help improve your pipeline. You can add artifact repositories to organize your build outputs. It’s important to set up good testing stages. Also, don’t miss continuous deployment (CD). It can help you automate your releases.
Improving all the time is important. It’s good to see how well your pipeline is working. Look for ways to make it better. Use new features as Azure DevOps grows.
Implementing Continuous Integration (CI)
Continuous Integration (CI) is very important in an Azure DevOps Pipeline. It helps mix code changes smoothly. When developers automate the CI process, they can easily combine code into a shared repository. This practice starts automated builds and runs tests to see if the changes are good. Because of this, teams can find bugs early and get quick feedback. This improves the quality of the code. It also helps teamwork. Using Azure Pipelines for CI helps teams improve their workflows and deliver software more effectively.
Automating Deployments with Continuous Deployment (CD)
One key feature of Azure DevOps is its ability to automate deployments through continuous deployment (CD). With CD pipelines in Azure DevOps, teams can make it easier to deploy applications. This leads to faster and more efficient delivery of applications. CD automatically sends code changes to production. This reduces the need for manual work. It lets teams release software more often and reliably. This boosts productivity and flexibility while developing. Using CD in Azure DevOps helps teams automate their deployment process. It allows them to focus on providing value for users.
Conclusion
Creating a good Azure DevOps pipeline is very important. It makes your CI/CD processes easier. First, you should learn the main parts. Next, set up your account and configure your project to get started. A clear guide will help you define your build pipeline. It will also help you connect to source control and run builds well. This helps in building a strong pipeline. You can make it better by using CI and automating deployments with CD. Use Azure DevOps to boost productivity and efficiency in your software development. If you want more details or have questions, check out our detailed guide.
Frequently Asked Questions
-
How Do I Monitor Build Success in Azure DevOps?
Azure DevOps helps you see updates on your build pipeline and test results as they happen. You can view builds directly in the portal. You can also check logs and add status badges to your repository. This keeps your team updated. If you want to learn more about monitoring, read the documentation.
-
What is the Azure DevOps pipeline?
An Azure DevOps pipeline makes use of Azure Pipelines to set up a smooth and automatic workflow. This workflow manages the CI/CD process. It tells you how the code gets built and tested. After that, it sends the code from your repository to various environments.
-
What are the two types of Pipelines in DevOps?
DevOps pipelines have two main parts. The first part is the build pipeline. This part is about the CI process. Its goal is to build and test the code. The second part is the release pipeline. This part covers the CD process. It helps to put the code into different environments.
-
What language is used in Azure pipelines?
Azure Pipelines usually use YAML for setup. You can also choose other scripting languages. These include PowerShell, Python, and Bash. You can add these languages to tasks to carry out specific actions and commands.

by Chris Adams | Dec 4, 2024 | Automation Testing, Blog, Latest Post |
In today’s fast-changing tech world, Salesforce test automation is very important. It ensures your Salesforce apps work well, are reliable, and meet user expectations. While many people have relied on manual testing methods, Salesforce test automation combined with a robust automation testing service offers a faster, more efficient, and more accurate approach. This blog will explore Salesforce test automation, its benefits, challenges, and best practices, providing insights to help you leverage an effective Automation Testing Service and create a successful test automation solution.
Key Highlights
- Test automation for Salesforce is very important. It helps keep your Salesforce instance running smoothly.
- Manual testing takes a lot of time. It can also cause mistakes, especially in complex Salesforce setups.
- Automated tests can cover more areas, speed up release cycles, and make your Salesforce application more accurate.
- Choosing the right Salesforce automation tool is key. It should match your needs and budget.
- By understanding the challenges and following best practices, businesses can enhance their Salesforce testing strategies for better results.
Understanding Salesforce Test Automation
Salesforce test automation uses software tools for tasks like UAT testing. It checks if the real results match our expectations and provides a report. This method makes the testing process quicker, cuts down on human input, and boosts the chances of finding defects or bugs.
By automating repetitive tasks in the Salesforce testing process, testers can focus on the more difficult parts. This means they can create better test cases, check test results, and work with development teams to solve issues quickly and effectively. This method reduces the time spent on boring tasks. As a result, development cycles are faster, time-to-market is shorter, and software quality gets better.
The Evolution and Necessity of Automating Salesforce Testing
At the beginning, manual testing was the main way to check Salesforce applications. As the applications got more complex, manual testing became harder and took longer. This increase in complexity meant more test cases and a greater chance of human error. Therefore, a better way to test was needed.
Automated testing was created to solve many problems, especially in user acceptance testing. With automation, special software tools do things like entering data, moving through screens, and checking results. This way, human errors are reduced, and test coverage increases. Moving to Salesforce test automation allows businesses to work better by freeing testers from repeated tasks.
Automated testing is a key part of software development at Salesforce. It speeds up release cycles and keeps deployments high-quality. This easier method is very important for businesses that want to stay competitive in today’s quickly changing tech world.
Key Components of Salesforce Automation: From Unit to Regression Testing
Salesforce automation has different levels of testing. Each level checks separate parts of your application. Here are the main components:
- Unit Testing: This step tests small pieces of code. Developers check each function or method to make sure it works well.
- Integration Testing: After unit testing, this testing checks how individual units work together in the Salesforce environment.
- System Testing: This testing looks at the entire Salesforce application. It checks if all parts, like user interfaces, workflows, data handling, and outside connections, work well together.
- Regression Testing: This testing happens when changes are made to the Salesforce application. It checks new features and updates to make sure they do not create new problems or stop something that is already working.
Strategies for Effective Salesforce Test Automation
Building a good system to automate testing needs careful planning and action. You should set clear goals for what you want the automation to do. Start by focusing on the most important sections of your application. Sort your tests by risk and their effect on your work. Create test cases that show real user experiences.
A good testing process and regular quality checks will help your automation achieve your business goals. It’s also important to choose a dependable test automation tool that works effectively in your Salesforce environment.
Custom Objects and Fields
Custom objects and fields are tailored to specific business needs, making their validation crucial. Automated testing ensures that they function correctly across workflows and integrations.
Workflows and Process Automation
Salesforce automation tools like Workflow Rules, Process Builder, and Flow must be thoroughly tested. Automating this ensures that business processes run seamlessly without manual intervention.
User Roles and Permissions
Ensuring proper access control is critical to maintaining data security. Automation testing validates role-based permissions, sharing rules, and profile settings to ensure compliance.
Integration Testing
Salesforce often integrates with third-party applications via APIs. Automated testing ensures the smooth exchange of data and functionality between Salesforce and external systems.
Lightning Components
Salesforce Lightning Web Components (LWCs) are dynamic and interactive, requiring robust automated testing to ensure they perform well across various user scenarios.
Reports and Dashboards
Automating tests for reports and dashboards validates that they display accurate, real-time data as per business requirements.
Data Validation
Automated testing ensures that data migration, imports, and synchronization are accurate and that no data corruption occurs during processing.
Regression Testing
Salesforce receives regular updates. Automated regression testing ensures that these updates do not impact existing functionalities, configurations, or workflows.
Cross-Browser Compatibility
Salesforce is accessed via multiple browsers and devices. Automating tests for compatibility ensures consistent performance and user experience.
Performance Testing
Testing for system performance, including API response times and load handling, is vital to ensure Salesforce can handle peak user demand.
Designing a Robust Testing Framework
A strong testing framework is very important for any Salesforce test automation plan. A good framework helps to keep the testing process organized. It makes maintenance simple. This framework can also grow when needed.
Start with a clear testing process. This process has four steps: planning, designing, executing, and reporting tests. It is also important to include quality assurance during the software development phase. This is key before launching the live application. By following these steps, testing becomes an essential part of development, not just something added later.
Choosing the right tools is very important. A good test automation tool can support many types of testing. This includes unit testing, integration testing, system testing, and regression testing. It should also connect easily to your Salesforce instance. Moreover, it needs several key features. These features help in managing test data, creating reports, and working well with your team.
Selecting the Right Tools for Diverse Testing Needs
Choosing a testing tool can be hard because there are many choices. To make it simpler, think about what you need. Create clear guidelines to help you decide. Here are some things to think about:
- Ease of Use: Choose a testing tool that is simple and easy. This helps your team learn it fast. A tool that lets you create, run, and manage test cases will make your automation tasks better.
- Integration Capabilities: Make sure the tool easily connects with your Salesforce instance and other development tools you use. This includes tools for version control, continuous integration, and test management.
- Scalability and Flexibility: Pick a tool that can grow with your testing needs. It should work well for different types of testing, support many browsers and devices, and manage a lot of test data effectively.
Challenges in Salesforce Test Automation
Salesforce automation can have problems. When Salesforce gets updates, it can change test scripts. This means you have to update them often. Also, testing with UI automation tools and Salesforce Lightning components requires special tools and methods.
There are other challenges too. You need to manage test data. You also have to handle complex user permissions. Plus, you must deal with asynchronous processes in Salesforce. This makes things more difficult. To solve these issues, you need the right tools and best practices. A good understanding of Salesforce is also important.
Navigating Common Pitfalls and Overcoming Obstacles
One common mistake is trying to automate too much too fast. If you don’t really know how the application works, it can be dangerous. This might cause tests to be unstable, give wrong results, and create a false sense of security.
Another problem is not having enough test coverage. This includes integration tests. If you do not test every part of the Salesforce application, you might overlook important mistakes. It is important to create test cases for various features and user situations. You should also rank these test cases based on their importance and the chances they will fail. This will make your testing better.
- To deal with these issues, use the best practices.
- Use version control for test scripts.
- Regularly update your tests.
- Apply data-driven testing methods.
Best Practices for Handling Complex Salesforce Architectures
Salesforce offers many ways to customize it, which can make things complicated. To deal with this complexity using test automation, you should have a good plan. Start by dividing the applications into smaller, simpler parts.
This way, you can look at each part on its own. It makes it easier to understand and fix items. Each part should have clear lines and links. This helps when testing them.
Before making any changes, you should do an impact analysis. This analysis shows how changes might affect what is already working. It helps you update test cases before issues arise.
Advanced Techniques in Salesforce Test Automation
As you improve your Salesforce testing, start using new methods. These methods can help you work faster and better. Using artificial intelligence (AI) and machine learning (ML) can help your tests be more accurate. They can also automate tasks like creating and managing test cases.
Using continuous integration (CI) and continuous deployment (CD) pipelines makes it simple to include testing while you develop. With these new methods, your testing will get better. This will help you make strong and dependable Salesforce apps.
Leveraging AI and ML for Enhanced Test Accuracy
Artificial intelligence (AI) and machine learning (ML) are changing how we do test automation in Salesforce. They help speed up tasks that used to take a long time. Now, these tasks are done smarter and quicker.
AI tools can look at a lot of testing data. They find patterns and can predict problems that might happen. They can also create their own exploratory testing cases. This makes the testing process faster and more accurate. It helps reduce human error too. Machine learning algorithms can spot parts of your application that need more focus. They learn from previous test results and find risky areas.
Using AI and ML in Salesforce test automation helps teams be more efficient. This leads to faster product releases and better-quality applications.
Implementing Continuous Integration (CI) and Continuous Deployment (CD) in Testing
Implementing continuous integration (CI) and continuous deployment (CD) is important for test automation in Salesforce. This method tests and deploys code changes automatically. It helps to lower manual errors and makes the testing process better. With CI/CD in your Salesforce testing workflow, you receive faster feedback on the quality of your Salesforce application. This leads to more reliable and stronger testing results. The testing process becomes simpler. You can easily spot and fix issues, which boosts quality assurance in your Salesforce environment.
Evaluating Test Automation Tools for Salesforce
Choosing the right Salesforce test automation tools can be tough. There are many options out there. You should think about what you really need. Look at how complex your Salesforce instance is. Also, consider the skills of your team members.
It’s important to decide what you want to test. Look at different testing types like unit, integration, system, and regression. You should think about the features that are important for your business processes. Check how well the tool works with other tools. Also, look at its reporting and analysis features. Finally, consider how easy it is to use.
Criteria for Choosing the Optimal Tools
To pick the right tools, you need clear guidelines. Find tools that match well with your salesforce ecosystem. They should easily connect with your development areas, testing setups, and other key tools.
Good integration makes it easy for data to flow. It helps people work together better and lowers the risk of problems. It’s also key to look at the support and guides from the tool’s vendor. A friendly support team and clear steps will help a lot during setup and later on.
- Talk to vendors and request demonstrations.
- Include your testing team to help assess the tools.
- This approach lets you collect various opinions.
- Collaborating makes it simpler to find a tool that fits everyone’s needs
Comparison of Top Salesforce Test Automation Tools
Let’s look at some popular Salesforce test automation tools and what they offer:
| Tool |
Features |
Integration Capabilities |
Ease of Use |
Pricing |
| Selenium |
This is an open-source framework. It works with many browsers and languages |
Needs third-party tools for integration It allows a lot of customization. |
It has a steep learning curve and requires coding skills. |
Free |
| Provar |
This tool is made just for Salesforce. It works with both classic and Lightning UI. |
It integrates easily with the Salesforce platform and supports many features. |
It offers a codeless interface, which is user-friendly. |
Paid |
| Testim |
This is an AI-powered codeless testing platform. It also supports API testing. |
It works well with CI/CD tools and different Salesforce environments. |
It has an easy interface for test creation and upkeep. |
Paid |
Choosing the right tool relies on your budget and skills. You should consider what you need to test. Selenium works well for teams that are okay with coding and custom settings. Provar is great for people who often use Salesforce. If you want an easy option without coding, Testim is the best choice. It also has smart features.
Every tool has good points and bad points. Think about what you need. Check the various options. After that, pick the best tool to improve your test automation process in Salesforce.
Conclusion
Salesforce test automation is very important. It makes automation testing more efficient and accurate. Companies can enhance their Salesforce testing by using good testing frameworks. They should pick the right tools and try modern methods like AI and ML. It is key to tackle challenges with best practices when dealing with complex Salesforce setups. Regularly checking and improving test automation tools is crucial for achieving the best results. Automation leads to better testing outcomes. It also supports the overall success of Salesforce projects. To improve your Salesforce testing strategies, invest in effective test automation and testing techniques for long-term development and growth.
Frequently Asked Questions
-
What Makes Salesforce Test Automation Unique?
Salesforce has a special platform design. It gets updates often and its user interface changes. This can make test automation difficult. To deal with this, we need custom solutions that fit these unique features. It's crucial to test in the sandbox environment first. We must do this before going to the production environment. Testing this way helps us handle the challenges well.
-
How Frequently Should Salesforce Testing Be Conducted?
Salesforce testing should happen regularly. This is important when there are new Salesforce updates, software updates, new features, or changes in business processes. Regular regression tests matter a lot. These tests check that the old features still work as they should.
-
Can Salesforce Test Automation Improve ROI?
Salesforce test automation offers a great return on investment (ROI). It helps save money and cuts down on the need for manual testing. This improvement makes the software development process run smoother. Also, thorough testing improves the quality of the software. All these benefits result in happier users and lower maintenance costs.
-

by Anika Chakraborty | Nov 29, 2024 | Automation Testing, Blog, Latest Post |
Artificial intelligence (AI) is revolutionizing the way we conduct software testing. ContentAutomation Testing with Selenium AI Testing has become an essential tool for ensuring the reliability and efficiency of web application testing. By combining AI with Selenium using Java, you can automate and enhance your testing process, making it smarter, faster, and more reliable. In this guide, we explore how to integrate AI into your Selenium framework to improve automation.
Key Highlights
- Leverage Selenium AI Testing to enhance your test automation process with the power of artificial intelligence, making it more efficient and robust.
- Discover how machine learning can improve various aspects of the testing lifecycle, including test creation, execution, and maintenance.
- Explore real-world case studies where AI has been used to optimize Selenium AI Testing and increase productivity.
- Understand the potential benefits, challenges, and future opportunities of integrating AI into your Selenium testing framework.
- Learn how to choose the best tools and strategies for adding AI to your Selenium tests using Java.
Understanding AI’s Role in Modern Software Testing
AI plays a critical role in modern software testing by introducing intelligent automation into traditional testing tasks. With Selenium AI Testing, test scripts can evolve dynamically as the application changes. AI can even predict and address potential issues before they arise, ensuring smoother testing operations.
Machine learning (ML), a branch of AI, teaches algorithms to learn from past test results, code changes, and user interactions. This allows Selenium AI Testing to improve over time, ensuring that your tests become smarter and more efficient.
Integrating AI into Selenium Testing with Java
Integrating AI into your Selenium AI Testing framework with Java involves using specialized libraries and tools designed for AI. These libraries often come with pre-trained models or allow you to train custom models based on your specific test scenarios. Java allows you to connect these models directly into your Selenium AI Testing scripts.
For example, you can utilize an AI image recognition library to identify UI elements in your app, or a Natural Language Processing (NLP) library to generate test cases from user stories or textual descriptions.
Enhancing Test Automation Scripts with AI Algorithms
- AI-Driven Test Case Generation: AI enables automatic generation of test cases using sources such as user stories, UI designs, or past user sessions, accelerating the testing process while ensuring thorough test coverage.
- Enhanced Test Coverage: AI captures scenarios that might otherwise be overlooked, providing a more comprehensive approach to testing.
- Dynamic Test Script Optimization: AI algorithms can refine test scripts over time, improving their efficiency and adaptability.
- Reinforcement Learning in Selenium: Incorporating reinforcement learning allows tests to handle complex user flows more effectively and adapt to application changes seamlessly.
AI-Driven Selenium Frameworks for Efficient Testing
Many new Selenium frameworks that use AI are coming out. They offer great tools for improving testing. These frameworks help solve common issues in test automation. They can fix tests on their own, keep them up to date, and create intelligent tests. Here are some popular options:
| Framework Name |
Key Features |
Ideal For |
| Healenium |
Self-healing Selenium scripts |
Reducing test maintenance and improving script reliability |
| Headspin |
AI-based element identification |
Enhanced test stability and accuracy in identifying elements |
These frameworks often have built-in links to popular testing tools and libraries. This helps you add AI features to your workflows easily. They usually offer options for data extraction from web pages, visual testing, and performance analysis. This makes the testing process simpler.
Choosing the right framework depends on your needs and tech skills. You should consider how simple it is to use. Think about whether it can expand with you. Check how well it works with other tools. Finally, consider how much AI knowledge you have.
Practical Applications of AI in Selenium Testing
AI can simplify and enhance practical applications of Selenium AI Testing. For example, you can use image recognition AI to automate visual test cases, checking UI elements for consistency and correctness across different browsers and platforms.
AI can also facilitate cross-browser testing by automatically adjusting Selenium scripts to ensure consistent functionality across different browsers and operating systems.
Case Studies: Success Stories of AI in Selenium
Many case studies show the real advantages of using AI for Selenium tests. For example, a top online shopping company used an AI testing tool. This tool cut their test maintenance needs by 80%. It found and repaired broken selectors by itself. Because of this, the QA team could focus more on important projects.
A bank recently did well by making their Selenium tests faster. They used AI to better decide the order of the tests. By paying attention to key test cases and running multiple tests at the same time, they reduced their testing time by 50%.
These case studies show some key benefits:
- Less Test Maintenance: Self-healing algorithms lower the work needed to keep tests updated as the application changes.
- Better Test Coverage: AI automatically creates more test scenarios, expanding the test coverage.
- Higher Test Efficiency: Smart scheduling of tests and running them at the same time speed up test execution.
Automating Complex Test Scenarios with AI and Java
AI enhances Selenium AI Testing by automating complex test scenarios. For instance, natural language processing (NLP) can be used to create tests that interact with chatbots or voice assistants. By training your AI models with real user conversations, you can ensure that your application responds correctly to a variety of inputs.
Using AI in Selenium AI Testing also enables the automation of multi-step workflows, where tests simulate real user interactions across web pages, APIs, and databases. Java seamlessly integrates these AI-driven test scenarios into your Selenium AI Testing framework.
Examples for AI integrated with selenium using java:
1. Using Applitools Eyes for Visual Testing
Applitools Eyes is an AI-powered visual testing tool that integrates with Selenium to identify visual differences and layout issues across devices and screen resolutions. This ensures a consistent user interface (UI) across different platforms.
By incorporating Selenium AI Testing into your automation strategy, you can leverage the power of AI and Java to enhance the reliability, speed, and efficiency of your testing processes.
Use Cases:
- Visual regression testing.
- Cross-browser and responsive UI testing.
Maven Dependency
<dependency>
    <groupId>com.applitools</groupId>
    <artifactId>eyes-selenium-java3</artifactId>
    <version>3.x.x</version>
</dependency>

Example Code
import com.applitools.eyes.selenium.Eyes;
import org.openqa.selenium.WebDriver;
import org.openqa.selenium.chrome.ChromeDriver;

public class VisualTestingWithApplitools {
    public static void main(String[] args) {
        System.setProperty("webdriver.chrome.driver", "path/to/chromedriver");

        WebDriver driver = new ChromeDriver();
        Eyes eyes = new Eyes();

        // Set Applitools API key
        eyes.setApiKey("YOUR_API_KEY");

        try {
            // Start visual test session
            driver = eyes.open(driver, "Demo App", "Test Case 1");

            driver.get("https://example.com");

            // Check the visual state of the page
            eyes.checkWindow("Home Page");

            // Close the eyes session
            eyes.close();
        } finally {
            driver.quit();
            eyes.abortIfNotClosed();
        }
    }
}
2. Using Healenium for Self-Healing Locators
Healenium is a self-healing library for Selenium that automatically fixes broken locators caused by UI changes. It uses AI to monitor and update your element locators dynamically, reducing test maintenance.
Use Cases:
- Reducing flaky tests caused by frequent UI updates.
- Maintaining test stability over time.
Maven Dependency
<dependency>
    <groupId>com.epam.healenium</groupId>
    <artifactId>healenium-web</artifactId>
    <version>3.x.x</version>
</dependency>

Example Code
import com.epam.healenium.SelfHealingDriver;
import com.epam.healenium.configuration.SelfHealingDriverConfig;
import org.openqa.selenium.By;
import org.openqa.selenium.WebDriver;
import org.openqa.selenium.WebElement;
import org.openqa.selenium.chrome.ChromeDriver;

public class SelfHealingLocators {
    public static void main(String[] args) {
        System.setProperty("webdriver.chrome.driver", "path/to/chromedriver");

        WebDriver delegate = new ChromeDriver();
        WebDriver driver = SelfHealingDriver.create(delegate);

        driver.get("https://example.com");

        // Interact with elements using self-healing capabilities
        WebElement button = driver.findElement(By.id("dynamic-button"));
        button.click();

        driver.quit();
    }
}
3. Running Selenium Tests on HeadSpin
Sign Up and Get API Key
- Sign up for a HeadSpin account at HeadSpin.
- Obtain your HeadSpin API Key from the platform.
Setup Environment
Ensure you have the following installed:
- Selenium WebDriver: To automate browser actions.
- HeadSpin API key: For authentication.
- Java (if using Java as the language in this example).
You can add the Selenium WebDriver and other dependencies using Maven (for Java):
<dependency>
    <groupId>org.seleniumhq.selenium</groupId>
    <artifactId>selenium-java</artifactId>
    <version>4.4.0</version>  <!-- or the latest version -->
</dependency>
Selenium Test Example with HeadSpin for Web
Here’s an example of how you can run Selenium tests on a real browser (e.g., Chrome) hosted by HeadSpin using a RemoteWebDriver.
Code Example (Java)
import org.openqa.selenium.By;
import org.openqa.selenium.WebDriver;
import org.openqa.selenium.WebElement;
import org.openqa.selenium.remote.DesiredCapabilities;
import org.openqa.selenium.remote.RemoteWebDriver;

import java.net.URL;

public class HeadSpinSeleniumWebTest {

    public static void main(String[] args) throws Exception {
        // Set up the DesiredCapabilities object with HeadSpin-specific capabilities
        DesiredCapabilities capabilities = new DesiredCapabilities();

        // Set HeadSpin API key (your personal API key from HeadSpin)
        capabilities.setCapability("headspin:apiKey", "your_headspin_api_key");

        // Specify the browser (Chrome in this case) and platform (Windows 10)
        capabilities.setCapability("browserName", "chrome");  // Example: Chrome
        capabilities.setCapability("platform", "Windows 10"); // Example: Windows 10
        capabilities.setCapability("version", "latest");      // Example: latest version of Chrome

        // Connect to HeadSpin's remote WebDriver hub
        WebDriver driver = new RemoteWebDriver(
                new URL("https://browser.headspin.io/wd/hub"), capabilities);

        // Navigate to a website for the test
        driver.get("https://www.example.com");

        // Find a Web element on the page and interact with it
        WebElement element = driver.findElement(By.xpath("//h1"));
        System.out.println("Page Header: " + element.getText());  // Output the text of the header

        // Perform any other interactions, assertions, or checks here
        WebElement link = driver.findElement(By.linkText("More information..."));
        link.click();  // Example: Click on a link

        // Print out the current page's URL to confirm the navigation
        System.out.println("Current URL after clicking: " + driver.getCurrentUrl());

        // Quit the driver after the test is done
        driver.quit();
    }
}
Conclusion
In conclusion, using AI with Selenium in Java offers many benefits for test automation. Testers can easily simplify their tasks and tackle difficult challenges using AI algorithms. The growth of AI in quality assurance has led to new testing tools that give accurate results. AI-based Selenium frameworks help make testing more reliable and effective. Real-life examples show how AI improves Selenium and supports test automation. Welcoming AI technology in software testing increases efficiency and enhances the testing process.
Frequently Asked Questions
-
What are the benefits of integrating AI with Selenium?
AI helps Selenium perform better. It makes tests faster and more precise. AI boosts automation skills. It cuts down on manual tasks. This makes it easier to create, run, and maintain tests in a smarter way.
-
Is Selenium used for AI?
Selenium is not only for AI. However, its tools can work well with AI technologies. This helps us create better and more efficient ways to test AI.
-
How is AI used in automation?
AI in automation does much more than finish tasks. It improves automation. It does this by guessing outcomes, making wise decisions, and adjusting to new situations.
-
Is there any AI tool for testing?
Yes, many AI tools for testing are coming out. These tools provide features such as self-fixing scripts and smart test creation. They also include visual testing. These tools help to improve software quality by using smart testing methods.

by Anika Chakraborty | Nov 7, 2024 | Automation Testing, Blog, Recent, Latest Post |
In today’s world of finance, mobile applications for test trading software are essential tools for users who need quick access to real-time data and market analysis within a reliable Electronic trading platform, including algorithmic trading capabilities, alongside vast amounts of data for portfolio management tools. As more investors, traders, and researchers rely on these apps for making informed decisions, the demand for a smooth, reliable, and fast experience grows, reflecting a continuous increase in the volume of trades and user expectations. Testing these complex, data-heavy applications and their interfaces for stability and accuracy is a challenging task, especially given frequent updates and high user expectations.
To meet this demand, automated software testing is an ideal solution. This blog will walk you through the key types of automated testing for mobile applications, focusing on functional testing, parallel testing, regression testing, and release support testing. We’ll also discuss how we used Appium, Java, and TestNG to streamline the software testing process, with the help of Extent Reports for detailed and actionable test results, drawing upon our years of experience in the industry.
Why Automate Testing for Trading Software?
Testing a financial app manually is time-consuming and can be prone to human error, especially when dealing with frequent updates. Automation helps in achieving quicker and more consistent test results, making it possible to identify issues early and ensure a smooth user experience across various devices.
In our case, automation allowed us to achieve:
- Faster Testing Cycles: By automating repetitive test cases, we were able to execute tests more quickly, allowing for rapid feedback on app performance.
- Increased Test Coverage: Automation enabled us to test a wide range of scenarios and device types, ensuring comprehensive app functionality.
- Consistent and Reliable Results: Automated tests run the same way every time, eliminating variability and minimizing the risk of missed issues.
- Early Bug Detection: By running automated tests frequently, bugs and issues are caught earlier in the development cycle, reducing the time and cost of fixes.
Tools and Frameworks:
To create a robust automated testing suite, we chose:
- Appium: This open-source tool is widely used for mobile app testing and supports both Android and iOS, making it flexible for testing cross-platform apps. Appium also integrates well with many other tools, allowing for versatile test scenarios.
- Java: As a powerful programming language, Java is widely supported by Appium and TestNG, making it easy to write readable and maintainable test scripts.
- TestNG: This testing framework is ideal for organizing test cases, managing dependencies, and generating reports. It also supports parallel test execution, which greatly reduces testing time.
This combination of tools allowed us to run detailed, reliable tests on our app’s functionality across a variety of devices, ensuring stability and performance under various conditions.
Essential Automated Testing Strategies
Given the complexity of our financial app, we focused on four primary types of automated testing to ensure full coverage and high performance: functional testing, parallel testing, regression testing, and release support testing.
1. Functional Testing
Functional testing ensures that each feature within the app works as intended. Financial applications have many interactive modules, such as market movers, portfolio trackers, and economic calendars, all of which need to perform correctly for users to make informed decisions.
For functional testing:
- We designed test cases for every major feature, such as alerts, notifications, portfolio performance, and economic calendar updates.
- Each test case was crafted to simulate real-world usage—like adding stocks to a watchlist, setting price alerts, or viewing market data updates.
- Our tests validated both individual functions and integrations with other features to ensure smooth navigation and information accuracy.
Functional testing through automation made it easy to rerun these tests after updates, confirming that each feature continued to work seamlessly with others, and gave us peace of mind that core functionality was stable.
2. Parallel Testing
Parallel testing is the practice of running tests on multiple devices simultaneously, ensuring consistent user experience across different screen sizes, operating system versions, and hardware capabilities. This is especially important for financial apps, as users access them on a wide variety of devices, from high-end to budget models.
Using Appium’s parallel testing capability, we could:
- Execute the same tests on multiple devices to check for performance or layout differences.
- Ensure UI elements are scaled correctly across screen sizes and resolutions, so users have a similar experience no matter what device they use.
- Measure the app’s speed and stability on low-spec and high-spec devices, ensuring it worked well even with slower hardware.
Parallel testing allowed us to identify issues that might only occur on certain devices, providing a consistent experience for all users regardless of device type.
3. Regression Testing
Financial apps often require frequent updates to add new features, integrate new data sources, or improve user experience. With every update, there’s a risk of inadvertently disrupting existing functionality, making regression testing essential.
Regression testing confirms that new code does not interfere with previously working features. We used automated tests to:
- Run tests on all core functionalities after each update, ensuring that previously verified features continue to work.
- Include a comprehensive set of test cases for all major modules like watchlists, market alerts, and data feeds.
- Quickly identify and address any issues introduced by new code, reducing the need for lengthy manual testing.
By running automated regression tests with each update, we could confirm that the app retained its stability, functionality, and performance while incorporating new features.
4. Release Support Testing
As part of the release process, release support testing provides a final layer of validation before an app is published or updated in the app store. This testing phase involves a combination of smoke testing and integration testing to confirm that the application is ready for end-users.
In release support testing, we focused on:
- Testing critical functions to ensure there were no blocking issues that could impact user experience.
- Performing sanity checks on newly added or modified features, ensuring they integrate smoothly with the app’s existing modules.
This final step was essential for giving both the development team and stakeholders confidence that the app was ready for public release, free from critical bugs, and aligned with user expectations.
5. API Testing
APIs are the backbone of trading apps, connecting them with data feeds, analytics, and execution services. Testing APIs thoroughly ensures they’re fast, accurate, and secure.
- Data Accuracy Checks: Verifies that APIs return accurate and up-to-date information, especially for real-time data like prices and news.
- Response Time Validation: Tests the speed of APIs to ensure low latency, which is critical in time-sensitive trading environments.
- Security and Error Handling: Ensures APIs are secure and handle errors effectively to protect user data and maintain functionality.
6. Performance Testing
Performance testing is vital to ensure trading software performs reliably, even during high-volume periods like market openings or volatility spikes.
- Load Testing: Verifies that the app can handle a high number of simultaneous users without slowing down.
- Stress Testing: Pushes the app to its limits to identify any breaking points, ensuring stability under extreme conditions.
- Scalability Assessment: Ensures that the app can scale as the user base grows without impacting performance.
Reporting and Results with Extent Reports
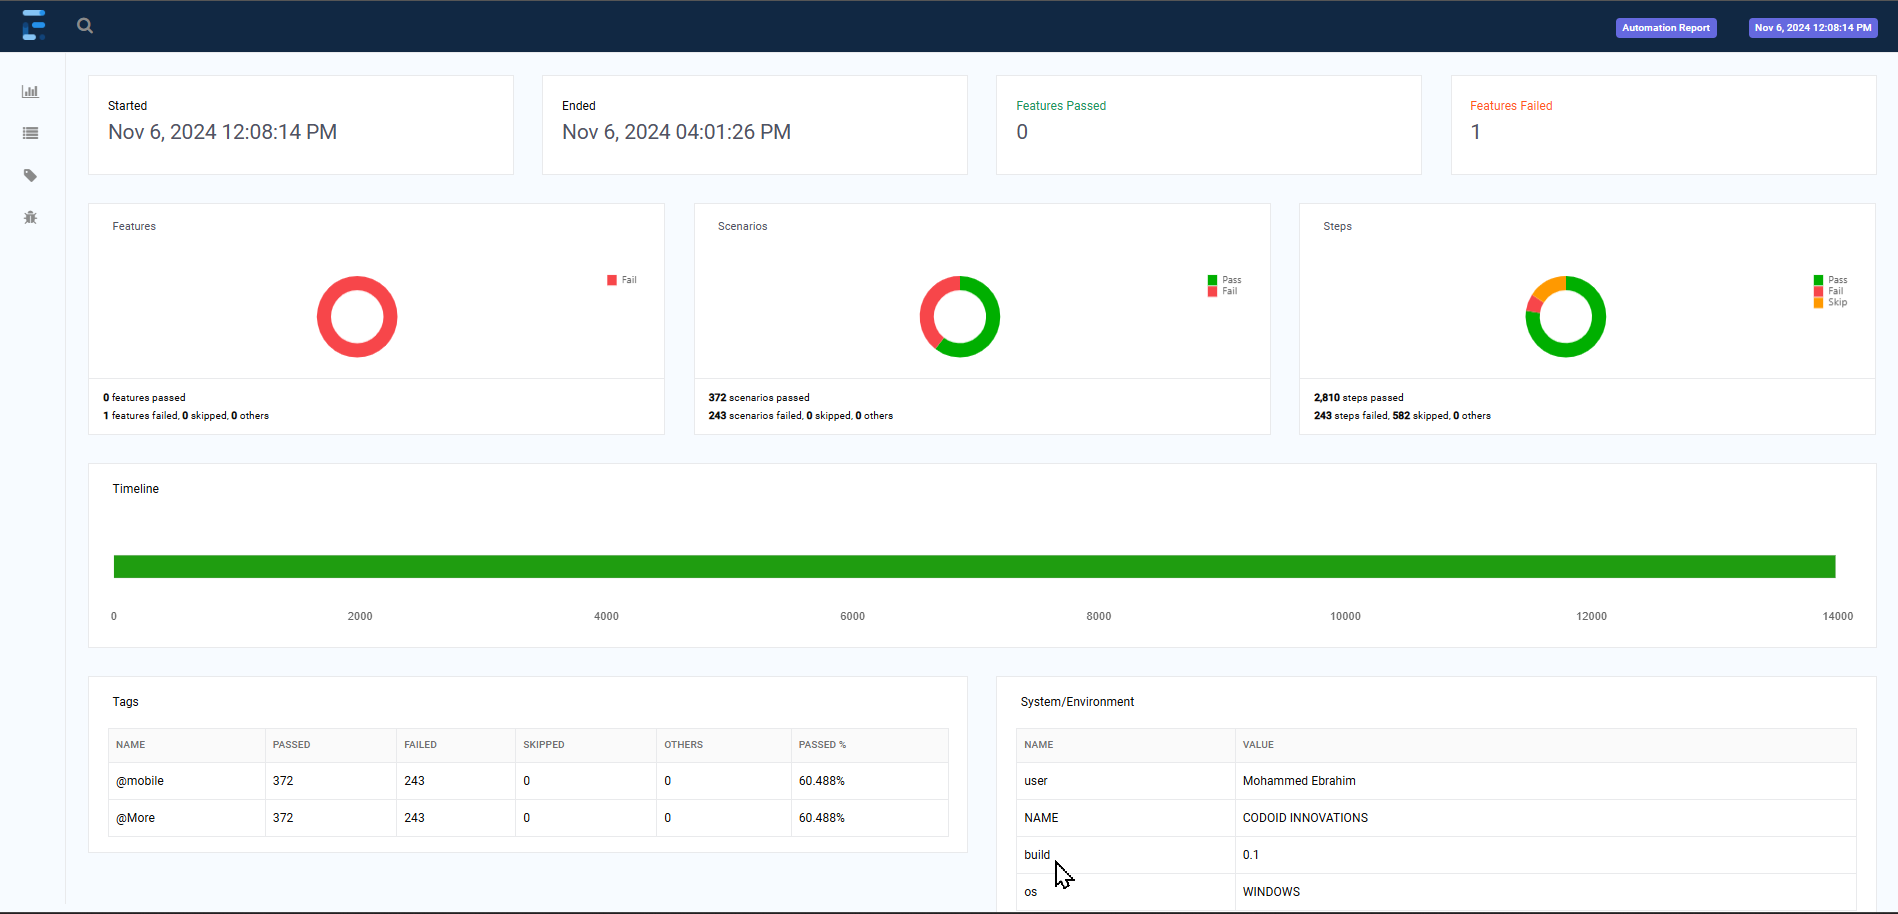
A critical component of automated testing is reporting. Extent Reports, a rich and detailed reporting tool, provided us with insights into each test run, allowing us to easily identify areas that needed attention.
With Extent Reports, we were able to:
- View detailed reports for each test—including screenshots of any failures, test logs, and performance metrics.
- Share results with stakeholders, making it easy for them to understand test outcomes, even if they don’t have a technical background.
- Identify trends in test performance over time, allowing us to focus on areas where issues were frequently detected.
The reports were visually rich, actionable, and essential in helping us communicate testing progress and outcomes effectively with the wider team.
Key Benefits of Automated Testing for Financial Apps
Implementing automated testing for our financial app provided numerous advantages:
- Efficiency and Speed: Automated testing significantly reduced the time required for each test cycle, allowing us to perform more tests in less time.
- Expanded Test Coverage: Automated tests allowed us to test a wide range of scenarios and interactions, ensuring a reliable experience across multiple device types.
- Consistency and Accuracy: By removing human error, automation enabled us to run tests consistently and with high accuracy, yielding reliable results.
- Reduced Costs: By identifying bugs earlier in the development cycle, we saved time and resources that would have otherwise been spent on fixing issues post-release.
- Enhanced Stability and Quality: Automation gave us confidence that each release met high standards for stability and performance, enhancing user trust and satisfaction.
Conclusion
Automating mobile app testing is essential in today’s competitive market, especially for data-driven applications that users rely on to make critical decisions. By using Appium, Java, and TestNG, we could ensure that our app delivered a reliable, consistent experience across all devices, meeting the demands of a diverse user base.
Through functional testing, parallel testing, regression testing, and release support testing, automated testing enabled us to meet high standards for quality and performance. Extent Reports enhanced our process by providing comprehensive and understandable test results, making it easier to act on insights and improve the app with each update.
Beyond being a time-saver, automation elevates the quality and reliability of mobile app testing, making it an essential investment for teams developing complex, feature-rich applications. Codoid delivers unparalleled expertise in these testing methodologies explore our case study for an in-depth view of our approach and impact.

by Mollie Brown | Nov 5, 2024 | Automation Testing, Blog, Latest Post, Top Picks |
In today’s quick software development world, it is important to keep apps high quality. A key part of this is software testing. Tosca automation is a strong tool that helps with this task. This blog, titled “Tosca Automation Tutorial: Model-Based Approach,” will cover the main points about Tosca. We will look into its new model-based method to make your software testing better.
Key Highlights
- Learn how Tricentis Tosca can make your software testing process easier.
- This blog gives a simple look at Tosca, its features, and how it helps with test automation.
- Find out how Tosca’s model-based approach allows you to create tests quickly, reuse them often, and ease maintenance.
- We will explore real-world examples of how Tosca works well in different environments.
- If you are new to Tosca or want to enhance your automation skills, this guide has helpful tips for using Tosca in your testing tasks.
Exploring the Core of Tosca Automation
Tosca automation, from Tricentis, is a top test automation tool. It helps make software testing easier and faster. Its simple design and strong features let you create, manage, and run automated tests easily. This means less manual work and faster software delivery.
Tosca is special because it uses a model-based approach. This means it creates reusable test pieces for the application being tested. Tosca simplifies technical details. As a result, both technical and non-technical people can join in test automation.
Unveiling the Features of Tosca Automation
Tosca is a powerful tool that makes testing easy and quick. One great feature of Tosca is how simple it is to create test cases. Users can use a drag-and-drop design to build their test cases. They do not need to know a lot about coding to do this.
Tosca offers excellent test data management. The platform helps you handle test data easily. This way, tests are completed with the right inputs and checks. A straightforward method to manage data cuts down on mistakes and makes test results more reliable.
Tosca is not just about basic needs. It offers many advanced features. These features include risk-based testing and API testing. Also, it connects easily with CI/CD pipelines. This makes it a great choice for software development today.
How Tosca Stands Out in the Automation Landscape
Tosca test automation stands out from other automation tools. It has special features that fit the needs of software testing. It is easy to use. Even those with little technical skills can use it without any trouble.
Tosca is not only about running tests. It covers the whole testing process. It works well with popular development and testing tools. This makes it easy for teams to add Tosca to what they already do. They can then work better together and get feedback faster.
Tosca works with many platforms and technologies. It can do several testing tasks. You can test web applications, mobile apps, APIs, or desktop applications using it. Tosca offers the flexibility and power you need to cover all tests completely.
What is Model-Based Approach?
The model-based approach changes how we make and manage test cases. It is different from the old script-based method. The traditional way takes a lot of time and is hard to keep up to date. Model-based testing focuses on creating a model of the application we are testing. This model is important because it illustrates how the app works. It includes details about its features, buttons, and logic.
With this method, the design of tests is separate from the code. This makes it easy to reuse tests and manage them. When the application is updated, testers only need to change the main model. These changes will then automatically update all connected test cases. This is very useful for keeping test suites current with changing applications. Therefore, it works well for quick development, especially in the functional testing of web applications.
Uniqueness of model-based approach
Model-based testing is important because it can change with the application. Rather than depending on weak scripts that may fail with each update, the model serves as a guide. This flexible approach helps keep tests helpful and efficient, even as software keeps changing.
This method is easy to understand. Testers can clearly see how the application works and what the test scenarios look like with the model. This visual approach supports teamwork between testers and developers. Both sides can understand and help with the testing process.
Enhance Reusability
At the core of model-based testing is reusable test libraries. These libraries keep parts of tests that you can use again. They include common actions, checks, and business tasks. When testers create a library of these reusable pieces, they can save a lot of time and effort. This helps them make new test cases much easier.
This method helps keep practice steady. When teams use ready-made and tested modules, they make fewer mistakes. They also stick to software processes.
We enjoy many benefits. These include better test coverage, faster test execution, and improved software quality. When companies use reusable test libraries, they can enhance their testing process. This helps them create great software that meets high standards.
Responsive Object Recognition
Tosca automation uses smart object recognition. This feature makes it different from regular testing tools. It allows Tosca to interact with application interfaces the same way a person would.
Tosca’s object recognition is more than just spotting items based on their features. It uses smart algorithms to learn the context and connections between different parts of the user interface. This helps Tosca deal with challenging situations in a better way.
Tosca is a good choice for testing apps that change regularly or need updates often. This includes testing for web, mobile, and desktop applications.
Reusable Test Libraries and Steps
Reusable test libraries are key for Tosca’s model-based method. They help testers build test parts that are simple to join and use. This speeds up the test creation process. It also supports best practices in testing.
Testers can make and save test steps in these libraries. A test step means any action or engagement with the application they are testing. Some test steps can be simple, like clicking a button. Others can be more complicated, like filling out forms or moving through different screens.
By putting these common test steps in reusable libraries, Tosca helps teams create a strong test automation framework. This way, it cuts down on repeated tasks and makes maintenance simpler. It also ensures that tests remain consistent and trustworthy.
Streamlined Testing and Validation
Tosca’s method makes testing simpler and well-organized. It keeps the test logic apart from the code. This setup helps teams build and run tests more quickly. Because of this, they get feedback fast. It helps them spot and solve issues early in the software development process.
Finding problems early is key to keeping high quality in software development. With Tosca, testers can make test suites that look at many different scenarios. This way, applications can be tested thoroughly before they go live. It helps lower the number of costly bugs and problems in production.
When companies use Tosca’s easy testing and checking methods, they can make their software better. This saves them time when they launch their products. A better software position means they can provide great user experiences. It also helps them stay on top in today’s fast software world.
Step-by-Step Guide to Implementing Model-Based Approach in Tosca
Step 1: Understand Model-Based Approach in Tosca
Learn about Tosca’s approach to model-based testing. It focuses on making and reusing models of the application. This way makes it easier to create and keep test cases.
Benefits:
Broad Scenario Testing: Model based testing allows testing a wide range of scenarios without embedding logic or data into the test cases directly.
Code-Free Models: Models are visual, code-free, and highly reusable, making MBT accessible to non-developers.
Ease of Maintenance: Updating a single model or data set propagates to all tests relying on it, reducing maintenance time.
Step 2: Set Up Your Tosca Environment
- Install Tosca: Ensure you have the latest version of Tricentis Tosca installed.
- Download and Install: Visit Tricentis to download Tosca. Run the installer, accept terms, select components (like Tosca Commander), and complete the setup.
- Chrome Extension: For web automation, add the “Tosca Automation Extension” from the Chrome Web Store.
- Initial Setup: Launch Tosca, activate your license, and set up a new project workspace. Create folders for Modules, Test Cases, and Execution Lists.
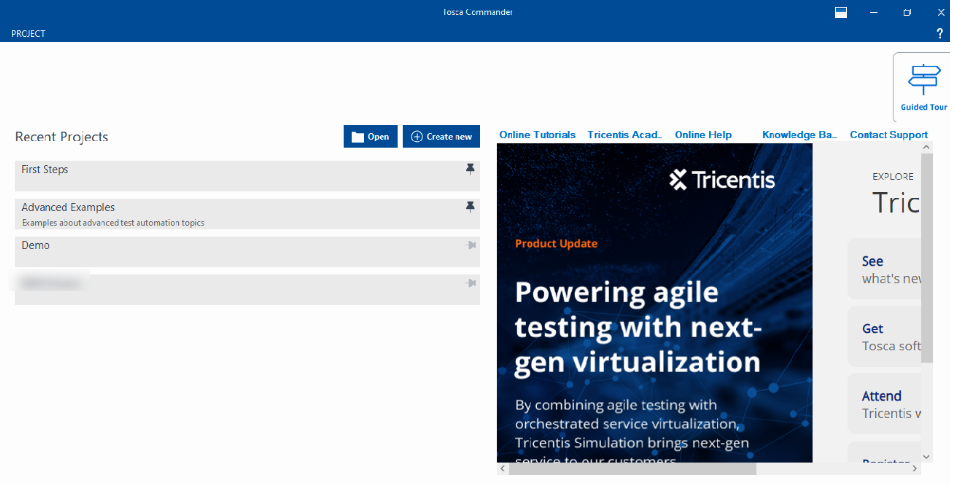
- Click > create new
- In the subsequent Tosca Commander: Create new workspace window, select Oracle, MS SQL Server, or DB2 from the Select type of Repository drop-down menu.
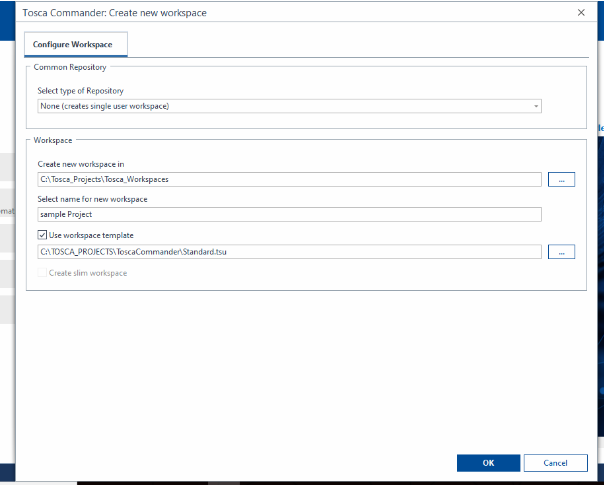
- Click OK to create a new workspace
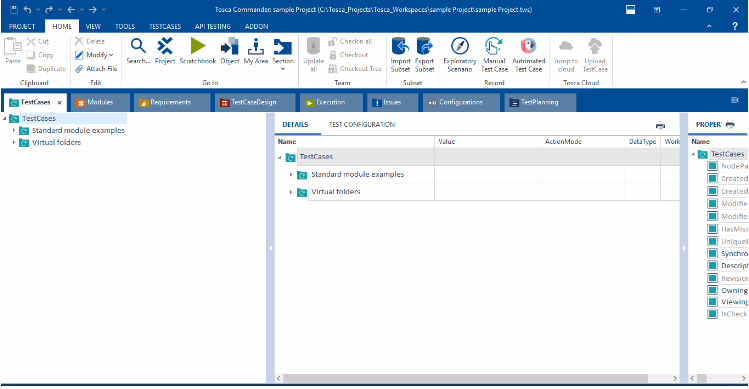
- To view the project structure, click on the Project
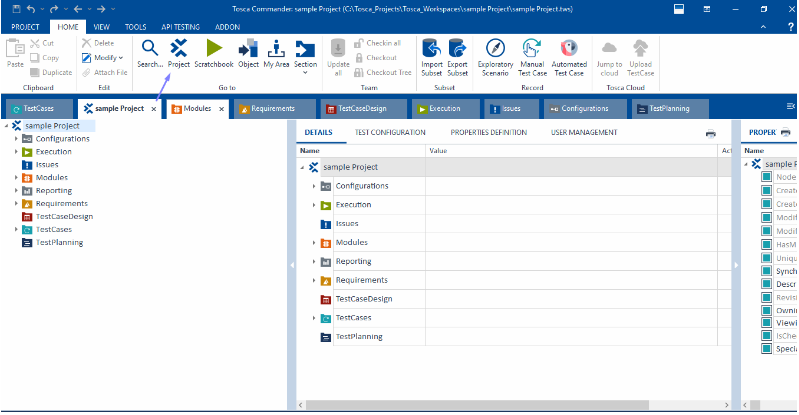
- Configure Project Settings: Set up your workspace. Also, adjust any necessary settings for your project in Tosca, such as database or API connections.
Step 3: Create the Application Model
- Find and Scan Your Application (AUT):
1.Open the Scanner: Tosca has different scanning options based on the application type (web, desktop, or mobile). Launch the scanner through Tosca Commander > Scan Application.
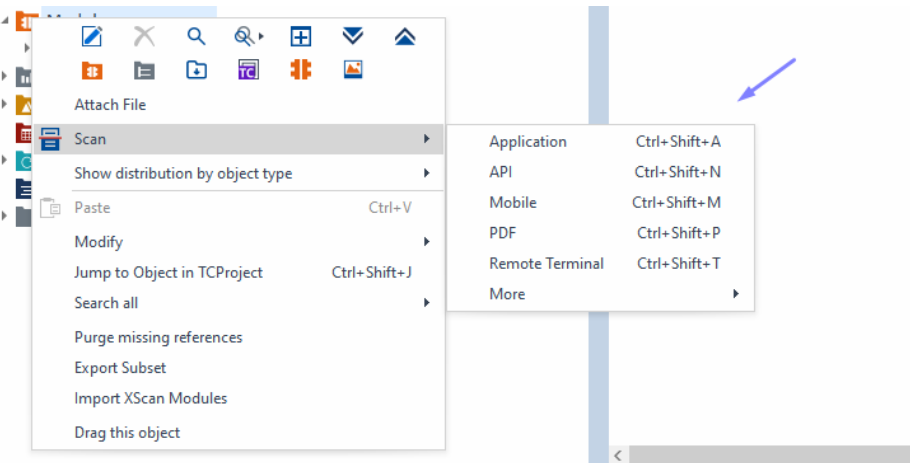
2.Identify Controls: For a web app, for example, open the browser and navigate to the AUT. Select the web scanner, and Tosca will display elements (buttons, input fields, etc.) as you hover over them.
Right click on Modules > scan > Application
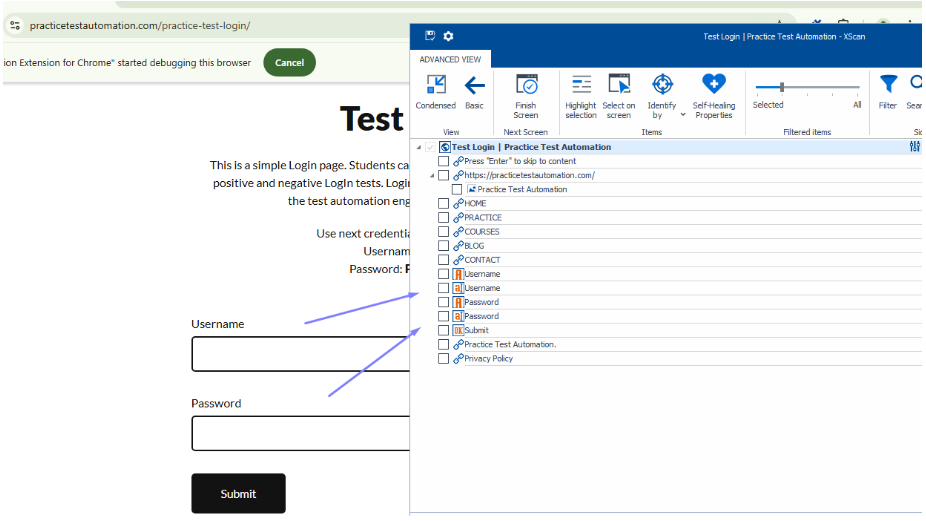
3.Select and Capture: Click to capture relevant elements for testing. Tosca will record these elements in a structured format, enabling them for reuse in different test cases.
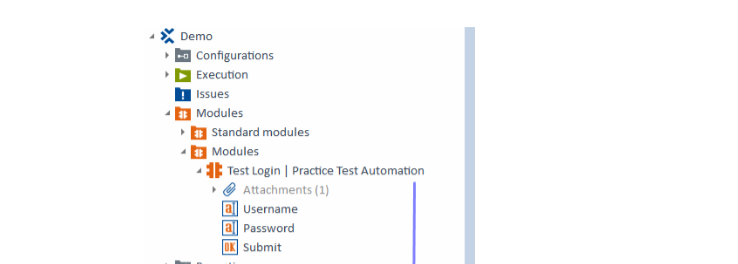
- Create Modules: Organize these parts into modules. These modules are the foundation for your test cases.
- Modules: Reusable components in Tosca for parts of an application (e.g., login screen with fields and buttons).
- Sub-Modules: Smaller sections within a Module, used for complex screens with multiple sections (e.g., product details in an e-commerce app).
To create a sub-module (Right click on the module > create folder
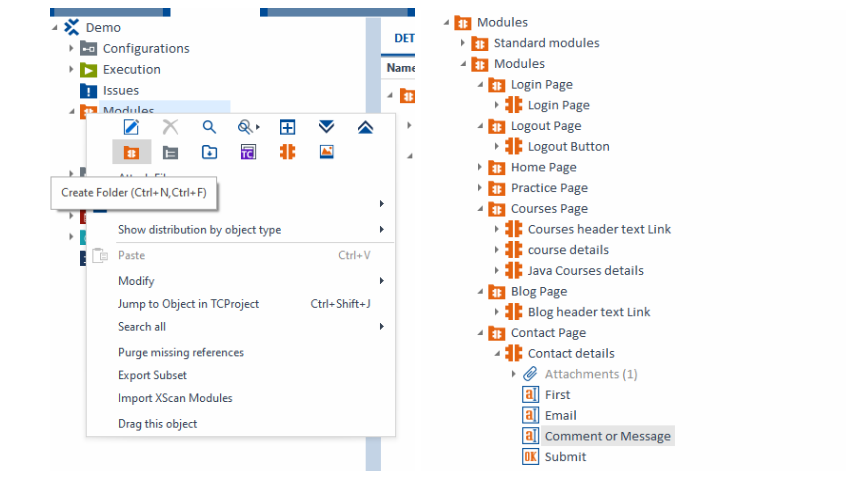
Step 4: Design Test Cases Using the Model
- Define Test Steps: Drag and Drop Elements: In Tosca Commander, start a new test case and drag elements from modules to create test steps. Arrange these steps in the order users typically interact with the application (e.g., navigating to login, entering credentials, and submitting).
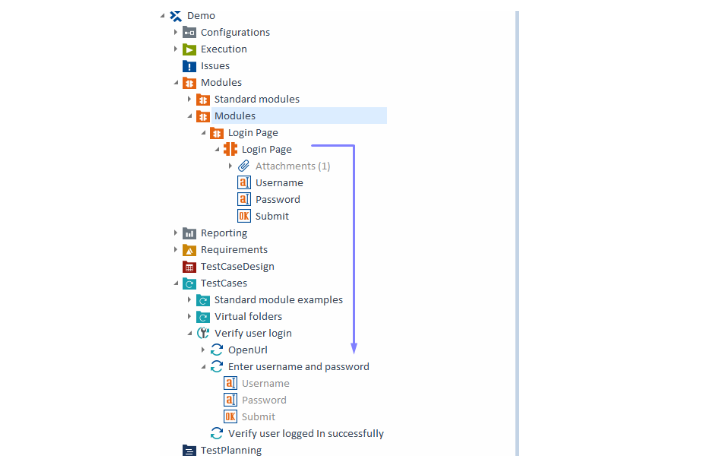
- Specify Actions and Values: For each step, specify actions (click, input text) and values (e.g., “username123” for a login field).
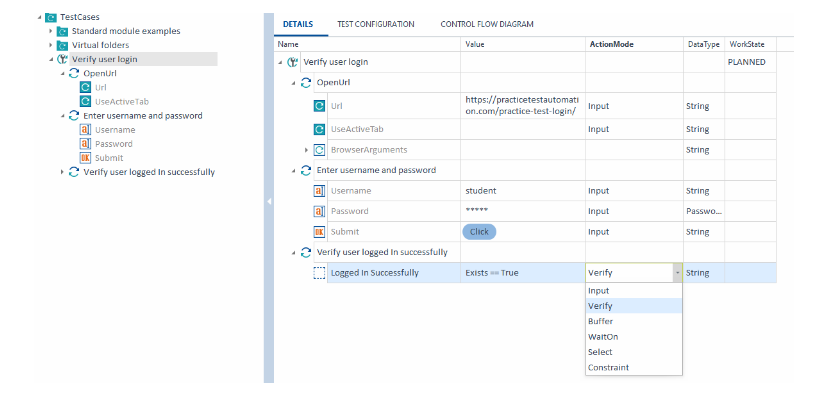
Input (Standard): Enters values into test objects (e.g., text fields, dropdowns).
Verify: Checks if test object values match expected results.
Buffer: Captures and stores data from test objects for later use.
WaitOn: Pauses execution until a specific condition is met on a test object.
Constraint: Defines conditions for filtering or selecting rows in tables.
Select: Selects items or rows in lists, grids, or tables based on criteria.
- Parameterize Test Steps: Include parameters to make tests flexible and based on data. This helps you run tests with various inputs.
Step 1: Create a Test Sheet in Test Case Design
- Go to the Test Case Design section in Tosca.
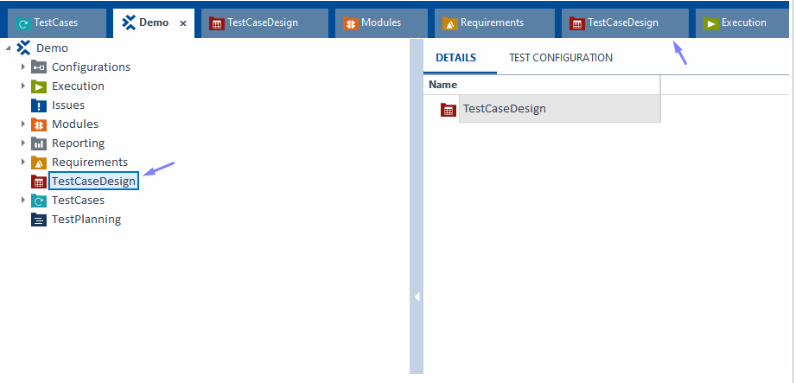
- Create a New Test Sheet: Right-click on the Test Case Design folder and select
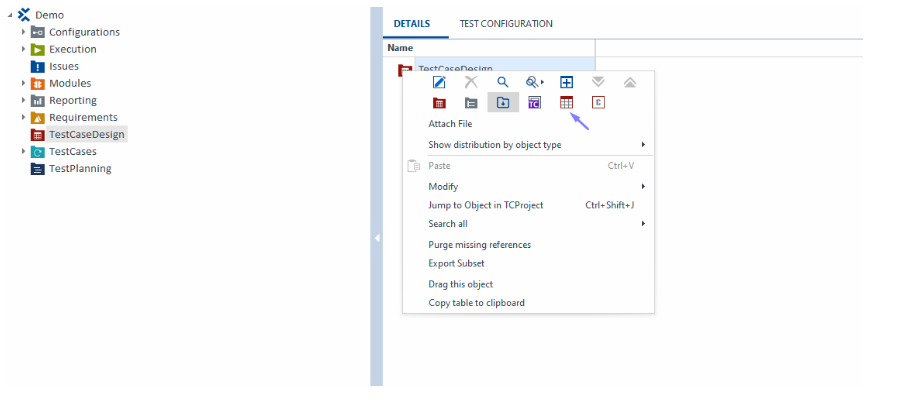
- Create Test Sheet Name your test sheet, e.g., “Environment Test Data.”
-
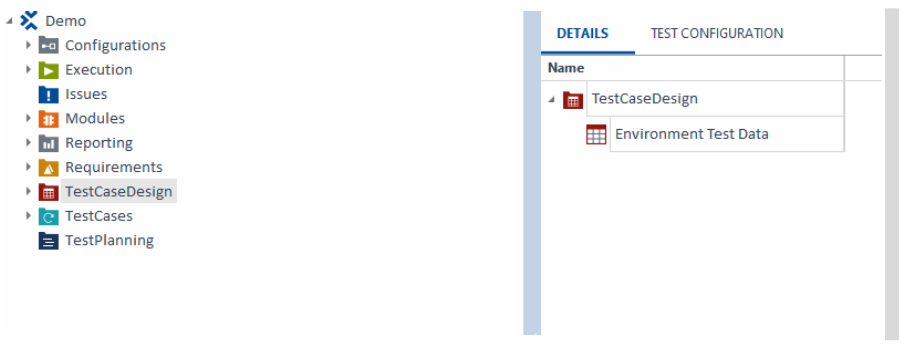
- Add Test Cases/Parameters to the Test Sheet:
- Add rows for the different environments (QA, Prod, and Test) with their respective values.
1.Right click on the sheet > Create Instance
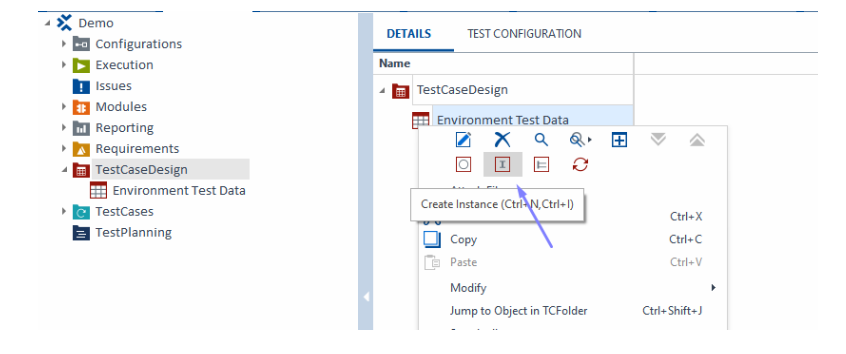
2.Create your own instance e.g., “QA, PROD”
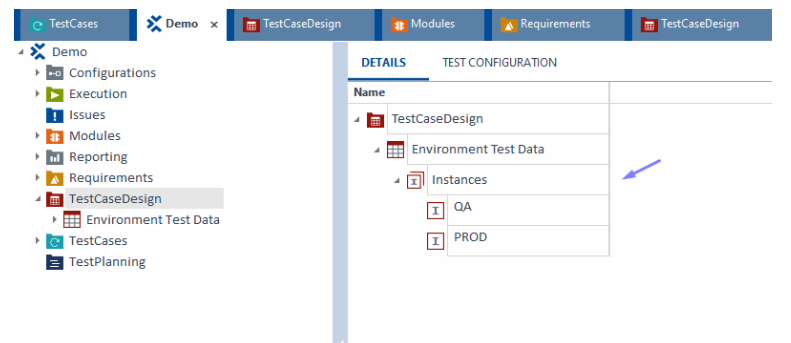
3.Double-click on the sheet for a more detailed instance view.
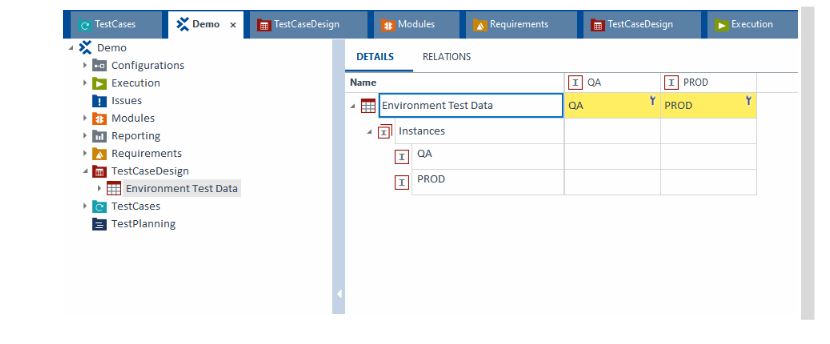
4.Right click on the sheet > Create Attribute
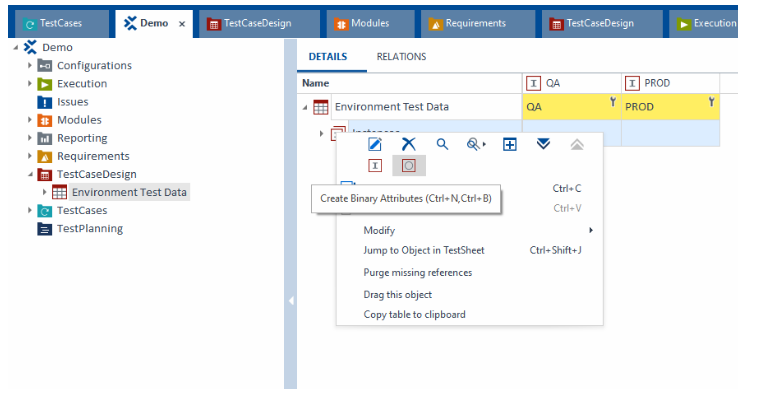
5.Inside the attribute, add parameters (e.g., URL, Username, Password).
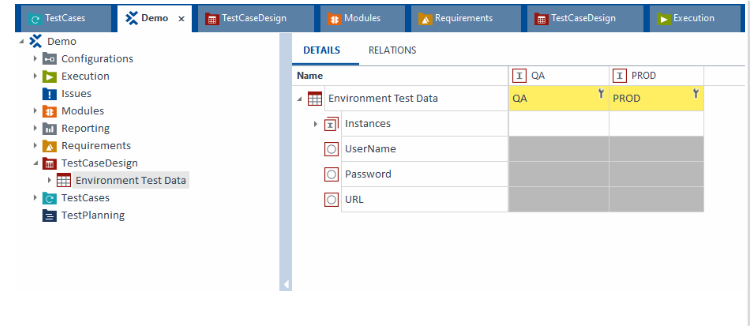
6.For single attributes, we can add multiple instance values [Right click on the attribute > click create instance]
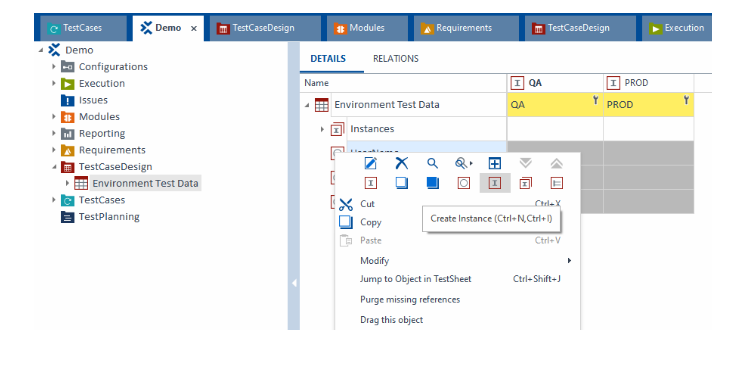
7.We can create a multiple instance (Test data) for single attribute
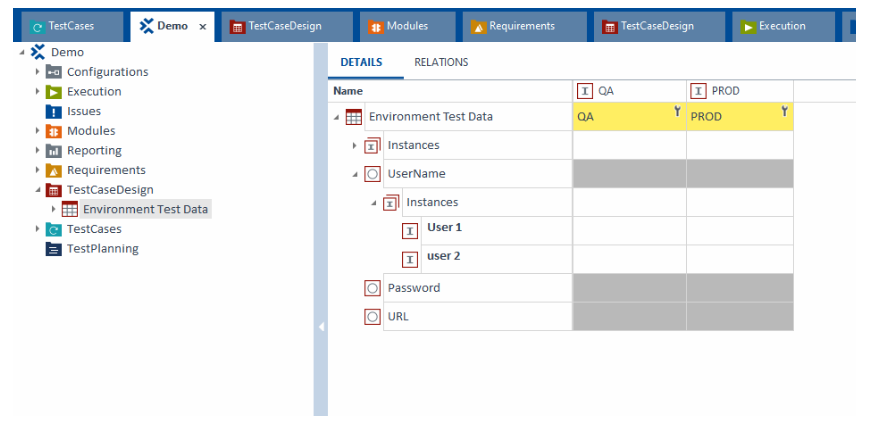
8.And select user 1 or user 2 according to you test case from drop-down
Note: Newly added instance will be displayed under the attribute drop-down
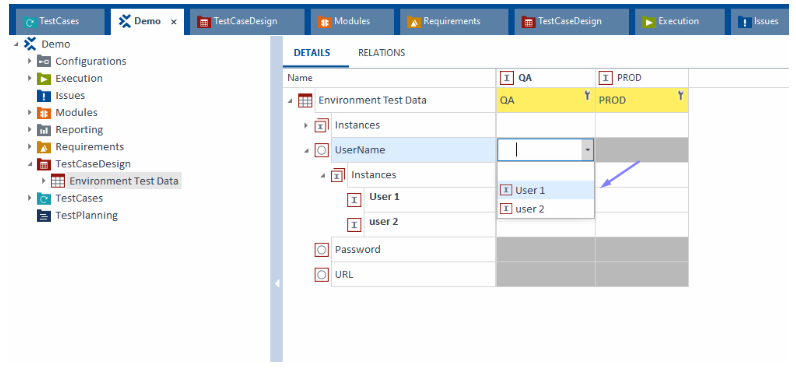
Step 2: Create Buffers and Link to Test Case
- Create Test Case: Open Tosca, right-click the desired folder, choose Create Test Case, and name it has “Buffer”.
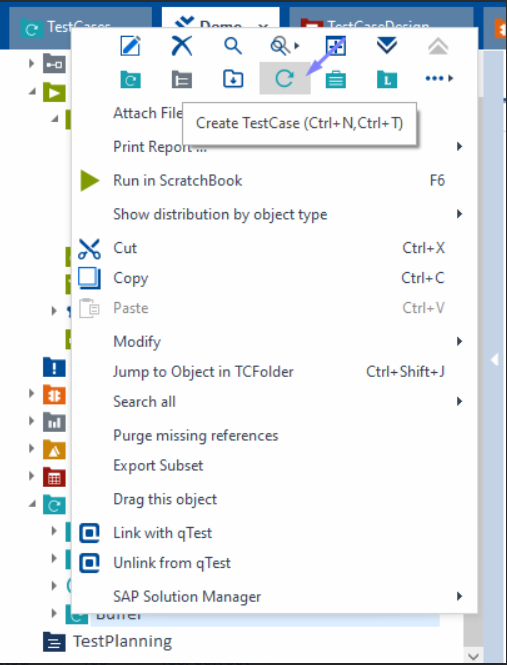
- Add Set Buffer Module: In Modules, locate Standard modules >TBox Automation Tools>Buffer Operations>TBox Set Buffer and drag it into the test case.
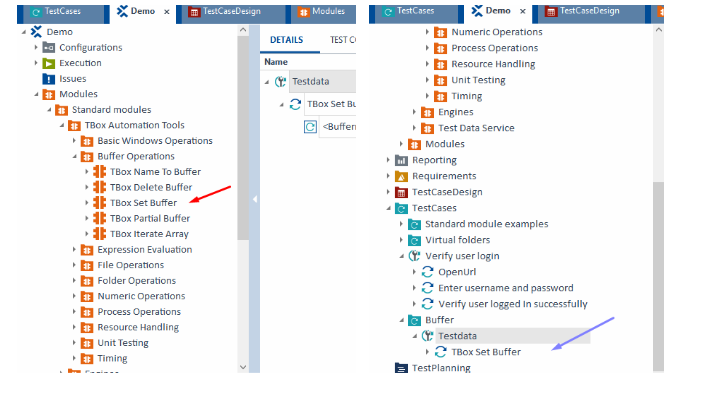
- Convert Test Case to Template: Right-click on the test case, select Convert to Template. This action makes the test case reusable with different data.
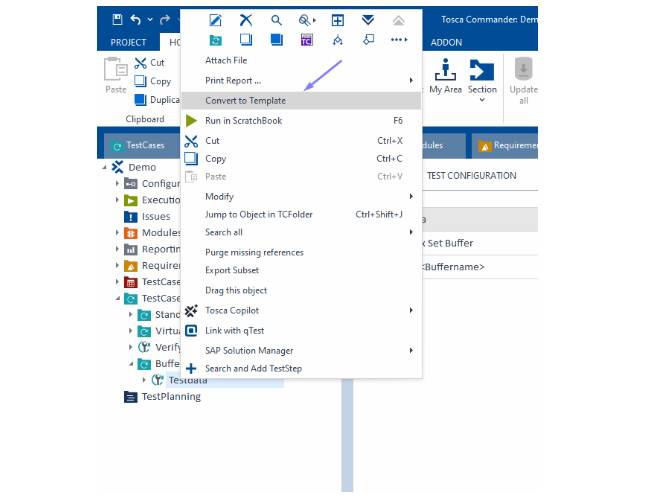
- Drag and drop, to map the test sheet from Test Case Design to the Test Case Template
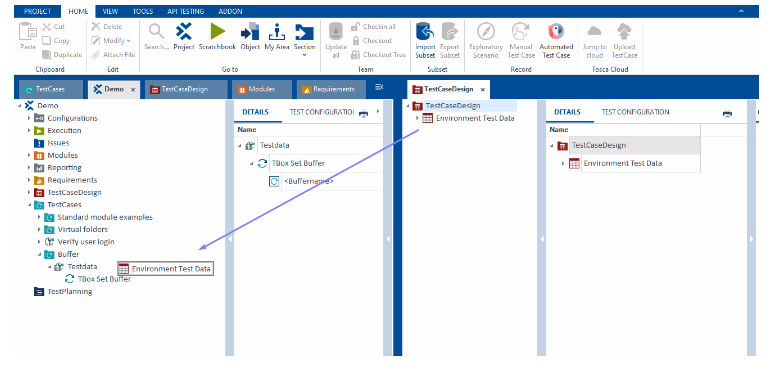
- After mapping the test sheet to the template test case, you can assign the test sheet attributes to buffer values for reuse within the test steps
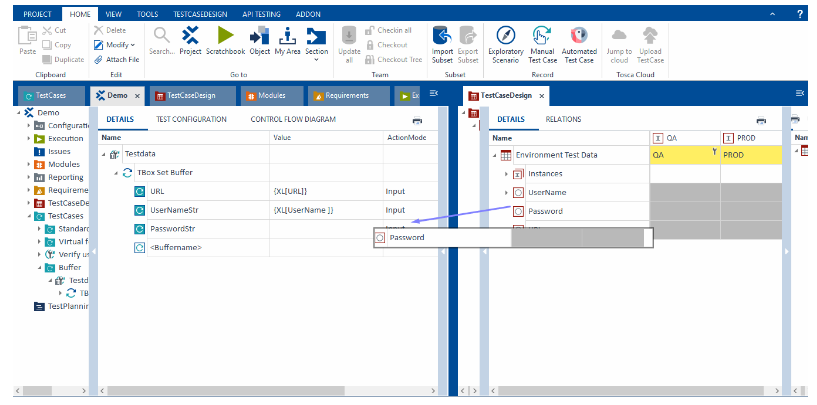
- Now, you can generate template instances for the created instance, Right-click on the Template Test Case and click > Create TemplateInstance.
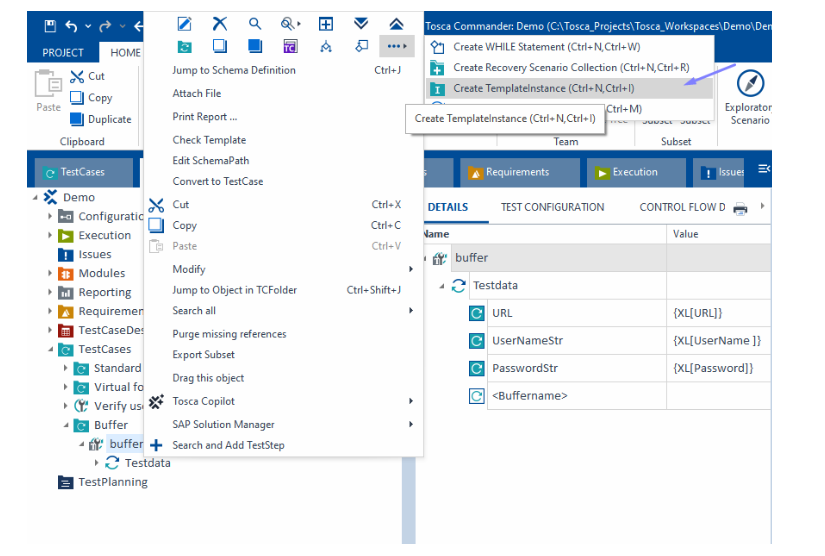
- Tosca will create separate instances under the template test case, each instance populated with data from one row in the test sheet.
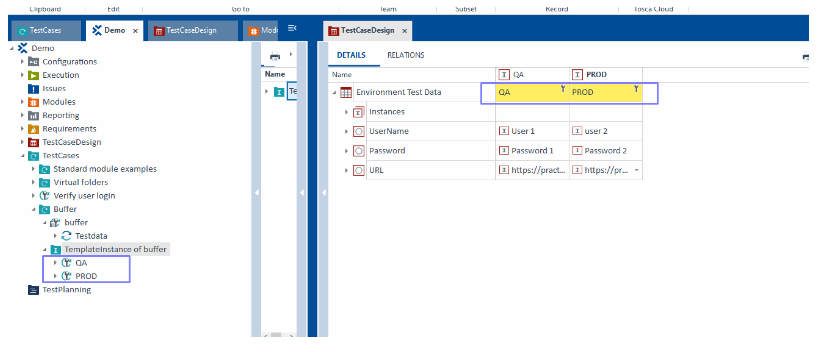
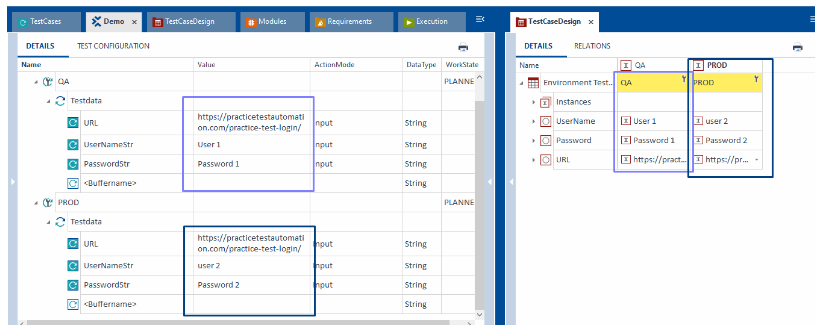
Step 3: Run the Test Case and View Buffer Values in Tosca
Run the test case and view buffer values in Tosca:
- Navigate to the Template Test Case Instances:
-Go to Test Cases in Tosca and locate the instances generated from your template test case.
- Run the Test Case:
-Right-click on an instance (or the template test case itself) and select Run.
-Tosca will execute the test case using the data from the test sheet, which has been mapped to buffers.
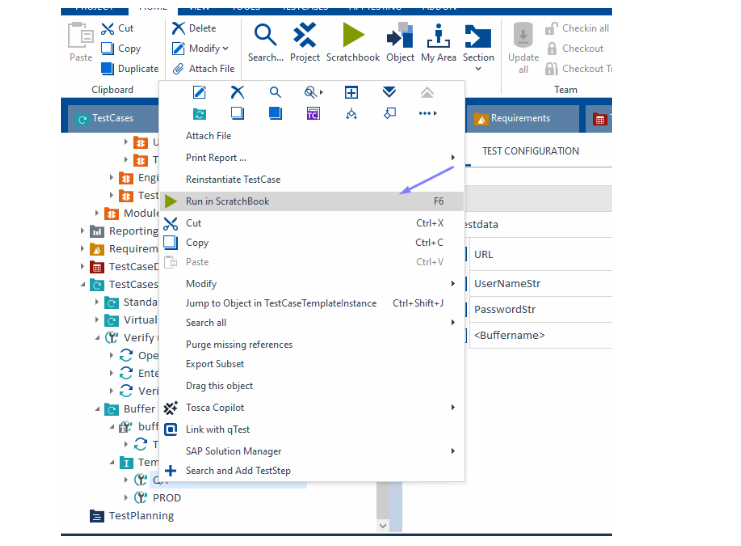
- Check the Execution Log:
-After execution completes, right-click on the instance or test case and select Execution Log.
-In the Execution Log, you’ll see detailed results for each test step. This allows you to confirm that the correct buffer values were applied during each step.
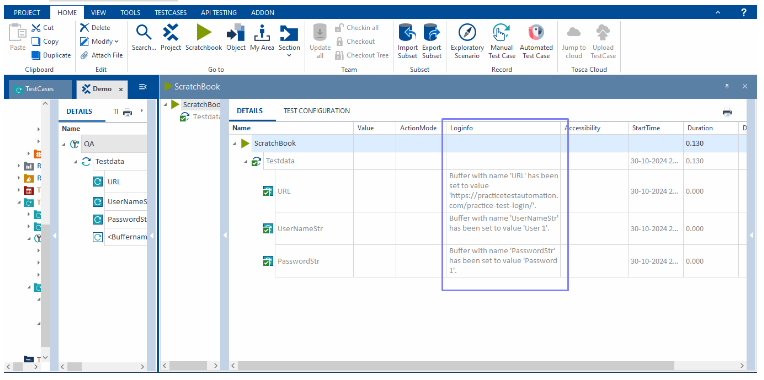
- Open the Buffer Viewer:
-To further inspect the buffer values, open the Buffer Viewer:
-Go to Tools > Buffer (or click on the Buffer Viewer icon in the toolbar).
-The Buffer Viewer will display all buffer values currently stored for the test case, including the values populated from the test sheet.
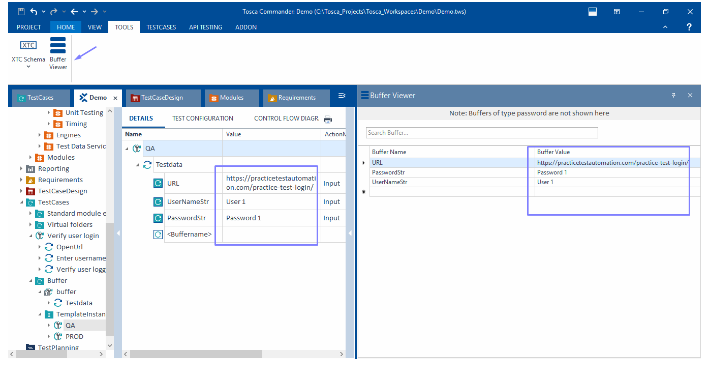
- Verify Buffer Values in Buffer Viewer:
-In the Buffer Viewer, locate and confirm the buffer names (e.g., URL_Buffer, Username_Buffer) and their corresponding values. These should match the values from the test sheet for the executed instance.
-Verify that each buffer holds the correct data based on the test sheet row for the selected instance (e.g., QA, Prod, Test environment data).
- Re-run as Needed:
-If needed, you can re-run other instances to verify that different buffer values are correctly populated for each environment or row.
Step 4: Using Buffers in Test Cases
- In any test step where you want to use a buffered value, type {B[BufferName]} (replace BufferName with the actual name of your buffer).
- For example, if you created a buffer called URL, use {B[URL]} in the relevant test step field to retrieve the buffered URL.
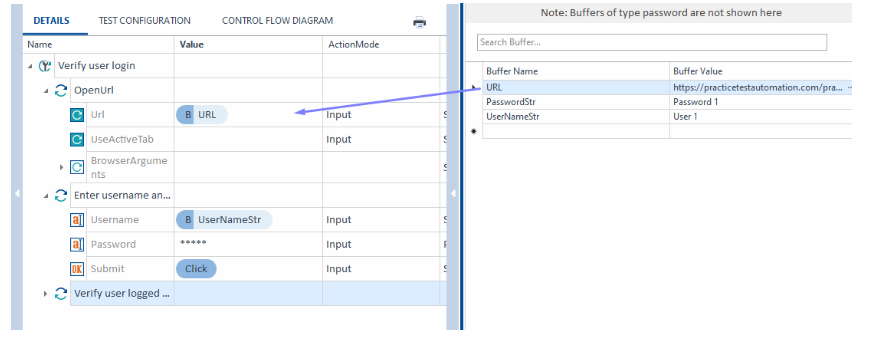
Step 5: Build Reusable Libraries and Test Step Blocks
- Create Libraries: Build libraries or testing steps that can be reused. This saves time and reduces work that needs to be done repeatedly.
- Divide and Organize: Arrange reusable sections so you can use them in various test cases and projects.
Step 6: Execute Test Cases
In Tosca, test cases can be executed in two main ways:
| Feature |
Scratchbook |
Execution List |
| Purpose |
For ad-hoc or quick test runs during development and troubleshooting. |
Designed for formal, repeatable test runs as part of a structured suite. |
| Persistence of Results |
Temporary results; they are discarded once you close Tosca or re-run the test case. |
Persistent results; saved to Tosca’s repository for historical tracking, reporting, and analysis. |
| Control Over Execution |
Limited configuration; runs straightforwardly without detailed settings. |
Detailed execution properties, including priorities, data-driven settings, and environment configurations. |
| Suitability for CI/CD |
Not intended for CI/CD pipelines or automated execution schedules. |
Commonly used in CI/CD environments for systematic, automated testing as part of build pipelines. |
| Scheduling & Reusability |
Suitable for one-off runs; not reusable for scheduled or repeatable tests. |
Can be scheduled and reused across test cycles, providing consistency and repeatability. |
Steps to Execute TestCases in Scratchbook
- Select TestCases/TestSteps in Tosca’s TestCases section.
- Right-click and choose Run in Scratchbook.
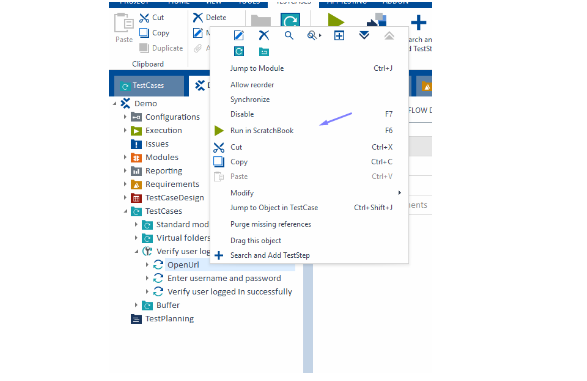
- View Results directly in Scratchbook (pass/fail status and logs).
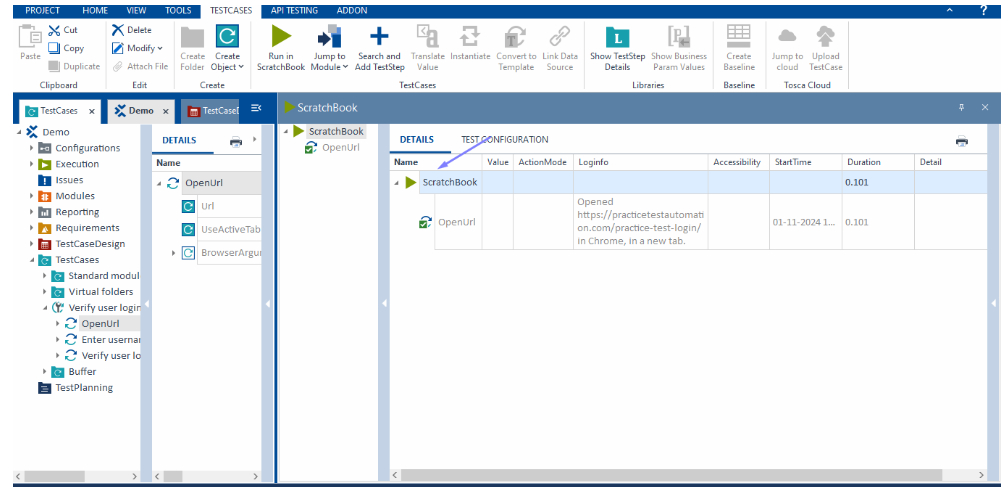
Steps to Set Up an Execution List in Tosca
- Identify the TestCases: Determine the test cases that need to be included based on the testing scope (e.g., manual, automated, API, or UI tests).
- Organize Test Cases in the Test Case Folder: Ensure all required test cases are organized within appropriate folders in the Test Cases section.
- Create an Execution List:
-Go to the Execution section of Tosca.
-Right-click > Create Execution List. Name the list based on your testing context (e.g., “Smoke Suite” or “Regression Suite”).
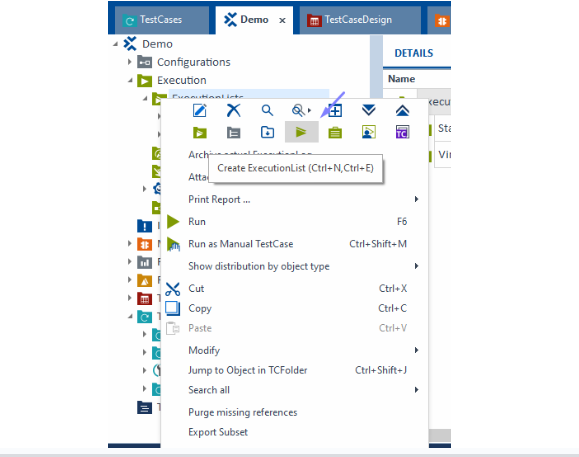
- Drag and Drop Test Cases:
-Navigate back to the TestCases section.
-Drag and drop the test cases (or entire test case folders if you want to include multiple tests) into your execution list in the Execution section.
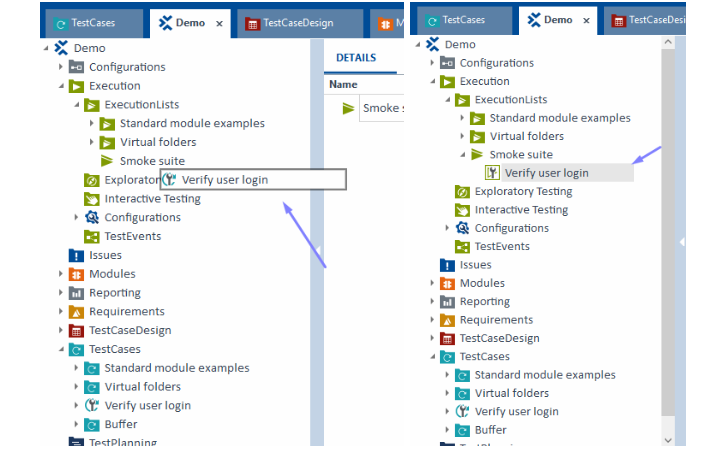
–Save and Execute: Save the execution list, then execute it by right-clicking and selecting Run.
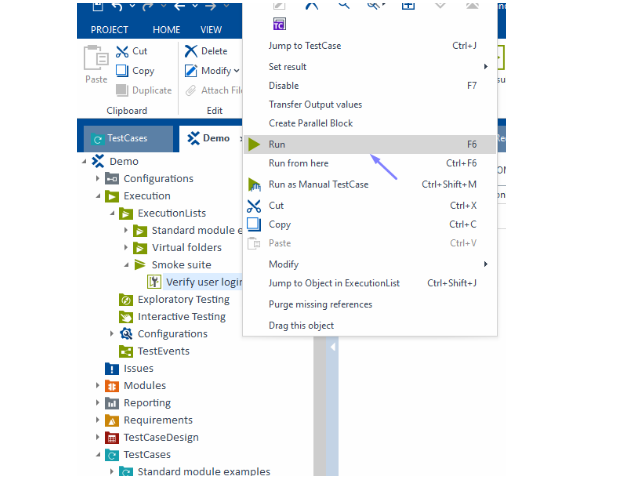
-The execution will start, and progress is shown in real-time.
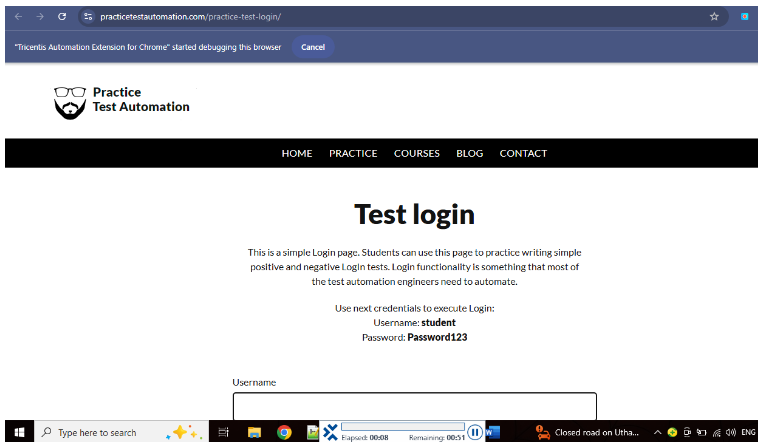
– After execution, you can view the pass/fail status and logs in Execution Results
- Navigate to Execution Results:
-Navigate back to the TestCases section.
-You’ll see each TestCase with a pass (green) or fail (red) status.
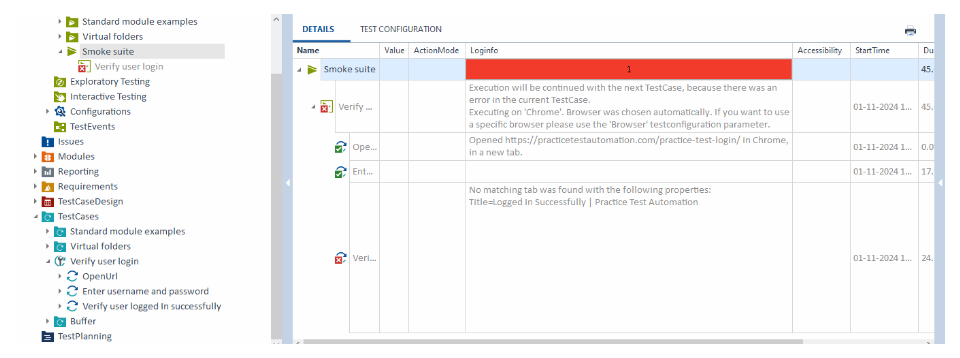
Step 7: Review and Validate Test Results
- Generate Reports:
-After execution, go to Execution Results.
-Right-click to print reports in various formats (Excel, PDF, HTML, etc.) based on your requirements.
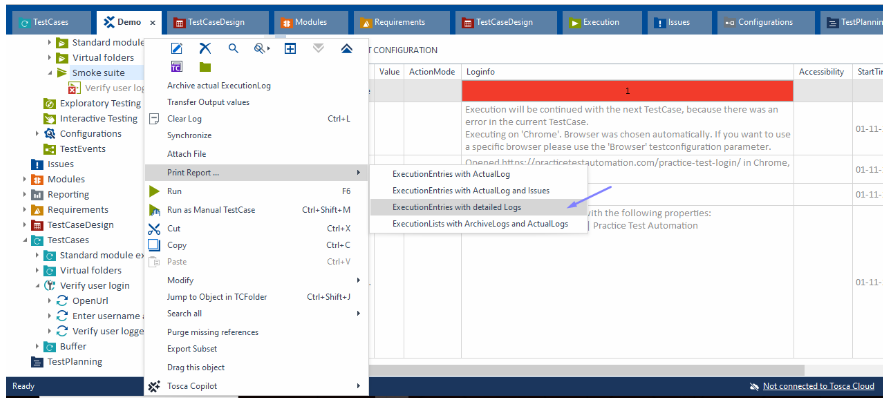
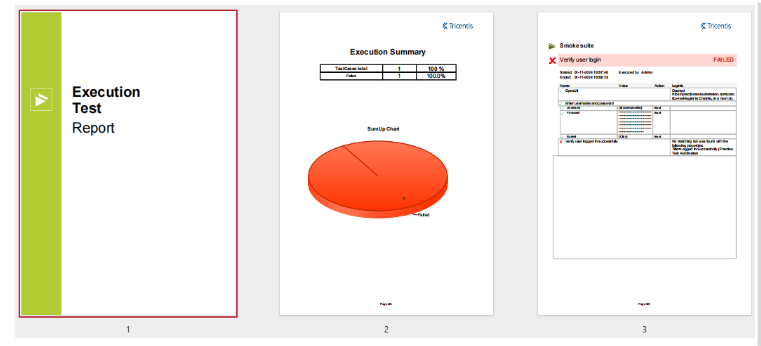
- Check Results: Use Tosca’s reporting tools to look at the test execution results. See if there are any issues.
- Record and Document Findings: Write down everything you find. This includes whether the tests pass or fail and any error details.
Step 8: Maintain and Update Models and Test Cases
- Get used to changes: Update your sections and test cases as your application grows. Make changes directly in the model.
- Make it easy to reuse: Keep improving your parts and libraries. This will help them remain usable and function well.
Benefits of using the Model-Based Approach in Tosca Automation
The benefits of using Tosca’s model-based approach are many. First, it greatly speeds up test automation. A major reason for this is reusability. When you create a module, you can use it for several test cases. This saves time and effort when making tests.
One big benefit is better software quality. A model-based approach helps teams build stronger and more complete Tosca test suites. The model provides a clear source of information. This allows the test cases to show how the application works correctly. It also helps find mistakes that may be missed otherwise.
Comparison of the Model-Based Approach with traditional methods of Tosca Automation
When you look at the model-based approach and compare it to the old Tosca automation methods, the benefits are clear. Traditional testing requires scripts. This means it takes a long time to create test suites. It is also hard to maintain them. As applications become more complex, this problem gets worse.
The model-based approach helps teams be flexible and quick. It allows them to adapt to changes smoothly. This is key for keeping up with the fast pace of software development. The back-and-forth process works well with modern development methods like Agile and DevOps.
Real-world examples of successful implementation of the Model-Based Approach in Tosca Automation
Many companies from different industries have had great success with Tosca’s model-based approach for automation. These real examples show the true benefits of this method in different environments and various applications.
| Industry |
Organization |
Benefits |
| Finance |
Leading Investment Bank |
Reduced testing time by 50%, Improved defect detection rates |
| Healthcare |
Global Healthcare Provider |
Accelerated time-to-market for critical healthcare applications |
| Retail |
E-commerce Giant |
Enhanced online shopping experience with improved application stability |
Conclusion
In conclusion, using the Model-Based Approach in Tosca Automation can really help with your testing. This method makes it easier to find objects and allows you to create reusable test libraries. With this approach, you will check your work and test more effectively. Following this method can lead to better efficiency and higher productivity in automation. Model-based testing with Tosca helps you design and run tests in a smart way. By trying this new approach, you can improve your automation skills and keep up in the fast-changing world of software testing. Companies like Codoid are continually innovating and delivering even better testing solutions, leveraging tools like Tosca to enhance automation efficiency and results. Check out the benefits and real examples to see what Tosca Automation offers with the Model-Based Approach.
Frequently Asked Questions
-
What Makes Tosca’s Model-Based Approach Unique?
Tricentis Tosca uses a model-based way to work. This helps teams get results quicker. It offers simple visual modeling. Test setup is easy and does not need scripts. Its powerful object recognition makes test automation easy. Because of this, anyone, whether they are technical or not, can use Tosca without problems.
-
How Does Tosca Automation Integrate with Agile and DevOps?
Tosca works well with agile and DevOps methods. It supports continuous testing and works nicely with popular CI/CD tools. This makes the software development process easier. It also helps teams get feedback faster.
-
Can Tosca Automation Support Continuous Testing?
Tosca Automation is an excellent software testing tool. It is designed for continuous testing. This tool allows tests to run automatically. It works perfectly with CI/CD pipelines. Additionally, it provides fast feedback for continuous integration.
-
What Resources Are Available for Tosca Automation Learners?
Tosca Automation learners can use many resources. These resources come from Tricentis Academy. You will find detailed documents, community forums, and webinars. This information supports Tosca test automation and shares best practices.


