Claude Code to Testing is becoming a useful solution for QA engineers and automation testers who want to create tests faster, reduce repetitive work, and improve release quality. As software teams ship updates more frequently, test engineers are expected to maintain reliable automation across web applications, APIs, and CI/CD pipelines without slowing delivery. This is why Claude Code to Testing is gaining attention in modern QA workflows.
It helps teams move faster with tasks like test creation, debugging, and workflow support, while allowing engineers to focus more on coverage, risk analysis, edge cases, and release confidence. Instead of spending hours on repetitive scripting and maintenance, teams can streamline their testing efforts and improve efficiency. In this guide, you will learn how Claude Code to Testing supports Selenium, Playwright, Cypress, and API testing workflows, where it adds the most value, and why human review remains essential for building reliable automation.
Claude Code is Anthropic’s coding assistant for working directly with projects and repositories. According to Anthropic, it can understand your codebase, work across multiple files, run commands, and help build features, fix bugs, and automate development tasks. It is available in the terminal, supported IDEs, desktop, browser, Slack, and CI/CD integrations.
For automation testers, that matters because testing rarely lives in one place. A modern QA workflow usually spans the following:
UI automation code
API test suites
Configuration files
Test data
CI pipelines
Logs and stack traces
Framework documentation
Claude Code fits well into that reality because it is designed to work with the project itself, not just answer isolated questions.
Why It Matters for Test Engineers
Test automation often includes work that is important but repetitive:
Creating first-draft test scripts
Converting raw scripts into page objects
Debugging locator or timing issues
Generating edge-case test data
Wiring tests into pull request workflows
Documenting framework conventions
Claude Code can reduce time spent on those tasks, while the engineer still owns the testing strategy, business logic validation, and final quality bar. That human-plus-AI model is the safest and most effective way to use it.
Key Capabilities of Claude Code to Testing Automation
1. Test Script Generation
Claude Code can create initial test scaffolding from natural-language prompts. Anthropic has specified that it is possible to use simple prompts such as “write tests for the auth module, run them, and fix any failures” to get the desired results. For QA teams, that makes it useful for generating starter tests in Selenium, Playwright, Cypress, or API frameworks.
2. Codebase Understanding
When you join a project or inherit a legacy framework, Claude Code can help explain structure, dependencies, and patterns. Anthropic’s workflow docs explicitly recommend asking for a high-level overview of a codebase before diving deeper. That is especially helpful when you need to learn a test framework quickly before extending it.
3. Debugging Support
Failing tests often come down to timing, selectors, environment drift, and test data problems. Claude Code can inspect code and error output, then suggest likely causes and fixes. It is particularly helpful for shortening the first round of investigation.
4. Refactoring and Framework Cleanup
Claude Code can help refactor large suites into cleaner patterns such as Page Object Model, utility layers, reusable fixtures, and more maintainable assertions. Anthropic lists refactoring and code improvements as core workflows.
5. CI/CD Assistance
Claude Code is also available in GitHub workflows, where Anthropic says it can analyze code, create pull requests, implement changes, and support automation in PRs and issues. That makes it relevant for teams that want tighter testing feedback inside code review and delivery pipelines.
Practical Ways to Use Claude Code to Testing Automation
1. Generate Selenium Tests Faster
Writing Selenium boilerplate can be slow, especially when you need to set up multiple page objects, locators, and validation steps. Claude Code can generate the first version from a structured prompt.
Prompt example:
Generate a Selenium test in Python using Page Object Model for a login flow.
Include valid login, invalid login, and empty-field validation.
This kind of output is not the finish line. It is the fast first-draft. Your team still needs to review selector quality, waits, assertions, test data handling, and coding standards. But it can remove a lot of repetitive setup work. That matches the productivity-focused use case in your source draft and Anthropic’s documented test-writing workflows.
2. Create Playwright Tests for Modern Web Apps
Playwright is a strong fit for fast, modern browser automation, and Claude Code can help generate structured tests for common user journeys.
Prompt example:
Create a Playwright test that verifies a shopper can open products, add one item to the cart, and confirm it appears in the cart page.
Starter example:
import { test, expect } from '@playwright/test';

test('add product to cart', async ({ page }) => {
 await page.goto('https://example.com');
 await page.click('text=Products');
 await page.click('text=Add to Cart');
 await page.click('#cart');
 await expect(page.locator('.cart-item')).toBeVisible();
});
This is useful when you want a baseline test quickly, then harden it with better locators, test IDs, fixtures, and assertions. The real value is not that Claude Code replaces test design. The value is that it speeds up the path from scenario idea to runnable draft.
3. Debug Flaky or Broken Tests
One of the best uses of Claude Code for testing automation is failure analysis.
When a Selenium or Playwright test breaks, engineers usually dig through the following:
Stack traces
Recent UI changes
Screenshots
Timing issues
Locator mismatches
Pipeline logs
Claude Code can help connect those clues faster. For example, if a Selenium test throws ElementNotInteractableException, it may suggest replacing a direct click with an explicit wait.
That does not guarantee the diagnosis is perfect, but it often gets you to the likely fix sooner. Anthropic’s docs explicitly position debugging as a core workflow, and your draft correctly identifies UI change, timing, selectors, and environment issues as common causes.
4. Turn Requirements Into Test Cases
Claude Code is also useful before you write any automation at all.
Give it a user story or acceptance criteria, such as:
Valid login
Invalid password
Locked account
Empty fields
It can turn that into:
Manual test cases
Automation candidate scenarios
Negative tests
Edge cases
Data combinations
That helps QA teams move faster from product requirements to test coverage plans. It is especially helpful for junior testers who need a framework for thinking through happy paths, validation, and exception handling.
Think of Claude Code like a fast first-pass test design partner.
A product manager says:
“Users should be able to reset their password by email.”
A junior QA engineer might only think of one test: “reset password works.”
Claude Code can help expand that into a fuller set:
Valid email receives reset link
Unknown email shows a safe generic response
Expired reset link fails correctly
Weak new password is rejected
Password confirmation mismatch shows validation
Reset link cannot be reused
That kind of expansion is where AI helps most. It broadens the draft, while the engineer decides what really matters for risk and release quality.
6. Improve CI/CD Testing Workflows
Claude Code is not limited to writing local scripts. Anthropic documents support for GitHub Actions and broader CI/CD workflows, including automation triggered in pull requests and issues. That makes it useful for teams that want to:
This kind of setup is a good starting point, especially for teams that know what they want but do not want to handwrite every pipeline file from scratch. Your draft’s CI/CD section fits well with Anthropic’s current GitHub Actions support.
The quality of Claude Code output depends heavily on the quality of your prompt. Anthropic’s best-practices guide stresses that the tool works best when you clearly describe what you want and give enough project context.
Use prompts like these:
Generate a Cypress test for checkout using existing test IDs and reusable commands.
Refactor this Selenium script into Page Object Model with explicit waits.
Analyze this flaky Playwright test and identify the most likely timing issue.
Create Python API tests for POST /login, including positive, negative, and rate-limit scenarios.
Suggest missing edge cases for this registration flow.
Review this test suite for brittle selectors and maintainability issues.
Prompting tips that work well
Name the framework
Specify the language
Define the exact scenario
Include constraints like POM, fixtures, or coding style
Paste the failing code or logs when debugging
Ask for an explanation, not just output
Benefits of Using Claude Code to Testing Automation
S. No
Benefit
What it means for QA teams
1
Faster script creation
Build first-draft tests in minutes instead of starting from zero
2
Better productivity
Spend less time on boilerplate and repetitive coding
3
Easier debugging
Get quick suggestions for locator, wait, and framework issues
4
Faster onboarding
Understand unfamiliar automation frameworks more quickly
5
Improved consistency
Standardize patterns like page objects, helpers, and reusable components
6
Better CI/CD support
Draft workflows and integrate testing deeper into pull requests
These benefits are consistent with both your draft and Anthropic’s published workflows around writing tests, debugging, refactoring, and automating development tasks.
Limitations You Should Not Ignore
Claude Code is powerful, but it should never be used blindly.
AI-generated test code still needs review
Selector reliability
Assertion quality
Hidden false positives
Test independence
Business logic accuracy
Context still matters
Long debugging sessions with large logs may reduce accuracy unless prompts are focused.
Security matters
If your test repository includes sensitive code, credentials, or regulated data, permission settings and review practices matter.
Over-automation is a real risk
Not every test should be automated. Teams must decide what to automate and what to test manually.
Best Practices for Using Claude Code in a Testing Team
1. Treat it as a coding partner, not a replacement
Claude Code is best at accelerating execution, not owning quality strategy. Let the AI assist with implementation, while humans own risk, design, and approval.
2. Start with narrow, well-defined tasks
Good first wins include:
Writing one page object
Fixing one flaky test
Generating one API test file
Explaining one legacy test module
3. Keep prompts specific
Include the framework, language, target component, coding pattern, and expected result. Specific prompts reduce rework.
4. Review every generated change
Do not merge AI-generated tests without checking coverage, assertions, data handling, and long-term maintainability.
5. Standardize with project guidance
Anthropic highlights project-specific guidance and configuration as part of effective Claude Code usage. A team can define conventions for naming, locators, waits, fixtures, and review rules so the AI produces more consistent output.
Conclusion
Claude Code to Testing automation is most valuable when it is used to remove friction, not replace engineering judgment. It can help you build Selenium and Playwright tests faster, debug flaky automation, turn requirements into structured test cases, and improve CI/CD support. For QA teams under pressure to move faster, that is a meaningful advantage. The strongest teams will not use Claude Code as a shortcut to avoid thinking. They will use it as a force multiplier: a practical assistant for repetitive work, faster drafts, and quicker troubleshooting, while humans stay responsible for test strategy, business accuracy, and long-term framework quality. That is where AI-assisted testing becomes genuinely useful.
Start building faster, smarter test automation with AI. See how Claude Code for Testing can transform your QA workflow today.
Claude Code can help QA engineers generate test scripts, explain automation frameworks, debug failures, refactor test code, and support CI/CD automation. Anthropic’s official docs specifically mention writing tests, fixing bugs, and automating development tasks.
Can Claude Code write Selenium, Playwright, or Cypress tests?
Yes. While output quality depends on your prompt and project context, Claude Code is well-suited to generating first-draft tests and helping refine them across common testing frameworks. Your draft examples for Selenium and Playwright are a good practical fit for that workflow.
Is Claude Code good for debugging flaky tests?
It can be very helpful for first-pass debugging, especially when you provide stack traces, failure logs, and code snippets. Anthropic’s common workflows include debugging as a core use case.
Can Claude Code help with CI/CD testing?
Yes. Anthropic documents Claude Code support for GitHub Actions and CI/CD-related workflows, including automation in pull requests and issues.
Is Claude Code safe to use with private repositories?
It can be, but teams should follow Anthropic’s security guidance: review changes, use permission controls, and apply stronger isolation practices for sensitive codebases. Local sessions keep code execution and file access local, while cloud environments use separate controls.
Does Claude Code replace QA engineers?
No. It speeds up implementation and investigation, but it does not replace human judgment around product risk, edge cases, business rules, exploratory testing, and release confidence. Anthropic’s best-practices and security guidance both reinforce the need for human oversight.
Desktop Automation Testing continues to play a critical role in modern software quality, especially for organizations that rely heavily on Windows-based applications. While web and mobile automation dominate most conversations, desktop applications still power essential workflows across industries such as banking, healthcare, manufacturing, and enterprise operations. As a result, ensuring their reliability is not optional; it is a necessity. However, testing desktop applications manually is time-consuming, repetitive, and often prone to human error. This is exactly where WinAppDriver steps in.
WinAppDriver, also known as Windows Application Driver, is Microsoft’s automation tool designed specifically for Windows desktop applications. More importantly, it follows the WebDriver protocol, which means teams already familiar with Selenium or Appium can quickly adapt without learning an entirely new approach. In other words, WinAppDriver bridges the gap between traditional desktop testing and modern automation practices.
In this guide, you will learn how to set up WinAppDriver, create sessions, locate elements, handle popups, perform UI actions, and build real automation tests using C#. Whether you are just getting started or looking to strengthen your desktop automation strategy, this guide will walk you through everything step by step.
At its core, WinAppDriver is a UI automation service for Windows applications. It allows testers and developers to simulate real user interactions such as clicking buttons, entering text, navigating windows, and handling dialogs.
What makes it particularly useful is its ability to automate multiple types of Windows applications, including:
Because of this wide support, WinAppDriver fits naturally into enterprise environments where different technologies coexist.
Even better, it follows the same automation philosophy used in Selenium. So instead of reinventing the wheel, you can reuse familiar concepts like:
Driver sessions
Element locators
Actions (click, type, select)
Assertions
This familiarity significantly reduces the learning curve and speeds up adoption.
Why Use WinAppDriver for Desktop Automation Testing?
Before diving into implementation, it is important to understand why WinAppDriver is worth using.
First, it provides a standardized way to automate desktop UI interactions. Without it, teams often rely on manual testing or fragmented tools that are hard to maintain.
Second, it supports multiple programming languages such as:
C#
Java
Python
JavaScript
Ruby
This flexibility allows teams to integrate WinAppDriver into their existing tech stack without disruption.
Additionally, WinAppDriver works well for real-world scenarios. Desktop applications often include:
Multiple windows
Popups and dialogs
Keyboard-driven workflows
System-level interactions
WinAppDriver is built to handle these complexities effectively.
Installing WinAppDriver
Getting started with WinAppDriver is straightforward. First, download the installer:
WindowsApplicationDriver.msi
Once downloaded, follow the standard installation process:
Double-click the installer
Follow the setup wizard
Accept the license agreement
Complete installation
By default, WinAppDriver is installed at:
C:\Program Files (x86)\Windows Application Driver
Before running any tests, make sure to enable Developer Mode in Windows settings. This step is essential and often overlooked.
Launching WinAppDriver
After installation, the next step is to start the WinAppDriver server.
You can launch it manually:
Search for Windows Application Driver in the Start menu
Right-click and select Run as Administrator
Alternatively, you can start it programmatically, which is useful for automation frameworks:
Using a code-based startup ensures consistency and removes manual dependency during test execution.
Creating an Application Session
Once the server is running, you need to create a session to interact with your application.
Here’s a basic example:
AppiumOptions options = new AppiumOptions();

options.AddAdditionalCapability("app", @"C:\notepad.exe");

options.AddAdditionalCapability("deviceName", "WindowsPC");

WindowsDriver<WindowsElement> driver =
new WindowsDriver<WindowsElement>(
new Uri("http://127.0.0.1:4723"), options);
This step is critical because it establishes the connection between your test and the application. Without a valid session, no automation can take place.
Working with Windows and Application State
Desktop applications often involve multiple windows. Therefore, handling window state becomes essential.
For example, you can retrieve the current window title:
Using keyboard actions makes your tests more realistic and closer to actual user behavior.
Creating a Desktop Root Session
Sometimes, you need to interact with the entire desktop instead of a single app.
Here’s how you create a root session:
var options = new AppiumOptions();

options.AddAdditionalCapability("app", "Root");

options.AddAdditionalCapability("deviceName", "WindowsPC");

var session = new WindowsDriver<WindowsElement>(
new Uri("http://127.0.0.1:4723"), options);
This approach is particularly useful for:
File dialogs
System popups
External windows
Required NuGet Packages
Appium.WebDriver
NUnit
NUnit3TestAdapter
Microsoft.NET.Test.Sdk
Complete NUnit Test Example
using NUnit.Framework;
using OpenQA.Selenium.Appium;
using OpenQA.Selenium.Appium.Windows;
using System;

namespace WinAppDriverDemo
{
  [TestFixture]
  public class NotepadTest
  {
      private WindowsDriver<WindowsElement> driver;

      [SetUp]
      public void Setup()
      {
          AppiumOptions options = new AppiumOptions();

          options.AddAdditionalCapability("app", @"C:\Windows\System32\notepad.exe");
          options.AddAdditionalCapability("deviceName", "WindowsPC");

          driver = new WindowsDriver<WindowsElement>(
              new Uri("http://127.0.0.1:4723"),
              options);

          driver.Manage().Timeouts().ImplicitWait = TimeSpan.FromSeconds(5);
      }

      [Test]
      public void EnterTextInNotepad()
      {
          WindowsElement textArea = driver.FindElementByClassName("Edit");

          textArea.SendKeys("Hello WinAppDriver Automation");

          string title = driver.Title;
          Assert.IsTrue(title.Contains("Notepad"));
      }

      [TearDown]
      public void TearDown()
      {
          driver.Quit();
      }
  }
}
A ready element is better than a rushed interaction
A dedicated session is better than forcing one session to handle everything
These small decisions significantly reduce flaky tests and improve long-term maintainability.
Conclusion
WinAppDriver provides a powerful yet approachable way to implement Desktop Automation Testing for Windows applications. It combines the familiarity of WebDriver with the flexibility needed for real desktop environments. By following the right setup, using stable locators, handling popups correctly, and structuring tests properly, teams can build reliable automation frameworks that scale over time. Ultimately, success with WinAppDriver is not just about tools it is about building a strategy that prioritizes stability, clarity, and maintainability.
Want to build a reliable WinAppDriver framework for your team? Get expert guidance tailored to your use case.
WinAppDriver is used for Desktop Automation Testing of Windows applications. It allows testers to automate UI interactions such as clicking buttons, entering text, and handling windows in Win32, WPF, and UWP apps.
How does WinAppDriver work?
WinAppDriver works using the WebDriver protocol, similar to Selenium. It creates a session between the test script and the Windows application, allowing automation of user actions like clicks, typing, and navigation.
Which applications can be automated using WinAppDriver?
WinAppDriver supports automation for multiple Windows application types, including:
Win32 applications
WPF (Windows Presentation Foundation) apps
UWP (Universal Windows Platform) apps
This makes it suitable for both legacy and modern desktop applications.
What is the best locator strategy in WinAppDriver?
The most reliable locator strategy in WinAppDriver is AccessibilityId. It provides stable and maintainable element identification. XPath can also be used, but it is less stable and should be avoided when possible.
Can WinAppDriver handle popup windows and dialogs?
Yes, WinAppDriver can handle popup windows by switching between window handles. For system-level dialogs, a Desktop Root Session can be used to interact with elements outside the main application.
Is WinAppDriver similar to Selenium?
Yes, WinAppDriver is similar to Selenium because both use the WebDriver protocol. The main difference is that Selenium automates web browsers, while WinAppDriver automates Windows desktop applications.
Modern software teams are expected to deliver high-quality applications faster than ever. However, as desktop applications become more complex, relying only on manual testing can slow down release cycles and increase the risk of defects. This is where understanding the TestComplete features becomes valuable for QA teams looking to automate their testing processes efficiently. TestComplete, developed by SmartBear, is a powerful automation tool designed to test desktop, web, and mobile applications. It is especially known for its strong desktop testing capabilities, supporting technologies like .NET, WPF, Java, and Delphi. With features such as keyword-driven testing, intelligent object recognition, and multi-language scripting, TestComplete helps teams automate repetitive tests, improve test coverage, and deliver more reliable software releases.
In this guide, we’ll walk through the key TestComplete features, explain how they work, and compare them with other automation tools. By the end, you’ll have a clear understanding of how TestComplete helps QA teams automate desktop applications faster and more reliably.
TestComplete is a functional UI test automation tool created by SmartBear. It allows teams to automate end-to-end tests for:
Desktop applications
Web applications
Mobile applications
QA teams typically use TestComplete for tasks like:
Regression testing
UI validation
Functional testing
End-to-end workflow testing
One of the most attractive aspects of TestComplete is its flexibility in scripting languages. Teams can write automation scripts using:
Python
JavaScript
VBScript
JScript
DelphiScript
C++Script
C# Script
This flexibility makes it easier for teams to integrate TestComplete into existing testing frameworks and workflows.
Key TestComplete Features for Desktop Test Automation
Intelligent Object Recognition
One of the most impressive TestComplete features is its object recognition capability.
Instead of interacting with UI elements based on fragile screen coordinates, TestComplete identifies application components based on their properties and hierarchy.
In simpler terms, the tool understands the structure of the application UI. So even if the layout changes slightly, the automation script can still locate the correct elements.
Why this matters
Without strong object recognition, automation scripts often break when developers update the interface. TestComplete reduces this problem significantly.
Example
Imagine testing a desktop login form.
A coordinate-based test might click on a button like this:
Click (X:220, Y:400)
But if the interface changes, the script fails.
With TestComplete, the script targets the object itself:
Aliases.MyApp.LoginButton.Click()
This approach makes automation far more reliable and easier to maintain.
Keyword-Driven Testing (Scriptless Automation)
Not every tester is comfortable writing code. TestComplete solves this by offering keyword-driven testing.
Instead of writing scripts, testers can create automated tests using visual steps such as:
Click Button
Enter Text
Verify Property
Open Application
These steps are arranged in a structured workflow that defines the automation process.
Why QA teams like this feature
Keyword testing allows manual testers to participate in automation, which helps teams scale their automation efforts faster.
Benefits include:
Faster test creation
Lower learning curve
Better collaboration between testers and developers
Multiple Scripting Language Support
Another major advantage of TestComplete is that it supports multiple scripting languages.
Different teams prefer different languages depending on their technology stack.
S. No
Language
Why Teams Use It
1
Python
Popular for automation frameworks
2
JavaScript
Familiar for many developers
3
VBScript
Common in legacy enterprise environments
4
C# Script
Useful for .NET applications
This flexibility allows organizations to choose the language that best fits their workflow.
Record and Playback Testing
For teams just starting with automation, TestComplete’s record-and-playback feature is extremely helpful.
Here’s how it works:
Start recording a test session
Perform actions in the application
Save the recording
Replay the test whenever needed
The tool automatically converts recorded actions into automation steps.
When is this useful?
Record-and-playback works well for:
Simple regression tests
UI workflows
Quick automation prototypes
However, most mature QA teams combine recorded tests with custom scripts to make them more stable.
Cross-Platform Testing Support
Although TestComplete is widely known for desktop automation, it also supports testing across multiple platforms.
Teams can automate tests for:
Desktop applications
Web applications
Mobile apps
This allows organizations to maintain one centralized automation platform instead of managing multiple tools.
Supported desktop technologies
Windows Forms
WPF
.NET
Java
Delphi
C++
This makes it especially useful for enterprise desktop applications that have been around for years.
Data-Driven Testing
Another powerful feature is data-driven testing, which allows the same test to run with multiple data inputs.
Instead of creating separate tests for each scenario, testers can connect their automation scripts to external data sources.
Common data sources include:
Excel spreadsheets
CSV files
Databases
Built-in data tables
With data-driven testing, one script can validate all these scenarios automatically.
This approach significantly reduces duplicate tests and improves coverage.
Detailed Test Reports and Logs
Understanding why a test failed is just as important as running the test itself.
TestComplete generates detailed execution reports that include:
Test steps performed
Screenshots of failures
Execution time
Error messages
Debug logs
These reports make it easier for QA teams and developers to identify and fix issues quickly.
CI/CD Integration
Modern software teams rely heavily on continuous integration and continuous delivery pipelines.
TestComplete integrates with popular CI/CD tools such as:
Jenkins
Azure DevOps
Git
Bitbucket
TeamCity
This allows automation tests to run automatically during:
Code commits
Build pipelines
Release validation
The result is faster feedback and improved release confidence.
TestComplete is often the preferred choice for teams that need reliable desktop automation and enterprise-level capabilities.
Example: Automating a Desktop Banking System
Consider a QA team working on a desktop banking application.
Before automation, the team manually tested features like:
User login
Transaction processing
Account updates
Report generation
Regression testing took two to three days every release cycle.
After implementing TestComplete:
Login tests were automated using keyword testing.
Transaction workflows were scripted using Python.
Multiple users were tested through data-driven testing.
Tests were integrated with Jenkins pipelines.
Regression testing time dropped from three days to just a few hours.
This allowed the team to release updates faster without sacrificing quality.
Benefits of Using TestComplete
S. No
Benefit
Description
1
Faster Automation
Record and keyword testing speed up automation
2
Lower Maintenance
Smart object recognition reduces broken tests
3
Flexible Scripting
Multiple language support
4
DevOps Friendly
CI/CD integrations available
5
Enterprise Ready
Handles large and complex applications
Best Practices for Using TestComplete
Use object mapping – Organize UI elements in a repository for better test stability.
Combine keyword and scripted tests – Use keyword tests for simple workflows and scripts for complex scenarios.
Implement data-driven testing – Improve test coverage without duplicating scripts.
Integrate with CI/CD – Run automation tests during build pipelines.
Maintain clear reporting – Use logs and screenshots to quickly identify failures.
Conclusion
TestComplete offers a powerful set of features that make desktop test automation faster, more reliable, and easier to scale. With capabilities like intelligent object recognition, keyword-driven testing, multi-language scripting, and CI/CD integration, it helps QA teams automate complex workflows while reducing manual effort. For organizations that rely heavily on Windows desktop applications, TestComplete provides the flexibility and stability needed to build efficient automation frameworks. When implemented with the right testing strategy, it can significantly improve test coverage, speed up regression cycles, and support faster, high-quality software releases.
Looking to improve your desktop test automation with TestComplete? Our QA experts can help you build scalable automation solutions and enhance testing efficiency.
The main TestComplete features include intelligent object recognition, keyword-driven testing, record and playback automation, multi-language scripting, data-driven testing, detailed reporting, and CI/CD integration. These features help QA teams automate testing for desktop, web, and mobile applications efficiently.
Why are TestComplete features useful for desktop test automation?
TestComplete features are especially useful for desktop testing because the tool supports Windows technologies such as .NET, WPF, Java, and Delphi. Its object recognition engine allows testers to interact with UI elements reliably, reducing test failures caused by interface changes.
Does TestComplete require programming knowledge?
No, TestComplete does not always require programming skills. One of the most helpful TestComplete features is keyword-driven testing, which allows testers to create automated tests using visual steps without writing code.
Which programming languages are supported by TestComplete?
One of the flexible TestComplete features is its support for multiple scripting languages. Testers can write automation scripts using Python, JavaScript, VBScript, JScript, DelphiScript, C#Script, and C++Script.
How do TestComplete features support CI/CD testing?
TestComplete integrates with popular CI/CD tools such as Jenkins, Azure DevOps, and Git. These TestComplete features allow automated tests to run during build pipelines, helping teams identify issues early in the development process.
Is TestComplete better than Selenium for desktop testing?
For desktop automation, TestComplete is often considered more suitable because Selenium primarily focuses on web testing. The built-in TestComplete features provide stronger support for desktop UI automation and enterprise applications.
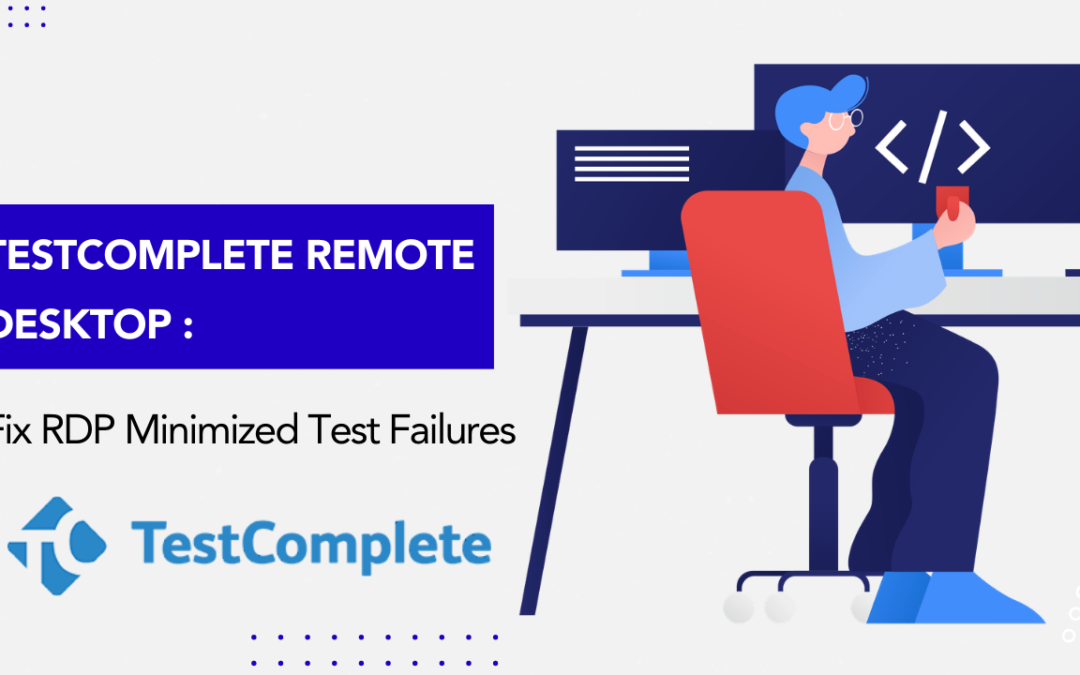
Automation testing helps software teams deliver reliable applications faster. By automating repetitive validation tasks, QA engineers can ensure that applications behave consistently across releases while reducing manual testing effort. However, teams performing TestComplete Remote Desktop testing on remote machines using Remote Desktop Protocol (RDP) often encounter an unexpected problem: automated GUI tests fail when the Remote Desktop session is minimized. This issue frequently affects testers using TestComplete, a powerful automation tool designed for desktop, web, and mobile testing. When running TestComplete automation remotely, engineers may assume that minimizing the Remote Desktop window should not affect the automation process. Unfortunately, Windows behaves differently.
When an RDP session is minimized, Windows automatically stops rendering the graphical interface of the remote machine. This optimization helps reduce resource usage, but it also causes problems for GUI-based automation tools. Since automation frameworks like TestComplete rely on visible UI elements such as buttons, text boxes, menus, and dialog windows, the automation engine can no longer interact with the application interface.
As a result, testers experience issues such as:
UI elements not being detected
Automated clicks failing
Object recognition errors
Tests stopping unexpectedly
For QA teams running automation in remote testing environments, CI/CD pipelines, or centralized test labs, this behavior can lead to unreliable test execution and wasted debugging time.
The good news is that this issue has a simple and reliable solution. By applying a small Windows registry tweak on the machine that initiates the Remote Desktop connection, testers can keep the remote GUI active even when the RDP window is minimized.
In this guide, we’ll explain:
Why TestComplete Remote Desktop Testing fails when RDP is minimized
How Windows handles remote GUI rendering
The registry fix that prevents automation failures
Best practices for running TestComplete tests on remote machines
How to build a stable remote automation environment
By the end of this article, you’ll have a clear understanding of how to run reliable TestComplete automation in Remote Desktop environments without interruptions.
Why TestComplete Remote Desktop Testing Fails When RDP Is Minimized
When automation tests run on a remote machine through Remote Desktop, the graphical interface of the system is transmitted to the client computer.
However, Windows introduces a performance optimization.
When the Remote Desktop window is minimized:
Windows assumes the user is not viewing the remote screen
The operating system stops rendering the graphical interface
The session switches into a GUI-less mode
The application continues running, but the visual interface disappears.
According to the uploaded guide, this behavior occurs because Windows disables the graphical rendering of the remote desktop when the RDP window is minimized.
For everyday users, this optimization is harmless.
But for GUI automation tools like TestComplete, it creates serious problems.
Automation tools rely on visible UI components to:
Locate elements
Simulate user interactions
Validate interface behavior
Without the rendered interface, TestComplete cannot detect UI objects, causing automation failures.
Common Symptoms of the TestComplete RDP Minimized Issue
QA engineers typically encounter the following problems:
Tests fail only when Remote Desktop is minimized
UI objects cannot be identified
Automated clicks do not work
Scripts that worked earlier suddenly fail
Here’s a simple breakdown.
S. No
Symptom
Cause
1
TestComplete cannot find objects
Remote GUI not rendered
2
Automation clicks fail
Controls are invisible
3
Tests stop unexpectedly
UI elements unavailable
4
Tests pass locally but fail remotely
RDP session behavior
The Registry Fix for Reliable TestComplete Remote Desktop Testing
Fortunately, there is a reliable workaround.
By modifying a registry setting on the local machine used to connect via Remote Desktop, you can force Windows to keep the remote GUI active even when the RDP window is minimized.
The solution involves adding a DWORD value called RemoteDesktop_SuppressWhenMinimized.
Setting this value to 2 prevents Windows from suppressing the GUI rendering.
This ensures that automation tools like TestComplete continue interacting with UI elements even when the RDP session is minimized.
Step-by-Step Guide to Fix the TestComplete RDP Minimized Issue
Step 1: Open the Windows Registry Editor
Press Windows + R, then type:
regedit
Press Enter to open the Registry Editor.
Step 2: Navigate to the Terminal Server Client Key
Choose one of the following registry paths.
For Current User
HKEY_CURRENT_USER\Software\Microsoft\Terminal Server Client
For All Users
HKEY_LOCAL_MACHINE\Software\Microsoft\Terminal Server Client
Step 3: Create the Required DWORD Value
Create a new DWORD entry with the following configuration.
Name: RemoteDesktop_SuppressWhenMinimized
Value: 2
This tells Windows to keep the remote GUI active even when the RDP session is minimized.
Step 4: Apply the Fix for 64-bit Windows
If your machine uses 64-bit Windows, repeat the same step in:
HKEY_CURRENT_USER\Software\Wow6432Node\Microsoft\Terminal Server Client
or
HKEY_LOCAL_MACHINE\Software\Wow6432Node\Microsoft\Terminal Server Client
Add the same DWORD value.
RemoteDesktop_SuppressWhenMinimized = 2
Step 5: Restart the Remote Desktop Session
After updating the registry:
Close Registry Editor
Disconnect the Remote Desktop session
Reconnect to the remote machine
Your TestComplete Remote Desktop Testing environment should now run automation reliably.
Imagine a QA team running nightly regression tests using TestComplete.
Their environment includes:
Dedicated test machine
Remote Desktop access
Scheduled automation runs
During test execution, an engineer minimizes the Remote Desktop window.
Suddenly:
Automation fails
TestComplete cannot find UI elements
Regression tests stop halfway
After applying the registry fix described earlier, the team can minimize the RDP session without breaking the automation.
Now their automation environment:
Runs tests reliably overnight
Supports remote monitoring
Prevents random automation failures
Benefits of This TestComplete Remote Desktop Testing Fix
S. No
Benefit
Description
1
Stable automation runs
GUI remains visible to automation tools
2
Reliable overnight testing
RDP state no longer affects automation
3
Reduced debugging time
Prevents mysterious automation failures
4
Better CI/CD compatibility
Remote environments stay consistent
5
Improved QA productivity
Automation becomes predictable
Best Practices for Running TestComplete Tests on Remote Machines
Use Dedicated Automation Machines
Automation environments should run on machines that are not used for daily development tasks.
This avoids interruptions like:
Session logouts
Screen locks
Unexpected reboots
Avoid Locking the Remote Machine
Locking the screen can also affect GUI rendering.
Ensure the session remains active during automation runs.
Integrate Automation with CI/CD Pipelines
Many QA teams run automation through CI/CD systems such as:
Jenkins
GitHub Actions
Azure DevOps
These systems help automate test execution and reporting.
TestComplete Remote Desktop Testing vs Local Automation
S. No
Feature
Remote Desktop Testing
Local Testing
1
Scalability
High
Limited
2
Infrastructure
Centralized
Individual machines
3
Stability
Requires configuration
Generally stable
4
CI/CD compatibility
Excellent
Limited
5
Ideal for
Large QA teams
Individual testers
Final Thoughts
Running GUI automation in Remote Desktop environments can introduce unexpected issues if the system configuration is not optimized for automation tools. One of the most common problems QA teams encounter is the TestComplete RDP minimized issue, where tests fail because the remote graphical interface stops rendering. Fortunately, a simple registry tweak can prevent this behavior and ensure your automation environment remains stable. By keeping the remote GUI active, testers can run automation scripts reliably even when the Remote Desktop session is minimized.
Frequently Asked Questions
Why do TestComplete tests fail when the RDP session is minimized?
Windows disables the graphical rendering of the remote desktop when the RDP window is minimized. GUI automation tools cannot interact with UI elements that are not rendered.
Does this problem affect all GUI automation tools?
Yes. Any automation tool that relies on visible UI components may experience similar issues in Remote Desktop environments.
Where should the registry change be applied?
The registry tweak must be applied on the local machine initiating the Remote Desktop connection, not the remote machine.
Can TestComplete run automation on remote machines?
Yes. TestComplete supports remote execution using tools like TestExecute and integration with CI/CD systems.
Is the registry fix safe?
Yes. The change simply instructs Windows to keep rendering the remote desktop GUI even when minimized.
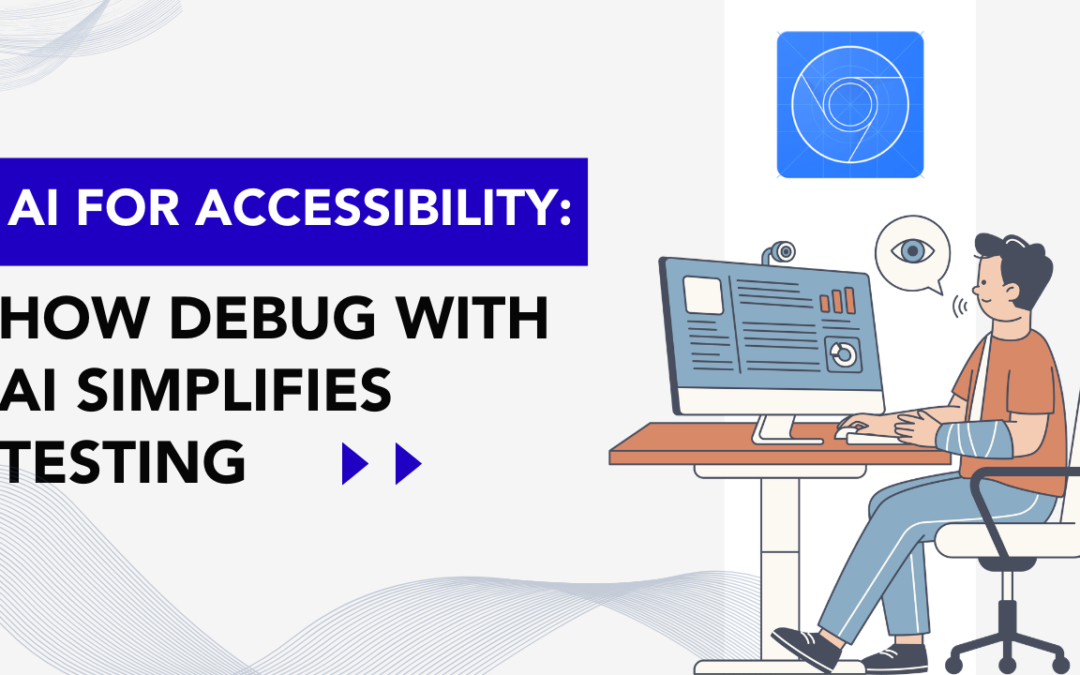
Accessibility has become a critical requirement in modern web development. Organizations are expected to ensure that their digital products are usable by people with disabilities, including individuals who rely on assistive technologies such as screen readers, keyboard navigation, and voice interfaces. Standards like Web Content Accessibility Guidelines (WCAG) define how websites should be structured to ensure inclusivity. However, accessibility testing can be time-consuming. QA engineers and developers often spend hours navigating complex DOM structures, verifying ARIA attributes, checking semantic HTML, and confirming that components behave correctly with assistive technologies. This is where AI for accessibility is beginning to transform the testing process.
AI-powered debugging tools can analyze web page structures, assist testers in understanding element relationships, and highlight accessibility issues that might otherwise require manual inspection. One such feature is Debug with AI in Chrome DevTools, which allows testers to ask natural-language questions about the DOM structure and quickly identify accessibility-related issues. Instead of manually searching through deeply nested HTML structures, testers can use AI assistance to inspect elements, verify labels, check roles, and detect structural problems affecting accessibility. This dramatically speeds up troubleshooting and helps teams catch accessibility gaps earlier in the development lifecycle.
From an accessibility perspective, Debug with AI can help testers validate key attributes used by assistive technologies such as ARIA roles, labels, semantic HTML structure, and relationships between elements. It also helps identify incorrectly rendered components, missing attributes, and potential keyboard navigation problems. However, while AI tools significantly improve efficiency, they cannot fully replace manual accessibility testing. Human validation is still required for tasks like color contrast checks, screen reader verification, and usability evaluation.
In This Guide, We’ll Explore
How AI for accessibility improves UI testing
How to enable Debug with AI in Chrome DevTools
What accessibility checks can be automated with AI
Which accessibility requirements still require manual testing
Best practices for combining AI-powered tools with traditional accessibility audits
AI for accessibility refers to the use of artificial intelligence to help identify, analyze, and improve accessibility in digital products.
In software testing, AI can assist with:
DOM structure analysis
Detection of missing accessibility attributes
Semantic HTML validation
Identifying incorrect ARIA roles
Highlighting keyboard navigation issues
Understanding complex UI components
Instead of manually analyzing HTML markup, testers can ask AI tools questions like:
“Does this form field have a proper label?”
“Which ARIA role is assigned to this component?”
“Is the heading hierarchy correct on this page?”
The AI engine analyzes the DOM and returns explanations or potential issues. This capability significantly reduces the effort required for early-stage accessibility validation.
What Is “Debug with AI” in Chrome DevTools?
Debug with AI is an AI-powered feature integrated into Chrome DevTools that helps developers and testers analyze DOM structures using natural language prompts.
The tool allows users to:
Inspect selected DOM elements
Understand hierarchical relationships between components
Identify structural or semantic issues
Validate accessibility attributes
Investigate dynamically rendered UI components
Instead of manually scanning the DOM tree, testers can simply ask AI to analyze elements and explain their structure. From an accessibility testing perspective, this helps testers quickly verify ARIA attributes, roles, labels, semantic HTML elements, and relationships between UI components.
How to Enable Debug with AI in Chrome DevTools
Step 1: Open Chrome Developer Tools
You can open DevTools using:
Ctrl + Shift + I
F12
These shortcuts open the browser developer panel, where debugging tools are available.
Step 2: Access the Debug with AI Option
Right-click the menu item next to Settings in DevTools
Select Debug with AI
Step 3: Enable AI Settings
Open Settings
Enable all AI-related options
Step 4: Open the AI Assistance Panel
Once enabled:
The AI assistance panel appears
You can start entering prompts
Example prompts:
Explain the structure of this DOM element
Check accessibility attributes for this component
Identify missing labels or roles
This allows testers to analyze accessibility issues directly within the DevTools environment.
How AI Helps Analyze DOM Structure for Accessibility
Modern web applications use frameworks like React, Angular, and Vue that generate dynamic DOM structures. These structures can be deeply nested and difficult to analyze manually. AI-powered debugging tools simplify this process.
Key Capabilities
AI can:
Understand nested DOM hierarchies
Identify missing accessibility attributes
Detect semantic markup issues
Explain relationships between UI components
Highlight accessibility risks
For example, a tester inspecting a custom dropdown component might ask: “Does this element expose the correct role for assistive technologies?”
The AI tool can analyze the DOM and report whether the component uses roles like:
role=”button”
role=”menu”
role=”listbox”
If roles are missing or incorrect, the tester can quickly identify the problem. :contentReference[oaicite:9]{index=9}
Using Chrome DevTools debugging features and AI assistance, testers can validate approximately 35% of accessibility checks automatically. However, this does not replace full accessibility audits.
Accessibility Checks That Still Require Manual Testing
Color contrast validation
Zoom and responsive behavior
Error identification and prevention
Keyboard navigation
Screen reader output validation
Alternative text quality
Multimedia accessibility (captions and transcripts)
Best Practices for Using AI in Accessibility Testing
Combine AI with manual accessibility testing
Validate results against WCAG 2.2 standards
Test using real assistive technologies (NVDA, JAWS, VoiceOver)
Include accessibility testing early in the development lifecycle
Document accessibility issues clearly with screenshots and WCAG references
Conclusion
AI is transforming the way teams approach accessibility testing. Tools like Debug with AI in Chrome DevTools make it easier for testers to understand DOM structures, verify accessibility attributes, and detect structural issues faster. By allowing testers to ask natural-language questions about web elements, AI simplifies complex debugging tasks and accelerates the accessibility validation process.
However, AI tools cannot fully replace manual accessibility testing. Critical requirements such as keyboard navigation, screen reader behavior, color contrast, and usability still require human verification. In practice, the most effective strategy is a hybrid approach: using AI-powered tools for fast structural validation while performing manual audits to ensure full WCAG compliance. By integrating AI into accessibility workflows, teams can detect issues earlier, reduce debugging time, and build more inclusive digital experiences for all users.
Frequently Asked Questions
What is AI for accessibility?
AI for accessibility refers to the use of artificial intelligence to identify, analyze, and improve accessibility in digital products such as websites and applications. AI tools can detect issues like missing ARIA attributes, incorrect semantic HTML, and inaccessible UI components, helping developers and testers create experiences that work better for users with disabilities.
How does AI help improve web accessibility?
AI improves web accessibility by automatically analyzing page structures and identifying potential issues that affect assistive technologies.
AI tools can help detect:
Missing ARIA roles and attributes
Incorrect heading hierarchy
Missing form labels
Images without alt text
Improper semantic HTML elements
This allows testers to identify accessibility gaps earlier in the development process.
Can AI fully automate accessibility testing?
No, AI cannot fully automate accessibility testing. While AI tools can detect structural issues and automate many checks, manual testing is still required to verify usability and assistive technology compatibility.
Manual testing is needed for:
Screen reader validation
Keyboard navigation testing
Color contrast verification
Error messaging and usability evaluation
AI tools typically support partial accessibility testing but cannot replace a full accessibility audit.
What tools use AI for accessibility testing?
Several modern tools use AI to assist with accessibility testing, including:
Chrome DevTools Debug with AI
AI-powered testing assistants
Automated accessibility scanners
DOM analysis tools
These tools help testers quickly understand page structure and identify accessibility issues.
What accessibility issues can AI detect automatically?
AI-based accessibility tools can automatically detect issues such as:
Missing alt attributes on images
Incorrect ARIA roles
Missing form field labels
Improper heading structure
Missing language attributes
Non-semantic HTML structures
These checks help ensure assistive technologies can correctly interpret web content.
What accessibility standard should websites follow?
Most websites follow the Web Content Accessibility Guidelines (WCAG) to ensure accessibility compliance. WCAG provides recommendations for making digital content accessible to users with disabilities, including those who rely on screen readers, keyboard navigation, and other assistive technologies.
Flutter is a cross-platform front-end development framework that enables organizations to build Android, iOS, web, and desktop applications from a single Dart codebase. Its layered architecture, comprising the Dart framework, rendering engine, and platform-specific embedders, delivers consistent UI rendering and high performance across devices. Because Flutter controls its own rendering pipeline, it ensures visual consistency and optimized performance across platforms. However, while Flutter accelerates feature delivery, it does not automatically solve enterprise-grade automation testing challenges. Flutter provides three official testing layers:
Unit testing for business logic validation
Widget testing for UI component isolation
Integration testing for end-to-end user flow validation
At first glance, this layered testing strategy appears complete. Nevertheless, a critical architectural limitation exists. Flutter integration tests operate within a controlled environment that interacts primarily with Flutter-rendered widgets. Consequently, they lack direct access to native operating system interfaces.
In real-world enterprise applications, this limitation becomes a significant risk. Consider scenarios such as:
Standard Flutter integration tests cannot reliably automate these behaviors because they do not control native OS surfaces. As a result, QA teams are forced either to leave gaps in automation coverage or to adopt heavy external frameworks like Appium. This is precisely where the Patrol framework becomes strategically important.
The Patrol framework extends Flutter’s integration testing infrastructure by introducing a native automation bridge. Architecturally, it acts as a middleware layer between Flutter’s test runner and the platform-specific instrumentation layer on Android and iOS. Therefore, it enables synchronized control of both:
Flutter-rendered widgets
Native operating system UI components
In other words, the Patrol framework closes the automation gap between Flutter’s sandboxed test environment and real-device behavior. For CTOs and QA leads responsible for release stability, regulatory compliance, and CI/CD scalability, this capability is not optional. It is foundational.
Without the Patrol framework, integration tests stop at Layer 2. However, with the Patrol framework in place, tests extend through Layer 3 into Layer 4, enabling direct interaction with native components.
Therefore, instead of simulating user behavior only inside Flutter’s rendering engine, QA engineers can automate complete device-level workflows. This architectural extension is what differentiates the Patrol framework from basic Flutter integration testing.
Why Enterprise Teams Adopt the Patrol Framework
From a B2B perspective, testing is not merely about catching bugs. Instead, it is about reducing release risk, maintaining compliance, and ensuring predictable deployment cycles. The Patrol framework directly supports these objectives.
1. Real Device Validation
While emulators are useful during development, enterprise QA strategies require real device testing. The Patrol framework enables automation on physical devices, thereby improving production accuracy.
2. Permission Workflow Automation
Modern applications rely heavily on runtime permissions. Therefore, validating:
Location permissions
Camera access
Notification consent
becomes mandatory. The Patrol framework allows direct interaction with permission dialogs.
3. Lifecycle Testing
Many enterprise apps must handle:
App backgrounding
Session timeouts
Push-triggered resume flows
With the Patrol framework, lifecycle transitions can be programmatically controlled.
4. CI/CD Integration
Additionally, the Patrol framework provides CLI support, which simplifies integration into Jenkins, GitHub Actions, Azure DevOps, or GitLab CI pipelines.
For QA Leads, this means automation is not isolated; it becomes part of the release governance process.
Official Setup of the Patrol Framework
Step 1: Install Flutter
Verify environment readiness:
flutter doctor
Ensure Android SDK and Xcode (for macOS/iOS) are configured properly.
Step 2: Install Patrol CLI
flutter pub global activate patrol_cli
Verify:
patrol doctor
Notably, Patrol tests must be executed using:
patrol test
Running flutter test will not execute Patrol framework tests correctly.
Flutter provides strong built-in testing capabilities, but it does not fully cover real device behavior and native operating system interactions. That limitation can leave critical gaps in automation, especially when applications rely on permission handling, push notifications, deep linking, or lifecycle transitions. The Patrol framework closes this gap by extending Flutter’s integration testing into the native OS layer.
Instead of testing only widget-level interactions, teams can validate real-world device scenarios directly on Android and iOS. This leads to more reliable automation, stronger regression coverage, and greater confidence before release.
Additionally, because the Patrol framework is designed specifically for Flutter, it allows teams to maintain a consistent Dart-based testing ecosystem without introducing external tooling complexity. In practical terms, it transforms Flutter UI testing from controlled simulation into realistic, device-level validation. If your goal is to ship stable, production-ready Flutter applications, adopting the Patrol framework is a logical and scalable next step.
Implementing the Patrol Framework for Reliable Flutter Automation Testing Across Real Devices and Production Environments
The Patrol framework is an advanced Flutter automation testing framework that extends the integration_test package with native OS interaction capabilities. It allows testers to automate permission dialogs, system alerts, push notifications, and lifecycle events directly on Android and iOS devices.
2. How is the Patrol framework different from Flutter integration testing?
Flutter integration testing primarily interacts with Flutter-rendered widgets. However, the Patrol framework goes further by enabling automation testing of native operating system components such as permission pop-ups, notification trays, and background app states. This makes it more suitable for real-device end-to-end testing.
3. Can the Patrol framework handle runtime permissions?
Yes. One of the key strengths of the Patrol framework is native permission handling. It allows automation testing of camera, location, storage, and notification permissions using built-in native APIs.
4. Does the Patrol framework support real devices?
Yes. The Patrol framework supports automation testing on both emulators and physical Android and iOS devices. Running tests on real devices improves accuracy and production reliability.
5. Is the Patrol framework better than Appium for Flutter apps?
For Flutter-only applications, the Patrol framework is often more efficient because it is Dart-native and tightly integrated with Flutter. Appium, on the other hand, is framework-agnostic and may introduce additional complexity for Flutter-specific automation testing.
6. Can Patrol framework tests run in CI/CD pipelines?
Yes. The Patrol framework includes CLI support, making it easy to integrate with CI/CD tools such as Jenkins, GitHub Actions, GitLab CI, and Azure DevOps. This allows teams to automate regression testing before each release.
7. Where should Patrol tests be stored in a Flutter project?
By default, Patrol framework tests are placed inside the patrol_test/ directory. However, this can be customized in the pubspec.yaml configuration file.
8. Is the Patrol framework suitable for enterprise automation testing?
Yes. The Patrol framework supports device-level automation testing, lifecycle control, and native interaction, making it suitable for enterprise-grade Flutter applications that require high test coverage and release confidence.