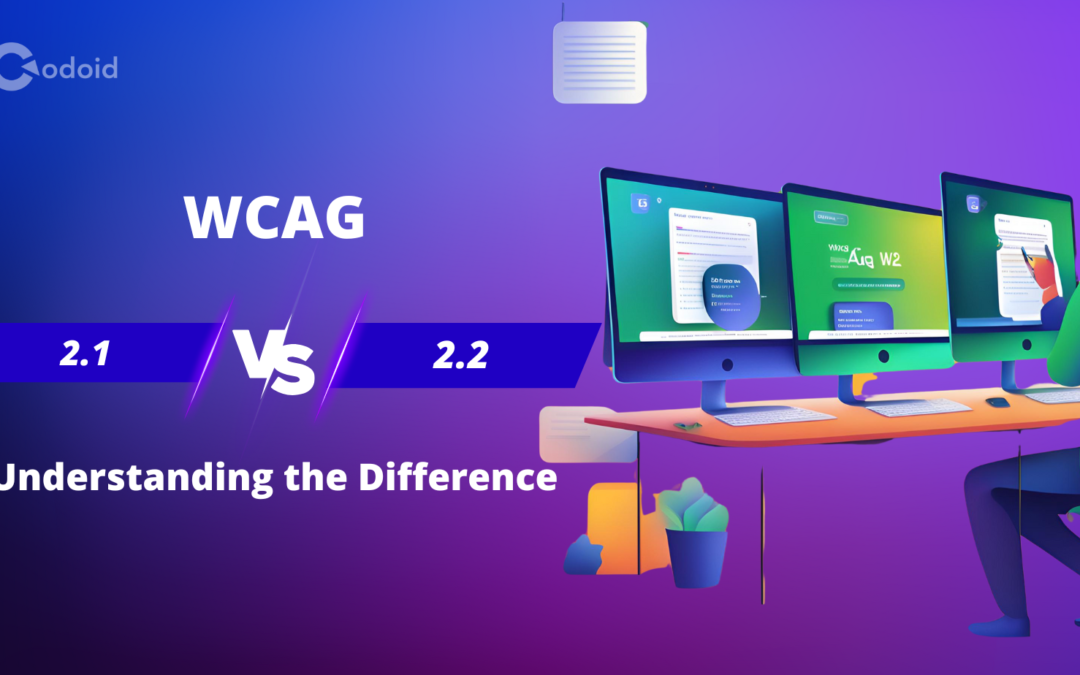
Finding your way online can be hard for people with disabilities. The web content accessibility guidelines, or WCAG, are here to help make web page content accessible to everyone, no matter their abilities. These guidelines offer a clear plan to create online experiences that are friendly and easy for all users. They focus on several major groups to ensure that everyone can enjoy the web.
Key Highlights
WCAG 2.2 is the newest version of the web content accessibility guidelines. It adds nine new success criteria to make the web more inclusive.
These guidelines help people with cognitive or learning disabilities, low vision, or those using mobile devices.
The new criteria focus on important areas like how things look when focused on, the size of targets, dragging actions, and accessible authentication.
WCAG 2.2 works well with assistive technologies. This helps everyone navigate and interact with ease.
These guidelines are important for developers and content creators. They promote best practices for a better and friendlier digital space.
Overview of WCAG 2.1 and 2.2
WCAG 2.1 and 2.2 are rules made by the World Wide Web Consortium (W3C). They aim to make web content easy for everyone to access. WCAG 2.1 came out in 2018. This version aimed to help people with disabilities who use mobile devices.
WCAG 2.2 builds on WCAG 2.1. It gives more options to make web content accessible. This version focuses on ensuring better features for users with cognitive disabilities. It wants to make sure everyone has a better time when they use web content.
The Evolution of Web Content Accessibility Guidelines
The path to WCAG began with W3C’s goal of making the internet fair for everyone. From the start, these guidelines have evolved and improved. WCAG 2.0 came out in 2008. This was an important development that created key rules for ensuring the web is accessible to everyone.
In 2018, WCAG 2.1 was launched. It introduced new success criteria. These criteria focused on the rise of mobile devices. They also took into account the needs of people with low vision and cognitive disabilities.
In 2023, WCAG 2.2 came out. This is the latest update in the work of WCAG. It focuses on improving online experiences for people with various disabilities. This update helps create a more inclusive web.
Key Objectives of WCAG 2.1 and 2.2
WCAG 2.1 and 2.2 aim to create rules that make websites easier to access, highlighting the benefits of WCAG. WCAG 2.1 made key updates for people with low vision. It improved rules for color contrast and offered more options for flexible designs. This guidance also helps make keyboard navigation better and supports people with cognitive disabilities.
WCAG 2.2 makes things better by adding new success criteria at the Level AAA and Level AA standard. It highlights the importance of accessible authentication within a set of web pages. It also suggests not using cognitive tests, such as CAPTCHAs. Instead, other better options should be used. The guidelines will also improve user interface component focus appearance, ensuring that there is sufficient color contrast between focused and unfocused states. This helps users easily see where their focus is when they use the keyboard.
The main goal of WCAG 2.2 is to improve on version 2.1. It wants to make the online world friendlier for everyone. The aim is to take away barriers. This way, all people can see, understand, find, and use the web easily.
Detailed Comparison Between WCAG 2.1 and 2.2
WCAG 2.2 is an update of WCAG 2.1, and there are important changes. Developers and content makers must learn about these changes. Understanding them can help you keep up with the new accessibility rules. This will make online experiences better for everyone.
A big change is that the “4.1.1 Parsing” success rule is no longer there. This rule was in WCAG 2.0 and 2.1. This change shows that HTML standards have improved. Now, with these new standards, parsing problems are solved automatically.
New Success Criteria in WCAG 2.2
WCAG 2.2 introduces nine new success criteria. These are designed to make web content more accessible. Some of these criteria target the needs of users with cognitive disabilities. Other criteria help make the web easier for everyone. Here is a table that lists these new criteria:
Success Criteria Description
Success Criteria
Description
2.4.11 Focus Not Obscured (Minimum)
Ensures keyboard focus is at least partially visible, preventing it from being hidden behind elements like sticky headers.
2.4.12 Focus Not Obscured (Enhanced)
Similar to the above, but requires the entire focus indicator to be visible, enhancing accessibility further.
2.4.13 Focus Appearance
Defines a clearer standard for visible keyboard focus indicators by specifying a minimum size and contrast ratio.
2.5.7 Dragging Movements
Requires that functionalities relying on dragging movements, like drag-and-drop, offer alternative single-pointer interactions.
2.5.8 Target Size (Minimum)
Sets a minimum target size of 24×24 CSS pixels for interactive elements or requires sufficient spacing between smaller targets to prevent accidental clicks.
3.2.6 Consistent Help
Mandates that if help mechanisms are used across multiple web pages within a set, they should maintain a consistent relative order for easy location.
3.3.7 Redundant Entry
Discourages asking users to re-enter the same information within the same process, suggesting auto-population or selection of previously entered data.
3.3.8 Accessible Authentication (Minimum)
Restricts the use of cognitive function tests (e.g., CAPTCHA) during authentication unless alternative methods or assistance are provided.
3.3.9 Accessible Authentication (Enhanced)
Building on the above, this stricter criterion removes the exception for “object recognition” and “personal content” identification tests during the authentication process.
Enhanced Focus on User Accessibility Needs
WCAG 2.2 is doing a great job in helping more users. It focuses on people with different needs, especially those with issues linked to cognitive function. These updates aim to make the web easier for individuals who struggle with memory, attention, or problem-solving.
One important change is the success criteria for Accessible Authentication. This change helps users log in without going through difficult tests. Now, people with cognitive disabilities can access websites and online services more easily. They will not have to face tough challenges.
WCAG 2.2 aims to provide clear and reliable help tools on websites. This is important because it helps users understand and find their way through online content. This is especially vital for people with cognitive disabilities who may need extra help to access the information.
Enhance your accessibility! Understand the differences between WCAG 2.1 and 2.2 to deliver more inclusive digital experiences
The Impact of WCAG 2.2 on Developers and Content Creators
The launch of WCAG 2.2 is an important step toward creating a more inclusive online world. This change will affect developers and content creators. To follow these new guidelines, they need to update their technical work and content plans.
Developers need to know the new rules for user interface parts. They must make sure that keyboard focus indicators meet the updated standards, specifically ensuring that no part of the component is hidden and the area of the focus indicator is at least as large as a 2 CSS pixel thick perimeter of the unfocused component with a minimum contrast ratio. Content creators also have to learn about accessible authentication. They should find ways to cut down on repetitive entries. This is key for making a better experience for users.
Changes in Technical Requirements
WCAG 2.2 has important updates that make websites easier to use. A key change is about improving how users can use the keyboard. The new ‘Focus Appearance’ rule helps show keyboard focus better. This update is very helpful for users who cannot use a mouse.
One important change is to assist users who have trouble dragging things. The ‘Dragging Movements’ rule states that websites should provide other ways to complete tasks, like drag-and-drop. This change will make it easier for people with motor challenges to use the site.
It is important for developers to learn and use these new rules. This will help ensure their websites follow the latest WCAG standards.
Best Practices for Implementing WCAG 2.2 Guidelines
The best way to use WCAG 2.2 guidelines is to mix technical skills with user-friendly design. Here are some helpful tips to think about:
Make Keyboard Accessibility a Priority: Your website should be simple to use with just a keyboard. Check all clickable parts, forms, and functions by using only a keyboard.
Provide Clear and Consistent Visual Cues: Use strong color differences for text and backgrounds. Make sure the focus indicator is the right size and color according to WCAG 2.2 rules.
Test with Assistive Technologies: Use screen readers and other tools. This helps you view your website like users with disabilities do. This view can reveal some accessibility issues.
Give Alternative Content Formats: Add captions for videos, transcripts for audio, and text descriptions for images. This helps users who can’t access some formats to still get the content.
Create Testable Success Criteria: Design your website to be easy to test. The new success criteria should be easy to check for rules. You can use automated testing tools, do manual tests, or a mix of both.
Legal and Compliance Aspects of WCAG 2.2
WCAG is not a law. However, it helps shape laws for making websites accessible in many places. If you do not follow these rules, you might run into legal issues. This can include lawsuits and fines.
It is important to know the laws where you live. You also need to keep your website updated to follow the latest WCAG guidelines. This is not just a good practice but also a legal need for many organizations.
Understanding the ADA and Section 508 in the Context of WCAG 2.2
In the United States, the Americans with Disabilities Act (ADA) and Section 508 set important rules for making digital content easy for everyone to use. They do not directly require following WCAG guidelines. Still, many people use these guidelines to reach their accessibility goals.
Section 508 is a law that applies to federal agencies and any program that receives federal funds. This law states that electronic and information technology should be easy for people with disabilities to use. Courts often see the ADA as covering websites and mobile apps now. This is especially true for businesses that serve the public.
Organizations should focus on digital accessibility because of the current legal landscape. They need to follow the newest WCAG guidelines, including the recent rules from WCAG 2.2.
Global Accessibility Laws and WCAG Compliance
WCAG is now seen as the most important global standard for web accessibility. It is the base for accessibility laws in many countries, including guidelines for user agent interactions. In Europe, the European Accessibility Act (EAA) lists the rules to make different products and services accessible. This includes websites and mobile apps. The EAA relies a lot on the most recent version of WCAG 2.1.
The EAA does not require WCAG 2.2 right now. However, it aims to follow similar accessibility standards. This means that changes are expected. These changes will include the latest guidelines.
The use of WCAG in laws shows that digital accessibility is now a key right. No matter what the laws say, organizations must focus on WCAG conformance. This practice improves the online experience for all users.
Conclusion
In conclusion, web developers and content creators should understand the differences between WCAG 2.1 and 2.2. WCAG 2.2 includes new success criteria that focus more on what users need. This change impacts technical requirements and best practices. It is required by law to follow WCAG guidelines. Doing this helps include all users. Keep up with the changing accessibility standards. By doing so, you can create a more welcoming online space. If you need help with WCAG 2.2 guidelines, look for resources that can support your compliance journey.
Frequently Asked Questions
What are the major differences between WCAG 2.1 and 2.2?
WCAG 2.2 has nine new success criteria that are different from WCAG 2.1. It focuses on important parts like focus visibility, accessible authentication, and target size. In short, WCAG 2.2 builds on the current rules we have. It also adds new rules to improve accessibility.
How does WCAG 2.2 affect existing websites?
Existing websites should check out the new criteria from WCAG 2.2 and try to follow them. Although it is not required right now, using these guidelines will help users with disabilities. This will make the website more welcoming and easy to use for everyone.
Are there new accessibility tests for WCAG 2.2 compliance?
Yes, new tests for accessibility are coming out. They will check if websites meet the success criteria of WCAG 2.2. These tests focus on several things. This includes focus appearance, target size, and contrast ratio, among other factors.
This blog talks about how large language models (LLMs) can connect with SQL databases. The goal is to build chat apps that are easy and fun to use. Picture chatting with your data like you would with a coworker when answering a user’s question. This guide will help you understand everything. By the end, you will know how to change the way you connect with SQL databases. You will also learn to use natural language for a clear and simple experience.
Key Highlights
Explore how Large Language Models (LLMs) and Structured Query Language (SQL) work together. This helps you talk to databases using natural language. It makes working with data feel easier.
Learn how to set up your environment for LLM-SQL. This means choosing the right tools and libraries. You will also set up your database for safe access.
We will show you how to create a simple chat interface. This will turn user requests into SQL queries and get the results.
Discover how to use LLMs like GPT to improve chat applications. They can help understand what users want and make SQL queries more flexible.
Learn about the common problems when working with LLMs and SQL. You will also find ways to solve these issues and make performance better.
Understanding the Basics of LLM and SQL for Database Chatting
The strength of this integration comes from the teamwork of LLMs and SQL databases. LLMs, such as GPT, are skilled at understanding and writing text that seems human. This skill helps them read user requests in simple words. They can understand what a person needs, even if the question is not asked with technical database terms.
SQL databases are key for storing and managing data. They have a clear structure, which helps to keep, organize, and find information with simple queries. When we mix these two ideas, we connect how people talk with how databases work.
Introduction to Large Language Models (LLM)
Large Language Models (LLMs) are useful for Natural Language Processing (NLP). They can read text and write sentences that feel real. This makes them perfect for chat apps because they can answer questions well. When you combine LLMs with generative AI and SQL queries, you can link to a database and find information fast. Bringing together language models and databases helps build smart chatbots. This improves the user experience. Using SQL with LLMs is a smart way to handle user queries efficiently.
The Role of SQL in Database Management
SQL means Structured Query Language. It is the main language used for working with relational databases. A SQL database stores data clearly. It uses tables that have rows and columns. Rows are the records, and columns are the fields. SQL gives a strong and standard way to access and manage data.
Users can make SQL queries to get, change, add, or remove data in the database. These queries are like instructions. They inform the database about what to do and which data to handle. To create these queries, you must follow specific rules. You also need to understand the structure of the database. This means knowing the table names, column names, and data types.
Setting Up Your Environment for LLM-SQL Interactions
Before you begin building, you need to set up a good environment. This means creating a workspace where your LLM and SQL database can work together smoothly. When you do this, everything, like your code and database links, will be ready to connect.
First, pick the right tools. Langchain is a great framework for making apps that use LLM. It helps you connect to various data sources, like SQL databases. You must install the right libraries and set up the links to your database.
Tools and Libraries Needed for LLM-SQL Integration
To begin using LLM with SQL, the first thing you need to do is set up the right tools and libraries. A good idea is to create a virtual environment as your default setup. This practice will help avoid problems with dependencies and keep your project organized. In this separate environment, all the packages you need for your project will stay safe.
You will use strong tools like Langchain. This tool helps you build apps that work with Large Language Models, or LLMs. Langchain links your chosen LLM to an external SQL database.
To create your chat application, you can pick from many good open-source LLMs. You can also use advanced models like GPT from OpenAI. The OpenAI libraries give you the tools you need to add these models to your Python setup easily.
Configuring Your Database for LLM Access
Once you have your tools ready, it is time to set up your SQL database. This helps ensure that the LLM can access it safely and in a controlled way. In this guide, we will use PostgreSQL. It is a strong and popular open-source relational database. People know it is reliable and packed with many features. You can also use similar ideas with other SQL databases.
It’s really important to protect sensitive information. This includes items like database details. A good method to do this is by using environment variables. They keep this information away from your code. This makes your setup more secure.
To handle your environment variables, you need to make a .env file. This file usually stays in the main folder of your project. It gives you a simple place to set and manage important configuration details.
from langchain_community.utilities import SQLDatabase
from langchain.chains import create_sql_query_chain
from langchain_openai import ChatOpenAI
from dotenv import load_dotenv

load_dotenv()
db = SQLDatabase.from_uri("mysql+mysqlconnector://root:Codoid%40123@localhost:3306/demo")
print(db.dialect)
print(db.get_usable_table_names())
result = db.run("SELECT * FROM worker_table LIMIT 10;")

llm = ChatOpenAI(model="gpt-3.5-turbo", temperature=0)
chain = create_sql_query_chain(llm, db)
question = input("enter you question here: \n")
response = chain.invoke({"question": question})

print("SQL IS : ", response)
print("Result is: ", db.run(response))
Developing Your First Chat Interface with LLM and SQL
Now, you can start making your chat interface! You can create a basic command-line interface or a chat application on the web. The main goal is to allow users to enter their requests using natural language.
In the end, this interface will connect human language to how accurately queries come from databases.
Designing a Simple Chat UI
Making a complete chat application can be tough. However, in this demo, we will keep things simple. We will mainly focus on sending a request to the LLM and showing the answer. The user interface (UI) for this version will be easy to understand.
A simple command-line interface is a great place to start. Picture an easy setup where people can type their questions in plain English.
This setup allows users to practice asking questions to the database in natural language.
Connecting the Chat Interface to the Database
Connecting your chat interface to the SQL database helps it run easily. This link lets the app send questions from the LLM to the database. Then, it gets the answers back.
An API, which stands for application programming interface, allows the chat interface to work well with the SQL server. It takes requests from the chat and turns them into commands that the SQL database can read.
After the database runs the query, the API sorts the database results. Then, it sends them back to the chat interface. This way, the user can see the results.
Enhancing Your Chat Application with Advanced SQL Queries
As your chat app grows, make sure it can deal with harder questions. By learning how tables connect and using more advanced SQL parts, you help the LLM give better and more useful answers.
Vector databases provide a fresh way to handle similarity searches. Regular SQL databases may struggle with this task. For example, if a user asks a question that does not exactly match what is in the database, a vector database can still locate information that is similar in meaning. This gives better results and helps create a more enjoyable experience for users.
Crafting Complex SQL Queries for More Dynamic Conversations
Improving your chat app to have better conversations means enhancing its ability to handle complex SQL queries. These queries do more than just retrieve basic data. They let the LLM perform tasks like merging data, grouping entries, and running subqueries. This offers you new ways to analyze data and have engaging discussions.
LLMs can learn to understand hard SQL queries. This lets them create queries that fit what users want, even when the questions are hard. By being good at making detailed queries, your chat application can collect data from various tables, do calculations, and provide better results to users.
Utilizing LLM to Interpret and Generate SQL Queries
At its heart, our chat application works well because the LLM connects common human language with the specific needs of the database. This is where it becomes interesting: the LLM serves as a smart interpreter.
When you ask a question, the language model looks at your words closely. It figures out what you want to know and then builds a SQL query. This SQL query presents your question in a way that the database can read.
The LLM can read and understand natural language. It can answer different types of questions. This means it can handle both simple queries and complex requests. Users can interact easily. They do not need to learn SQL.
Troubleshooting Common Issues in LLM-SQL Chat Applications
Even with good planning, you may still face problems, especially in the start. This is normal. What’s important is being ready with solutions. This will help make the experience easy and fun for users.
Watch out for common problems, like incorrect SQL syntax in your queries.
Also, check for issues when connecting the LLM to the SQL database.
You can often fix these problems by using good error-handling techniques in your application’s code.
Debugging Connection Problems Between LLM and SQL Databases
Connection issues happen often with any app that connects to a database. LLM-SQL chat apps also face these problems. You might notice slow responses, receive error messages, or struggle to connect to the database at all.
To fix connection problems, you should start by checking the connection string your app uses for the SQL server. Make sure the hostname or IP address, port number, database name, username, and password are all correct.
Wrong permissions can cause access problems. Make sure the user account linking to the database has the right privileges. This is necessary to run the SQL queries made by the LLM.
Optimizing Performance for Real-time Interactions
In real-time chats, users want quick answers. That is why it is important to improve performance. The goal is to keep your chat application fast and responsive. It should be able to handle many user requests to the Postgres database without lagging.
Using the right methods can help your app show results to the user much quicker.
Optimization Technique
Description
Database Indexing
Creating indexes on frequently queried columns in your Postgres database can dramatically expedite data retrieval, making your queries faster.
Query Optimization
Efficient queries are crucial. Carefully analyze your queries and make use of database tools to identify areas for improvement.
Caching
Implementing a caching mechanism can significantly boost performance.
Conclusion
In conclusion, learning how to combine LLM and SQL for your chat database projects can create fun and engaging apps. First, it is important to grasp the basics. Next, set up your workspace. Make your designs easy for users. Then, enhance features by using advanced SQL queries. Fixing common problems and improving performance will lead to smoother interactions. Use LLM and SQL’s power to make your chat apps even better. If you want to know more about this great topic, visit our FAQ section for tips and help.
Frequently Asked Questions
How do I secure my LLM-SQL chat application?
To keep your LLM-SQL chat application safe, you need a strong plan. First, store important things, like your OpenAI API key and database passwords, in a safe place. Do not show these details in your code. You also need to protect your tokens. It is important to have good steps for authentication and authorization. This helps control access and stop unauthorized use of your application.
Can the LLM-SQL setup handle multiple users concurrently?
Yes, if you set up your LLM-SQL the right way, it can help many users at the same time. You can do this by handling requests in an asynchronous manner. Also, using good database connection pooling works well. These methods help create a strong and scalable solution. This means you can serve a lot of ChatGPT users at once without making it slower.
The way we use technology is changing a lot because of artificial intelligence (AI). The main goal of AI is to help machines think, learn, and talk like people. This effort has led to amazing new developments, especially in natural language processing (NLP). In this new world, prompt engineering plays a crucial role in becoming very important as it helps to harness the power of AI effectively. Prompt engineering means creating clear instructions or questions called “prompts,” to help AI models, especially large language models (LLMs), produce the results we want.
Key Highlights
The rise of AI: Prompt engineering is gaining traction due to the increasing use of AI models, particularly large language models (LLMs), across various sectors.
Bridging the communication gap: It acts as a bridge between human intention and machine interpretation, ensuring AI models provide accurate and relevant outputs.
Evolving alongside AI: The field is constantly evolving, driven by advancements in areas such as natural language processing (NLP) and machine learning.
Applications across industries: Prompt engineering has wide-ranging applications, from enhancing chatbot interactions and streamlining voice-activated systems to aiding in research and development.
A promising career path: The demand for skilled prompt engineers is on the rise, offering a promising career path in the expanding field of AI.
Exploring the Essence of Prompt Engineering
In the world of AI, we have systems that are trained on big sets of data to act like humans. Clear and effective communication between people and machines is very important. This is where prompt engineering plays a key role. It focuses on helping AI systems to understand and interpret human language correctly.
Prompt engineering is not just about giving data to AI systems; it is also about asking the right questions in the right way. By creating effective prompts, we help these systems deal with the challenges of human language, which includes the generation of code snippets. This, in turn, allows them to reach their true potential in data science and many other uses.
Defining Prompt Engineering in the AI Realm
A prompt engineer is like a builder of language. They help connect what people want to say with what AI can understand. Their main job is to create and improve prompts that play a vital role in the AI landscape. Prompts are the questions or instructions that direct how an AI model works. It’s similar to teaching an AI model to understand human speech and reply in a way we expect.
Essentially, prompt engineering is about making a shared language between humans and AI. By choosing and organizing words carefully in prompts, prompt engineers help AI models understand the details of how we communicate. This ensures that the responses from AI are relevant, accurate, and fair.
Their work is important for many AI applications. For example, they help chatbots provide smooth customer service. They also play a role in AI tools that change the way we write.
The Significance of Prompt Engineering Today
The importance of good communication in our technology-focused world is very high. As AI systems become more important in different areas, it’s key to make sure they understand and meet our needs well. This is where prompt engineering is helpful. It connects what people want with how AI understands it.
For example, chatbots have become popular in customer service. By creating clear and simple prompts, developers help these AI helpers understand customer questions. This enables them to give useful information and offer quick solutions.
Prompt engineering is changing how we work with AI, making these strong tools easier to use in areas like data analysis and content creation.
The Evolution of Prompt Engineering
Prompt engineering seems new, but it has roots in natural language processing (NLP) and machine learning. The growth of this field follows the progress in AI. It started with rule-based systems and moved to generative AI and strong large language models (LLMs).
As machine learning, especially deep learning, grew stronger, prompt engineering started to develop. When LLMs could produce text that feels human-like, it became clear that creating effective prompts is very important.
From Simple Queries to Complex Interactions
The growth of prompt engineering is clear when we look at how prompts have become more complex as AI has advanced. In the beginning, prompts were simple queries. They mostly used keywords to find information. Over time, as AI models got better, the prompts also had to improve.
Now, prompt engineering includes many techniques. It can mean giving specific instructions to create different types of text, such as poems, code, scripts, music, emails, and letters. It can also involve making detailed prompts that help AI solve difficult problems step by step.
This change shows the drive to explore the full potential of AI. We keep pushing to see what is possible by using new and clever ways of prompting.
Key Milestones in the Development of Prompt Engineering
Prompt engineering’s journey has been marked by significant milestones, each pushing the boundaries of how we interact with AI. These advancements reflect both the increasing complexity of AI models and the growing expertise of data scientists and prompt engineers.
The development of the transformer model, a neural network architecture that revolutionized natural language processing, marked a turning point. Transformers, with their ability to process sequential data more effectively, paved the way for more sophisticated language models and, consequently, more intricate prompt engineering.
Milestone
Description
Impact on Prompt Engineering
Rule-based systems
Early AI systems relied on manually crafted rules.
Limited prompt complexity, focused on keyword matching.
Statistical NLP and machine learning
The introduction of statistical methods and machine learning algorithms brought more flexibility to language models.
Prompts became more nuanced, incorporating contextual information.
The rise of LLMs
Large language models, such as GPT-3, showcased an unprecedented ability to generate human-quality text.
Prompting became crucial for guiding these powerful models, leading to the development of advanced techniques.
Core Components of Effective Prompt Design
Crafting effective prompts is a mix of skill and knowledge. It takes good technical know-how and an understanding of user experience. On the technical side, prompt engineers must know how AI models operate.
Writing clear and simple prompts is just as important. These prompts should be easy to understand for both people and AI. The goal of good prompt design is to create a smooth user experience. This way, AI seems like a natural part of what humans can do.
Understanding User Intent and Context
Effective prompt engineering starts with empathy. It is important to understand what the user wants and their context. Before writing a prompt, think about the user’s goal. What do they want to achieve? What information do they need?
When creating prompts for customer service chatbots, virtual assistants, or AI research tools, the main goal is to predict what users will need. You should write prompts that get clear and useful answers.
For example, when a user talks to a virtual assistant to book a flight, the prompt should capture the travel destination and dates. It should also note any special preferences, such as the airline or class. Recognizing these details is crucial for creating effective prompts that ensure a good user experience.
Balancing Specificity with Flexibility
A key challenge in prompt engineering is finding the right mix of specificity and flexibility. Giving clear instructions is important, but we must also avoid prompts that are too strict. Strict prompts can limit the AI model’s ability to create unique and helpful responses.
At the center of this challenge is the skill of asking the right questions. Instead of specifying every detail of the output, skilled prompt engineers give enough guidance for the AI model. This way, the model can draw on its broad knowledge and come up with valuable responses.
Balancing this carefully helps the AI stay a useful tool for exploring ideas. It ensures that the AI can give relevant responses, even if the user’s question is a bit open-ended.
Emerging Trends in Prompt Engineering
As AI technology grows quickly, prompt engineering is changing too. New trends keep appearing. These changes come from improvements in machine learning, natural language processing, and better AI tools.
These trends change how we use AI. They also create new ways to use these strong tools in different jobs and parts of our lives.
Advancements in Natural Language Processing (NLP)
Advancements in natural language processing (NLP) have changed prompt engineering, which is an emerging field that requires technical expertise. Machine learning and generative AI are key in making good prompts for AI systems. Data scientists use new methods to make communication better in different areas. This includes virtual assistants and website content. The field of prompt engineering is growing. This growth allows AI tools to give useful answers for many tasks. The impact of AI on how we understand and use language is clear in the new area of prompt engineering.
The Role of Machine Learning in Refining Prompts
The new area of prompt engineering is greatly influenced by advances in machine learning. This is especially true in reinforcement learning. Prompt engineers are looking at how they can use machine learning algorithms to automatically improve and refine prompts. They base this on user feedback and what outcomes users want.
Think about an AI system that learns from each interaction. It can get better at understanding and replying to user prompts over time. This is what reinforcement learning offers to prompt engineering. By adding ways for users to give feedback, prompt engineers can build AI systems that are more accurate, relevant, and personal.
This cycle of learning and improving is very important. It helps develop AI systems that are flexible, strong, and able to handle many types of user queries with better accuracy as time goes on.
Practical Applications of Prompt Engineering
Prompt engineering is not just a theory; it is changing how we use technology in real life. It helps make chatbot conversations better and makes voice-activated systems work smoothly. The uses of prompt engineering are growing quickly.
Many businesses see how useful good prompt engineering can be. It helps them improve customer service, automate tasks, and understand data more deeply.
Enhancing Chatbot Interactions
One of the main ways we use prompt engineering is in chatbots. More businesses are using AI-powered chatbots to answer customer questions and offer help. Because of this, prompt engineering is gaining prominence and is very important. ChatGPT is a large language model chatbot made by OpenAI that can perform a range of tasks. It shows how effective prompt engineering can change the game.
By creating prompts that match customer questions, concerns, and needs, developers can teach chatbots to give accurate and helpful answers. It is key for chatbots to understand different ways people talk, know what users need, and have natural conversations. This helps create a good customer experience.
As AI becomes more common in our daily lives, prompt engineering is becoming the “job of the future.” It is changing how we talk to machines and helping us be more efficient and personal in our interactions.
Streamlining Voice-Activated Systems
Voice-activated systems are everywhere now. This includes virtual assistants like Siri and Alexa, as well as smart home devices. They are changing how we use technology. The success of these systems depends on how well they can understand and react to our speech. Here is where prompt engineering is very important.
Natural language processing, or NLP, is key for voice recognition and understanding language in these systems. But NLP alone is not good enough. Good prompt engineering helps these systems not only understand what is said but also grasp the intent, context, and nuance behind the words. This leads to a smoother and easier user experience.
As voice-activated systems keep improving, prompt engineering will be essential. It will help these systems reach their full potential. This will make technology more accessible and easier to use in our everyday lives.
The Future Landscape of Prompt Engineering
The future of prompt engineering looks very promising. It has the power to change many areas like healthcare, education, and creative arts. As AI models, like the latest from Google, get better at understanding human language, prompt engineering will become even more important.
There will be a growing need for skilled prompt engineers. These are the people who connect what humans want to what AI can do. Their work will greatly influence how humans and AI work together in the future.
Anticipated Innovations and Their Impacts
The AI world is always changing, with new ideas appearing very quickly. In the small but growing area of prompt engineering, we expect to see some amazing changes in the scope of prompt engineering in the next few years. One big idea is “multimodal” prompting. This means prompts won’t just be text but will also include images, videos, and even sounds. This will help AI systems to create more detailed and complex results.
Another cool area is using AI to help with prompt engineering. Think about AI tools that can help make better prompts, find possible biases, and adjust prompts for different user groups. This will make these strong technologies available to more people.
As prompt engineering grows, it is very important to think about ethics. We need to focus on fairness, clarity, and reducing biases in AI systems. This will need teamwork from researchers, developers, and prompt engineers.
Preparing for the Next Wave of AI Interactions
As AI becomes a bigger part of our lives, getting ready for the new ways we will use AI is important today. Platforms like Midjourney show how easy it is to use AI to create images from words.
To stay ahead in this AI change, it’s not enough to just know about it. You need to learn actively and develop new skills. Getting certifications in AI and prompt engineering can help people gain the knowledge they need to succeed in this changing job market.
Also, having a mindset that values continuous learning is important. Being able to accept new technologies and understand their uses will be key to doing well in the AI age.
Conclusion
The world of Prompt Engineering is rapidly evolving, introducing innovative ideas that transform our interactions with AI. As we look to the future, staying informed and adaptable is crucial. Understanding user needs and leveraging advancements in NLP and machine learning will be vital. Despite the challenges faced, significant opportunities await those who can navigate the complexities of AI.
Codoid provides the best AI solutions and top-notch software development services to help you succeed in this dynamic field.
Frequently Asked Questions
How Can I Start a Career in Prompt Engineering?
Having a strong background in computer science or a similar field can help, but it is not necessary. You should concentrate on gaining skills in NLP and machine learning. Look for online resources and think about getting certifications. This can improve your qualifications and job opportunities.
What Are the Challenges Facing Prompt Engineers Today?
One of the biggest challenges is reducing biases in AI systems. It is important to make prompts that lead to fair and unbiased responses. We also need to think about the ethics of the growing power of generative AI technologies. This requires careful thought.
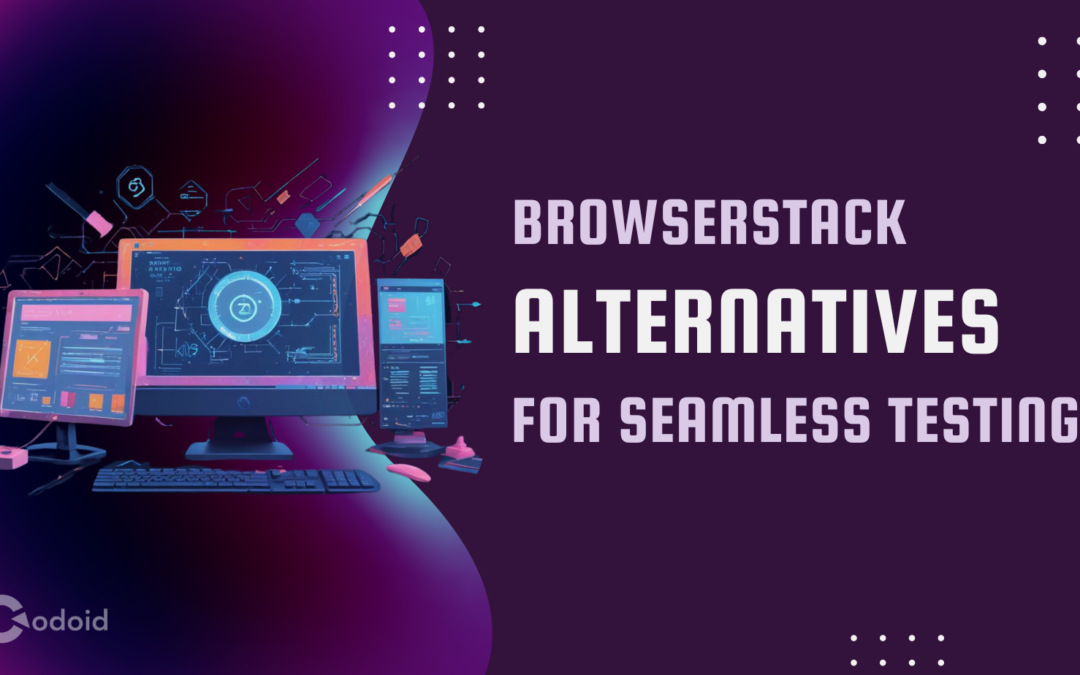
In today’s online world, it is very important for your web applications to work well on different browsers to meet various testing requirements. That’s why tools for real mobile testing, like BrowserStack, are so useful. As the software industry keeps changing, looking at different options instead of BrowserStack can help you find features, downsides, and pricing that fit your testing needs better. In this blog post, you will learn about nine top alternatives to BrowserStack. We will discuss their strengths and how they can help improve your browser testing strategies.
This blog post provides a comprehensive overview of the nine best Browserstack alternatives.
It explores the key features, pros, and cons of each alternative to help you make an informed decision.
The alternatives are chosen based on factors like affordability, device compatibility, mobile testing support, and integrations.
Each alternative is compared to Browserstack, highlighting its strengths and weaknesses.
The blog post concludes by emphasizing the importance of choosing the right testing tool for your specific needs.
Exploring the Top 9 Browserstack Alternatives for Seamless Testing
While Browserstack is still a favorite for many, the demand for different testing tools that support various OS is growing. This has led to more strong alternatives. If you are looking for low costs, specific mobile testing help, or better integrations, including GitHub, many options meet these needs, including real mobile devices for testing. Our well-made list shows the features, pros, and cons of each Browserstack alternative. This can help you make smart choices to improve your web application testing.
PCloudy: A Way to Test Mobile Apps on Android and iOS
PCloudy is a platform for testing mobile apps on Android and iOS. You can do both manual and automated testing with real devices. It works well with popular tools, like Appium, Espresso, and XCUITest. This makes it a good choice for teams who focus on mobile automation. PCloudy has features like simulating networks, testing geolocation, checking live device logs, and making video recordings to improve testing. The pricing starts at $159 each month for live testing. For more advanced features, it starts at $469. PCloudy is a good choice for development teams that mainly work on mobile apps.
HeadSpin: Testing That Focuses on Performance for Mobile, Web, and IoT Apps.
HeadSpin is a strong testing platform that focuses on performance for mobile, web, IoT, and 5G apps. It makes a mark by giving AI-driven insights, remote debugging, and live data on how networks perform. This makes it a good choice for improving user experience. With detailed numbers on delays, loading times, and how devices behave, HeadSpin is perfect for media, telecom, and e-commerce sectors. The pricing is made for business needs, and HeadSpin lets you test on different networks like 3G, 4G, and 5G from around the world.
Diving Deeper into Browserstack Alternatives
While we have looked at two popular Browserstack alternatives, our search for the best testing tool is still going. There are many other platforms that you should check out. They each offer special features and meet different testing needs. Let’s keep exploring more options. This will help you make a good choice based on your project requirements and preferences. If you need special tools for mobile app testing, AI-based visual testing platforms, or affordable options, the following alternatives are great choices. Each one has its own benefits. They aim to make your testing easier and improve the quality of your apps.
Ranorex: Complete Automation Testing for Desktop, Web, and Mobile
Ranorex is a strong automation testing tool that works for desktop, web, and mobile apps, mostly on Windows. It is known for its ability to recognize objects, making it great for UI and functional testing, especially for hard desktop apps. You can customize it a lot because it works with C# and VB.NET. It also supports testing with browsers and data. A one-time license costs $3,590, making it a good long-term choice. Ranorex is perfect for teams that want to automate different types of applications. It works well with CI/CD tools to make development cycles smoother.
AWS Device Farm: Cloud-Based Testing on Real Devices for Web and Mobile Apps
AWS Device Farm is a cloud testing tool. It helps teams test web and mobile apps on real Android and iOS devices that are hosted by AWS. It works well with automatic tools like Appium, Calabash, and Espresso. This makes it great for adding mobile testing to development processes. The pricing is easy, with pay-as-you-go rates at $0.17 per device used or a flat rate starting at $250 per device each month. It is part of the AWS system. This allows easy use of AWS services for checking performance, security, and data. It is a strong option for development teams.
Why These Alternatives Stand Out?
As we looked at different Browserstack alternatives, it is clear that each one has its own strengths. They meet specific needs and do well in different areas of testing and documentation across different OS versions. These options offer choices that fit budget concerns, focus on things like mobile testing, visual testing, and URL integration, and blend smoothly with current workflows.
The best choice will depend on carefully checking your project requirements, budget limits, and needed features. By matching these things with the advantages of each alternative, you can equip your team with the right testing tool. This tool will help ensure your applications work well on all platforms and devices.
Sofy.ai: A Mobile App Testing Tool for Android and iOS That Uses AI
Sofy.ai is a new app testing platform that uses AI to make testing for Android and iOS apps faster. It focuses on speed and does not rely on manual testing. The platform provides functional, visual, and performance testing on several devices. This makes it great for teams that want to use AI for their testing. Sofy.ai has different pricing plans that work for any project size, from small startups to big companies. It also offers a free trial to help users see its features. This makes Sofy.ai a strong choice for anyone looking for AI-driven tools for mobile app testing.
Bitbar: Test Mobile Apps in the Cloud Using Real Devices
Bitbar is a mobile app testing platform. It lets you test on real Android and iOS devices in the cloud. This makes it a good choice for mobile teams, rivaling BrowserStack. Bitbar works with tools like Appium and Selenium. It supports many programming languages. You can run several tests at the same time, which saves time. The pricing is flexible, with options to pay per use or subscribe. Bitbar offers features like screen testing and detailed reports. It has strong support for devices. This makes Bitbar great for teams wanting thorough mobile testing and better productivity.
WeTest: Complete Mobile App Testing with Real Devices and Testers
WeTest is a mobile app testing platform for Android and iOS. It offers services like testing on real devices, automation, and watching how well apps work. Unlike BrowserStack, WeTest is specialized in mobile apps. It supports tools for checking how well the app is compatible, how easy it is to use, and its security to make sure apps work well on different devices. They have different pricing plans, including pay-as-you-go and subscriptions, which fit teams of any size. This makes WeTest a great choice for teams that want to focus on mobile testing and check app quality before it hits the market.
Making the Right Choice for Your Testing Needs
With many great Browserstack alternatives, picking the right tool can feel overwhelming. Focus on your specific testing needs, budget, and features you want. This will help you narrow down your choices. Try the free trials from most platforms. This way, you can see what they can do before deciding.
Choosing the right testing tool can change how well your development process works. It can also improve your application quality and keep your users happy. Take time to research, try things out, and find the best Browserstack alternative. This will help your team create amazing digital experiences.
Sauce Labs: Testing on the Cloud for Browsers and Mobile
Sauce Labs is a top cloud testing platform. It offers strong testing for web and mobile apps. This includes checking if apps work on different web browsers and automatic testing. Sauce Labs supports real devices and many types of browsers and systems. It allows you to run several tests at the same time, which helps cut down testing time. It works well with tools like Selenium and Appium. It also has different pricing options that match team size and needs. Features like real-time testing, detailed reports, and video recordings make Sauce Labs great for teams that want good quality assurance across different platforms.
Perfecto: Testing Mobile and Web Apps in the Cloud
Perfecto is a cloud testing platform for mobile and web apps. It gives you the chance to use many real devices and operating systems. It is great for teams that want to test deeply and release fast. Perfecto lets several tests run at once, helps to check performance, and has automated testing to boost productivity and make feedback easier. The prices can fit different team sizes. Features like real-time data, session recording, and simulating different conditions help make sure that apps are high-quality and work well in CI/CD pipelines.
Here’s a comparison table for the nine mobile and web testing platforms:
In conclusion, choosing the right testing platform from these top BrowserStack options is key for easy testing. Each choice has unique features for different needs, like cross-browser testing and simple UI automation. Think about what you need and pick a tool that matches your goals to feel good about your digital projects. Also, Codoid provides a great way to test on real mobile devices, ensuring you have good performance and reliability. Look at these options to boost your testing skills and achieve the best results in your development work.
Frequently Asked Questions
What Makes These Alternatives Better Than Browserstack for Some Users?
These options meet a variety of needs. They differ in pricing, ease of use, and special features like mobile app testing and visual testing. Their advanced features and customized experiences allow them to fit well with different teams and projects.
How Do I Choose the Right Testing Platform Among These Alternatives?
Think about what your project needs. Look at your team’s skills and your budget. Check the main features of each option. See what devices they support and how well they work with your development tools. Also, find out if the test automation platforms provide a free trial. This way, you can try them out before you decide.
The Web Content Accessibility Guidelines (WCAG) 2.1 is an important new version from the Web Accessibility Initiative. It aims to make the web easier for everyone to use. This includes better access to important status messages. This update introduces additional success criteria that improve on those in WCAG 2.0. WCAG 2.1 mainly focuses on how people with disabilities use technology. It pays close attention to assistive technologies and the growth of mobile devices. It also highlights key shortcuts and character key shortcuts to help users navigate web content better.
Key Highlights
WCAG 2.1 adds 17 new success criteria. This makes websites easier for more people to use.
The update is meant to help individuals with disabilities who use the internet.
A major focus of WCAG 2.1 is mobile accessibility. It addresses the rise in mobile device use.
This version improves experiences for those with low vision and users of screen readers.
Developers now have new tools and resources. These will help them shift from WCAG 2.0 to 2.1 easily.
Understanding WCAG: An Overview
Web content accessibility means that everyone, including people with disabilities, can easily access and use online content. This includes various ways to interact with it, called input modalities, ensuring the use of input modalities is diverse and effective. This idea is a key part of WCAG. WCAG stands for Web Content Accessibility Guidelines, created by the World Wide Web Consortium (W3C). When developers stick to these rules, they help build a digital environment where everyone can find and use information easily. This means that everyone feels included, no matter their physical or mental abilities.
WCAG is important for everyone, not just people with disabilities. A website that is well-designed and easy to access offers a better experience for all users. When web developers follow WCAG, they help make the web a nicer place for everyone.
The Evolution from WCAG 2.0 to 2.1
The move from WCAG 2.0 to WCAG 2.1 is important for making the world wide web easier for everyone. WCAG 2.1 adds more success criteria. It includes new criteria like motion actuation, which helps prevent accidental actuation. This update does not throw out what we already have. It improves and adds to the current rules. This change helps web pages meet the changing needs of users with disabilities.
The new success criteria highlight different challenges and chances in digital access. There are many mobile devices and different user needs. WCAG 2.1 puts more attention on mobile access. It also includes help for visual, auditory, and cognitive disabilities.
These changes aim to make the online experience better for everyone. They recognize the different ways people connect to the digital world. By addressing specific issues and using new assistive technologies, WCAG 2.1 helps create a fair and easy-to-use web for all.
Key Principles of Web Accessibility
Accessibility is about helping all people. This includes those with different abilities. It helps them to see, understand, and use web content. When developers work on web content accessibility, they want to make it simple for all kinds of needs and choices.
This effort is about finding new ways to share information. This includes giving text descriptions for pictures, adding captions to videos, and providing keyboard navigation options. Many people with disabilities use assistive technologies. These features help them have a better experience online.
When developers think about accessibility, they build websites for many people. This creates a friendly space for all users. By prioritizing accessibility in their work, they help create a more inclusive internet.
Major Enhancements in WCAG 2.1
WCAG 2.1 is an update that builds on the previous version. It makes important changes to help many users. These updates consider how technology has improved and how we depend on the internet. The aim is to make it easy for everyone to access web development.
A big change is happening in how people use their phones. More people are going online with their phones. Because of this, WCAG 2.1 introduces new rules. These rules help ensure that websites are shaped and look good on any screen size and position.
New Guidelines for Mobile Accessibility
WCAG 2.1 focuses on how many people are now using mobile devices and changes in web accessibility because of this. Its goal is to make sure there is no loss of information or parts of the content. The new guidelines take into account the unique challenges faced by users with disabilities when they use mobile devices, ensuring that a specific display orientation is not essential. For those with visual impairments, WCAG 2.1 emphasizes the need for a responsive design that uses CSS pixels. This means that the content should fit well on various screen sizes and resolutions.
The guidelines are about motor impairments. These impairments can make it hard for users to touch screens properly. WCAG 2.1 advises that interactive parts should have larger touch areas. This change helps users with motor impairments to use them without mistakes.
WCAG 2.1 uses mobile-focused rules to help developers create websites and apps for the many people who use mobile devices. These updates ensure that everyone has a better and more inclusive online experience.
Improvements in Visual and Hearing Accessibility
The look of web content is very important for people who need better access. WCAG 2.1 brings new useful features for users with low vision and for those who use various human languages. This is especially true for those who have low contrast sensitivity. The guidelines point out the importance of having a good contrast ratio between text and background colors. These major changes make text style properties easier to read. This all helps people read and understand content, no matter what their vision is.
WCAG 2.1 has improved rules for non-text content. It shows how important it is to use alternative text for images and graphics. This allows screen readers to share important visual details with people who are blind or have low vision.
The need for screen reader support goes beyond just adding alternative text. WCAG 2.1 advises web developers to use simple markup, ARIA attributes, and more tools. These practices help users understand the design of the website. They also assist in navigating the site and using its interactive features with screen readers.
Detailed Comparison between WCAG 2.0 and 2.1
Both WCAG 2.0 and 2.1 work to make the web better for all users. It’s key to know the differences between them to create websites and apps that everyone can use. The biggest difference is that WCAG 2.1 has new success criteria. These new success criteria focus on the needs of today’s technology and its users.
The new guidelines have the same rules as WCAG 2.0. They make the rules better. They also help more people access our digital world as it evolves. The next section highlights the key differences between these two versions. It shows how moving to WCAG 2.1 can truly make a difference.
Enhanced Criteria for Text and Images
Text and images are important for how people use a website. WCAG 2.1 introduces new rules to make these areas better. It knows that good formatting and alternative text descriptions matter a lot. This helps people with disabilities in understanding and using web content easily.
WCAG 2.1 helps with text spacing. It allows users to change how text appears to fit their needs. You can change the line spacing, add space after paragraphs, and adjust letter and word spacing.
WCAG 2.1 knows there are many images of text. It gives rules to make these images easier to access. Developers should use text alternatives whenever possible. This means they need to provide text versions of the images. This way, screen readers can read the text to users. It helps users who cannot see the image get the same information.
Feature
WCAG 2.0
WCAG 2.1
Text Spacing
Addressed, but WCAG 2.1 provides more specific guidance
Encourages flexibility, allowing users to adjust spacing without loss of content or functionality
Images of Text
Use of text alternatives encouraged
Reiterates the importance of providing text alternatives for images of text for accessibility
Advanced Navigation Accessibility Features
Navigation can be hard for people with disabilities. WCAG 2.1 has new tools to help users use keyboards better. This change helps those who have difficulty using a mouse or trackpad.
A key part of this is making keyboard focus easy to see. WCAG 2.1 says that we should make keyboard focus easy to notice. This helps people know where they are on the page.
For people who use single pointer tools, like a head pointer or mouth stick, WCAG 2.1 has guidelines for single pointer gestures. These guidelines help make sure that functions using multi-touch gestures, such as pinch-to-zoom, can also work in different ways. If you are using voice recognition software or a user agent, WCAG 2.1 shows the importance of clear form input data and the visual presentation of the additional content. It needs easy labels, clear instructions, and helpful error messages. This way, forms will be accessible and simple to use for people with cognitive disabilities.
Implementing WCAG 2.1 for Web Developers
Making changes to follow WCAG 2.1 can feel tough, but a good plan can help. Developers should view these guidelines as important rules for good web design. They also need to consider how to make their project accessible from the start.
Many resources can help developers meet WCAG 2.1 standards. Using these tools can make work easier. They assist developers in creating websites that everyone can use.
Tools and Resources for Compliance
To make sure web pages follow the WCAG 2.1 rules, you need the right tools, resources, and practices. Automated testing tools are very important. They help developers find accessibility problems early during development. These tools check web pages based on WCAG rules and give reports that point out areas that need improvement.
But using only automated testing is not enough. Manual testing remains very important. It helps find tricky accessibility issues. It also checks how users feel about the site. Including users with disabilities in the testing is crucial. This allows developers to receive helpful feedback. They can also make sure the solutions work well in real life.
Developers can use accessibility libraries and frameworks to make their work easier. These tools provide simple and accessible user interface components. They show what the purpose of user interface components is. This can help save time and lower the chance of mistakes. By adding accessibility from the start and using the right markup languages, developers can make sure their web pages and applications follow WCAG 2.1 standards.
Best Practices for Smooth Transition
Transitioning to WCAG 2.1 needs careful planning. This planning helps ensure users have a good experience and stops new accessibility issues from happening. Begin by looking at your current code to find problems related to the new rules. Do a thorough check to see what updates you need to make, especially in areas affected by the new guidelines.
Ensure that new styles or features do not lead to any loss of content or function for users of assistive technologies.
Test everything across different devices and browsers.
Also, check it with assistive technologies.
This will help ensure that all parts work well together.
It will also help prevent any unexpected problems.
Preventing data loss is very important during this change. You need to create strong systems to manage errors. It is also key to give clear steps to users on how to recover data if something goes wrong. Following these best practices can make it easier for developers to switch to WCAG 2.1. This can reduce problems for users and keep the digital space fair and open for everyone.
Conclusion
In summary, it is important to know the differences between WCAG 2.0 and 2.1. This knowledge helps ensure websites follow accessibility rules. The change from 2.0 to 2.1 brings important updates in design, especially useful for mobile users and individuals with vision challenges. Using WCAG 2.1 provides clearer guidelines for text, images, and navigation, resulting in a more accessible internet for everyone. Web developers need to understand these new rules and should use available tools and best practices to easily follow WCAG 2.1. This change will improve the experience for people with disabilities. Additionally, Codoid has experienced testers familiar with accessibility testing, who can assist in ensuring that websites comply with these updated guidelines.
Frequently Asked Questions
What are the main differences between WCAG 2.0 and 2.1?
WCAG 2.1 is an upgrade from WCAG 2.0. It includes 17 new success criteria. These changes focus on helping people with low vision. They also assist users with cognitive disabilities. Plus, there is better visual presentation for an improved experience.
Why was WCAG 2.1 introduced?
WCAG 2.1 was created to keep up with new technology and how people use it. More people are using mobile devices today. We now understand cognitive disabilities better. Because of this, we had to add new content and rules. This helps everyone interact more easily.
How can organizations ensure compliance with WCAG 2.1?
To meet WCAG 2.1 standards, you need a good plan. First, learn about the new Web Content Accessibility Guidelines. Next, use the tools and resources that are available. Testing is important, so make sure to test everything well. Also, listen to user feedback. This will help improve web content accessibility for everyone.
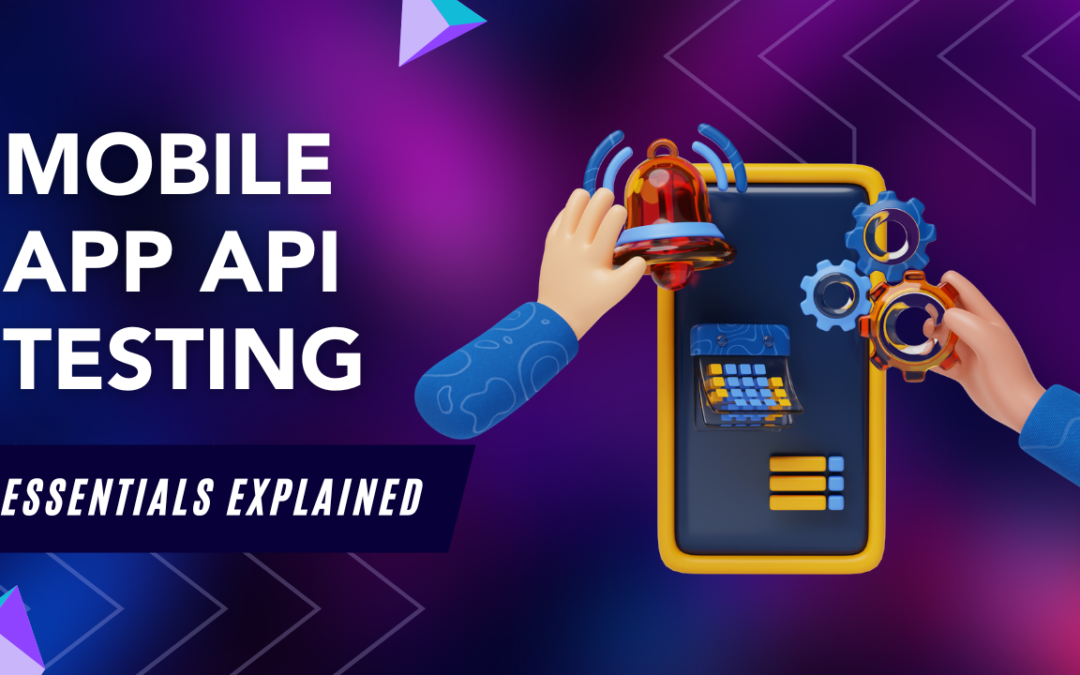
In today’s world, we rely on our mobile devices. Because of this, a good user experience is very important. A key part of getting this is careful API testing. This blog will help you learn the basics of mobile app API testing. You will see why it matters, the types involved, how to put it into practice, and the best ways to do it. When developers understand and follow these ideas, they can build safe, strong, and fast mobile applications that meet the needs of users.
Key Highlights
API testing for mobile apps is important. It helps check the quality, security, and performance of the APIs in your mobile applications.
There are different types of testing involved, including functional testing, security testing, performance testing, and compliance testing.
A good testing environment with the right tools is important for effective API testing.
Creating detailed test cases for different situations and edge cases is key for thorough API testing.
Automating your API tests can make your work faster and improve test coverage.
Following best practices such as continuous integration, monitoring, and logging can enhance your API testing strategy.
Understanding Mobile App API Testing
The application programming interface, or API, is crucial for today’s mobile apps. It helps different software systems talk to each other and share data. Mobile API testing examines these APIs without checking the user interface. This testing ensures that the APIs work well and are safe.
This process is about sending requests to the API and checking the answers. This step is crucial to ensure the API functions correctly, remains secure, and meets all standards. By doing careful API testing during the development process, developers can find and fix problems early. This leads to a final product that is more reliable and effective.
The Importance of API Testing in Mobile Applications
In mobile app development, API testing is very important for a good user experience. APIs help different parts of an app talk to each other and connect with other services.
Thorough API testing is important for a few key reasons. First, it ensures that the app works properly by handling data requests and responses correctly. Second, API testing can help find security problems. This protects sensitive data that moves between the app and the server.
It also looks at how well an API works in different situations. This helps to ensure it replies quickly. It also tries to stop bottlenecks that could harm the overall user experience.
Key Components of Mobile App APIs
To better understand mobile app API testing, let’s look at the key parts:
API stands for Application Programming Interface. It is a set of rules that help different parts of a mobile app or other apps talk to each other. You can think of it like a waiter. The waiter takes your order to the kitchen, which is another system, and brings back your food.
API Endpoint: This is a special web address that a mobile app uses to connect to a server. It is where the app sends requests and gets replies. You can compare it to the address of a restaurant. You need the right address to order.
HTTP Requests: These are messages an app sends to an API endpoint. You can view these requests as telling the waiter what you want to order. They often use methods like GET to read data, POST to send new data, PUT to change existing data, and DELETE to get rid of data.
Types of Mobile App API Testing
Mobile app API testing comes in several types. Each type focuses on different areas.
Functional testing checks each function of the API to make sure they work correctly.
Performance testing tests how quickly the API responds. It also looks at how reliable it is and how well it can manage different workloads.
Security testing searches for weaknesses in the API that could lead to attacks.
Compliance testing ensures that the API meets industry rules and standards.
There are other ways to test too, like fuzz testing. In fuzz testing, random data is used to see how the API reacts. Using these different tests helps developers find out more about the API’s performance, security, and reliability.
Functional Testing for App Logic Verification
Functional testing ensures that every API function performs correctly. It requires creating specific test case scenarios. These scenarios confirm that the API processes orders properly, returns the correct information, and manages errors appropriately.
A key part of functional testing is to ensure the API logic meets the needs of the application. This involves checking rules for data validation, input limits, and error handling. For example, if a user submits a form without completing all the fields, the API should display a clear error message.
By testing each part carefully, developers can check that the API works well. This step helps to improve user satisfaction. Clear functional tests are very important. They help to build a mobile application that is reliable and easy to use.
Security Testing to Safeguard Data
In today’s world, cyber threats are happening more often. This is why security testing matters. It helps find weak spots that could let sensitive data get into the wrong hands or cause issues for the whole system.
Security tests check for issues in areas like login security, user permissions, and data safety. For example, testers might try to break login rules, enter hidden parts of the app, or catch data that passes between the app and the server.
When developers find and fix weak areas early, they can make the API stronger. This helps protect against unauthorized access, data leaks, and other harmful actions. It also keeps user privacy and data safe.
Performance Testing for Optimal App Response
Performance testing measures how well the API handles requests. It looks at how the API responds, grows, and stays reliable when there are different levels of use. This testing is important to make sure the API can manage actual usage without slowing down or crashing.
There are many ways to perform testing on how well something works. This includes load testing, stress testing, and endurance testing. These tests check how fast the API responds. They also measure how many transactions the API can handle each second. Lastly, they look at how many system resources the API needs, both during normal times and when it is busy.
Careful performance testing helps developers find and fix problems with API performance. These problems can be slow database queries or poor coding. This work ensures the app remains fast and reliable for users. Good performance is key to keeping users happy. We want to avoid losing them because of annoying delays.
Setting Up Your Environment for API Testing
Before you start testing, it is important to set up a good environment. This usually means using a special server or a cloud testing platform.
The testing area should feel like the real world. This will help you get honest test results. Choosing the right testing tool is very important. You can find tools ranging from simple REST clients to more complex API testing suites. When you pick a tool, think about several points. Consider what protocols it supports and how easy it is to use. Also, make sure it works well with other tools you use in development.
Tools and Resources Needed
Choosing the right API testing tool is very important for good tests. There are many tools available for different needs. Each one has its own features. These features can include automated testing, performance tracking, and security checks.
Tool
Description
Postman
A popular choice providing a user-friendly interface for sending requests, analyzing responses, and creating automated tests.
JMeter
Open-source tool designed for load testing, enabling you to simulate heavy user traffic and measure API performance.
Swagger UI
If your API is documented with Swagger (OpenAPI), Swagger UI provides an interactive interface to test API endpoints directly.
HyperTest
A new-age testing tool that leverages existing traffic to create comprehensive tests without needing code. Versatile choice that integrates well with CI/CD pipelines.
In addition to these tools, you might also need resources like mock servers. They help to mimic API responses.
You will need API documentation to learn about the endpoints and how to format requests.
A version control system, such as Git, is also key. It helps you keep track of your test scripts.
Configuring the Test Environment
Setting up the test environment is very important. It is like having the right tools. You need to arrange the settings, requirements, and data to feel like the real world where the API will be used.
First, set up the network. Make sure your mobile device or emulator sends data to the test environment and not to the live server. This helps you test with the right version of the API. Next, check if all outside services that your API uses are either simulated or can be accessed in your test environment.
Lastly, put the data you need into the test environment. This could mean creating fake user accounts, test products, or other important details for your API tests. The aim is to set up an environment that seems very real. Doing this will help you find problems before they affect real users.
Designing Effective API Test Cases
Effective API testing requires good test cases that consider various situations. Each test case tells you what condition or action to test. It also describes the result you expect and how to perform the test.
Start by outlining the main steps users take in your mobile app when they make API calls. Think about the different types of data they might enter, any errors that could happen, and unusual situations. A good test case is not just about checking if the API works. It’s also about making sure it can handle unexpected inputs and errors well.
Having complete test coverage for different user cases is important for a stable and reliable mobile app. A single bug in the API can lead to several problems in the user interface. So, it is essential to test carefully.
Identifying Key Scenarios for Testing
Start by looking at the parts of your mobile app that use the API. For example, when users register, log in, get data, or make in-app purchases, they often rely on API calls. Each of these actions can be a good chance to test.
Consider both positive and negative test cases.
Positive test cases use valid inputs. They verify if the API functions correctly during normal conditions.
For instance, checking if a user can log in with the correct information.
Negative test cases use incorrect or unexpected inputs. These tests see if the API handles errors properly. They check for issues like wrong data formats, unauthorized access, or attempts to exceed API limits. By looking at both types of tests, you make sure to have good test coverage.
Crafting Precise Test Cases
A good test case is easy to understand. It should aim for a clear goal. It must include the API endpoint being tested. Also, add the HTTP method, such as GET, POST, PUT, or DELETE. Mention any headers or parameters needed too. Lastly, say what the expected status code and response data are.
When we test the API that updates user data, we will say to use the PUT method in the test case. We will add the endpoint URL and the JSON body that has the updated data. We will also expect the status code to be 200 OK, which means the update was a success.
Good documentation of test cases is very important. It makes things easier to manage and use again. A well-organized test suite is a useful tool for future coding. It also helps solve problems, especially when your API changes or when you add new functionalities.
Implementing API Test Automation
Automation is key for good API testing. Automated tests run faster than manual ones. You can easily repeat these tests. This makes them ideal for checking updates and changes.
When you automate your API tests, your QA team can focus more on challenging tests and come up with fresh ideas. Human judgment is very important in this process. However, remember that not everything should be automated. Some things do not need it.
Selecting the Right Automation Tools
Choosing the right tools for automation is important for better API testing. Think about how complex your API is. Also, consider the skills of your team and your budget when you decide.
Tools like Postman and JMeter are popular for automated API testing. Postman has an easy-to-use interface. You can quickly create and run tests with it. JMeter, however, is better for performance testing. It can handle heavy loads very well.
There are special tools for security testing, contract testing, and other types of API testing. You should look at different options. Pick the tool that fits your needs and skills the best.
Automating Test Execution and Scheduling
Once you create your automated tests, it should be simpler to use them. A good way to do this is by connecting your test framework to your CI/CD pipeline. This will let your tests run automatically any time there is a change in the code.
Tools like Jenkins, GitLab CI, and CircleCI are popular for making the testing process easier. They let you set up workflows. These workflows can run your API tests automatically when new code is added or merged into a branch.
You can set specific times for your tests to run. This lets you check how healthy your API is. It is especially good for finding problems early. By doing this, your API will stay stable and reliable, even when your code changes fast.
Best Practices in Mobile App API Testing
Adopting good habits can make a big difference in your mobile app API testing. Here are some key strategies to think about:
Continuous Integration: Add your API tests to your CI/CD pipeline. This way, they will run automatically when changes are made in the code.
Thorough Documentation: Write simple notes for all your test cases. Include what they do, the steps to follow, what the expected results are, and any dependencies.
Monitoring: Use tools to check API performance in real-time. This can help you find and fix problems before they grow into bigger issues.
By using these practices, you create a good quality assurance culture. This leads to mobile applications that are reliable and function smoothly. They meet and exceed what users want.
Continuous Integration for Ongoing Quality Assurance
Continuous integration (CI) is the practice of bringing together code changes from different developers regularly into one spot. Whenever changes are combined, an automated system builds and tests the code. This practice helps to find errors early in the development process.
By adding your API tests to your CI pipeline, you can check every change in code before it goes live. This lowers the risk of bugs in the production version. It makes your app more stable and reliable.
QA engineers and developers can team up to decide which tests to add to the CI pipeline. This teamwork helps ensure that the important API functionalities are tested regularly for errors or strange actions.
Monitoring and Logging for In-depth Analysis
Monitoring and logging are important for understanding how your mobile API works. You need to collect, check, and show several details about API calls. This includes how long they take to respond, how often errors happen, and how resources are used.
When you pay attention to these details, you can spot problems like slow speeds, high errors, or unusual traffic that could show issues with the API. By noticing these problems early, you can fix them before they upset the users.
Logging gives helpful information about how the API works in real life. By looking at this log data, you can notice patterns, fix problems, and improve your API over time. This keeps your API running well and steady.
Conclusion
In conclusion, knowing the basics of mobile app API testing is very important. This testing ensures your mobile applications run smoothly, are safe, and work well. By testing your APIs properly, you can improve user experience, protect sensitive data, and make your app more responsive. To do this, set up the right testing environment. Create good test cases and use automation. Following best practices like continuous integration and monitoring can boost the quality of your mobile apps. Stay informed, be proactive, and pay attention in your API testing to provide your users with a smooth and safe mobile experience.
Frequently Asked Questions
What Makes Mobile App API Testing Essential?
API testing is very important for mobile app development. It affects user experience a lot. A well-tested API helps create a smooth and seamless user experience. This is because how well the app talks with and gets data in a safe way affects the overall user experience.
How Can I Ensure Comprehensive API Test Coverage?
To get complete test coverage, use an API testing tool. It is important to make different test case scenarios. Think about both good and bad test cases. Also, check boundary conditions and edge cases in your mobile API testing. This way, you can make sure thorough API testing is done.
What Are the Most Common Challenges in API Testing?
In API testing, there are several common challenges you might face. First, you may deal with authentication. Next, it's important to make sure that data transfers correctly. You also need to manage different data formats. Another concern is keeping test environments running properly. Additionally, there may be problems with version compatibility and security.
Which Tools Are Preferred for Automated API Testing?
Popular tools for API testing are Postman and JMeter. Postman is well-liked because it is easy to use and offers many testing options. JMeter, on the other hand, is best for load testing and checking performance. When you pick a tool, think about your needs and the difficulty of your automation tasks.