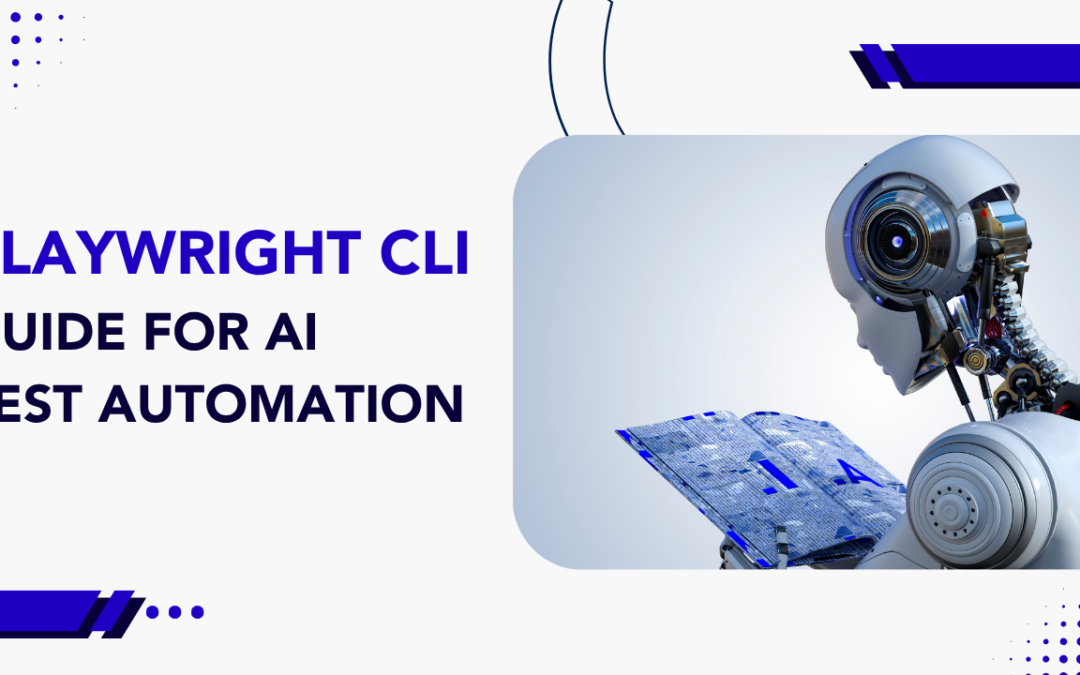
Automation testing is evolving fast, and Playwright CLI is becoming part of that shift as AI starts changing how teams build, debug, and validate software. For years, QA and engineering teams relied on scripted frameworks, manual investigation, and constant maintenance to keep browser testing reliable. However, as applications become more complex and release cycles move faster, that approach alone is no longer enough. At the same time, AI coding agents such as GitHub Copilot and Claude Code are influencing how teams handle browser-based workflows. Because of that, teams now need tools that are not only powerful but also practical and efficient in real development environments.
This is where Playwright CLI becomes relevant. It helps simplify browser interactions through direct command-line actions, making it easier to experiment, debug flows, and support agent-driven testing. In this guide, we will explore where it fits and why it matters.
Playwright CLI is a command-line interface (CLI) that allows developers, QA engineers, and automation testers to control browser actions using terminal commands.
In simple terms, a CLI means users type instructions into a terminal instead of performing every step manually in the browser interface. As a result, common browser actions can be executed more quickly and consistently, which is especially useful in automation testing workflows.
For example, instead of manually:
Opening a browser
Navigating to a website
Clicking a button
You can run commands like:
playwright-cli open https://example.com
playwright-cli click "Login"
This is the core idea behind CLI. It replaces repetitive manual browser actions with direct, structured commands.
Key Capabilities of Playwright CLI
Direct browser interaction Open pages, click elements, fill forms, and capture screenshots through terminal commands instead of manual browser actions.
Optimized for coding agents Works efficiently with tools such as GitHub Copilot and Claude Code, which can use concise commands to perform browser tasks.
SKILLS support for better guidance Provides built-in reference guides that help coding agents understand available commands and workflows more clearly.
Faster experimentation and debugging Makes it easier to validate user flows, reproduce issues, and inspect browser behavior without writing full test scripts upfront.
Supports the shift toward AI-assisted testing Helps teams move from manual validation to more structured, agent-driven automation workflows.
Why Playwright CLI Matters for Modern Test Automation
Traditional automation frameworks were designed for human-authored tests first. By contrast, CLI is built for a world where both humans and AI agents participate in the testing workflow.
That matters for several reasons.
1. It is better aligned with coding-agent workflows
Coding agents work best when tools are clear, short, and composable. In official Playwright guidance, playwright-cli is presented as the preferred fit for coding agents because its commands avoid loading large tool schemas and verbose accessibility trees into the model context.
2. It reduces friction during exploratory automation
When a developer or QA engineer wants to validate a flow quickly, writing a full test file can feel slow. With CLI, they can interact with the page immediately from the terminal.
3. It supports observation and intervention
The playwright-cli show dashboard allows users to observe active sessions and even step in when needed. Official docs describe it as a visual dashboard for monitoring and controlling running browser sessions.
4. It makes browser automation more flexible
Because it supports sessions, snapshots, storage management, routing, tracing, and code execution, CLI can fit into debugging, reproduction, test generation, and validation workflows.
Playwright CLI vs Playwright MCP
Feature
Playwright CLI
Playwright MCP
What it is
A tool to control the browser using simple terminal commands
A server-based setup that lets AI agents interact deeply with the browser
How it works
You run direct commands like open, click, type
Uses a protocol (MCP) for continuous communication with the browser
Ease of use
Easy to start and use for developers and testers
More complex setup, mainly for advanced workflows
Best for
Quick testing, debugging, and simple automation flows
Complex, long-running AI agent workflows
Speed & efficiency
Faster for small tasks due to simple commands
Slower for small tasks but powerful for complex reasoning
AI agent support
Works well with coding agents using short commands
Designed for deeper AI reasoning and multi-step workflows
Setup effort
Minimal setup (install and run commands)
Requires an MCP-compatible environment and configuration
Use case example
Quickly test the login flow or reproduce a bug
Build an AI agent that continuously tests and analyzes UI behavior
Microsoft’s own guidance is clear:
Playwright CLI is best for coding agents that prefer token-efficient, skill-based workflows.
Playwright MCP is better for specialized agentic loops that benefit from persistent state and iterative reasoning over page structure.
Requirements for Playwright CLI
To get started with Playwright CLI, you need:
Node.js 18 or newer
Optionally, a coding agent such as Claude Code, GitHub Copilot, or a similar assistant
The official Playwright docs list Node.js 18+ and a coding agent as prerequisites. They also note that you can install the package globally or use it locally with npx.
Official docs also mention a local dependency approach:
npx playwright-cli --help
That local option is useful for teams that prefer project-scoped tooling rather than global installation.
How to Install SKILLS in Playwright CLI
One of the most interesting parts of CLI is its SKILLS system.
These skills act as local guides that help coding agents understand supported commands and workflows more effectively. That means agents can discover capabilities with less ambiguity and less context overhead.
To install them:
playwright-cli install --skills
Official Playwright documentation describes this as a way to give coding agents richer local context about available commands.
Skills-less operation
Even without formally installing skills, an agent can still inspect the CLI through –help.
For example:
Test the “add todo” flow on https://demo.playwright.dev/todomvc using playwright-cli.
Check playwright-cli –help for available commands.
That flexibility is useful because it lowers the barrier to experimentation.
A Simple Playwright CLI Tutorial
To understand how CLI works in practice, let’s walk through a simple TodoMVC example before exploring its more advanced capabilities.
playwright-cli open https://demo.playwright.dev/todomvc/ --headed
playwright-cli type "Buy groceries"
playwright-cli press Enter
playwright-cli type "Water flowers"
playwright-cli press Enter
playwright-cli check e21
playwright-cli check e35
playwright-cli screenshot
What makes this example compelling is not only that it works. More importantly, it shows how quickly a real browser flow can be executed without creating a traditional test file first.
That is especially useful during:
exploratory testing
bug reproduction
quick validation before writing a formal test
AI-assisted scenario discovery
Headed vs Headless Mode
By default, Playwright CLI runs in headless mode, which means the browser does not open visually. When you want to watch the browser interact with the page, add –headed.
playwright-cli open https://playwright.dev --headed
Official docs confirm headless as the default behavior and show –headed for visible execution.
This matters because:
Headless mode is better for automation speed and background execution
Headed mode is better for demonstrations, debugging, and trust-building with teams
Sessions: One of the Most Valuable Playwright CLI Features
Session management is where CLI becomes far more practical for real teams.
Browser state, including cookies and local storage, can be shared within the same session. Moreover, named sessions make it possible to test different user paths side by side.
Example:
playwright-cli open https://playwright.dev
playwright-cli -s=example open https://example.com --persistent
playwright-cli list
You can also set a session at the environment level:
PLAYWRIGHT_CLI_SESSION=todo-app claude.
Official docs also include related session management commands, such as:
playwright-cli list
playwright-cli close-all
playwright-cli kill-all
and even delete-data for named sessions.
Why this matters in practice
For QA teams, sessions help with:
Testing different user roles
Preserving logged-in states
Isolating flows across projects
Debugging state-dependent issues
Monitoring with playwright-cli show
When an AI agent is running browser actions in the background, visibility becomes critical. That is where playwright-cli show helps.
playwright-cli show
According to the Playwright docs, this command opens a visual dashboard for observing and controlling running sessions. Your attachment adds an especially useful explanation: users can see a session grid with previews and open a detailed session view to take over mouse and keyboard control when necessary.
In other words, this is not just about “watching automation.” It is about creating a human-in-the-loop testing experience.
After commands run, Playwright CLI can produce snapshots that represent the current browser state. The official docs show that playwright-cli snapshot captures page state and provides element references that can then be reused in actions like click e15. They also document support for CSS and role-based selectors.
Instead of guessing unstable selectors every time, developers and agents can work with compact refs from snapshots. That reduces friction during rapid automation.
Configuration File Support
For teams that need more control, Playwright CLI supports a JSON configuration file.
playwright-cli --config path/to/config.json open example.com
The official docs state that the CLI can also automatically load .playwright/cli.config.json, with support for browser options, context options, timeouts, network rules, and more. They also document browser selection flags such as –browser=firefox, –browser=webkit, –browser=chrome, and –browser=msedge.
This is helpful for teams that need standardized behavior across environments.
Built-in SKILL Areas for Coding Agents
Once skills are installed, coding agents can work with detailed guides for areas such as:
Running and debugging Playwright tests
Request mocking
Running Playwright code
Browser session management
Storage state handling
Test generation
Tracing
Video recording
Inspecting element attributes
This is important because it shows that Playwright CLI is not just a tool for running commands. Instead, it provides a structured way for coding agents to perform and manage browser testing more effectively.
Key Benefits of Playwright CLI
Benefit
Why It Matters
Token-efficient workflows
Better fit for coding agents working within context limits
Faster experimentation
Lets teams validate flows without creating full test files first
Human + AI collaboration
Supports monitoring, intervention, and interactive debugging
Rich browser control
Covers interactions, state, network, tracing, and video
Flexible adoption
Works for manual debugging, agent-driven automation, and test generation
Conclusion
Playwright CLI marks an important step forward in agent-driven test automation. It keeps browser control simple, makes coding-agent workflows more practical, and gives teams a flexible way to move between quick experimentation and deeper automation work. At the same time, it does not try to replace every other Playwright interface. Instead, it fills a very specific need: concise, skill-aware, terminal-based browser automation for modern AI-assisted engineering. Official Playwright docs consistently position it that way, especially for coding agents that need efficient command-based workflows.
For teams exploring AI-assisted QA, that is a meaningful advantage. You get speed, visibility, session control, and broad browser automation coverage without forcing every workflow through a heavier protocol model.
Improve your automation strategy with expert guidance on Playwright CLI and AI-assisted testing.
Playwright CLI is a command-line tool that allows developers and QA engineers to control browser actions using simple terminal commands. It helps perform tasks like opening pages, clicking elements, and capturing screenshots without writing full test scripts.
How is Playwright CLI used in automation testing?
Playwright CLI is used in automation testing to quickly validate user flows, reproduce bugs, and interact with web applications without creating complete test scripts. It is especially useful for exploratory testing and debugging.
What is the difference between Playwright CLI and Playwright MCP?
Playwright CLI is designed for quick, command-based browser actions, while Playwright MCP is built for advanced, agent-driven workflows that require deeper reasoning and continuous interaction with the browser.
Can Playwright CLI replace traditional test automation frameworks?
Playwright CLI does not fully replace traditional frameworks but complements them. It is best used for quick testing, debugging, and supporting AI-driven workflows, while full frameworks are still needed for structured test suites.
Does Playwright CLI support screenshots and debugging?
Yes, Playwright CLI supports screenshots, PDFs, console logs, network inspection, tracing, and video recording, making it useful for debugging and test validation.
Is Playwright CLI suitable for beginners?
Yes, Playwright CLI is beginner-friendly because it uses simple commands to perform browser actions. It allows users to start testing without needing to write complex automation scripts.
What are Playwright CLI skills?
Playwright CLI skills are built-in guides that help coding agents understand available commands and workflows. They improve accuracy and reduce confusion during automation tasks.
What are the main benefits of using Playwright CLI?
The main benefits include faster testing, easier debugging, reduced setup time, better support for AI workflows, and the ability to perform browser actions without writing full scripts.
If you’re learning Playwright or your team is already using it for UI automation, understanding the right Playwright commands is more important than trying to learn everything the framework offers. Most real-world test suites don’t use every feature; they rely on a core set of commands used consistently and correctly. Instead of treating Playwright as a large API surface, successful teams focus on a predictable flow: navigate to a page, locate elements using stable strategies, perform actions, validate outcomes, and handle dynamic behavior like waits and downloads. When done right, this approach leads to automation testing that is easier to maintain, debug, and scale.
This guide is designed to be practical, not theoretical. Based on a real TypeScript implementation, it walks you through the most important Playwright commands, explains when to use them, and shows how they work together in real scenarios like form handling, file uploads, and paginated table validation. Unlike a cheatsheet, this article focuses on how commands are used together in actual test flows, helping QA engineers and developers build reliable automation faster.
Instead of relying on rigid scripts or complex frameworks, Playwright commands provide a flexible and reliable way to automate modern web applications. Here’s what makes them powerful:
Improved Test Stability
Commands like getByRole() and expect() reduce flaky tests by focusing on user-visible behavior.
Built-in Auto-Waiting
Playwright automatically waits for elements to be ready before performing actions, reducing the need for manual waits.
Cleaner and Readable Tests
Commands are intuitive and map closely to real user actions like clicking, typing, and verifying.
Efficient Debugging
Features like screenshot() and detailed error messages make it easier to identify issues quickly.
Scalability with Reusable Patterns
Using structures like BasePage and centralized test data allows teams to scale automation efficiently.
Conclusion
Mastering Playwright commands is key to building reliable and maintainable UI tests. By focusing on strong locators, clean actions, and effective assertions, you can reduce test failures and improve stability. Using built-in auto-waiting instead of hard waits ensures more consistent execution, while reusable patterns like BasePage and centralized test data make scaling easier. These practices help teams write cleaner, more efficient automation, making Playwright a powerful tool for modern testing.
From better locators to smarter waits, these Playwright commands can transform how your team approaches UI automation.
Playwright commands are methods used to automate browser actions such as navigation, locating elements, clicking, typing, waiting, and validating results.
Which Playwright command is most commonly used?
page.goto() is one of the most commonly used Playwright commands because it is usually the starting point for most UI test cases.
How do you handle waits in Playwright?
Playwright supports auto-waiting by default, and you can also use commands like waitForEvent() when needed for specific actions such as downloads.
How do Playwright commands improve test stability?
They improve stability by supporting reliable locators, built-in auto-waiting, and strong assertions that reduce flaky test behavior.
Can beginners learn Playwright commands easily?
Yes, beginners can learn Playwright commands quickly because the syntax is straightforward and closely matches real user actions.
Why are Playwright commands important for test automation?
Playwright commands help testers build stable, maintainable, and scalable UI tests by simplifying navigation, interaction, and validation.
As Playwright usage expands across teams, environments, and CI pipelines, reporting needs naturally become more sophisticated. StageWright is designed to meet that need by turning standard Playwright results into a more structured and actionable reporting experience. This is particularly relevant for organizations delivering an automation testing service, where clear reporting and reliable insights are essential for maintaining quality at scale. Instead of focusing only on individual test outcomes, StageWright helps QA teams and engineering stakeholders understand broader patterns such as stability, retries, performance changes, and historical trends. This added visibility makes it easier to review test results, share insights, and support better release decisions.
While Playwright’s built-in HTML reporter is useful for quick inspection, StageWright extends reporting with capabilities that are better suited to growing test suites and collaborative QA workflows. This blog explores how StageWright adds structure, clarity, and actionable insight to Playwright reporting for growing QA teams.
StageWright is an intelligent reporting layer for Playwright Test. You install it as a dev dependency and add a single entry to your playwright.config.ts, and run your tests as usual. However, instead of the default output, you get a polished, single-file HTML report that you can open in any browser, share with your team, or upload to a CI artifact store.
What makes StageWright “smart” is what happens beyond the basic pass/fail summary.
Stability Grades: Every test gets an A–F grade based on historical pass rate, retry frequency, and duration variance.
Retry & Flakiness Analysis: Automatically detects and flags tests that only pass after retries.
Run Comparison: Compares the current run against a baseline, helping identify regressions instantly.
Trend Analytics: Tracks pass rates, durations, and flakiness across builds.
Artifact Gallery: Centralizes screenshots, videos, and trace files.
AI Failure Analysis: Available in paid tiers for clustering failures by root cause.
StageWright is compatible with Playwright Test v1.40 and above and runs on Node.js version 18 or higher.
Getting Started with StageWright
The setup process for StageWright is designed to be simple and efficient. In just a few steps, you can move from basic test output to a fully interactive report.
Step 1: Install the package
npm install playwright-smart-reporter --save-dev
Step 2: Add it to your Playwright config
Open playwright.config.ts and add StageWright to the reporters array. Importantly, it works alongside existing reporters rather than replacing them.
At this point, you’ll have a fully self-contained HTML report. Since no server or build step is required, you can easily share it across your team or attach it to CI artifacts.
Pro Tip:
Although the default output is smart-report.html, it’s recommended to store reports in a dedicated folder, such as test-results/report.html for better organization.
Configuration Reference: Why It Matters More Than You Think
Once you have a basic report working, configuration becomes essential. In fact, this is where StageWright starts delivering its full value.
Core options you’ll use most
HistoryFile: Stores run history and enables trend analytics, run comparison, and stability grading. Without it, you lose historical visibility.
MaxHistoryRuns: Controls how many runs are stored. Typically, 50–100 works well.
EnableRetryAnalysis: Tracks retries and identifies flaky tests.
FilterPwApiSteps: Removes unnecessary noise from reports, improving readability.
PerformanceThreshold: Flags tests with performance regression.
EnableNetworkLogs: Captures network activity when needed for debugging.
Environment variables
In addition to config options, StageWright supports environment variables, which are particularly useful in CI environments.
Stability Grades: A Report Card for Your Test Suite
One of the most valuable features of StageWright is its Stability Grades system. Instead of treating all tests equally, it evaluates them based on reliability over time.
Because the pass rate has the highest weight, it strongly influences the final score. However, retries and performance variability also contribute to a more realistic assessment.
As a result, teams can quickly identify unstable tests and prioritize fixes effectively.
Run Comparison: Catch Regressions Before They Reach Production
Another key feature of StageWright is Run Comparison. Instead of manually comparing results, it automatically highlights differences between runs.
Tests are categorized as follows:
New Failure
Regression
Fixed
New Test
Removed
Stable Pass / Stable Fail
Additionally, performance changes are tracked, making it easier to detect slowdowns.
Because of this, debugging becomes faster and more focused.
Retry Analysis: Flakiness, Measured
Retries can sometimes create a false sense of stability. However, StageWright ensures that these hidden issues are visible.
A test that fails initially but passes on retry is marked as flaky. While it may not fail the build, it is still flagged for attention.
The report also highlights the following:
Total retries
Flaky test percentage
Time spent on retries
Most retried tests
Over time, this helps teams reduce flakiness and improve overall reliability.
Trend Analytics: The Long View on Suite Health
While individual runs provide immediate feedback, trend analytics offer long-term insights.
StageWright tracks:
Pass rate trends
Duration trends
Flakiness trends
Moreover, it detects degradation automatically, helping teams identify issues early.
As a result, teams can move from reactive debugging to proactive improvement.
CI Integration: Built for Real Pipelines
StageWright integrates seamlessly with modern CI platforms such as GitHub Actions, GitLab CI, Jenkins, and CircleCI.
Importantly, no additional plugins are required. Instead, it runs as part of your existing workflow.
To maximize its value:
Always upload reports (even on failure)
Cache history files
Maintain report retention
This ensures consistency and visibility across builds.
This makes it easier to filter tests by priority, ownership, or related tickets. Consequently, debugging and triaging become more efficient.
Starter Features: What’s Behind the License Key
StageWright also offers advanced capabilities through its Starter and Pro plans.
These include:
AI failure clustering
Quality gates
Flaky test quarantine
Export formats
Notifications
Custom branding
Live execution view
Accessibility scanning
Importantly, these features integrate seamlessly without requiring separate configurations.
Conclusion: Why StageWright Matters
Ultimately, QA automation is only as effective as your ability to understand test results. StageWright transforms Playwright reporting into a structured, insight-driven process. Instead of relying on logs and guesswork, teams gain clear visibility into test stability, performance, and trends. As a result, teams can prioritize effectively, reduce flakiness, and improve release confidence.
Frequently Asked Questions
What is StageWright in Playwright?
StageWright is an intelligent reporting tool for Playwright that provides insights like stability grades, flakiness detection, and test trends.
How is StageWright different from the Playwright HTML reporter?
Unlike the default reporter, StageWright adds historical tracking, run comparison, and analytics to improve test visibility and debugging.
Does StageWright help identify flaky tests?
Yes, StageWright detects tests that pass only after retries and marks them as flaky, helping teams improve test reliability.
Can StageWright be used in CI/CD pipelines?
Yes, StageWright integrates with CI tools like GitHub Actions, GitLab, Jenkins, and CircleCI, and supports artifact-based reporting.
What are the system requirements for StageWright?
StageWright works with Playwright Test v1.40+ and requires Node.js version 18 or higher.
Why should QA teams use StageWright?
StageWright helps QA teams improve test visibility, reduce debugging time, detect regressions faster, and make better release decisions.
Flutter is a cross-platform front-end development framework that enables organizations to build Android, iOS, web, and desktop applications from a single Dart codebase. Its layered architecture, comprising the Dart framework, rendering engine, and platform-specific embedders, delivers consistent UI rendering and high performance across devices. Because Flutter controls its own rendering pipeline, it ensures visual consistency and optimized performance across platforms. However, while Flutter accelerates feature delivery, it does not automatically solve enterprise-grade automation testing challenges. Flutter provides three official testing layers:
Unit testing for business logic validation
Widget testing for UI component isolation
Integration testing for end-to-end user flow validation
At first glance, this layered testing strategy appears complete. Nevertheless, a critical architectural limitation exists. Flutter integration tests operate within a controlled environment that interacts primarily with Flutter-rendered widgets. Consequently, they lack direct access to native operating system interfaces.
In real-world enterprise applications, this limitation becomes a significant risk. Consider scenarios such as:
Standard Flutter integration tests cannot reliably automate these behaviors because they do not control native OS surfaces. As a result, QA teams are forced either to leave gaps in automation coverage or to adopt heavy external frameworks like Appium. This is precisely where the Patrol framework becomes strategically important.
The Patrol framework extends Flutter’s integration testing infrastructure by introducing a native automation bridge. Architecturally, it acts as a middleware layer between Flutter’s test runner and the platform-specific instrumentation layer on Android and iOS. Therefore, it enables synchronized control of both:
Flutter-rendered widgets
Native operating system UI components
In other words, the Patrol framework closes the automation gap between Flutter’s sandboxed test environment and real-device behavior. For CTOs and QA leads responsible for release stability, regulatory compliance, and CI/CD scalability, this capability is not optional. It is foundational.
Without the Patrol framework, integration tests stop at Layer 2. However, with the Patrol framework in place, tests extend through Layer 3 into Layer 4, enabling direct interaction with native components.
Therefore, instead of simulating user behavior only inside Flutter’s rendering engine, QA engineers can automate complete device-level workflows. This architectural extension is what differentiates the Patrol framework from basic Flutter integration testing.
Why Enterprise Teams Adopt the Patrol Framework
From a B2B perspective, testing is not merely about catching bugs. Instead, it is about reducing release risk, maintaining compliance, and ensuring predictable deployment cycles. The Patrol framework directly supports these objectives.
1. Real Device Validation
While emulators are useful during development, enterprise QA strategies require real device testing. The Patrol framework enables automation on physical devices, thereby improving production accuracy.
2. Permission Workflow Automation
Modern applications rely heavily on runtime permissions. Therefore, validating:
Location permissions
Camera access
Notification consent
becomes mandatory. The Patrol framework allows direct interaction with permission dialogs.
3. Lifecycle Testing
Many enterprise apps must handle:
App backgrounding
Session timeouts
Push-triggered resume flows
With the Patrol framework, lifecycle transitions can be programmatically controlled.
4. CI/CD Integration
Additionally, the Patrol framework provides CLI support, which simplifies integration into Jenkins, GitHub Actions, Azure DevOps, or GitLab CI pipelines.
For QA Leads, this means automation is not isolated; it becomes part of the release governance process.
Official Setup of the Patrol Framework
Step 1: Install Flutter
Verify environment readiness:
flutter doctor
Ensure Android SDK and Xcode (for macOS/iOS) are configured properly.
Step 2: Install Patrol CLI
flutter pub global activate patrol_cli
Verify:
patrol doctor
Notably, Patrol tests must be executed using:
patrol test
Running flutter test will not execute Patrol framework tests correctly.
Flutter provides strong built-in testing capabilities, but it does not fully cover real device behavior and native operating system interactions. That limitation can leave critical gaps in automation, especially when applications rely on permission handling, push notifications, deep linking, or lifecycle transitions. The Patrol framework closes this gap by extending Flutter’s integration testing into the native OS layer.
Instead of testing only widget-level interactions, teams can validate real-world device scenarios directly on Android and iOS. This leads to more reliable automation, stronger regression coverage, and greater confidence before release.
Additionally, because the Patrol framework is designed specifically for Flutter, it allows teams to maintain a consistent Dart-based testing ecosystem without introducing external tooling complexity. In practical terms, it transforms Flutter UI testing from controlled simulation into realistic, device-level validation. If your goal is to ship stable, production-ready Flutter applications, adopting the Patrol framework is a logical and scalable next step.
Implementing the Patrol Framework for Reliable Flutter Automation Testing Across Real Devices and Production Environments
The Patrol framework is an advanced Flutter automation testing framework that extends the integration_test package with native OS interaction capabilities. It allows testers to automate permission dialogs, system alerts, push notifications, and lifecycle events directly on Android and iOS devices.
2. How is the Patrol framework different from Flutter integration testing?
Flutter integration testing primarily interacts with Flutter-rendered widgets. However, the Patrol framework goes further by enabling automation testing of native operating system components such as permission pop-ups, notification trays, and background app states. This makes it more suitable for real-device end-to-end testing.
3. Can the Patrol framework handle runtime permissions?
Yes. One of the key strengths of the Patrol framework is native permission handling. It allows automation testing of camera, location, storage, and notification permissions using built-in native APIs.
4. Does the Patrol framework support real devices?
Yes. The Patrol framework supports automation testing on both emulators and physical Android and iOS devices. Running tests on real devices improves accuracy and production reliability.
5. Is the Patrol framework better than Appium for Flutter apps?
For Flutter-only applications, the Patrol framework is often more efficient because it is Dart-native and tightly integrated with Flutter. Appium, on the other hand, is framework-agnostic and may introduce additional complexity for Flutter-specific automation testing.
6. Can Patrol framework tests run in CI/CD pipelines?
Yes. The Patrol framework includes CLI support, making it easy to integrate with CI/CD tools such as Jenkins, GitHub Actions, GitLab CI, and Azure DevOps. This allows teams to automate regression testing before each release.
7. Where should Patrol tests be stored in a Flutter project?
By default, Patrol framework tests are placed inside the patrol_test/ directory. However, this can be customized in the pubspec.yaml configuration file.
8. Is the Patrol framework suitable for enterprise automation testing?
Yes. The Patrol framework supports device-level automation testing, lifecycle control, and native interaction, making it suitable for enterprise-grade Flutter applications that require high test coverage and release confidence.
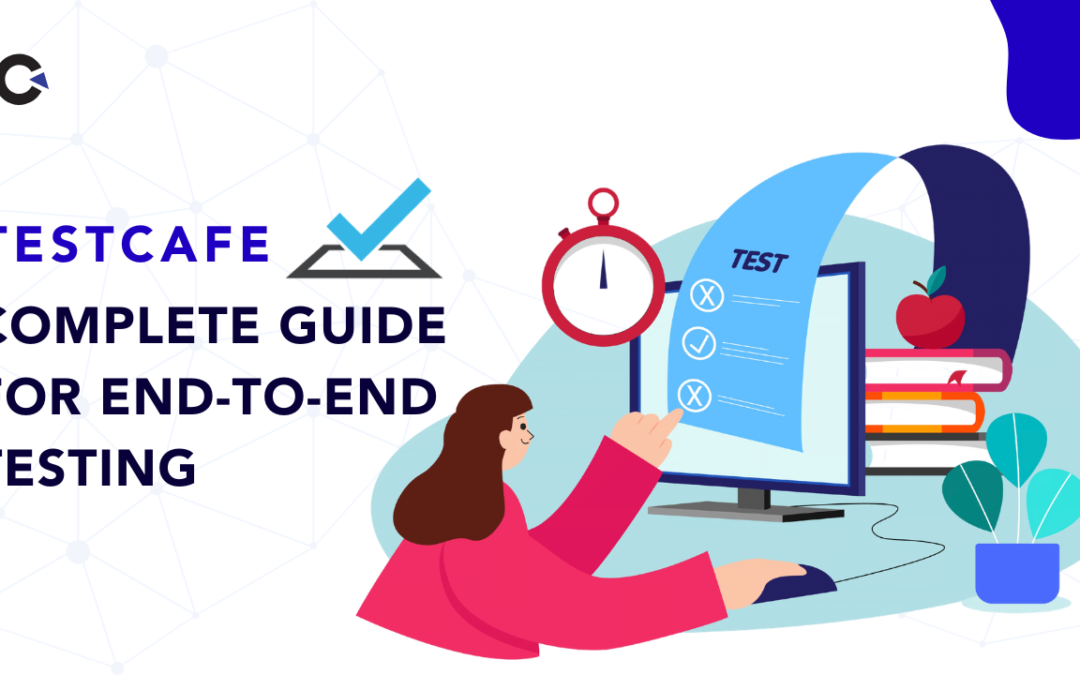
Automated end-to-end testing has become essential in modern web development. Today, teams are shipping features faster than ever before. However, speed without quality quickly leads to production issues, customer dissatisfaction, and expensive bug fixes. Therefore, having a reliable, maintainable, and scalable test automation solution is no longer optional; it is critical. This is where TestCafe stands out. Unlike traditional automation frameworks that depend heavily on Selenium or WebDriver, Test Cafe provides a simplified and developer-friendly way to automate web UI testing. Because it is built on Node.js and supports pure JavaScript or TypeScript, it fits naturally into modern frontend and full-stack development workflows.
Moreover, Test Cafe eliminates the need for browser drivers. Instead, it uses a proxy-based architecture to communicate directly with browsers. As a result, teams experience fewer configuration headaches, fewer flaky tests, and faster execution times.
In this comprehensive TestCafe guide, you will learn:
What Test Cafe is
Why teams prefer Test Cafe
How TestCafe works
Installation steps
Basic test structure
Selectors and selector methods
A complete working example
How to run tests
By the end of this article, you will have a strong foundation to start building reliable end-to-end automation using Test Cafe.
What is TestCafe?
TestCafe is a JavaScript end-to-end testing framework used to automate web UI testing across browsers without WebDriver or Selenium.
Unlike traditional tools, Test Cafe:
Runs directly in browsers
Does not require browser drivers
Automatically waits for elements
Reduces test flakiness
Works across multiple browsers seamlessly
Because it is written in JavaScript, frontend teams can adopt it quickly. Additionally, since it supports TypeScript, it fits well into enterprise-grade projects.
Why TestCafe?
Choosing the right automation tool significantly impacts team productivity and test reliability. Therefore, let’s explore why Test Cafe is increasingly popular among QA engineers and automation teams.
1. No WebDriver Needed
First and foremost, Test Cafe does not require WebDriver.
No driver downloads
No version mismatches
No compatibility headaches
As a result, setup becomes dramatically simpler.
2. Super Easy Setup
Getting started is straightforward.
Simply install Test Cafe using npm:
npm install testcafe
Within minutes, you can start writing and running tests.
3. Pure JavaScript
Since Test Cafe uses JavaScript or TypeScript:
No new language to learn
Perfect for frontend developers
Easy integration into existing JS projects
Therefore, teams can write tests in the same language as their application code.
4. Built-in Smart Waiting
One of the most powerful features of Test Cafe is automatic waiting.
Unlike Selenium-based frameworks, you do not need:
Explicit waits
Thread.sleep()
Custom wait logic
Test Cafe automatically waits for:
Page loads
AJAX calls
Element visibility
Consequently, this reduces flaky tests and improves stability.
5. Faster Execution
Because Test Cafe runs inside the browser and avoids Selenium bridge overhead:
Tests execute faster
Communication latency is minimized
Test suites complete more quickly
This is especially beneficial for CI/CD pipelines.
6. Parallel Testing Support
Additionally, Test Cafe supports parallel execution.
You can run multiple browsers simultaneously using a simple command. Therefore, test coverage increases while execution time decreases.
How TestCafe Works
Test Cafe uses a proxy-based architecture. Instead of relying on WebDriver, it injects scripts into the tested page.
Through this mechanism, TestCafe can:
Control browser actions
Intercept network requests
Automatically wait for page elements
Execute tests reliably without WebDriver
Because it directly communicates with the browser, it eliminates the need for driver binaries and complex configuration.
Prerequisites Before TestCafe Installation
Since TestCafe runs on Node.js, you must ensure your environment is ready.
TestCafe requires a recent version of the Node.js platform:
TestCafe automates these steps programmatically. Therefore, every time the code changes, the login flow is automatically validated.
This ensures consistent quality without manual effort.
TestCafe Benefits Summary Table
S. No
Feature
Benefit
1
No WebDriver
Simpler setup
2
Smart Waiting
Fewer flaky tests
3
JavaScript-Based
Easy adoption
4
Proxy Architecture
Reliable execution
5
Parallel Testing
Faster pipelines
6
Built-in Assertions
Cleaner test code
Final Thoughts: Why Choose TestCafe?
In today’s fast-paced development environment, speed alone is not enough quality must keep up. That is exactly where TestCafe delivers value. By eliminating WebDriver dependencies and simplifying setup, it allows teams to focus on writing reliable tests instead of managing complex configurations. Moreover, its built-in smart waiting significantly reduces flaky tests, which leads to more stable automation and smoother CI/CD pipelines.
Because TestCafe is built on JavaScript and TypeScript, frontend and QA teams can adopt it quickly without learning a new language. As a result, collaboration improves, maintenance becomes easier, and productivity increases across the team.
Ultimately, TestCafe does more than simplify end-to-end testing. It strengthens release confidence, improves product quality, and helps organizations ship faster without sacrificing stability.
Frequently Asked Questions
What is TestCafe used for?
TestCafe is used for end-to-end testing of web applications. It allows QA engineers and developers to automate browser interactions, validate UI behavior, and ensure application functionality works correctly across different browsers without using WebDriver or Selenium.
Is TestCafe better than Selenium?
TestCafe is often preferred for its simpler setup, built-in smart waiting, and no WebDriver dependency. However, Selenium offers a larger ecosystem and broader language support. If you want fast setup and JavaScript-based testing, TestCafe is a strong choice.
Does TestCafe require WebDriver?
No, TestCafe does not require WebDriver. It uses a proxy-based architecture that communicates directly with the browser. As a result, there are no driver installations or version compatibility issues.
How do you install TestCafe?
You can install TestCafe using npm. For a local project installation, run:
npm install --save-dev testcafe
For global installation, run:
npm install -g testcafe
Make sure you have an updated version of Node.js and npm before installing.
Does TestCafe support parallel testing?
Yes, TestCafe supports parallel test execution. You can run tests across multiple browsers at the same time using a single command, which significantly reduces execution time in CI/CD pipelines.
What browsers does TestCafe support?
TestCafe supports major browsers including Chrome, Firefox, Edge, and Safari. It also supports remote browsers and mobile browser testing, making it suitable for cross-browser testing strategies.
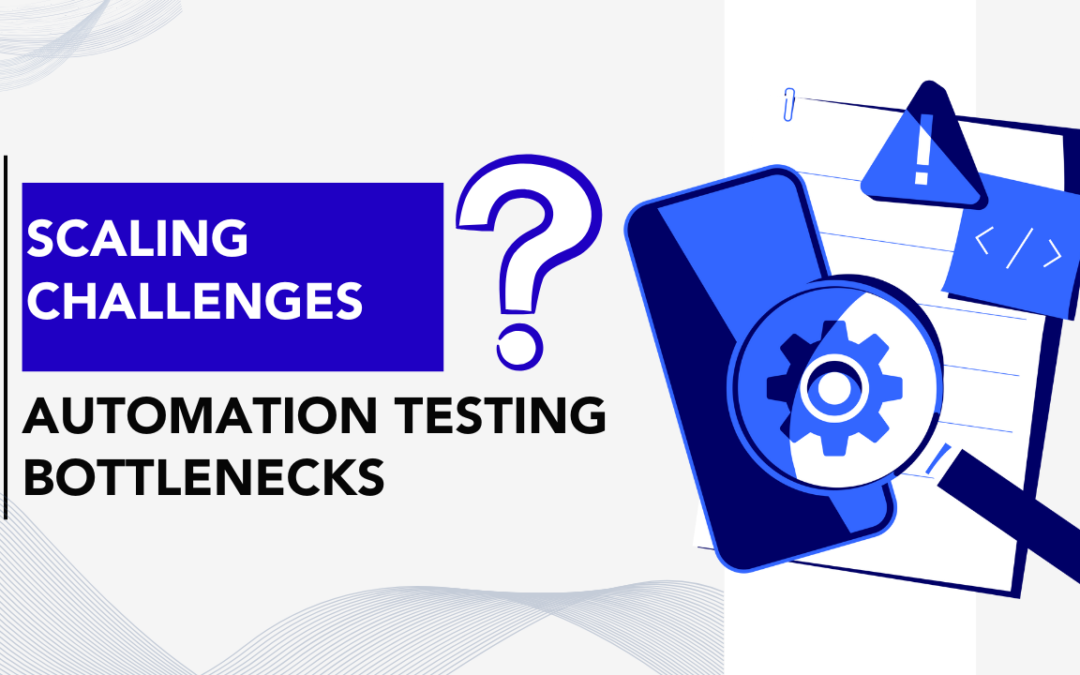
As digital products grow more complex, software testing is no longer a supporting activity it is a core business function. However, with this growth comes a new set of problems. Most QA teams don’t fail because they lack automation. Instead, they struggle because they can’t scale automation effectively. Scaling challenges in software testing appear when teams attempt to expand test coverage across devices, browsers, platforms, geographies, and release cycles without increasing cost, execution time, or maintenance overhead. While test automation promises speed and efficiency, scaling it improperly often leads to flaky tests, bloated infrastructure, slow feedback loops, and frustrated engineers.
Moreover, modern development practices such as CI/CD, microservices, and agile releases demand continuous testing at scale. A test suite that worked perfectly for 20 test cases often collapses when expanded to 2,000. This is where many QA leaders realize that scaling is not about writing more scripts it’s about designing smarter systems.
Additionally, teams now face pressure from multiple directions. Product managers want faster releases. Developers want instant feedback. Business leaders expect flawless user experiences across devices and regions. Meanwhile, QA teams are asked to do more with the same or fewer resources.
Therefore, understanding scaling challenges is no longer optional. It is essential for any organization aiming to deliver high-quality software at speed. In this guide, we’ll explore what causes these challenges, how leading teams overcome them, and how modern platforms compare in supporting scalable test automation without vendor bias or recycled content.
Scaling challenges in software testing refer to the technical, operational, and organizational difficulties that arise when test automation grows beyond its initial scope.
At a small scale, automation seems simple. However, as applications evolve, testing must scale across:
Multiple browsers and operating systems
Thousands of devices and screen resolutions
Global user locations and network conditions
Parallel test executions
Frequent deployments and rapid code changes
As a result, what once felt manageable becomes fragile and slow.
Key Characteristics of Scaling Challenges
Increased test execution time
Infrastructure instability
Rising maintenance costs
Inconsistent test results
Limited visibility into failures
In other words, scaling challenges are not about automation failure they are about automation maturity gaps.
Common Causes of Scaling Challenges in Automation Testing
Understanding the root causes is the first step toward solving them. While symptoms vary, most scaling challenges stem from predictable issues.
1. Infrastructure Limitations
On-premise test labs often fail to scale efficiently. Adding devices, browsers, or environments requires capital investment and ongoing maintenance. Consequently, teams hit capacity limits quickly.
2. Poor Test Architecture
Test scripts tightly coupled to UI elements or environments break frequently. As the test suite grows, maintenance efforts grow exponentially.
3. Lack of Parallelization
Without parallel test execution, test cycles become painfully slow. Many teams underestimate how critical concurrency is to scalability.
4. Flaky Tests
Unstable tests undermine confidence. When failures become unreliable, teams stop trusting automation results.
5. Tool Fragmentation
Using multiple disconnected tools for test management, execution, monitoring, and reporting creates inefficiencies and blind spots.
Why Scaling Challenges Intensify with Agile and CI/CD
Agile and DevOps practices accelerate releases but they also magnify testing inefficiencies.
Because deployments happen daily or even hourly:
Tests must run faster
Feedback must be immediate
Failures must be actionable
However, many test frameworks were not designed for this velocity. Consequently, scaling challenges surface when automation cannot keep pace with development.
Furthermore, CI/CD pipelines demand deterministic results. Flaky tests that might be tolerable in manual cycles become blockers in automated pipelines.
Types of Scaling Challenges QA Teams Face
Technical Scaling Challenges
Limited device/browser coverage
Inconsistent test environments
High infrastructure costs
Operational Scaling Challenges
Long execution times
Poor reporting and debugging
Resource contention
Organizational Scaling Challenges
Skill gaps in automation design
Lack of ownership
Resistance to test refactoring
Each category requires a different strategy, which is why no single tool alone can solve scaling challenges.
How Leading QA Teams Overcome Scaling Challenges
Modern QA organizations focus on strategy first, tooling second.
1. Cloud-Based Test Infrastructure
Cloud testing platforms allow teams to scale infrastructure on demand without managing hardware.
Benefits include:
Elastic parallel execution
Global test coverage
Reduced maintenance
2. Parallel Test Execution
By running tests simultaneously, teams reduce feedback cycles from hours to minutes.
However, this requires:
Stateless test design
Independent test data
Robust orchestration
3. Smarter Test Selection
Instead of running everything every time, teams use:
Risk-based testing
Impact analysis
Change-based execution
As a result, scalability improves without sacrificing coverage.
Why Tests Fail at Scale
Imagine testing a login page manually. It works fine for one user.
Now imagine:
500 tests
Running across 20 browsers
On 10 operating systems
In parallel
If all tests depend on the same test user account, conflicts occur. Tests fail randomly not because the app is broken, but because the test design doesn’t scale.
This simple example illustrates why scaling challenges are more about engineering discipline than automation itself.
Comparing How Leading Platforms Address Scaling Challenges
S. No
Feature
HeadSpin
BrowserStack
Sauce Labs
1
Device Coverage
Real devices, global
Large device cloud
Emulators + real devices
2
Parallel Testing
Strong support
Strong support
Strong support
3
Performance Testing
Advanced
Limited
Moderate
4
Debugging Tools
Network & UX insights
Screenshots & logs
Video & logs
5
Scalability Focus
Experience-driven testing
Cross-browser testing
CI/CD integration
Key takeaway: While all platforms address scaling challenges differently, success depends on aligning platform strengths with team goals.
One overlooked factor in scaling challenges is test maintenance.
As test suites grow:
Small UI changes cause widespread failures
Fixing tests consumes more time than writing new ones
Automation ROI declines
Best Practices to Reduce Maintenance Overhead
Use stable locators
Apply Page Object Model (POM)
Separate test logic from test data
Refactor regularly
Therefore, scalability is sustained through discipline, not shortcuts.
The Role of Observability in Scalable Testing
Visibility becomes harder as test volume increases.
Modern QA teams prioritize:
Centralized logs
Visual debugging
Performance metrics
This allows teams to identify patterns rather than chasing individual failures.
How AI and Analytics Help Reduce Scaling Challenges
AI-driven testing doesn’t replace engineers but it augments decision-making.
Applications include:
Test failure clustering
Smart retries
Visual change detection
Predictive test selection
As a result, teams can scale confidently without drowning in noise.
Benefits of Solving Scaling Challenges Early
Sno
Benefit
Business Impact
1
Faster releases
Improved time-to-market
2
Stable pipelines
Higher developer confidence
3
Reduced costs
Better automation ROI
4
Better coverage
Improved user experience
In short, solving scaling challenges directly improves business outcomes.
Conclusion
Scaling challenges in software testing are no longer an exception they are a natural outcome of modern software development. As applications expand across platforms, devices, users, and release cycles, testing must evolve from basic automation to a scalable, intelligent, and resilient quality strategy. The most important takeaway is this: scaling challenges are rarely caused by a lack of tools. Instead, they stem from how automation is designed, executed, and maintained over time. Teams that rely solely on adding more test cases or switching tools often find themselves facing the same problems at a larger scale long execution times, flaky tests, and rising costs.
In contrast, high-performing QA organizations approach scalability holistically. They invest in cloud-based infrastructure to remove hardware limitations, adopt parallel execution to shorten feedback loops, and design modular, maintainable test architectures that can evolve with the product. Just as importantly, they leverage observability, analytics, and where appropriate AI-driven insights to reduce noise and focus on what truly matters. When scaling challenges are addressed early and strategically, testing transforms from a release blocker into a growth enabler. Teams ship faster, developers trust test results, and businesses deliver consistent, high-quality user experiences across markets. Ultimately, overcoming scaling challenges is not just about keeping up it’s about building a testing foundation that supports innovation, confidence, and long-term success.
Frequently Asked Questions
What are scaling challenges in software testing?
Scaling challenges occur when test automation fails to grow efficiently with application complexity, causing slow execution, flaky tests, and high maintenance costs.
Why does test automation fail at scale?
Most failures result from poor test architecture, lack of parallel execution, shared test data, and unstable environments.
How do cloud platforms help with scaling challenges?
Cloud platforms provide elastic infrastructure, parallel execution, and global device coverage without hardware maintenance.
Is more automation the solution to scaling challenges?
No. Smarter automation not more scripts is the key. Test selection, architecture, and observability matter more.
How can small teams prepare for scaling challenges?
By adopting good design practices early, using cloud infrastructure, and avoiding tightly coupled tests.


")
