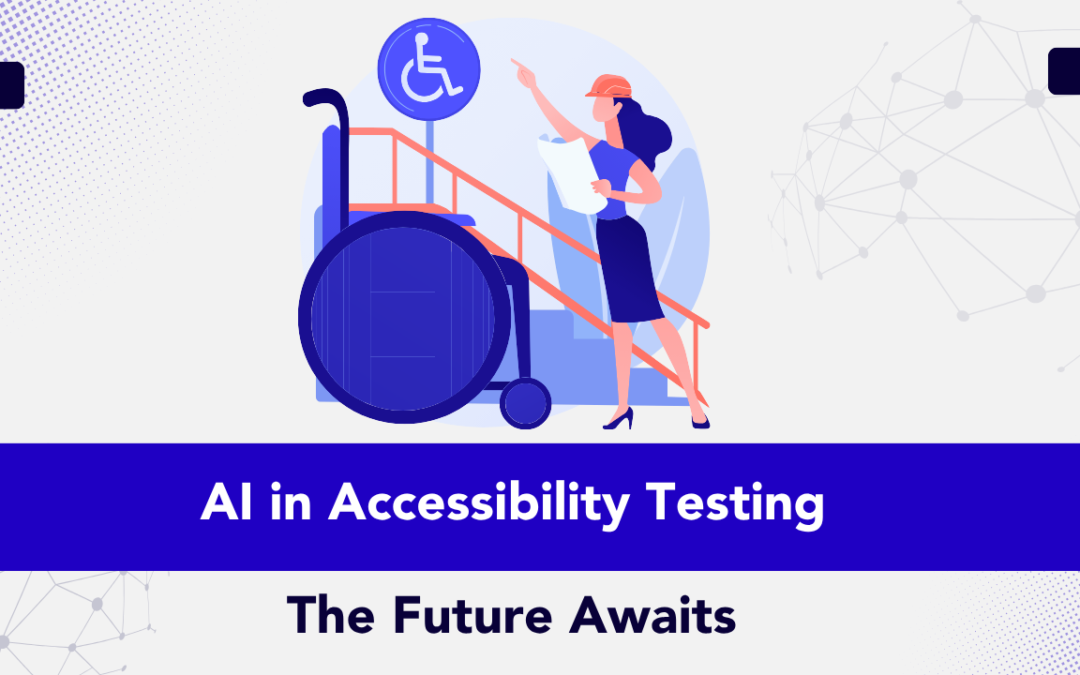
by Rajesh K | Aug 5, 2025 | Artificial Intelligence, Blog, Latest Post |
Imagine this familiar scene: it’s Friday evening, and your team is prepping a hot-fix release. The code passes unit tests, the sprint board is almost empty, and you’re already tasting weekend freedom. Suddenly, a support ticket pings:“Screen-reader users can’t reach the checkout button. The focus keeps looping back to the promo banner.”The clock is ticking, stress levels spike, and what should have been a routine push turns into a scramble. Five years ago, issues like this were inconvenient. Today, they’re brand-critical. Lawsuits over inaccessible sites keep climbing, and social media “name-and-shame” threads can tank brand trust overnight. That’s where AI in Accessibility Testing enters the picture. Modern machine-learning engines can crawl thousands of pages in minutes, flagging low-contrast text, missing alt attributes, or keyboard traps long before your human QA team would ever click through the first page. More importantly, these tools rank issues by severity so you fix what matters most, first. Accessibility Testing is no longer a nice-to-have it’s a critical part of your release pipeline.
However, and this is key, AI isn’t magic pixie dust. Algorithms still miss context, nuance, and the lived experience of real people with disabilities. The smartest teams pair automated scans with human insight, creating a hybrid workflow that’s fast and empathetic. In this guide you’ll learn how to strike that balance. We’ll explore leading AI tools, walk through implementation steps, and share real-world wins and pitfalls, plus answer the questions most leaders ask when they start this journey. By the end, you’ll have a clear roadmap for building an accessibility program that scales with your release velocity and your values.
Accessibility in 2025: The Stakes Keep Rising
Why the Pressure Is Peaking
- Regulators have sharpened their teeth.
- European Accessibility Act (June 2025): Extends digital liability to all EU member states and requires ongoing compliance audits with WCAG 2.2 standards.
- U.S. DOJ ADA Title II Rule (April 2025): Provides explicit WCAG mapping and authorises steeper fines for non-compliance.
- India’s RPwD Rules 2025 update: Mandates quarterly accessibility statements for any government-linked site or app.
- Legal actions have accelerated. UsableNet’s 2024 Litigation Report shows
U.S. digital-accessibility lawsuits rose 15 % YoY, averaging one new case every working hour. Parallel class actions are now emerging in Canada, Australia, and Brazil.
- Users are voting with their wallets. A 2025 survey from the UK charity Scope found 52 % of disabled shoppers abandoned an online purchase in the past month due to barriers, representing £17 billion in lost spend for UK retailers alone.
- Inclusive design is proving its ROI. Microsoft telemetry reveals accessibility-first features like dark mode and live captions drive some of the highest net-promoter scores across all user segments.
Quick Reality Check
- Tougher regulations, higher penalties: financial fines routinely hit six figures, and reputation damage can cost even more.
- User expectations have skyrocketed: 79 % of homepages still fail contrast checks, yet 71 % of disabled visitors bounce after a single bad experience.
- Competitive edge: teams that embed accessibility from sprint 0 enjoy faster page loads, stronger SEO, and measurable brand lift.
Takeaway: Annual manual audits are like locking your doors but leaving the windows open. AI-assisted testing offers 24/7 surveillance, provided you still invite people with lived experience to validate real-world usability.
From Manual to Machine: How AI Has Reshaped Testing
| Sno |
Era |
Typical Workflow |
Pain Points |
AI Upgrade |
| 1 |
Purely Manual (pre-2018) |
Expert testers run WCAG checklists page by page. |
Slow, costly, inconsistent. |
— |
| 2 |
Rule-Based Automation |
Linters and static analyzers scan code for known patterns. |
Catch ~30 % of issues; misses anything contextual. |
Adds early alerts but still noisy. |
| 3 |
AI-Assisted (2023-present) |
ML models evaluate visual contrast, generate alt text, and predict keyboard flow. |
Needs human validation for edge cases. |
Real-time remediation and smarter prioritization. |
Independent studies show fully automated tools still miss about 70 % of user-blocking barriers. That’s why the winning strategy is hybrid testing: let algorithms cover the broad surface area, then let people verify real-life usability.
What AI Can and Can’t Catch
AI’s Sweet Spots
- Structural errors: missing form labels, empty buttons, incorrect ARIA roles.
- Visual contrast violations: color ratios below 4.5 : 1 pop up instantly.
- Keyboard traps: focus indicators and tab order problems appear in seconds.
- Alt-text gaps: bulk-identify images without descriptions.
AI’s Blind Spots
- Contextual meaning: Alt text that reads “image1234” technically passes but tells the user nothing.
- Logical UX flows: AI can’t always tell if a modal interrupts user tasks.
- Cultural nuance: Memes or slang may require human cultural insight.
Consequently, think of AI as a high-speed scout: it maps the terrain quickly, but you still need seasoned guides to navigate tricky passes.
Spotlight on Leading AI Accessibility Tools (2025 Edition)
| Sno |
Tool |
Best For |
Signature AI Feature |
Ballpark Pricing* |
| 1 |
axe DevTools |
Dev teams in CI/CD |
“Intelligent Guided Tests” ask context-aware questions during scans. |
Free core, paid Pro. |
| 2 |
Siteimprove |
Enterprise websites |
“Accessibility Code Checker” blocks merges with WCAG errors. |
Quote-based. |
| 3 |
EqualWeb |
Quick overlays + audits |
Instant widget fixes common WCAG 2.2 issues. |
From $39/mo. |
| 4 |
accessiBe |
SMBs needing hands-off fixes |
24-hour rescans plus keyboard-navigation tuning. |
From $49/mo. |
| 5 |
UserWay |
Large multilingual sites |
Over 100 AI improvements in 50 languages. |
Freemium tiers. |
| 6 |
Allyable |
Dev-workflow integration |
Pre-deploy scans and caption generation. |
Demo, tiered pricing. |
| 7 |
Google Lighthouse |
Quick page snapshots |
Open-source CLI and Chrome DevTools integration. |
Free. |
| 8 |
Microsoft Accessibility Insights |
Windows & web apps |
“Ask Accessibility” AI assistant explains guidelines in plain English. |
Free. |
*Pricing reflects public tiers as of August 2025.
Real-life Example: When a SaaS retailer plugged Siteimprove into their GitHub Actions pipeline, accessibility errors on mainline branches dropped by 45 % within one quarter. Developers loved the instant feedback, and legal felt calmer overnight.
Step‑by‑Step: Embedding AI into Your Workflow
Below you’ll see exactly where the machine‑learning magic happens in each phase.
Step 1: Run a Baseline Audit
- Launch Axe DevTools or Lighthouse; both use trained models to flag structural issues, such as missing labels and low-contrast text.
- Export the JSON/HTML report; it already includes an AI‑generated severity score for each error, so you know what to fix first.
Step 2: Set Up Continuous Monitoring
- Choose Siteimprove, EqualWeb, UserWay, or Allyable.
- These platforms crawl your site with computer‑vision and NLP models that detect new WCAG violations the moment content changes.
- Schedule daily or weekly crawls and enable email/Slack alerts.
- Turn on email/Slack alerts that use AI triage to group similar issues so your inbox isn’t flooded.
Step 3: Add an Accessibility Gate to CI/CD
- Install the CLI for your chosen tool (e.g., axe‑core).
- During each pull request, the CLI’s trained model scans the rendered DOM headlessly; if it finds critical AI‑scored violations, the build fails automatically.

Step 4: Apply Temporary Overlays (Optional)
- Deploy an overlay widget containing on‑page machine‑learning scripts that:
- Auto‑generate alt text (via computer vision)
- Reflow layouts for better keyboard focus
- Offer on‑the‑fly colour‑contrast adjustments
- Document which pages rely on these AI auto‑fixes so you can tackle the root code later.
Step 5: Conduct Monthly Manual Verification
- Use a tool like Microsoft Accessibility Insights. It’s AI “Ask Accessibility” assistant guides human testers with context‑aware prompts, “Did this modal trap focus for you?” reducing guesswork.
- Pair at least two testers who rely on screen readers; the tool’s speech‑to‑text AI can transcribe their feedback live into your ticketing system.
Step 6: Report Progress and Iterate
- Dashboards in Siteimprove or Allyable apply machine‑learning trend analysis to show which components most frequently cause issues.
- Predictive insights highlight pages likely to fail next sprint, letting you act before users ever see the problem.
Benefits Table AI vs. Manual vs. Hybrid
| Benefit |
Manual Only |
AI Only |
Hybrid (Recommended) |
| Scan speed |
Hours → Weeks |
Seconds → Minutes |
Minutes |
| Issue coverage |
≈ 30 % |
60–80 % |
90 %+ |
| Context accuracy |
High |
Moderate |
High |
| Cost efficiency |
Low at scale |
High |
Highest |
| User trust |
Moderate |
Variable |
High |
Takeaway: Hybrid testing keeps you fast without losing empathy or accuracy.
Real-World Wins: AI Improving Everyday Accessibility
- Netflix captions & audio descriptions now spin up in multiple languages long before a series drops, thanks to AI translation pipelines.
- Microsoft Windows 11 Live Captions converts any system audio into real-time English subtitles hugely helpful for Deaf and hard-of-hearing users.
- E-commerce brand CaseStudy.co saw a 12 % increase in mobile conversions after fixing keyboard navigation flagged by an AI scan.
Common Pitfalls & Ethical Watch-outs
- False sense of security. Overlays may mask but not fix code-level barriers, leaving you open to lawsuits.
- Data bias. Models trained on limited datasets might miss edge cases; always test with diverse user groups.
- Opaque algorithms. Ask vendors how their AI makes decisions; you deserve transparency.
- Privacy concerns. If a tool captures real user data (e.g., screen reader telemetry), confirm it’s anonymized.
The Road Ahead: Predictive & Personalized Accessibility
- Generative UIs that reshape layouts based on user preferences in real time.
- Predictive testing: AI suggests component fixes while designers sketch wireframes.
- Voice-first interactions: Large language models respond conversationally, making sites more usable for people with motor impairments.
Sample Code Snippet: Quick Contrast Checker in JavaScript
Before You Paste the Script: 4 Quick Prep Steps
- Load the page you want to audit in Chrome, Edge, or any Chromium-based browser; make sure dynamic content has finished loading.
- Open Developer Tools by pressing F12 (or Cmd+Opt+I on macOS) and switch to the Console tab.
- Scope the test if needed. Optional: type document.body in the console to confirm you’re in the right frame (useful for iframes or SPAs).
- Clear existing logs with Ctrl+L so you can focus on fresh contrast warnings.
Now paste the script below and hit Enter to watch low-contrast elements appear in real time.
// Flag elements failing 4.5:1 contrast ratio
function hexToRgb(hex) {
  const bigint = parseInt(hex.replace('#', ''), 16);
  return [(bigint >> 16) & 255, (bigint >> 8) & 255, bigint & 255];
}

function luminance(r, g, b) {
  const a = [r, g, b].map(v => {
    v /= 255;
    return v <= 0.03928 ? v / 12.92 : Math.pow((v + 0.055) / 1.055, 2.4);
  });
  return a[0] * 0.2126 + a[1] * 0.7152 + a[2] * 0.0722;
}

function contrast(rgb1, rgb2) {
  const lum1 = luminance(...rgb1) + 0.05;
  const lum2 = luminance(...rgb2) + 0.05;
  return lum1 > lum2 ? lum1 / lum2 : lum2 / lum1;
}

[...document.querySelectorAll('*')].forEach(el => {
  const color = window.getComputedStyle(el).color;
  const bg = window.getComputedStyle(el).backgroundColor;
  const rgb1 = color.match(/\d+/g).map(Number);
  const rgb2 = bg.match(/\d+/g).map(Number);
  if (contrast(rgb1, rgb2) < 4.5) {
    console.warn('Low contrast:', el);
  }
});
Drop this script into your dev console for a quick gut-check, or wrap it in a Lighthouse custom audit to automate feedback.
Under the Hood: How This Script Works
- Colour parsing: The helper parseColor() hands off any CSS colour HEX, RGB, or RGBA to an off-screen <canvas> so the browser normalises it. This avoids fragile regex hacks and supports the full CSS-Colour-4 spec.
- Contrast math: WCAG uses relative luminance. We calculate that via the sRGB transfer curve, then compare foreground and background to get a single ratio.
- Severity levels: The script flags anything below 4.5 : 1 as a WCAG AA failure and anything below 3 : 1 as a severe UX blocker. Adjust those thresholds if you target AAA (7 : 1).
- Performance guard: A maxErrors parameter stops the scan after 50 hits, preventing dev-console overload on very large pages. Tweak or remove as needed.
- Console UX: console.groupCollapsed() keeps the output tidy by tucking each failing element into an expandable log group. You see the error list without drowning in noise.
Adapting for Other Environments
| S. No |
Environment |
What to Change |
Why |
| 1 |
Puppeteer CI |
Replace document.querySelectorAll(‘*’) with await page.$$(‘*’) & run in Node context. |
Enables headless Chrome scans in pipelines. |
| 2 |
Jest Unit Test |
Import functions and assert on result length instead of console logs. |
Makes failures visible in test reporter. |
| 3 |
Storybook Add-on |
Wrap the scanner in a decorator that watches rendered components. |
Flags contrast issues during component review. |
Conclusion
AI won’t single-handedly solve accessibility, yet it offers a turbo-boost in speed and scale that manual testing alone can’t match. By blending high-coverage scans with empathetic human validation, you’ll ship inclusive features sooner, avoid legal headaches, and most importantly, welcome millions of users who are too often left out.
Feeling inspired? Book a free 30-minute AI-augmented accessibility audit with our experts, and receive a personalized action plan full of quick wins and long-term strategy.
Frequently Asked Questions
-
Can AI fully replace manual accessibility testing?
In a word, no. AI catches the bulk tech issues, but nuanced user flows still need human eyes and ears.
-
What accessibility problems does AI find fastest?
Structural markup errors, missing alt text, color‑contrast fails, and basic keyboard traps are usually flagged within seconds.
-
Is AI accessibility testing compliant with India’s accessibility laws?
Yes most tools align with WCAG 2.2 and India’s Rights of Persons with Disabilities Act. Just remember to schedule periodic manual audits for regional nuances.
-
How often should I run AI scans?
Automated checks should run on every pull request and at least weekly in production to catch CMS changes.
-
Do overlay widgets make a site "fully accessible"?
Overlays can patch surface issues quickly, but they don’t always fix underlying code. Think of them as band‑aids, not cures.

by Rajesh K | Aug 1, 2025 | Automation Testing, Blog, Latest Post |
In today’s rapidly evolving software testing and development landscape, ensuring quality at scale can feel like an uphill battle without the right tools. One critical element that facilitates scalable and maintainable test automation is effective configuration management. YAML, short for “YAML Ain’t Markup Language,” stands out as a powerful, easy-to-use tool for managing configurations in software testing and automation environments. Test automation frameworks require clear, manageable configuration files to define environments, manage test data, and integrate seamlessly with continuous integration and continuous delivery (CI/CD) pipelines. YAML is uniquely suited for this purpose because it provides a clean, human-readable syntax that reduces errors and enhances collaboration across development and QA teams.
Unlike traditional methods, its simplicity helps both technical and non-technical team members understand and modify configurations quickly, minimizing downtime and improving overall productivity. Whether you’re managing multiple testing environments, handling extensive data-driven tests, or simplifying integration with popular DevOps tools like Jenkins or GitHub Actions, it makes these tasks intuitive and error-free. In this post, we’ll dive deep into the format, exploring its key benefits, real-world applications, and best practices. We’ll also compare it to other popular configuration formats such as JSON and XML, guiding you to make informed decisions tailored to your test automation strategy.
Let’s explore how YAML can simplify your configuration processes and elevate your QA strategy to the next level.
What is YAML? An Overview
It is a data serialization language designed to be straightforward for humans and efficient for machines. Its syntax is characterized by indentation rather than complex punctuation, making it highly readable. The format closely resembles Python, relying primarily on indentation and simple key-value pairs to represent data structures. This simplicity makes it an excellent choice for scenarios where readability and quick edits are essential.
Example Configuration:
environment: staging
browser: chrome
credentials:
  username: test_user
  password: secure123
In this example, the YAML structure clearly communicates the configuration details. Such a clean layout simplifies error detection and speeds up configuration modifications.
Benefits of Using YAML in Test Automation
Clear Separation of Code and Data
By separating test data and configuration from executable code, YAML reduces complexity and enhances maintainability. Testers and developers can independently manage and update configuration files, streamlining collaboration and minimizing the risk of unintended changes affecting the automation logic.
Easy Environment-Specific Configuration
YAML supports defining distinct configurations for multiple environments such as development, QA, staging, and production. Each environment’s specific settings, such as URLs, credentials, and test data, can be cleanly managed within separate YAML files or structured clearly within a single YAML file. This flexibility significantly simplifies environment switching, saving time and effort.
Supports Data-Driven Testing
Data-driven testing, which relies heavily on input data variations, greatly benefits from YAML’s clear structure. Test cases and their expected outcomes can be clearly articulated within YAML files, making it easier for QA teams to organize comprehensive tests. YAML’s readability ensures non-technical stakeholders can also review test scenarios.
Enhanced CI/CD Integration
Integration with CI/CD pipelines is seamless with YAML. Popular tools such as GitHub Actions, Azure DevOps, Jenkins, and GitLab CI/CD utilize YAML configurations, promoting consistency and reducing complexity across automation stages. This unified approach simplifies maintenance and accelerates pipeline modifications and troubleshooting.
YAML vs JSON vs XML: Choosing the Right Format
| S. No |
Aspect |
YAML |
JSON |
XML |
| 1 |
Readability |
High readability; indentation-based, intuitive |
Moderate readability; bracket-based syntax |
Low readability; verbose, heavy markup |
| 2 |
Syntax Complexity |
Minimal punctuation; indentation-driven |
Moderate; relies on brackets and commas |
High complexity; extensive use of tags |
| 3 |
Ideal Use Case |
Configuration files, test automation |
Web APIs, structured data interchange |
Document markup, data representation |
| 4 |
Compatibility |
Broad compatibility with modern automation tools |
Widely supported; web-focused tools |
Legacy systems; specialized applications |
YAML’s clear readability and ease of use make it the ideal choice for test automation and DevOps configurations.
How YAML Fits into Test Automation Frameworks
YAML integrates effectively with many widely used automation frameworks and programming languages, ensuring flexibility across technology stacks:
- Python: Integrated using PyYAML, simplifying configuration management for Python-based frameworks like pytest.
- Java: SnakeYAML allows Java-based automation frameworks like TestNG or JUnit to manage configurations seamlessly.
- JavaScript: js-yaml facilitates easy integration within JavaScript testing frameworks such as Jest or Cypress.
- Ruby and Go: YAML parsing libraries are available for these languages, further extending YAML’s versatility.
Example Integration with Python
import yaml

with open('test_config.yaml') as file:
    config = yaml.safe_load(file)

print(config['browser'])  # Output: chrome
Best Practices for Using YAML
- Consistent Indentation: Use consistent spacing typically two or four spaces and avoid tabs entirely.
- Modularity: Keep YAML files small, focused, and modular, grouping related settings logically.
- Regular Validation: Regularly validate YAML syntax with tools like yamllint to catch errors early.
- Clear Documentation: Include comments to clarify the purpose of configurations, enhancing team collaboration and readability.
Getting Started: Step-by-Step Guide
- Editor Selection: Choose YAML-friendly editors such as Visual Studio Code or Sublime Text for enhanced syntax support.
- Define Key-Value Pairs: Start with basic pairs clearly defining your application or test environment:
application: TestApp
version: 1.0
- Creating Lists: Represent lists clearly:
dependencies:
  - libraryA
  - libraryB
- Validate: Always validate your YAML with tools such as yamllint to ensure accuracy.
Common Use Cases in the Tech Industry
Configuration Files
YAML efficiently manages various environment setups, enabling quick, clear modifications that reduce downtime and improve test reliability.
Test Automation
YAML enhances automation workflows by clearly separating configuration data from test logic, improving maintainability and reducing risks.
CI/CD Pipelines
YAML simplifies pipeline management by clearly defining build, test, and deployment steps, promoting consistency across development cycles.
CI/CD Example with YAML
name: CI Pipeline
on: [push]
jobs:
  build:
    runs-on: ubuntu-latest
    steps:
      - uses: actions/checkout@v2
      - name: Run tests
        run: pytest
Conclusion
YAML has simplified test automation configurations through clarity, accessibility, and ease of use. Its intuitive structure allows seamless collaboration between technical and non-technical users, reducing errors significantly. By clearly organizing environment-specific configurations and supporting data-driven testing scenarios, YAML minimizes complexity and enhances productivity. Its seamless integration with popular CI/CD tools further ensures consistent automation throughout development and deployment phases.
Overall, YAML provides teams with a maintainable, scalable, and efficient approach to managing test automation, making it a strategic choice for modern QA environments. underscores its adaptability and future-proof nature, making YAML a strategic choice for robust, scalable test automation environments.
Frequently Asked Questions
-
What is YAML used for?
YAML is primarily utilized for configuration files, automation tasks, and settings management due to its readability and simplicity.
-
How does YAML differ from JSON?
YAML emphasizes readability with indentation-based formatting, while JSON relies heavily on brackets and commas, making YAML easier for humans to read and edit.
-
Can YAML replace JSON?
Yes, YAML can fully replace JSON because it is a superset of JSON, supporting all JSON capabilities with additional readability enhancements.
-
Why is YAML popular for DevOps?
YAML’s readability, ease of use, and seamless integration capabilities make it an ideal format for automation within DevOps, particularly for CI/CD workflows.
-
Is YAML better than XML?
YAML is generally considered superior to XML for configuration and automation due to its simpler, clearer syntax and minimalistic formatting.

by Rajesh K | Jul 30, 2025 | Software Testing, Blog, Latest Post |
Have you ever wondered why some software teams are consistently great at handling unexpected issues, while others scramble whenever a bug pops up? It comes down to preparation and more specifically, software testing technique known as bebugging. You’re probably already familiar with traditional debugging, where developers identify and fix bugs that naturally occur during software execution. But bebugging takes this a step further by deliberately adding bugs into the software. Why would anyone intentionally introduce errors, you ask? Simply put, bebugging is like having a fire drill for your software. It prepares your team to recognize and resolve issues quickly and effectively. Imagine you’re about to launch a new app or software update. Wouldn’t it be comforting to know that your team has already handled many of the potential issues before they even arose?
In this detailed guide, you’ll discover exactly what bebugging is, why it’s essential for your development process, and how you can implement it successfully. Whether you’re a QA engineer, software developer, or tech lead, mastering bebugging will transform your team’s approach to troubleshooting and significantly boost your software’s reliability.
What Exactly Is Bebugging, and How Is It Different from Debugging?
Though they sound similar, bebugging and debugging have very different purposes:

- Debugging is reactive. It involves locating and fixing existing software errors.
- Bebugging is proactive. It means intentionally inserting bugs to test how effectively your team identifies and resolves issues.
Think about it this way: debugging is like fixing leaks as you discover them in your roof. Bebugging, on the other hand, involves deliberately making controlled leaks to test whether your waterproofing measures are strong enough to handle real storms. This proactive practice encourages a problem-solving culture in your team, making them better prepared for real-world software challenges.
A Brief History: Where Did Bebugging Come From?
The term “debugging” famously originated with Admiral Grace Hopper in the 1940s when she literally removed a moth from a malfunctioning computer. Over the years, as software became increasingly complex, engineers realized that simply reacting to bugs wasn’t enough. In response, the concept of “bebugging” emerged, where teams began intentionally inserting errors to test their software’s reliability and their team’s readiness.
By the 1970s and 1980s, the practice gained traction, especially in large-scale projects where even minor errors could lead to significant disruptions. With modern development practices like Agile and CI/CD, bebugging has become a critical component in ensuring software quality.
Why Should Your Team Use Bebugging?
Bebugging isn’t just a quirky testing technique; it brings substantial benefits:
- Enhanced Troubleshooting Skills: Regularly handling intentional bugs improves your team’s ability to quickly diagnose and fix complex real-world issues.
- Better Preparedness: Your team will be better equipped to deal with unexpected problems, significantly reducing panic and downtime during critical periods.
- Improved Software Reliability: Regular bebugging ensures your software remains robust, reducing the likelihood of major issues slipping through to customers.
- Sharper Error Detection: It refines your team’s ability to spot subtle errors, enhancing overall testing effectiveness.
Key Techniques for Successful Bebugging
Error Seeding
Error seeding involves strategically placing known bugs within critical software components. It helps teams practice identifying and fixing errors in controlled scenarios, just like rehearsing emergency drills. For example, introducing bugs in authentication or payment processing modules can greatly enhance your team’s readiness for high-risk situations.
Automated Error Injection
Automation is a powerful tool in bebugging, particularly for larger or continuously evolving projects. AI-driven automated tools systematically introduce errors, allowing for consistent, repeatable testing without overwhelming your team. These tools often integrate with robust error tracking systems to monitor anomalies and improve detection accuracy.
Stress Testing Combined with Bebugging
Stress testing pushes your software to its limits to observe its behavior under extreme conditions. When combined with bebugging, intentionally adding bugs during these stressful scenarios, you’ll gain insight into potential vulnerabilities, allowing your team to proactively address issues before users encounter them.
How to Implement Bebugging Step-by-Step

- Identify Critical Areas: Pinpoint areas within your software most susceptible to significant impacts if bugs arise.
- Plan and Inject Errors: Decide on the types of intentional errors, syntax errors, logical bugs, and runtime issues, and introduce them systematically.
- Monitor and Measure: Observe how effectively and swiftly your team identifies and fixes these injected bugs. Capture metrics like detection time and accuracy.
- Evaluate and Improve: Analyze your team’s performance, identify strengths and weaknesses, and refine your error-handling procedures accordingly.
Bebugging in Action: A Real-World Example
Consider a fintech company that adopted bebugging in their agile workflow. They intentionally placed logic and security errors in their payment processing software. Because they regularly practiced handling these issues, the team quickly spotted and resolved them. This proactive strategy significantly reduced future debugging time and helped prevent potential security threats, increasing customer trust and regulatory compliance.
Traditional Debugging vs. Bebugging
| Aspect |
Traditional Debugging |
Bebugging |
| Purpose |
Reactive error fixing |
Proactive error detection |
| Implementation |
Fixing existing errors |
Introducing intentional errors |
| Benefits |
Immediate bug resolution |
Enhanced long-term reliability |
| Suitability |
Post-development phase |
Throughout software development |
Why Rapid Bug Detection Matters to Your Business
Rapid bug detection is critical because unresolved issues harm your software’s performance, disrupt user experience, and damage your brand reputation. Quick detection helps you avoid:
- User Frustration: Slower software performance or crashes lead to dissatisfied customers.
- Data Loss Risks: Bugs can cause significant data issues, potentially costing your business heavily.
- Brand Damage: Persistent issues weaken customer trust and loyalty, negatively impacting your business.
Common Types of Bugs to Look Out For:
- Syntax Errors: Basic code mistakes, like typos or missing punctuation.
- Semantic Errors: Logic errors where the software works incorrectly despite being syntactically correct.
- Runtime Errors: Issues arising during the software’s actual execution, often due to unexpected scenarios.
- Concurrency Errors: Bugs related to improper interactions between parallel processes or threads, causing unpredictable results or crashes.
Conclusion
Bebugging isn’t just another testing practice, it’s a strategic move toward building reliable and robust software. It empowers your team to handle problems confidently, proactively ensuring your software meets the highest quality standards. At Codoid Innovations, we are committed to staying ahead of software testing challenges by continuously embracing innovative methods like bebugging. With our dedicated expertise in quality assurance and advanced testing strategies, we ensure your software is not just error-free but future-proof.
Frequently Asked Questions
-
What's the key difference between debugging and bebugging?
Debugging reacts to errors after they appear, while bebugging proactively inserts errors to prepare teams for future issues.
-
Can we automate bebugging for large projects?
Absolutely! Automation tools using AI are perfect for systematic bebugging, especially in extensive or continuously evolving software projects.
-
Is bebugging good for all software?
While helpful in most cases, bebugging is especially beneficial in agile environments or complex software systems where rapid, continuous improvement is essential.
-
What tools are best for bebugging?
Integrated Development Environment (IDE) debuggers like GDB, combined with error-tracking tools like Sentry, Bugzilla, or JIRA, work effectively for bebugging practices.
by Rajesh K | Jul 23, 2025 | Software Testing, Blog, Latest Post |
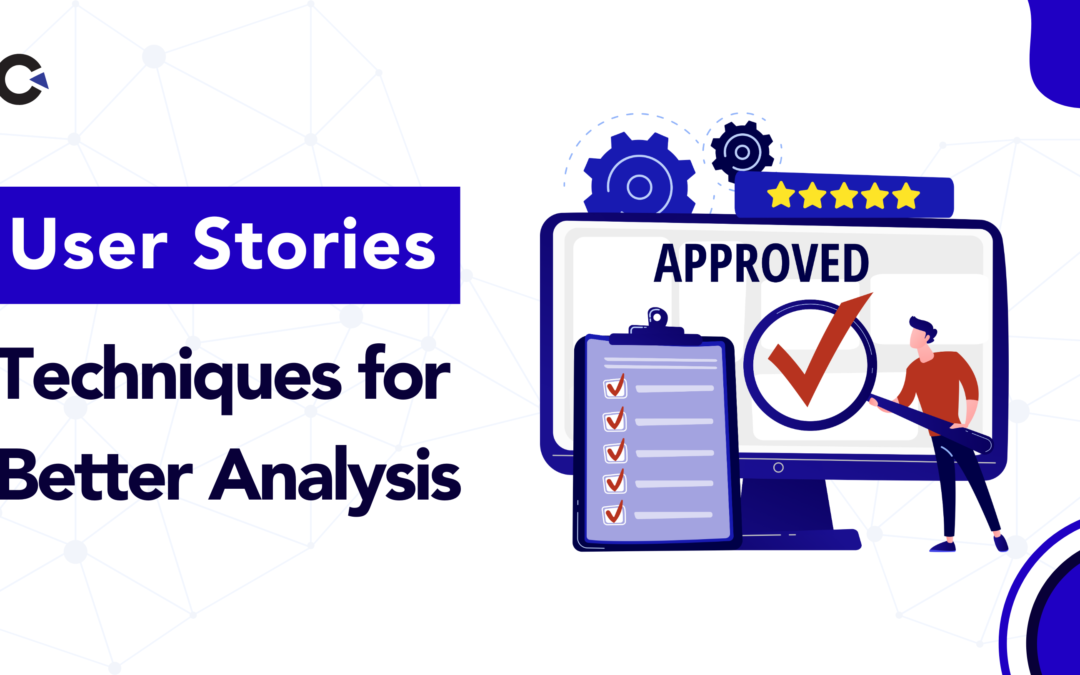
Let’s be honest: building great software is hard, especially when everyone’s juggling shifting priorities, fast-moving roadmaps, and the demands of software testing. If you’ve ever been part of a team where developers, testers, designers, and business folks all speak different languages, you know how quickly things can go off the rails. This is where user stories become your team’s secret superpower. They don’t just keep you organized; they bring everyone together, centering the conversation on what really matters: the people using your product. User stories help teams move beyond technical checklists and buzzwords. Instead, they spark genuine discussion about the user’s world. The beauty? Even a simple, well-written story can align your developers, QA engineers, and stakeholders, making it clear what needs to be built, how it will be validated through software testing, and why it matters.
And yet, let’s be real: writing truly great user stories is more art than science. It’s easy to fall into the trap of being too vague (Let users do stuff faster!) or too prescriptive (Build exactly this, my way!). In this post, I’ll walk you through proven strategies, real-world examples, and practical tips for making user stories work for your Agile team, no matter how chaotic your sprint board might look today.
What Exactly Is a User Story?
Think of a user story as a mini-movie starring your customer, not your code. It’s a short, plain-English note that spells out what the user wants and why it matters.
Classic format:
As a [type of user], I want [goal] so that [benefit].
For example:
As a frequent traveler, I want to store multiple addresses in my profile to save time during bookings.
Why does this simple sentence matter so much? Because it puts real people at the center of your development process. You’re not just shipping features; you’re solving actual problems.
Real-life tip:
Next time your team debates a new feature, just ask, Who is this for? What do they want? Why? If you can answer those three, you’re already on your way to a great user story.
Who Really Writes User Stories?
If you picture a Product Owner hunched over a laptop, churning out stories in a vacuum, it’s time for a rethink. The best user stories come out of collaboration a little bit like a writers’ room for your favorite TV show.
Here’s how everyone pitches in:
- Product Owner: Sets the vision and makes sure stories tie back to business goals.
- Business Analyst: Adds detail and helps translate user needs into practical ideas.
- Developers: Spot technical hurdles early and help shape the story’s scope.
- QA Engineers: Insist on clear acceptance criteria, so you’re never guessing at done.
- Designers (UX/UI): Weave in the usability side, making sure stories match real workflows.
- Stakeholders and End Users: Their feedback and needs are the source material for stories in the first place.
- Scrum Master: Keeps conversations flowing, but doesn’t usually write the stories themselves.
What matters most is that everyone talks. The richest stories are refined together debated, improved, and sometimes even argued over. That’s not dysfunction; that’s how clarity is born.
A True Story: Turning a Stakeholder Wish Into a User Story
Let’s look at a situation most teams will recognize:
A hotel manager says, Can you let guests skip the front desk for check-in?
The Product Owner drafts:
As a tired traveler, I want mobile check-in so I can go straight to my room.
Then, during a lively backlog grooming session, each expert chimes in:
- Developer: We’ll need to hook into the keycard system for this to work.
- QA: Let’s be sure: guests get a QR code by email, and that unlocks their room?
- Designer: I’ll mock up a confirmation screen showing their room number and a map.
Suddenly, what started as a vague wish becomes a clear, buildable, and testable user story that everyone can rally behind.

The INVEST Checklist: Your Go-To for User Story Quality
Ever feel like you’re not sure if a user story is good enough? The INVEST model can help. Here’s what each letter stands for and how you can apply it without getting bogged down in jargon:
| I |
N |
V |
E |
S |
T |
| Independent: Can this story stand on its own? |
Negotiable: Are we allowed to discuss and reshape it as we learn? |
Valuable: Will it deliver something users (or the business) care about? |
Estimable: Can the team size it up without endless debate? |
Small: Is it bite-sized enough to finish in one sprint? |
Testable: Could QA (or anyone) clearly say, Yes, we did this? |
Example:
As a user, I want to log my daily medication so I can track my health.
- Independent? Yes.
- Negotiable? Maybe we want more tracking options later.
- Valuable? Absolutely better health tracking.
- Estimable? Team can give a quick point estimate.
- Small? Just daily logging for now, not reminders.
- Testable? The log appears in the user’s history.
Why it matters:
Teams using INVEST avoid that all-too-common pain of stories that are either too tangled (But that depends on this other feature) or too fuzzy ( Did we really finish it? ).
User Stories, Tasks, and Requirements: Untangling the Mess
If you’re new to Agile, or even if you’re not, these words get tossed around a lot. Here’s a quick cheat sheet:
- User Story: A short description of what the user wants and why. The big picture.
Ex: As a caregiver, I want to assign a task to another family member so we can share responsibilities.
- Task: The building blocks or steps needed to turn that story into reality.
Ex: Design the UI for task assignment, code the backend API, add tests…
- Requirement: The nitty-gritty rules or constraints your system must follow.
Ex: Only assign tasks to users in the same group, Audit all changes for six months, Supports mobile and tablet.
How to use this:
Start with user stories to frame the why. Break them down into tasks for the how. Lean on requirements for the rules and edge cases.
Writing Great User Stories: How to Get the Goldilocks Level of Detail
Here’s the balancing act:
- Too vague? Everyone will interpret it differently. Chaos ensues.
- Too detailed? You risk stifling innovation or drowning in minutiae.
Here’s what works (in the real world):
- Stay user-focused:
As a [user], I want [goal] so that [benefit]. Always ask yourself: Would the real user recognize themselves in this story?
- Skip the tech for now:
The “how” is for planning sessions and tech spikes. The story itself is about need.
- Set clear acceptance criteria:
What does “done” look like? Write a checklist.
- Give just enough context:
If there are relevant workflows, mention them but keep it snappy.
- Save the edge cases:
Let your main story cover the core path. Put exceptions in separate stories.
Well-balanced story example:
As a caregiver, I want to assign a recurring task to a family member so that I can automate reminders for ongoing responsibilities.
Acceptance Criteria:
- The user can select “recurring” when creating a task
- Choose how often: daily, weekly, or monthly
- Assigned user gets reminders automatically

A Relatable Example: When User Stories Make All the Difference
Let’s say you’re building a health app. During a sprint review, a nurse on the team says, We really need a way to track each patient’s medication.You turn that need into: As a nurse, I want to log each patient’s medication so I can ensure adherence to treatment. Through team discussion, QA adds testable criteria and devs note integration needs. The story quickly moves from a wish list to something meaningful, testable, and, most importantly, useful in the real world.
Quick-Glance Table: Why Great User Stories Matter
| Sno |
Benefit |
Why Your Team Will Thank You |
| 1 |
Focuses everyone on user needs |
Features actually get used |
| 2 |
Improves estimates and planning |
No more surprise work mid-sprint |
| 3 |
Boosts cross-team communication |
Fewer meetings, more clarity |
| 4 |
Prevents rework and misunderstandings |
Less frustration, faster delivery |
| 5 |
Ensures testability and value |
QA and users both win |
| 6 |
Adapts easily to changing needs |
Your team stays agile literally |
Sample Code Snippet: User Story as a Jira Ticket
Title: Allow recurring tasks for caregivers

Story:
As a caregiver, I want to assign a recurring task to a family member so that I can automate reminders for ongoing responsibilities.

Acceptance Criteria:
- User can select “recurring” when creating a task
- Frequency options: daily, weekly, monthly
- Assigned user receives automated reminders
Conclusion: Take Your User Stories and Product to the Next Level
Writing great user stories isn’t just about following a template; it’s about fostering a culture of empathy, clarity, and collaboration. By focusing on real user needs, adhering to proven criteria like INVEST, and keeping stories actionable and testable, you empower your Agile team to deliver high-value software faster and with greater confidence. Partners like Codoid, with expertise in Agile testing and behavior-driven development (BDD), can help ensure your user stories are not only well-written but also easily testable and aligned with real-world outcomes.
Frequently Asked Questions
-
What makes a user story different from a requirement?
User stories are informal, user-focused, and designed to spark discussion. Requirements are formal, detailed, and specify what the system must do—including constraints and rules.
-
How detailed should a user story be?
Enough to explain what’s needed and why, without dictating the technical implementation. Add acceptance criteria for clarity, but leave the “how” to the team.
-
Can developers write user stories?
Yes! While product owners typically own the process, developers, testers, and other team members can suggest or refine stories to add technical or practical insights.
-
What is the best way to split large user stories?
Break them down by workflow, user role, or acceptance criteria. Ensure each smaller story still delivers independent, testable value.
-
How do I know if my user story is “done”?
If it meets all acceptance criteria, passes testing, and delivers the intended value to the user, it’s done.
-
Should acceptance criteria be part of every user story?
Absolutely. Clear acceptance criteria make stories testable and ensure everyone understands what success looks like.

by Rajesh K | Jul 22, 2025 | Artificial Intelligence, Blog, Latest Post |
Artificial Intelligence is no longer a distant dream; it’s rapidly reshaping how we build, test, and release software. And just when we thought GPT-4o was groundbreaking, OpenAI is gearing up to launch its next leap: GPT-5. For software testers, QA engineers, and automation experts, this isn’t merely another version upgrade; it’s a complete transformation. GPT-5 is poised to become a pivotal asset in the QA toolbox, offering unmatched speed, accuracy, and automation for nearly every testing task. Expected to roll out by mid to late Summer 2025, GPT-5 brings with it advanced reasoning, broader context understanding, and fully multimodal capabilities. But more than the technical specifications, it’s the real-world implications for QA teams that make this evolution truly exciting.
In this blog, we’ll explore how GPT-5 will elevate testing practices, automate tedious tasks, improve testing accuracy, and ultimately reshape how QA teams operate in an AI-first world. Let’s dive in.

When Is GPT-5 Launching?
While OpenAI hasn’t confirmed a precise date, industry chatter and leaks point to a July or August 2025 launch. That gives forward-thinking QA teams a valuable window to prepare. More specifically, this is the perfect time to:
- Explore GPT-4o (the current multimodal model)
- Test AI-assisted tools for documentation, log analysis, or code review
- Identify current inefficiencies that GPT-5 might eliminate
Pro Tip: Start using GPT-4o today to experiment with AI-driven tasks like automated test case generation or log parsing. This will help your team acclimate to GPT’s capabilities and smooth the transition to GPT-5.
What Makes GPT-5 So Different?
GPT-5 isn’t just an upgraded chatbot. It’s expected to be a fully agentic, unified, multimodal system capable of understanding and executing complex, layered tasks. Let’s unpack what that mean and more importantly, what it means for software testing teams.
1. A Unified, Context-Aware Intelligence
Previous versions like GPT-3.5, GPT-4, and even GPT-4o came in different variants and capabilities. GPT-5, however, is expected to offer a single adaptive model that intelligently adjusts to user context.
Instead of juggling tools for generating test cases, analyzing logs, and reviewing code, testers can now use one model to handle it all.
For QA Teams: You can move fluidly between tasks like test case generation, regression suite review, and defect triaging without ever switching tools.
2. Massive Context Window: Up to 1 Million Tokens
One of GPT-5’s biggest leaps forward is its expanded context window. Where GPT-4 capped out at 128,000 tokens, GPT-5 could support up to 1 million tokens.
Imagine feeding an entire product’s source code, full regression suite, and two weeks’ worth of logs into one prompt and getting back an intelligent summary or action plan. That’s the kind of power GPT-5 unlocks.
Example: Upload your full test plan, including test scripts, requirement documents, and bug reports, and GPT-5 can flag missing test coverage or suggest new edge cases in a single pass.
3. Truly Multimodal Understanding
GPT-5’s ability to handle text, images, voice, and possibly even video, makes it ideal for modern, agile testing environments.
- Upload UI screenshots and get instant feedback on layout bugs or accessibility issues.
- Speak commands during live testing sessions to fetch results or summarize logs.
- Analyze structured data like test case matrices or Swagger files directly.
Example: Upload a screenshot of your checkout page, and GPT-5 can identify misaligned elements, contrast errors, or missing alt tags, all essential for accessibility compliance.
4. Agentic Capabilities: From Instructions to Execution
GPT-5 will likely act as an autonomous AI agent, meaning it can carry out multi-step tasks independently. This is where the real productivity gains come into play.
Some examples of agentic behavior include:
- Triggering test runs in your CI/CD pipeline
- Fetching test results from TestRail or Zephyr
- Submitting bug reports directly into Jira
- Running scripts to simulate real user activity
Real-World Scenario: Say, “Run regression tests on the latest build, compare results to the previous run, and log any new failures.” GPT-5 could manage the entire workflow execution to reporting without further human input.
5. Improved Accuracy and Reduced Hallucination
GPT-5 is also being designed to minimize hallucinations those frustrating moments when AI confidently gives you incorrect information.
This upgrade is especially critical in software testing, where logical reasoning and factual accuracy are non-negotiable. You’ll be able to trust GPT-5 for things like:
- Accurately generating test cases from specs
- Reproducing bugs based on logs or user steps
- Suggesting bug fixes that are actually executable
QA Win: Reduced false positives, better bug reproduction, and a lot less manual rechecking of AI outputs.
How GPT-5 Will Reshape Your Testing Workflow
So, what does all this mean for your day-to-day as a tester or QA lead?
Here’s a breakdown of how GPT-5 can automate and enhance various parts of the software testing lifecycle:
| S. No |
Testing Area |
GPT-5 Impact |
| 1 |
Test Case Generation |
Generate edge, boundary, and negative cases from specs |
| 2 |
Code Review |
Spot logical bugs and performance bottlenecks |
| 3 |
Defect Triage |
Summarize bug logs and suggest fixes |
| 4 |
UI/UX Testing |
Identify layout issues via image analysis |
| 5 |
Accessibility Audits |
Check for WCAG violations and missing ARIA labels |
| 6 |
API Testing |
Simulate requests and validate responses |
| 7 |
Log Analysis |
Pinpoint root causes in massive logs |
| 8 |
CI/CD Integration |
Trigger tests and analyze coverage gaps |
Example: A tester uploads a user story for login functionality. GPT-5 instantly generates test cases, including failed login attempts, timeout scenarios, and JWT token expiry all aligned with business logic.
Preparing Your QA Team for the GPT-5 Era
1. Start with GPT-4o
Get hands-on with GPT-4o to understand its current capabilities. Use it to:
- Draft basic test cases
- Detect UI bugs in screenshots
- Extract key insights from logs
This practical experience lays the groundwork for smoother GPT-5 adoption.
2. Identify Where AI Can Help Most
Pinpoint tasks where your team loses time or consistency like:
- Manually writing regression test cases
- Debugging from 1,000-line logs
- Reviewing accessibility in every release
GPT-5 can take over these repetitive yet vital tasks, letting your team focus on strategic areas.
3. Plan Toolchain Integration
Evaluate how GPT-5 could plug into your existing stack. Think:
- TestRail or Zephyr for managing cases
- Jenkins, GitHub Actions, or CircleCI for automation
- Jira or YouTrack for defect management
Also, explore OpenAI’s API to build custom testing agents that fit your infrastructure.
4. Train Your Team in Prompt Engineering
GPT-5 will only be as good as the prompts you give it.
Bad Prompt:
“Test the signup form.”
Great Prompt:
“Write 10 boundary and 10 negative test cases for the signup form, covering email format, password strength, and age validation.”
Invest in prompt training sessions. It’s the key to unlocking GPT-5’s true power.
5. Track ROI and Optimize
Once integrated, measure performance improvements:
- How much faster are test cycles?
- How many defects are caught earlier?
- How much manual effort is saved?
Use this data to refine your testing strategy and justify further investment in AI-driven tools.
Looking Ahead: The Future Role of QA in an AI-First World
GPT-5 isn’t here to replace QA professionals; it’s here to augment them. Your role will evolve from test executor to AI orchestrator.
You’ll spend less time writing the same test scripts and more time:
- Strategizing for edge-case scenarios
- Guiding AI to cover risk-heavy areas
- Collaborating across Dev, Product, and Design for better releases
Insight: In the future, the best QA engineers won’t be the ones who write the most test cases but the ones who can teach AI to do it better.
Emerging Trends to Watch
- AI-Powered Test Prioritization: Use historical bug data and code diffs to run only the most impactful tests.
- Real-Time Monitoring: Let GPT-5 flag flaky tests or unstable environments as soon as they occur.
- Cross-Team Sync: Designers, developers, and QA teams can interact with GPT-5 in shared channels, closing the feedback loop faster than ever.
Final Thoughts: GPT-5 Will Redefine QA Excellence
The release of GPT-5 is more than just a new chapter it’s a rewriting of the rulebook for QA teams. Its powerful blend of multimodal understanding, intelligent orchestration, and reduced friction can make quality assurance more efficient, more strategic, and more collaborative. But success won’t come by default. To capitalize on GPT-5, QA teams need to start now by experimenting, learning, and embracing change.
Frequently Asked Questions
-
Is GPT-5 better than GPT-4o for testers?
Yes. GPT-5 is expected to offer better reasoning, a larger context window, and full agentic capabilities tailored for technical tasks.
-
Can GPT-5 replace manual testing?
Not entirely. GPT-5 enhances manual testing by automating repetitive work, but exploratory and strategic testing still need human oversight.
-
What tools can GPT-5 integrate with?
GPT-5 can work with TestRail, Jira, Jenkins, GitHub Actions, Postman, and others via APIs or third-party plugins.
-
Is GPT-5 suitable for non-coders in QA?
Absolutely. With natural language inputs, non-coders can describe testing needs, and GPT-5 will generate test scripts, reports, or defect summaries.
-
How can my team start preparing?
Begin using GPT-4o, master prompt writing, and identify workflows that GPT-5 can streamline or automate.
by Rajesh K | Jul 18, 2025 | AI Testing, Blog, Latest Post |
Artificial Intelligence (AI) continues to revolutionize industries, driving unprecedented productivity and efficiency. One of its most transformative effects is on the field of automation testing, where AI tools are helping QA teams write test scripts, identify bugs, and optimize test coverage faster than ever. Among today’s standout AI tools are GitHub Copilot vs Microsoft Copilot. Though similarly named and under Microsoft’s ecosystem, these tools address entirely different needs. GitHub Copilot is like a co-pilot for developers, always ready to jump in with smart code suggestions and streamline your programming and test automation workflow. Meanwhile, Microsoft Copilot feels more like a business assistant that’s embedded right into your day-to-day apps, helping you navigate your workload with less effort and more impact.
So, how do you decide which one fits your needs? Let’s break it down together. In this blog, we’ll explore their differences, use cases, benefits, and limitations in a conversational, easy-to-digest format. Whether you’re a developer drowning in code or a business professional juggling meetings and emails, there’s a Copilot ready to help.
Understanding the Basics: What Powers GitHub and Microsoft Copilot?
Shared Foundations: OpenAI Models
Both GitHub Copilot and Microsoft Copilot are powered by OpenAI’s language models, but they’re trained and optimized differently:
| Copilot |
Underlying Model |
Hosted On |
| GitHub Copilot |
OpenAI Codex (based on GPT-3) |
GitHub servers |
| Microsoft Copilot |
GPT-4 (via Azure OpenAI) |
Microsoft Azure |
Deep Dive into GitHub Copilot
If you write code regularly, you’ve probably wished for an assistant who could handle the boring stuff like boilerplate code, test generation, or fixing those annoying syntax errors. That’s exactly what GitHub Copilot brings to the table.

Core Capabilities:
- Smart code completion as you type
- Entire function generation from a simple comment
- Generate test cases and documentation
- Translate comments or pseudo-code into working code
- Refactor messy or outdated code instantly
Supported Programming Languages:
GitHub Copilot supports a wide array of languages including:
Python, JavaScript, TypeScript, Java, Ruby, Go, PHP, C++, C#, Rust, and more
Why Developers Love It:
- It helps cut development time by suggesting full functions and reusable code snippets.
- Reduces errors early with syntax-aware suggestions.
- Encourages best practices by modeling suggestions on open-source code patterns.
Real-world Example:
Let’s say you’re building a REST API in Python. Type a comment like # create an endpoint for user login, and Copilot will instantly draft a function using Flask or FastAPI, including error handling and basic validation. That’s time saved and fewer bugs.
Comprehensive Look at Microsoft Copilot
Now, imagine you’re in back-to-back meetings, drowning in emails, and you’ve got a massive report to prepare. Microsoft Copilot jumps in like a helpful assistant, reading your emails, summarizing documents, or generating entire PowerPoint presentations—all while you focus on bigger decisions.

Core Capabilities:
- Rewrite and summarize documents or emails
- Draft email responses with tone customization
- Analyze spreadsheets and create charts using natural language
- Turn meeting transcripts into organized action items
- Build presentations from existing content or documents
Practical Use Cases:
- Word: Ask Copilot to summarize a 20-page legal document into five bullet points.
- Excel: Type “show sales trends by quarter” and it creates the charts and insights.
- Outlook: Auto-generate replies, follow-ups, or even catch tone issues.
- Teams: After a meeting, Copilot generates a summary and assigns tasks.
- PowerPoint: Turn a planning document into a visually appealing slide deck.
Why Professionals Rely on It:
- It eliminates repetitive manual tasks.
- Helps teams collaborate faster and better.
- Offers more clarity and focus by turning scattered data into actionable insights.
Security and Privacy Considerations
| Feature |
GitHub Copilot |
Microsoft Copilot |
| Data Residency |
Public code repositories |
Enterprise data residency within Azure |
| Data Retention |
Potential snippet retention |
Zero retention of business data |
| Compliance & Security |
Trust Center & Filtering options |
Microsoft 365 Compliance, DLP, permissions |
Pricing & Licensing Overview
| Copilot |
Pricing Model |
Ideal Audience |
| GitHub Copilot |
Free (students/open-source), $10-$19/user/month |
Developers, coding teams |
| Microsoft Copilot |
₹2,495 (~$30)/user/month + Microsoft 365 E3/E5 |
Business and enterprise users |
Why Were GitHub Copilot and Microsoft Copilot Created?
GitHub Copilot’s Purpose:
GitHub Copilot was born out of the need to simplify software development. Developers spend a significant portion of their time writing repetitive code, debugging, and referencing documentation. Copilot was designed to:
- Reduce the friction in the coding process
- Act as a real-time mentor for junior developers
- Increase code quality and development speed
- Encourage best practices through intelligent suggestions
Its goal? To let developers shift from mundane code generation to building more innovative and scalable software.
Microsoft Copilot’s Purpose:
Microsoft Copilot emerged as a response to the growing complexity of digital workflows. In enterprises, time is often consumed by writing reports, parsing emails, formatting spreadsheets, or preparing presentations. Microsoft Copilot was developed to:
- Minimize time spent on repetitive office tasks
- Maximize productivity across Microsoft 365 applications
- Turn information overload into actionable insights
- Help teams collaborate more effectively and consistently
It’s like having a productivity partner that understands your business tools and workflows inside out.
Which Copilot Is Right for You?
Choose GitHub Copilot if:
- You write or maintain code daily.
- You want an AI assistant to speed up coding and reduce bugs.
- Your team collaborates using GitHub or popular IDEs.
Choose Microsoft Copilot if:
- You spend most of your day in Word, Excel, Outlook, or Teams.
- You need help summarizing, analyzing, or drafting content quickly.
- You work in a regulated industry and need enterprise-grade security.
Conclusion
GitHub Copilot and Microsoft Copilot are both designed to make you more productive but in totally different ways. Developers get more done with GitHub Copilot by reducing coding overhead, while business professionals can focus on results, not grunt work, with Microsoft Copilot.
Frequently Asked Questions
-
What is the difference between GitHub Copilot and Microsoft Copilot?
GitHub Copilot is designed for developers to assist with coding inside IDEs, while Microsoft Copilot supports productivity tasks in Microsoft 365 apps.
-
Can GitHub Copilot help junior developers?
Yes, it provides real-time coding suggestions, helping less experienced developers learn and follow best practices.
-
What applications does Microsoft Copilot integrate with?
Microsoft Copilot works with Word, Excel, Outlook, PowerPoint, and Teams to boost productivity and streamline workflows.
-
Is GitHub Copilot good for enterprise teams?
Absolutely. GitHub Copilot for Business includes centralized policy management and organization-wide deployment features.
-
Does Microsoft Copilot require an additional license?
Yes, it requires a Microsoft 365 E3/E5 license and a Copilot add-on subscription
-
Is GitHub Copilot free?
It’s free for verified students and open-source maintainers. Others can subscribe for $10/month (individuals) or $19/month (business).
-
Can Microsoft Copilot write code too?
It’s not built for coding, but it can help with simple scripting in Excel or Power Automate.
-
Is my data safe with Microsoft Copilot?
Absolutely. It uses Microsoft’s enterprise-grade compliance model and doesn’t retain your business data.


