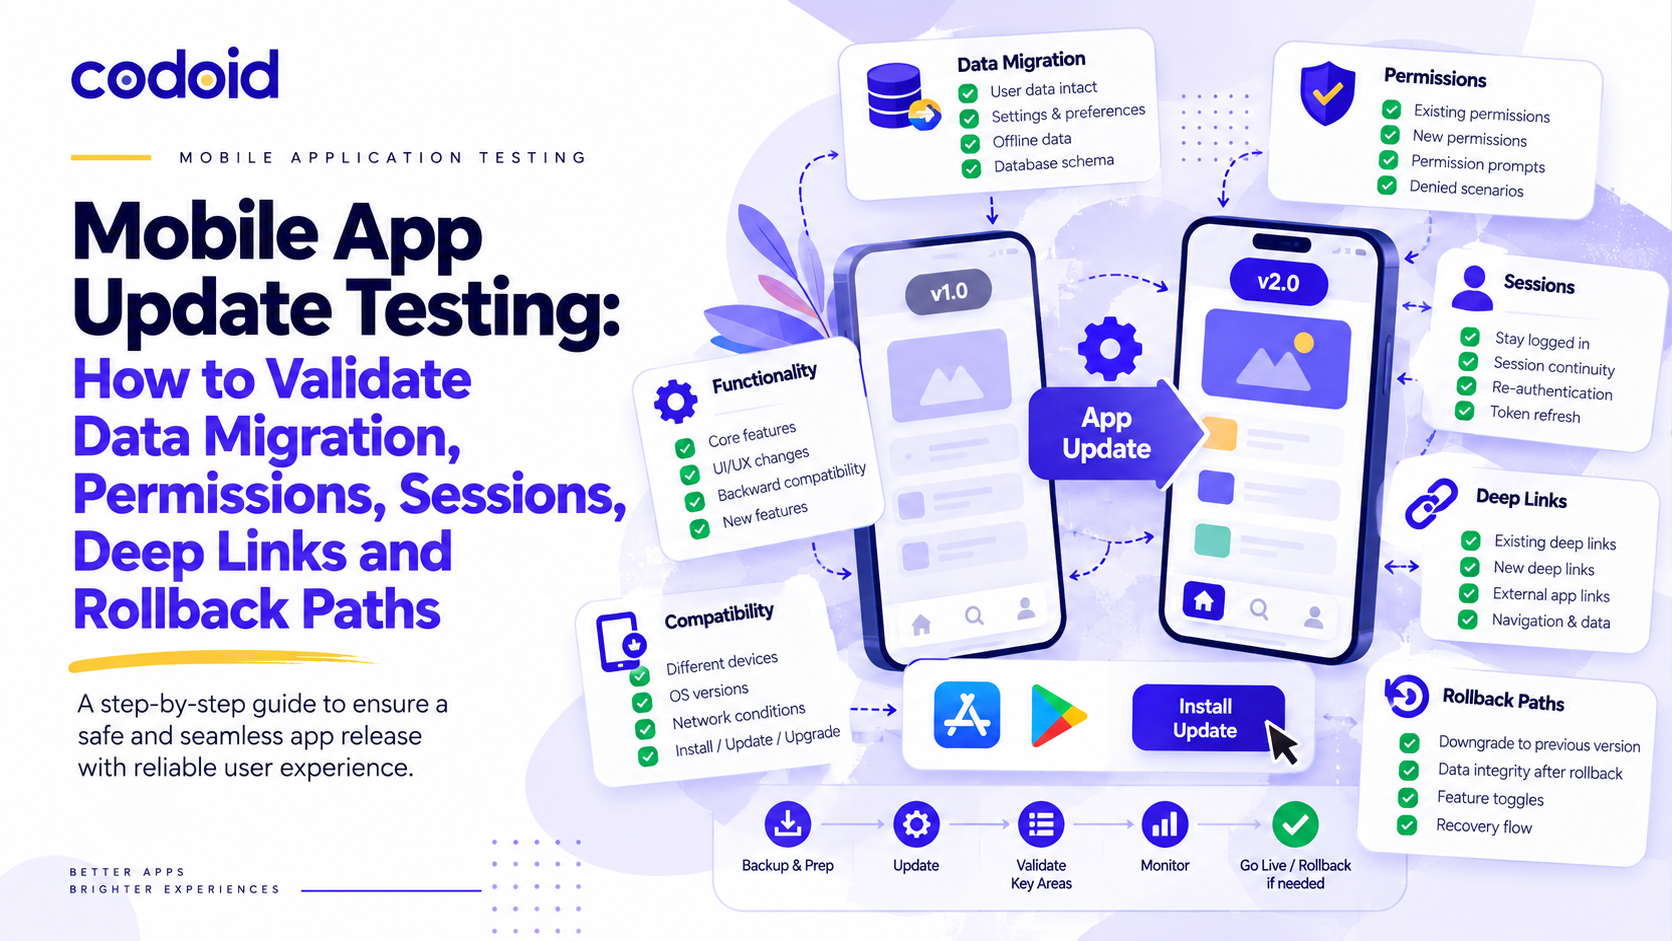
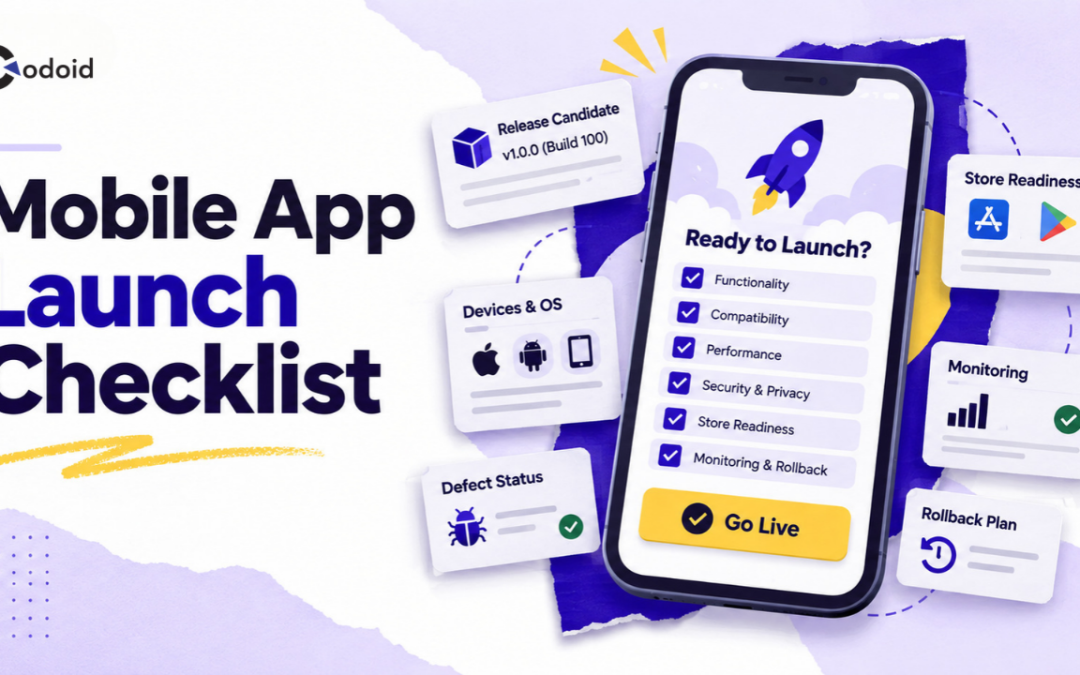
A mobile app launch checklist turns a stressful release day into a structured decision instead of a last-minute scramble. Most teams already run functional tests, but fewer explicitly define what should stop a release, who signs off on the residual risk, and how a bad build gets pulled back after users have already installed it. This guide walks through a practical release-readiness framework, plus a sample QA sign-off report you can adapt directly. If you’d rather have a team run this process for you end to end, our mobile app testing services cover exactly this kind of release validation.
What makes a mobile app ready for release?
A mobile app is release-ready when the exact production candidate has passed agreed functional, compatibility, security, performance, privacy, and store-compliance gates, with no unresolved release-blocking defects and with monitoring and rollback controls prepared. This mobile app launch checklist walks through how to structure that decision.
A go/no-go decision should therefore answer a risk question, not merely a test-execution question: Is the remaining known risk acceptable enough to expose this build to users?
Apple expects submitted apps to be complete, tested on-device, and free of obvious technical problems or crashes. Google Play provides pre-launch testing that can identify stability, compatibility, performance, and accessibility issues before an Android release reaches users.
Key takeaways
Define measurable release gates before testing starts rather than deciding acceptable quality at the end.
Run final validation against the exact signed release candidate that will be distributed.
Treat critical-path failures, reproducible crashes, security blockers, incorrect production configuration, and incomplete store requirements as no-go conditions.
A 100% test pass rate is not required for every release, but every failed, skipped, or blocked test should have a documented disposition.
Use a QA sign-off report to record evidence, residual defects, accepted risks, approvers, rollback readiness, and the final go/no-go decision.
For app updates, staged or phased rollout can reduce exposure while real-world telemetry is validated.
Mobile app release readiness is the verified state in which a specific app build, its backend dependencies, distribution configuration, and operational controls satisfy the organization’s agreed criteria for production deployment.
Release readiness normally covers more than QA execution. It includes:
Functional correctness
Regression risk
Device and operating-system compatibility
Stability
Performance
Security
Privacy and permissions
Accessibility where applicable
Backend and third-party dependency readiness
App Store or Google Play submission requirements
Production configuration
Analytics and observability
Rollback or rollout-halt capability
Business approval
Release readiness is not the same as “testing is complete.” Testing can be complete while a release remains unsafe, for example, because a critical defect is still open, production API credentials are wrong, privacy declarations are outdated, or rollback procedures have not been validated.
Release readiness vs. QA sign-off
Release readiness is the condition of the software and deployment environment. QA sign-off is the documented assessment of that condition from the quality perspective.
QA should provide evidence and risk analysis. The final business release decision may also involve engineering, product, security, operations, compliance, or executive stakeholders depending on the application.
Why do go/no-go criteria matter for mobile releases?
A mobile release has a different risk profile from many web deployments because teams do not have complete control over how quickly an installed binary can be replaced.
Once a problematic version reaches users, some devices may continue running it even after distribution is stopped. Google notes that halting a staged rollout prevents additional users from receiving the affected version, but users who already received it remain on that version.
That makes pre-release decision quality important.
Weak release gates can lead to:
Production crashes and unusable flows. A defect in authentication, onboarding, checkout, synchronization, or application startup can block a disproportionately large part of the user journey.
Store rejection or publication delays.Apple states that submissions should be final and functional and that incomplete binaries or apps that crash or exhibit obvious technical problems may be rejected.
Privacy or compliance problems. Apple requires App Store privacy information to accurately represent an app’s data practices, including relevant third-party code. Google similarly requires developers to maintain accurate Data safety declarations, including data handled by third-party SDKs.
Difficult recovery. A team that discovers a severe defect without a feature flag, backend kill switch, rollback build, or rollout-halt procedure may have limited mitigation options.
The purpose of a go/no-go framework is therefore not to promise a defect-free release. Its purpose is to ensure that the remaining risk is understood, evidenced, owned, and recoverable.
How does a mobile app go/no-go process work?
A practical release-readiness process converts test and operational evidence into an explicit release decision.
Define the release gates. Decide which conditions must be met for functionality, defects, security, compatibility, performance, store compliance, monitoring, and recovery.
Identify the release candidate. Record the immutable version, build number, source commit, environment configuration, and signing state.
Reconcile exceptions. Review every open defect, failed test, skipped test, known limitation, and dependency risk.
Assess operational readiness. Confirm production services, feature flags, monitoring, support coverage, rollout strategy, and recovery controls.
Make and record the decision. Mark the release Go, Conditional Go, or No-Go and record who accepted any remaining risk.
The important principle is traceability: another person reviewing the release later should be able to understand what was tested, what was not tested, what remained broken, why the risk was accepted, and who approved it.
Mobile app release readiness criteria
The following decision framework can be adapted to your product. The numeric values are examples; teams should calibrate thresholds according to business impact, regulatory obligations, user population, architecture, and historical defect patterns.
S. No
Release area
Sample Go criterion
Typical No-Go condition
Evidence
1
Release candidate
Exact signed production build identified and unchanged after final regression
Code, dependency, configuration, or binary changed after sign-off
Build ID, commit SHA, CI artifact
2
Critical user flows
100% of release-critical scenarios pass
Login, onboarding, purchase, payment, sync, account recovery, or another critical journey fails
Material regression without approved workaround or risk acceptance
Regression dashboard
4
Blocker/critical defects
0 unresolved release-blocking defects
Any reproducible defect capable of causing severe user, security, data, or business impact
Defect report
5
Stability
No known reproducible release-blocking crashes or ANRs in covered flows
New reproducible crash/ANR in a supported critical flow
Device tests, crash reports, Play pre-launch report
6
Compatibility
Representative supported OS/device matrix passes
Critical flow broken on a materially supported OS/device segment
Device matrix
7
Performance
Meets agreed baseline or approved regression budget
Material degradation in startup, responsiveness, memory, battery, or network behavior
Benchmark comparison
8
Security
No unresolved findings above the organization’s permitted risk level
Critical/high-risk exploitable issue without formal acceptance
Security assessment
9
Privacy
App behavior matches declared collection, sharing, permissions, and policy
Undeclared collection or materially incorrect privacy declaration
Privacy review
10
Backend readiness
Production APIs and dependent services validated
Required service unavailable, incompatible, or misconfigured
Environment check
11
Store readiness
Required metadata, reviewer access, declarations, signing, and release configuration complete
Submission cannot be reviewed or violates a known store requirement
App Store Connect/Play Console checklist
12
Observability
Crash, error, API, and business telemetry available
Release cannot be monitored sufficiently to detect material failure
Monitoring dashboard
13
Recovery
Rollout can be paused, halted, mitigated, or superseded according to plan
No practical mitigation for a known high-impact failure mode
Rollback/runbook
14
Stakeholder approval
Required owners approve residual risk
Required approver rejects or has not reviewed the release
Sign-off record
Which defects should automatically block a mobile release?
A defect should generally trigger a No-Go when its expected impact exceeds the organization’s release-risk tolerance and there is no reliable mitigation.
Typical blockers include a defect that:
Prevents installation, launch, authentication, or another primary user journey.
Causes repeatable crashes or Android Not Responding events in a supported critical flow.
Creates data corruption, data loss, duplicate transactions, or incorrect financial outcomes.
Introduces an exploitable security vulnerability above the permitted risk threshold.
Sends sensitive information somewhere it should not go.
Makes required privacy disclosures materially inaccurate.
Breaks an important supported operating-system or device segment.
Disables the team’s ability to observe or safely control the release.
Severity labels alone should not make the decision. A defect labeled “Medium” can still be release-blocking when it affects nearly every user, while a formally “High” issue in an unreachable experimental feature may be containable behind a disabled feature flag.
Need Help Running a Mobile App Release Readiness Review?
How should QA perform a mobile release-readiness review?
1. Freeze the intended release scope
Record the user stories, fixes, configuration changes, SDK updates, feature flags, backend dependencies, and store changes included in the release.
Why: the test conclusion is only valid for the scope actually evaluated.
Expected result: the team can distinguish deliberate release content from unexpected changes.
2. Identify the exact production candidate
Capture at minimum:
Application version
iOS build number and/or Android version code
Source commit
CI/CD artifact identifier
Build configuration
Target environment
Signing state
Do not silently rebuild after final QA approval. A new binary is a new release candidate unless the build process is demonstrably reproducible and the organization explicitly handles it otherwise.
3. Execute critical-path smoke testing first
Test the flows whose failure would make the release unacceptable.
For a consumer application, these might include installation, upgrade, startup, authentication, onboarding, account recovery, content retrieval, core transaction flows, push/deep-link entry points, logout, and account deletion.
A failure here should be escalated before the team spends hours completing lower-risk regression coverage.
4. Complete risk-based regression and compatibility testing
Use production analytics, supported-device commitments, OS adoption, architecture changes, and historical defect areas to decide coverage.
Android’s current core app-quality guidance recommends testing representative real hardware and relevant Android versions rather than attempting to test every device, and it also recommends testing against the latest Android version.
For Android builds, Google Play’s pre-launch report can supplement, not replace, your own test strategy. Google explicitly notes that pre-launch testing cannot guarantee that every issue will be identified.
5. Validate performance and stability
Compare the release candidate with an agreed baseline for metrics relevant to the product, such as:
Startup responsiveness
Screen rendering
API latency
Memory behavior
Battery consumption
Network usage
Crash behavior
ANRs on Android
Android’s core quality guidance includes startup responsiveness, rendering performance, StrictMode compliance, and freedom from crashes and UI-thread-blocking ANRs among its quality checks. Battery consumption deserves particular attention; our battery drain testing maturity model covers how to build this into a release gate rather than a one-off check.
Avoid inventing one performance threshold for every application. A navigation app, banking application, media editor, casual game, and enterprise field application have different acceptable profiles.
6. Verify mobile security requirements
Define security gates using the application’s threat model and risk classification.
For a security-sensitive application, QA sign-off may depend on a separate security-team approval rather than QA attempting to certify every security control.
7. Reconcile privacy, permissions, and SDK changes
Before release, compare actual application behavior with store declarations and the privacy policy.
On Apple platforms, developers are responsible for keeping App Store privacy responses accurate, including applicable data practices of third-party partners integrated into the app.
Google Play likewise requires developers to disclose relevant user-data collection and handling, including through third-party libraries and SDKs.
A change to analytics, advertising, authentication, crash reporting, payments, or another SDK therefore deserves release-readiness review even when the visible UI barely changes.
8. Verify store-submission readiness
For iOS, confirm that reviewer-access requirements, backend services, metadata, URLs, purchases, and other submission dependencies are functional. Apple specifically asks developers with login-based apps to provide review access and ensure the backend service is available.
For Android, review Play Console pre-review checks and the pre-launch report before production submission when applicable. Google says pre-review checks can identify potential issues before changes are sent for review.
9. Confirm production monitoring and recovery
QA should know what happens after the release button is pressed.
Define:
Who monitors the rollout.
Which dashboards are watched.
Which alert thresholds trigger escalation.
Which business KPIs indicate release failure.
Who can pause or halt distribution.
Which feature flags can mitigate an incident.
Whether the previous backend/client combination remains compatible.
How users already on the affected binary will be supported.
Analytics and business-event telemetry are exactly what teams rely on here; see our Mobile App Analytics Testing guide for how to validate that this instrumentation is trustworthy before you need it during an incident.
For updates, Apple supports a seven-day phased release for automatic updates, while Google Play supports staged rollout percentages that can be increased or halted.
Practical example: Evaluating an e-commerce mobile release
Assume a retail application is releasing version 6.8.0 on iOS and Android.
The update changes checkout, introduces a new promotion engine, upgrades the analytics SDK, and fixes several account-management defects.
Preconditions
The release candidate has been built from the approved branch, staging regression is complete, the production backend is backward compatible, and store metadata is prepared.
Sample evidence
S. No
Area
Result
1
Critical checkout tests
42/42 passed
2
Authentication/account tests
31/31 passed
3
Full planned regression
486 passed, 5 failed, 3 blocked
4
Reproducible crash blockers
0
5
Open P0 defects
0
6
Open P1 defects
0
7
Open P2 defects
3
8
Device/OS matrix
Passed on all mandatory combinations
9
Android pre-launch report
No unresolved release-blocking error
10
Performance
Within approved release baseline
11
Security review
Approved
12
Privacy review
Analytics SDK change reflected in declarations
13
Production configuration
Verified
14
Monitoring
Dashboard and alerts confirmed
15
Rollback/mitigation
Checkout feature flag and rollout halt procedure verified
Three P2 defects remain:
Product-image placeholder briefly flashes on one tablet configuration.
A noncritical promotional animation stutters in battery-saver mode.
A localized help-page heading wraps incorrectly in one language.
None affects checkout correctness, authentication, security, privacy, or data integrity. Product and QA document the limitations and accept the risk.
Decision: GO with monitored staged/phased rollout.
Now change one fact: the failed tests reveal that applying a promotion twice occasionally generates the wrong order total.
The overall test pass rate may still exceed 99%, but the release should be NO-GO because a defect affecting transaction correctness carries materially different risk from cosmetic failures.
This is why release gates should prioritize impact and criticality over aggregate pass percentage.
Sample QA sign-off report
Mobile Application QA Release Sign-Off
S. No
Field
Sample value
1
Application
Example Shopping App
2
Release
6.8.0
3
Platforms
iOS and Android
4
iOS build
680.142
5
Android version code
680142
6
Source revision
release/6.8.0 – a7f91c2
7
QA environment
Staging + production-readiness checks
8
Test cycle
Final release candidate
9
QA owner
[QA Lead Name]
10
Decision date
September 7, 2026
11
Final recommendation
GO – controlled rollout
Test summary
S. No
Test area
Planned
Passed
Failed
Blocked
Release status
1
Critical smoke
73
73
0
0
Pass
2
Functional regression
421
417
4
0
Pass with accepted exceptions
3
Device/OS compatibility
28
28
0
0
Pass
4
Upgrade/install
18
18
0
0
Pass
5
Network/interruption
22
22
0
0
Pass
6
Accessibility checks
16
15
1
0
Accepted nonblocking issue
7
Production configuration
12
12
0
0
Pass
Defect status
S. No
Severity
Open
Release-blocking
Disposition
1
P0 / Blocker
0
0
N/A
2
P1 / Critical
0
0
N/A
3
P2 / High
3
0
Accepted with owners
4
P3 / Medium/Low
7
0
Backlog/follow-up
Release gate assessment
S. No
Gate
Status
Evidence/notes
1
Critical flows
PASS
Login, checkout, payment, order history, logout verified
2
Stability
PASS
No reproducible critical crash in release scope
3
Compatibility
PASS
Mandatory device matrix completed
4
Performance
PASS
No release-blocking regression against approved baseline
5
Security
PASS
Security review approved
6
Privacy
PASS
SDK/data-flow change reviewed
7
Store readiness
PASS
Metadata, reviewer access and declarations checked
8
Production backend
PASS
APIs and feature configuration verified
9
Monitoring
PASS
Crash/error/business dashboards available
10
Recovery
PASS
Feature flags and rollout-halt procedure confirmed
Known risks accepted for release
Risk R-184: Cosmetic layout issue on one tablet size. User impact: Text alignment only; no functional impact. Mitigation: None required during rollout. Owner: Mobile UI team. Target: Next maintenance release.
Risk R-191: Promotional animation degradation under battery-saver conditions. User impact: Animation smoothness; transaction behavior unaffected. Mitigation: Animation can be disabled remotely. Owner: Android team.
Rollout plan
The update will use controlled distribution where supported. The team will monitor crash/error telemetry, authentication success, checkout success, API error rates, and support contacts at each rollout checkpoint.
Any material regression in a critical journey triggers release review and consideration of rollout pause/halt, feature disablement, or a corrective build.
QA recommendation
GO.
QA recommends production release because all mandatory release gates have passed, no P0/P1 release-blocking defects remain, known exceptions have owners and accepted impact, and rollout monitoring plus mitigation controls are ready.
Approvals
QA: [Name / Date]
Mobile Engineering: [Name / Date]
Product: [Name / Date]
Security/Compliance, if required: [Name / Date]
Release Manager: [Name / Date]
Go vs. Conditional Go vs. No-Go
S. No
Factor
Go
Conditional Go
No-Go
1
Meaning
Required gates passed and remaining risk is acceptable
Release is acceptable only under documented conditions
Risk exceeds agreed tolerance
2
Blocking defects
None
None unless formally waived under exceptional governance
One or more unresolved blockers
3
Known issues
Low/manageable impact
Material but bounded and mitigated
Severe, uncontrolled, or insufficiently understood
4
Mitigation
Standard monitoring
Specific flag, limited rollout, support procedure, or owner required
Mitigation absent or unreliable
5
Approval
Normal release approval
Explicit risk acceptance required
Release rejected
6
Typical action
Release
Release to limited exposure and monitor
Fix, rebuild, and retest
A Conditional Go should not become a mechanism for relabeling a No-Go. It is appropriate only when the risk is bounded, understood, observable, and genuinely controllable.
Mobile release readiness best practices
Define gates before the code freeze. Teams make more consistent decisions when release criteria are agreed before deadline pressure appears.
Separate critical-flow results from aggregate pass rate. One failed payment test matters more than dozens of successful settings-page tests.
Test the binary that will actually ship. Signing, compiler options, minification, environment variables, entitlements, permissions, feature flags, and SDK configuration can create release-only behavior.
Use representative real devices. Emulators and simulators are efficient, but physical devices remain valuable for hardware behavior, manufacturer differences, interruptions, sensors, battery conditions, and real network behavior. Android’s quality guidance recommends representative hardware alongside emulator and device-lab coverage.
Treat third-party SDK upgrades as release risk. Analytics, identity, advertising, payment, maps, notification, and security SDKs can affect privacy declarations, startup behavior, networking, permissions, and stability.
Require an owner for every accepted risk. An accepted defect without an owner or follow-up target often becomes permanent ambiguity.
Use progressive delivery for updates when appropriate. Apple phased release and Google staged rollout provide mechanisms for gradually exposing an update rather than immediately delivering it to the entire eligible population.
Define stop conditions before rollout. A rollback decision is easier when the team has already agreed what constitutes unacceptable crash, transaction, authentication, or support behavior. Crash conditions are exactly what a tool like our iOS Jetsam testing guide helps you diagnose correctly, rather than misreading a memory kill as an ordinary crash.
Common mobile release-readiness mistakes
S. No
Mistake
Why it happens
Impact
Recommended fix
1
Using overall pass percentage as the release decision
Dashboards emphasize totals
Critical failures are hidden by low-risk passing tests
Gate critical journeys separately
2
Testing a different build from production
Last-minute rebuild or signing change
QA evidence no longer represents the shipped artifact
Record and verify immutable build identity
3
Ignoring skipped tests
Only failures receive attention
Untested risk is mistaken for passing behavior
Require disposition for skipped/blocked tests
4
Accepting defects without owners
Deadline pressure
Known issues disappear after release
Record owner, impact, mitigation, and target
5
Skipping privacy review after SDK changes
Change appears nonfunctional
Store disclosures may no longer match behavior
Review SDK data flows during release readiness
6
Relying solely on store pre-launch automation
Automated report appears comprehensive
Product-specific journeys may remain untested
Combine platform tooling with your own risk-based tests
7
No rollback or mitigation rehearsal
Team assumes a hotfix will be easy
Incident response begins only after users are affected
Why is the regression suite green but QA still recommends No-Go?
The likely cause is that an important release gate exists outside the automated regression suite.
Verify critical defects, production configuration, store submission requirements, security findings, privacy changes, backend dependencies, and operational readiness.
A green test suite demonstrates that those tests passed. It does not demonstrate that every release condition has been satisfied.
What should we do when one critical test fails only intermittently?
Treat the intermittent failure as unresolved until the team understands its probability, impact, scope, and cause well enough to assess risk.
Attempt controlled reproduction, collect logs and telemetry, vary device/network/environment conditions, and determine whether the failure reflects the application, test automation, backend, or environment.
Do not classify the issue as “flaky automation” merely because rerunning it passes.
What if the Android pre-launch report finds an error that internal QA cannot reproduce?
Investigate the affected device, Android version, stack trace, logs, and interaction sequence.
Google’s pre-launch reports can identify crashes, ANRs, compatibility problems, performance warnings, and accessibility issues, and reports can include device-specific diagnostic information.
If the problem cannot be reproduced, document the investigation and make an explicit risk decision rather than silently ignoring the report.
What if an issue appears after a staged rollout begins?
First determine severity and scope using production telemetry.
If exposure should not increase, halt or pause distribution using the applicable platform mechanism. Google Play allows staged rollouts to be halted, while Apple phased releases can be paused.
Then decide whether remote mitigation, backend configuration, a replacement release, or user communication is required.
A release-readiness process typically combines several tool categories rather than depending on one platform.
Apple distribution and review tooling: App Store Connect can be used to manage submissions, review information, privacy details, and phased releases. Apple requires apps submitted for review to be complete and functional.
Google Play Console: Play Console provides testing/release views, pre-launch reports, pre-review checks, Android vitals, and staged rollout controls. Pre-launch reports can test stability, compatibility, performance, and accessibility.
Device labs: Device-cloud services can expand OS, form-factor, and hardware coverage. Android’s quality guidance explicitly identifies device labs as an option for broader testing.
CI/CD systems: Use continuous integration to preserve build identity, execute automated checks, store artifacts, and produce traceable evidence.
Defect and test-management systems: Link release gates to test results, defects, risk acceptance, and owners.
Observability platforms: Production crash, network, backend, and business-event telemetry should make the first stages of rollout measurable.
The right implementation is the one that gives the team reliable evidence and traceability. Buying additional tooling does not compensate for undefined release criteria.
Limitations and risks of a go/no-go checklist
A release-readiness checklist reduces decision ambiguity, but it cannot prove that an application has no defects.
Testing is always constrained by combinations of:
Devices and OS versions
Network states
User data
Accounts and permissions
Regional configurations
Backend behavior
Third-party services
Timing and concurrency
Real-world usage patterns
Google explicitly cautions that its own pre-launch testing cannot guarantee that all issues will be identified.
The same principle applies to an internal QA process.
For that reason, release readiness should combine pre-release verification with controlled deployment, observability, and recovery capability.
The sample thresholds in this article should also not be copied mechanically. A healthcare, financial, aviation, industrial, or other high-consequence application may require substantially stricter controls than a low-risk consumer application.
Conclusion
This mobile app launch checklist treats QA sign-off as an evidence-based risk assessment rather than a ceremonial final step. Before declaring Go, confirm that the exact release candidate passes critical business journeys, contains no unresolved release blockers, behaves acceptably across representative supported environments, satisfies relevant security and privacy requirements, is correctly configured for store distribution, and can be monitored and controlled after launch.
The most practical next step is to take the sample release-gate table and QA sign-off report above, replace the example thresholds with your organization’s risk tolerances, and require the completed report for every production mobile release.
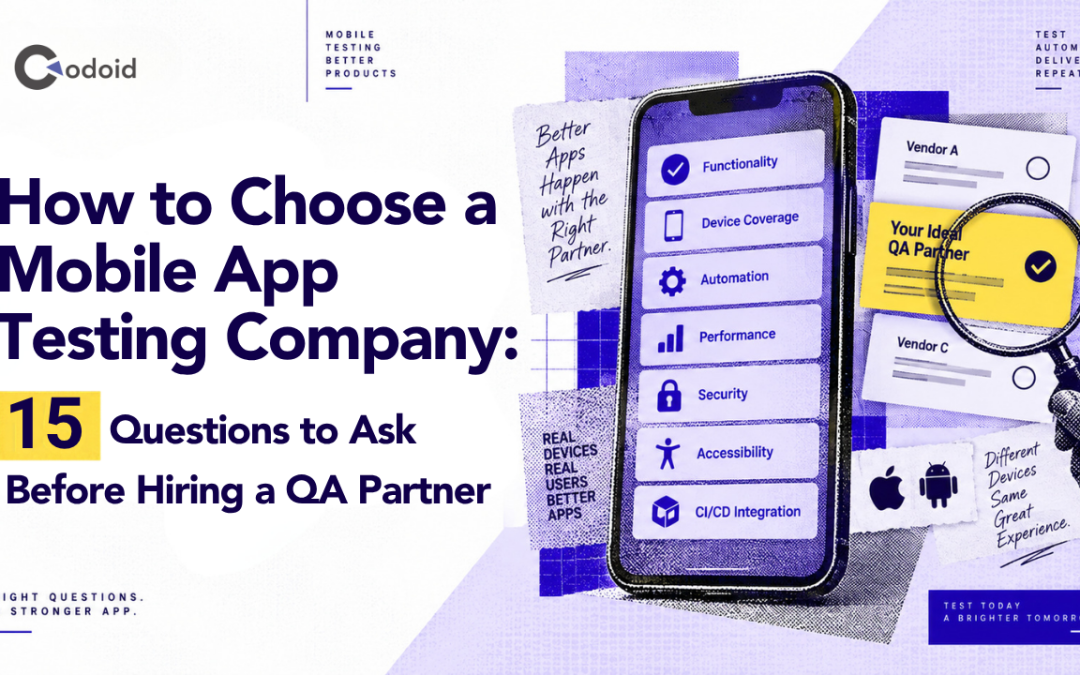
Knowing how to choose a mobile app testing company means going beyond comparing hourly rates, headcount, or a list of testing tools. A QA partner can influence release confidence, engineering velocity, production risk, and the experience customers receive across different devices and operating systems. The challenge is separating providers that can demonstrate a disciplined mobile QA capability from those offering generic testing services under a mobile label.
This guide provides a practical framework for evaluating a mobile app testing company, including 15 questions to ask before signing a contract, evidence to request, warning signs to investigate, and a scorecard you can use to compare shortlisted QA partners.
How do you choose the right mobile app testing company?
Choose a mobile app testing company by verifying that it can test your highest-risk user journeys on representative devices, build an appropriate mix of manual and automated testing, integrate with your development process, protect sensitive data, and provide measurable evidence of quality.
Before hiring a QA partner, ask for concrete examples, sample deliverables, technical explanations, and, where practical, a limited pilot engagement rather than relying only on capability claims in a sales proposal.
Key takeaways
Evaluate mobile-specific expertise, not just general QA experience.
Ask how the company chooses real devices, virtual devices, operating-system versions, and test scenarios rather than asking only how many devices it has.
Make automation decisions based on repeatability, maintenance cost, release frequency, and risk, not a target automation percentage.
Include security, accessibility, performance, network behavior, and device-specific conditions in the evaluation when they matter to your app.
Define defect quality, reporting, release criteria, test ownership, and commercial terms before the engagement begins.
Use a paid pilot or representative test assignment to validate the team’s actual working practices before making a long-term commitment.
What is a mobile app testing company?
A mobile app testing company is an external quality assurance provider that tests mobile applications for defects, usability problems, compatibility issues, performance problems, security weaknesses, accessibility barriers, and other risks before or during production releases.
Depending on the engagement, a mobile QA partner may provide:
Manual functional testing
Regression testing
Android and iOS compatibility testing
Test automation
API and integration testing
Performance testing
Security testing
Accessibility testing
Exploratory testing
Release validation
Test strategy and QA consulting
Continuous testing within CI/CD pipelines
A mobile testing company is different from simply hiring additional testers. A managed QA partner normally assumes responsibility for defined testing outcomes, processes, reporting, and coordination. Staff augmentation primarily supplies people who work within your existing QA process. Crowdtesting provides broad access to testers, devices, locations, or user conditions but may offer less ownership of the overall test strategy.
The right model depends on what problem you need to solve.
Why does choosing the right mobile QA partner matter?
Mobile application testing involves more than confirming that screens and buttons work.
Android guidance recommends combining tests at different levels rather than relying exclusively on broad end-to-end tests, while Apple similarly recommends a strategy that combines multiple test types.
Device coverage also matters. Google Firebase Test Lab, for example, supports testing Android and iOS applications across multiple device configurations, including tests on physical devices; Google notes that device testing can expose issues that may not appear in an emulator.
A capable mobile testing partner therefore needs to reason about several dimensions simultaneously:
Application architecture
Business-critical workflows
Android and iOS differences
Device models and screen sizes
Operating-system versions
Permissions and hardware capabilities
Network conditions
Third-party services
Background and interruption behavior
Performance
Security and privacy
Accessibility
Release frequency
Memory-related failures are a common blind spot here; see our guide on iOS Jetsam testing for how easily these get misdiagnosed as ordinary crashes.
A vendor that performs functional regression well may therefore still be the wrong partner for an app that has demanding security, accessibility, hardware, localization, or performance requirements.
How should you evaluate a mobile app testing company?
A structured selection process reduces the chance of choosing a vendor because of a polished proposal rather than proven delivery capability.
1. Define the testing problem before contacting vendors
Document what you actually need.
For example:
Platforms: Android, iOS, or both
Native, hybrid, Flutter, React Native, or another architecture
Release frequency
Current QA team and responsibilities
Existing automated tests
Priority customer journeys
Supported markets and languages
Device and OS requirements
Security or regulatory constraints
Required integrations
Production defect patterns
Expected engagement duration
Without this baseline, vendors may be proposing solutions to different problems, making their estimates difficult to compare.
2. Convert requirements into evaluation criteria
Separate mandatory requirements from preferences.
A banking application may place greater weight on security and device integrity testing. An ecommerce application may prioritize checkout reliability across devices and payment methods. A media app may care heavily about startup time, streaming behavior, interruptions, and network changes.
3. Shortlist vendors using evidence
Look for relevant mobile testing work, technical documentation, team profiles, sample reports, automation examples, and customer references where available.
Industry experience is useful only when it translates into relevant testing knowledge.
4. Use the same questions for every shortlisted company
Standardizing the evaluation makes comparisons more objective.
The 15 questions below can form the basis of an RFP, discovery call, technical interview, or vendor scorecard.
5. Validate claims technically
Include someone from engineering, QA, DevOps, security, or product who can challenge vague answers.
A procurement-only evaluation may miss significant technical differences between proposals.
6. Run a pilot when the engagement is material
Give finalists a small but realistic test assignment involving your actual application, environment, and workflow.
Evaluate how they think, not simply how many defects they submit.
15 questions to ask a mobile app testing company before hiring
1. What experience do you have testing apps similar to ours?
Start with relevance rather than total years in business.
Ask the QA company to explain experience with applications that resemble yours in areas such as:
Platform
Architecture
Business model
User volume
Hardware integrations
Payment flows
Authentication
Offline capabilities
Localization
Security requirements
Release cadence
What a strong answer looks like: The vendor explains comparable technical challenges, testing approaches, and lessons learned without exposing another client’s confidential information.
Warning sign: The answer consists primarily of client logos or generic statements such as “we test apps across every industry.”
A team that has tested an ecommerce application is not automatically prepared for a mobile banking app, healthcare workflow, Bluetooth device integration, or high-frequency trading interface.
2. How would you design the test strategy for our app?
This question reveals whether the vendor thinks in terms of risk or simply executes test cases.
Ask what they would test at different levels and which areas they would prioritize first.
A mature answer should discuss some combination of:
Unit-level coverage owned by developers
API and integration testing
Feature testing
UI testing
Exploratory testing
End-to-end flows
Regression testing
Release-candidate validation
Non-functional testing
Android’s current testing guidance emphasizes using different test sizes and levels, with smaller tests offering speed and reliability while broader tests provide greater environmental fidelity.
Ask for: A one-page sample test strategy based on your application.
Warning sign: Every feature receives the same testing depth regardless of business impact.
3. How will you decide which devices and OS versions to test?
Do not settle for “we have hundreds of devices.”
The important question is which devices will be used for your application and why.
A defensible device matrix can consider:
Customer analytics
Target markets
OS adoption
Device manufacturers
Screen dimensions
Hardware capabilities
Minimum supported OS
New OS releases
High-value customer segments
Known defect history
The partner should also explain where simulators, emulators, cloud devices, and physical devices fit into the strategy. Firebase Test Lab provides both Android and iOS testing options and supports tests on physical devices hosted by Google, illustrating how cloud infrastructure can supplement local device labs.
Warning sign: The device matrix is determined entirely by what happens to be available in the vendor’s lab.
4. What should be tested manually, and what should be automated?
A good QA partner should not promise to automate everything.
Automation is most valuable for tests that are sufficiently stable, repeatable, valuable, and economical to maintain.
Typical candidates include:
Smoke tests
Critical regression flows
Authentication
Checkout or transaction paths
Repetitive data-driven scenarios
API validation
Cross-device regression
Stable release checks
Manual testing remains useful for:
Exploratory testing
New or rapidly changing features
Visual observations
Complex interaction patterns
Usability investigation
Scenarios where automation maintenance exceeds its value
Ask: “Show us how you decide whether a test case should be automated.”
Warning sign: The vendor measures success primarily by the percentage of test cases automated.
5. Which automation frameworks will you use, and who owns the test code?
Tool selection should match your application architecture, development skills, and maintenance model.
For Android, Espresso is an official Android UI testing framework. Apple provides XCTest and XCUIAutomation for testing application behavior and user-interface flows. Appium provides a driver-based architecture for automating multiple platforms through WebDriver-style interfaces.
Ask:
Why is the proposed framework appropriate?
Will developers be able to run the tests locally?
Will tests run in CI?
Where will the repository live?
Who reviews automation code?
Who fixes flaky tests?
Who owns the framework after the contract ends?
Is documentation included in handover?
Warning sign: The provider proposes a proprietary framework that creates unnecessary dependence on the vendor and offers no clear exit path.
6. How will you test real mobile conditions beyond normal happy paths?
Mobile applications interact with operating systems, connectivity, permissions, hardware, and interruptions.
Ask how the team will test relevant conditions such as:
Wi-Fi to mobile-data transitions
Poor or lost connectivity
App backgrounding and restoration
Incoming interruptions
Permission denial and revocation
Low-storage conditions
Camera, GPS, biometric, Bluetooth, or NFC behavior
Deep links
Push notifications
Device rotation
Different locales
Time zones
Offline synchronization
Not every application needs every scenario. The test strategy should reflect actual product risk.
Warning sign: The proposed scope focuses almost entirely on scripted happy-path functional checks.
7. How will you test mobile app performance?
Ask the company to define measurable performance scenarios instead of promising that the application will be “fast.”
Depending on the product, relevant measurements can include:
Android’s Macrobenchmark tooling can measure larger user-facing scenarios such as app startup, scrolling, and other application interactions, with metrics including startup timing and frame timing.
Ask: “What performance threshold would cause you to block a release, and how would we establish it?”
Warning sign: Performance testing is described only as “opening the app on several devices and checking whether it feels slow.”
8. How do you approach mobile security and privacy testing?
Security testing should be evaluated separately from ordinary functional QA.
Ask whether the team can test relevant areas such as:
Also ask how the QA partner protects your information. If testers will receive source code, credentials, customer-like datasets, intellectual property, or access to internal environments, evaluate the provider’s information-security controls.
ISO/IEC 27001:2022 defines requirements for an information security management system, while SOC reporting can provide information about controls at service organizations. Certification or reports are evidence to consider, not substitutes for evaluating the controls relevant to your project.
Warning sign: The vendor treats penetration testing and standard functional testing as interchangeable services.
9. How will you test accessibility?
Ask whether accessibility is treated as part of normal quality engineering or as an optional final audit.
Relevant activities may include:
Screen-reader testing
Focus order
Labels
Contrast
Dynamic text
Touch target behavior
Orientation
Keyboard or switch interaction where applicable
Automated accessibility checks
Manual testing with assistive technologies
W3C’s mobile accessibility guidance explains how WCAG 2.2 can be applied to native mobile apps, mobile web apps, and hybrid applications. Android also recommends multiple approaches to accessibility testing, and Apple provides Accessibility Inspector and XCTest-based accessibility auditing capabilities.
Warning sign: Accessibility testing means running one automated scanner and reporting whatever it finds.
10. How will testing integrate with our CI/CD and development workflow?
QA should produce feedback at a point when teams can act on it.
Ask:
Which tests run on pull requests?
Which run on each build?
Which run nightly?
Which run before release?
What triggers a full regression?
How are failures communicated?
How are flaky tests handled?
Can engineers reproduce the same test locally?
How are test environments and test data controlled?
Firebase Test Lab, for example, supports command-line execution suitable for scripting tests as part of automated build and testing workflows.
Warning sign: Automated testing runs separately from engineering and results arrive only through periodic spreadsheets.
11. What information will a defect report contain?
The number of bugs found is a poor measure if developers cannot reproduce or prioritize them.
Ask to see an anonymized defect report.
Useful defect evidence can include:
Clear title
Environment
Device and OS
App/build version
Preconditions
Reproduction steps
Expected behavior
Actual behavior
Severity
Screenshots or video
Logs
Network evidence where appropriate
Reproducibility
Related test case
Test the vendor: Give the team a known defect during a pilot and evaluate the report they produce.
Warning sign: Bug reports routinely require several rounds of developer clarification.
Practical example: evaluating two QA partners for a mobile fintech app
Consider a hypothetical company preparing to outsource testing for an Android and iOS financial application.
The app includes:
Email and biometric authentication
Account balances
Transaction history
Money transfers
Push notifications
Sensitive customer information
Releases every two weeks
The buyer shortlists two testing companies.
Provider A offers the lower rate and advertises access to hundreds of devices. Its proposal contains a large regression checklist but does not explain device prioritization, test-data security, CI integration, accessibility, or automation maintenance.
Provider B costs more but proposes:
A risk-based test strategy
A customer-informed device matrix
Real-device validation for critical flows
Automated smoke and regression coverage
Defined CI execution
OWASP MASVS-informed security checks
Accessibility testing
Standardized defect evidence
Explicit test-code ownership
A four-week pilot before scaling
The buyer could evaluate both partners with a weighted scorecard:
S. No
Evaluation area
Weight
1
Mobile and domain expertise
25%
2
Test strategy and device coverage
20%
3
Automation and delivery integration
20%
4
Security and accessibility
15%
5
Reporting and communication
10%
6
Commercial and contractual fit
10%
The important lesson is not that Provider B must win. The company should award scores based on evidence from proposals, interviews, references, and the pilot, then document why one provider presents a better risk-adjusted fit.
Mobile app testing company vs other QA models
S. No
Factor
Managed mobile QA company
Staff augmentation
Crowdtesting
In-house QA
1
Primary purpose
Outsource defined QA capabilities or outcomes
Add individual QA capacity
Expand user/device/location coverage
Build internal testing capability
2
Process ownership
Often shared or vendor-managed
Usually client-managed
Usually limited to assigned campaigns
Internal
3
Mobile specialization
Can be high
Depends on individuals
Often useful for device diversity
Depends on hiring
4
Automation ownership
Can be included
Client usually directs it
Limited in many engagements
Internal
5
Scaling
Relatively flexible
Flexible by headcount
Highly flexible for campaigns
Slower due to hiring
6
Product knowledge
Builds over the engagement
Builds with individuals
Often shallower
Typically strongest over time
7
Best fit
Teams seeking sustained external QA ownership
Teams with a mature QA process needing capacity
Exploratory, localization, device, or real-user coverage
Core products where deep long-term ownership matters
8
Main limitation
Vendor-management and dependency risk
Requires internal management
Less suitable as sole QA strategy for many products
Hiring cost and slower capacity changes
These models are not mutually exclusive. A company might retain an internal QA lead, use a managed testing partner for regression automation, and employ crowdtesting for regional device coverage.
Best practices when hiring a mobile app testing partner
Tie the scope to product risk
Prioritize the workflows whose failure would have the greatest customer or business impact.
Do not allocate equal effort to every screen.
Use production evidence to choose devices
Where available, use customer device and OS analytics to build the primary compatibility matrix.
Supplement that data with strategic markets, minimum supported versions, upcoming releases, and known defect patterns.
Require traceable deliverables
Define what the partner must produce:
Test strategy
Test cases where needed
Automation code
Execution results
Defect reports
Release recommendation
Coverage records
Handover documentation
Keep test assets portable
Automation, documentation, and test data definitions should remain usable if you later change vendors or bring QA in-house.
Treat flaky automation as a defect in the test system
A suite that cannot be trusted loses operational value.
For example, Android’s Espresso documentation emphasizes synchronization and provides idling resources specifically for asynchronous application behavior rather than relying on arbitrary sleeps that can make suites slow or unreliable.
Review the testing strategy as the product changes
A device matrix, regression suite, or automation strategy that made sense twelve months ago may no longer reflect current customers or product architecture.
Common mistakes when choosing a mobile app testing company
S. No
Mistake
Why it happens
Impact
Recommended fix
1
Choosing mainly on hourly rate
Testing services appear interchangeable
Hidden rework and weak coverage
Compare outcomes, scope, and evidence
2
Asking only about total device count
Large labs sound impressive
Tests may miss your users’ devices
Require a justified device matrix
3
Demanding maximum automation
Automation is treated as inherently better
High maintenance and flaky suites
Automate based on risk and repeatability
4
Ignoring non-functional testing
Functional defects are easier to scope
Performance, accessibility, or security problems remain
Define required quality attributes explicitly
5
Accepting generic sample reports
Procurement happens before technical review
Weak defect evidence appears after onboarding
Review real anonymized deliverables
6
Failing to define asset ownership
Attention stays on delivery
Vendor lock-in becomes costly
Put ownership and handover in the contract
7
Skipping a technical pilot
References appear sufficient
Delivery style remains untested
Pilot representative workflows
8
Measuring QA by bug count
Bug totals are easy to quantify
Incentivizes volume over risk reduction
Measure actionable quality outcomes
Troubleshooting common QA vendor-selection problems
Why do all QA proposals sound almost identical?
The requirements are probably too broad.
Verify it: Check whether each vendor received only a feature list and a request for “manual and automation testing.”
Fix it: Give vendors explicit release frequency, supported platforms, risk areas, current automation, device requirements, environments, and expected responsibilities.
Risk: Otherwise, you may compare prices for materially different scopes.
Why does a vendor’s automation demo look good but fail in our CI pipeline?
The demonstration may have been optimized for a controlled local environment.
Verify it: Run the suite repeatedly in your actual CI environment and measure failures that are unrelated to product defects.
Fix it: Establish stable test data, environment controls, synchronization practices, failure diagnostics, and clear ownership of flaky tests.
Risk: Engineers may eventually ignore failed tests if they cannot trust the signal.
Why is the partner finding many bugs but release confidence is not improving?
Bug volume may not be aligned with risk.
Verify it: Review whether defects affect priority user journeys and whether production escapes are decreasing.
Fix it: Reorient testing around critical flows, defect prevention, recurring root causes, and explicit release criteria.
Risk: The team can spend increasing amounts of time processing low-value findings while serious risks remain.
Why are device-testing costs increasing rapidly?
The test matrix may be growing without prioritization.
Verify it: Map each device and configuration to customer usage, known risk, or a specific coverage objective.
Fix it: Create tiers, for example a small release-gating matrix plus broader scheduled compatibility coverage.
Risk: Uncontrolled device coverage can increase execution time and infrastructure cost without proportionate risk reduction.
Which tools might a mobile app testing company use?
Tool choice should follow the testing problem. No single framework proves that a QA company is competent.
S. No
Need
Example options
1
Android UI automation
Espresso
2
iOS UI automation
XCTest with XCUIAutomation
3
Cross-platform UI automation
Appium
4
Cloud device testing
BrowserStack, Firebase Test Lab and comparable device-cloud platforms
5
Android performance measurement
Macrobenchmark
6
Mobile security verification
OWASP MASVS and MASTG
7
Android accessibility checks
Android accessibility testing tools and Espresso checks
8
iOS accessibility checks
Accessibility Inspector and XCTest accessibility audits
9
Cross-platform accessibility guidance
WCAG 2.2 and W3C mobile guidance
Google documents Espresso as an Android UI-testing framework, while Apple provides XCTest/XCUIAutomation for automated UI interactions. Appium uses separate drivers to connect its automation model to individual platforms.
Tools should be evaluated alongside maintainability, debugging, CI compatibility, team skills, and ownership.
Conclusion
This guide on how to choose a mobile app testing company treated the decision as a technical and operational risk, not simply a procurement exercise. The strongest QA partner is the one that can explain what it will test, why those tests matter, where they will run, how results reach developers, how test assets will be maintained, and how success will be measured.
Use the 15 questions in this guide to compare vendors consistently. Require evidence behind important claims, establish explicit quality and ownership expectations, and validate the proposed working model with a representative pilot when the scale of the engagement justifies it. The goal is not to find the company with the longest tool list or the largest device lab. It is to find a QA partner whose testing strategy matches the risks, users, architecture, and delivery model of your mobile application.
What should I look for in a mobile app testing company?
Look for mobile-specific expertise, a risk-based test strategy, a justified device matrix, appropriate manual and automation capabilities, CI/CD integration, high-quality defect reporting, and clear ownership of test assets. Add security, accessibility, performance, localization, or hardware expertise when those characteristics are important to your application. Ask for evidence such as sample deliverables, technical interviews, references, and a representative pilot.
How much does mobile app testing outsourcing cost?
There is no meaningful universal price because scope can vary substantially. Cost depends on team size, geography, platforms, device coverage, release frequency, automation requirements, environments, specialist testing, working-hour coverage, and engagement model. Compare proposals using the same scope and explicitly identify infrastructure, device-cloud, automation-maintenance, after-hours, and specialist-testing charges before comparing headline prices.
Should I choose the cheapest QA company?
Usually not on price alone. The lowest-cost provider can still be the best choice if it satisfies the required technical and delivery criteria, but hourly rate should be evaluated alongside coverage, productivity, rework, defect quality, automation maintainability, communication, and project risk. A weighted scorecard makes the trade-offs more visible.
How many real devices should a mobile app testing company have?
There is no correct universal number. What matters is whether the partner can access the devices and operating-system versions that represent your users and technical risks. Ask the company to derive a primary device matrix from analytics and product requirements and explain where real devices, emulators, simulators, and cloud infrastructure will be used.
Is real-device testing better than emulator or simulator testing?
Neither should automatically replace the other. Virtual environments can provide fast, scalable feedback, while physical devices are valuable when hardware, manufacturer behavior, performance, or device-specific configuration matters. Google's Firebase Test Lab documentation specifically notes that testing on hosted devices can reveal issues that may not appear during emulator testing.
What is the best mobile test automation framework?
There is no single best framework for every application. Native Android teams may use Espresso; Apple teams can use XCTest and XCUIAutomation; cross-platform programs may consider Appium or other frameworks. The better choice depends on application architecture, team skills, CI environment, coverage requirements, debugging needs, and long-term maintenance.
Should a QA partner perform security testing too?
Only if the provider has the required security capability. Routine QA can verify functional security requirements, but specialist mobile security assessments require additional techniques and expertise. If security testing is in scope, define the methodology and expected evidence explicitly and consider recognized resources such as OWASP MASVS and MASTG.
Mobile app analytics and event testing is a critical part of Mobile Application Testing, focusing on defining meaningful user-behavior events, implementing them correctly within an app, and verifying that each event is triggered at the right time with accurate properties, identity, consent, and delivery behavior. Effective mobile app analytics testing checks the entire analytics pipeline not just whether an event appears in a dashboard. It validates the app code, event schema, local queue, network delivery, analytics platform, data warehouse, and final reports. This guide provides a comprehensive approach to mobile app analytics testing that developers and QA teams can use to validate every aspect of their analytics implementation.
Key takeaways
Create a version-controlled tracking plan before adding analytics code.
Track meaningful product outcomes rather than every button tap.
Centralize event creation behind an analytics interface or facade.
Mobile app analytics is the collection and analysis of structured data describing how people use an application. Typical measurements include screen views, onboarding completion, searches, purchases, subscription changes, feature adoption, errors, and retention. mobile app analytics testing ensures these measurements are accurate and reliable.
An analytics event represents a meaningful occurrence. It normally contains:
An event name
A timestamp
An anonymous or authenticated user identifier
An event identifier
Context such as app version, platform, locale, and device type
Event-specific properties
A schema version
Event testing verifies that these records accurately represent what happened in the application. This is the core of mobile app analytics testing.
For example, testing a purchase_completed event means checking more than its presence. The test should confirm that:
The event occurs only after a confirmed purchase.
It is emitted once rather than once per screen render.
Its transaction identifier matches the backend transaction.
Its amount and currency are correct.
It contains no payment credentials or unnecessary personal data.
It follows the approved consent and privacy rules.
It remains queryable after ingestion and transformation.
A tracking plan formalizes which events and properties an organization intends to collect. Amplitude describes a taxonomy as the definition of tracked events, properties, names, and relationships, while Segment defines a tracking plan as a data specification for events and properties collected across sources. A tracking plan is the foundation of effective mobile app analytics testing.
Event Testing versus Functional Testing
Functional testing asks whether the application completed the intended operation. Event testing asks whether the analytics record accurately described that operation. Both are essential in mobile app analytics testing.
A checkout can therefore pass its functional test while failing analytics testing. The customer may receive the product, but the app might:
Omit the purchase event
Report the wrong value
Attribute the purchase to the wrong user
Send the event twice
Send it before payment confirmation
Expose sensitive information in event properties
Both forms of testing are necessary. Comprehensive mobile app analytics testing covers all these scenarios.
Why Mobile Analytics Testing Matters
Product, engineering, marketing, finance, and support teams make decisions from analytics data. Incorrect instrumentation can produce technically valid dashboards that describe the wrong behavior. This is why mobile app analytics testing is critical for data-driven organizations.
A missing event can understate feature adoption. A duplicate purchase event can overstate revenue. An event emitted before a backend confirmation can report conversions that never occurred. Inconsistent naming can divide one user action across multiple events, while incorrect identity handling can merge separate users or split one user into several profiles.
Analytics testing is also a privacy control. Apple requires developers to describe data collected by their apps and integrated third-party partners in App Store Connect. Google Play similarly requires developers to declare collection and handling performed by the app and its third-party libraries or SDKs. Mobile app analytics testing helps ensure these disclosures are accurate.
OWASP’s mobile privacy controls emphasize data minimization, prevention of unnecessary identification, transparency, and user control. An analytics implementation should therefore be tested against both its tracking plan and its privacy disclosures.
How Does a Mobile Analytics Pipeline Work?
A typical mobile analytics pipeline has the following flow:
User action
Application state change
Analytics facade
Schema validation and context enrichment
Local event queue
Analytics SDK or first-party collector
Routing, transformation, and deduplication
Analytics platform or data warehouse
Reports, funnels, experiments, and alerts
Each stage can introduce a different defect. mobile app analytics testing must cover each stage to ensure data reliability.
User-action layer: The event may be connected to the wrong UI interaction.
Application-state layer: The event may fire before the operation actually succeeds.
Analytics facade: The event name or properties may be incorrect.
Schema validation: Required properties may be missing or have the wrong type.
Local queue: Events may be lost, duplicated, or reordered during retries.
Transport: The device may be offline, backgrounded, or terminated.
Routing and transformation: A destination may rename, reject, or remove fields.
Reporting: A property may not be registered, indexed, or available in the expected report.
Analytics SDKs may batch events instead of transmitting them immediately. Firebase, for example, states that normal events can be batched to conserve battery and network usage, while its DebugView uploads development-device events with minimal delay for validation. Understanding batching behavior is crucial for mobile app analytics testing.
This is why dashboard-only testing is unreliable: a delayed or transformed event may appear later, while an event visible in a debug stream may still be rejected or altered farther downstream.
Step-by-Step Mobile App Analytics Testing Guide
1. Convert business questions into a measurement plan
Action: Start with the questions the organization needs to answer. This is the first step in effective mobile app analytics testing.
Examples include:
How many users finish onboarding?
Which search filters lead to purchases?
Where do users abandon checkout?
Which subscription offers produce confirmed activations?
Does a new feature improve repeat usage?
Map each question to the smallest set of events needed to answer it.
S no
Business question
Event
Important properties
1
Do users complete onboarding?
onboarding_completed
method, duration_seconds, schema_version
2
Which filters are used?
search_submitted
filter_count, sort_order, result_count
3
Where does checkout fail?
checkout_failed
stage, failure_category, is_retryable
4
Was a purchase confirmed?
purchase_completed
transaction_id, value_minor, currency
Reason: Starting from UI controls commonly produces noisy events such as blue_button_clicked. Starting from business questions produces durable events such as checkout_started.
Expected result: Every event has a stated purpose and an identified consumer.
Common error: Tracking interactions simply because they are easy to instrument.
2. Create a version-controlled tracking plan
Action: Define each event before implementation. A tracking plan is the foundation of mobile app analytics testing.
A useful tracking-plan record contains:
S no
Field
Example
1
Canonical name
purchase_completed
2
Business definition
A payment has been confirmed and the order created
3
Trigger
Backend-confirmed order success
4
Owner
Checkout team
5
Source
Mobile client or order service
6
Required properties
transaction_id, value_minor, currency
7
Optional properties
coupon_type, payment_category
8
Identity state
Authenticated user
9
Consent category
Product analytics
10
Schema version
1
11
Expected volume
Approximately one per confirmed order
12
Data retention
Defined by organizational policy
Use recommended vendor events when their semantics match the business action. Google Analytics, for example, publishes recommended events for common application and ecommerce behaviors. Custom names remain appropriate when a recommended event would misrepresent the action.
Check destination-specific restrictions during planning. Google Analytics currently limits event and parameter names to 40 characters and applies additional collection limits. Other platforms have their own naming, property, size, and cardinality rules.
Reason: A tracking plan acts as the contract among product managers, developers, QA engineers, analysts, and data engineers.
Expected result: Reviewers can determine exactly when an event should fire and what it should contain.
Common errors: Undefined optional fields, inconsistent casing, overloaded event meanings, and undocumented identity behavior.
Action: Route events through a small analytics interface rather than calling vendor SDKs throughout the UI code. Centralization is a best practice in mobile app analytics testing.
The following Kotlin example creates a testable analytics boundary:
data class AnalyticsEvent(
    val name: String,
    val eventId: String,
    val properties: Map<String, Any>
)

interface AnalyticsSink {
    fun track(event: AnalyticsEvent)
}

class CheckoutAnalytics(
    private val sink: AnalyticsSink,
    private val idFactory: () -> String
) {
    fun purchaseCompleted(
        transactionId: String,
        valueMinor: Long,
        currency: String
    ) {
        require(transactionId.isNotBlank()) {
            "transactionId must not be blank"
        }
        require(valueMinor >= 0) {
            "valueMinor must not be negative"
        }
        require(currency.matches(Regex("^[A-Z]{3}$"))) {
            "currency must be a three-letter uppercase code"
        }
        sink.track(
            AnalyticsEvent(
                name = "purchase_completed",
                eventId = idFactory(),
                properties = mapOf(
                    "transaction_id" to transactionId,
                    "value_minor" to valueMinor,
                    "currency" to currency,
                    "schema_version" to 1
                )
            )
        )
    }
}
A recording implementation can verify the event without transmitting data:
class RecordingAnalyticsSink : AnalyticsSink {
    val events = mutableListOf<AnalyticsEvent>()
    override fun track(event: AnalyticsEvent) {
        events += event
    }
}
The corresponding unit test verifies the event contract. This is a key technique in mobile app analytics testing.
@Test
fun 'purchase completion emits one valid event' {
    val sink = RecordingAnalyticsSink()
    val analytics = CheckoutAnalytics(sink) { "evt-test-001" }
    analytics.purchaseCompleted(
        transactionId = "txn-42",
        valueMinor = 2599,
        currency = "USD"
    )
    assertEquals(1, sink.events.size)
    val event = sink.events.single()
    assertEquals("purchase_completed", event.name)
    assertEquals("evt-test-001", event.eventId)
    assertEquals("txn-42", event.properties["transaction_id"])
    assertEquals(2599L, event.properties["value_minor"])
    assertEquals("USD", event.properties["currency"])
    assertEquals(1, event.properties["schema_version"])
}
The canonical model uses an integer minor-unit value to avoid floating-point ambiguity. A destination adapter can convert 2599 to 25.99 when the destination requires a decimal monetary value.
Reason: Centralization reduces vendor coupling, enforces naming rules, supports redaction, and makes events independently testable.
Expected result: Analytics behavior can be tested without launching the analytics SDK or sending data externally.
Common error: Placing analytics calls directly inside view-rendering or recomposition code, which can create duplicate events.
4. Separate development, staging, and production data
Action: Use distinct projects, properties, API keys, datasets, or environment fields for non-production builds. This isolation is essential for effective mobile app analytics testing.
At minimum, attach the following context automatically:
App version
Build number
Platform
Operating-system version
Environment
Analytics schema version
Test-device marker
Session identifier
Do not depend only on a property such as environment == staging when the same production destination receives both test and real events. A filter can be removed or incorrectly configured. Separate destinations provide stronger isolation.
Reason: Synthetic checkout, login, subscription, and error events can corrupt production funnels, revenue reports, audiences, and experiments.
Expected result: QA engineers can run realistic scenarios without affecting production metrics.
Common error: Using a production analytics key in debug builds because it simplifies configuration.
5. Verify consent and identity before testing event content
Action: Define which event categories can be collected under each privacy and authentication state. Consent and identity verification is a critical part of mobile app analytics testing.
Test at least these states:
Fresh installation before consent
Analytics consent granted
Analytics consent denied
Consent withdrawn after previously being granted
Anonymous session
Anonymous-to-authenticated transition
Logout
Account switching
App reinstall
Data-deletion request, where applicable
Apple’s App Tracking Transparency framework is required when app data is used to track users across apps or websites owned by other companies. The framework provides the user’s tracking-authorization status. Not every form of first-party product analytics is “tracking” under Apple’s definition, but the distinction must be assessed against the actual data use rather than the SDK’s name.
Reason: A technically correct payload can still violate the approved collection state or attach behavior to the wrong identity.
Expected result: Events are enabled, disabled, anonymized, or routed according to the documented policy.
Common error: Testing only after consent has already been granted on a long-used development device.
6. Perform manual event validation on a device
Action: Install a clean debug or staging build and execute one scenario at a time. Manual validation remains an important part of mobile app analytics testing.
For every event, verify:
Correct trigger
Correct event name
Required properties
Property data types
Allowed values
Timestamp
User or anonymous identity
Event identifier
App and environment context
Consent state
Event count
Sequence relative to related events
Absence of prohibited data
Firebase DebugView displays raw events and user properties from development devices in near real time. This makes it useful during instrumentation, but it should be treated as one checkpoint rather than the final source of truth for mobile app analytics testing.
On Android, adb logcat can be used to view and filter application or SDK logs. Equivalent inspection is available through Xcode’s device and console tooling for Apple-platform builds.
Reason: Manual testing exposes timing, lifecycle, SDK configuration, and device-specific behavior that a unit test cannot observe.
Expected result: The observed event matches the tracking plan exactly.
Common error: Confirming only the event name while ignoring properties, duplicates, and identity.
7. Add contract validation and automated tests
Action: Convert the tracking plan into machine-checkable rules. Automation is a cornerstone of scalable mobile app analytics testing.
Validation can reject or flag:
Unknown event names
Missing required properties
Unexpected properties
Incorrect property types
Empty identifiers
Invalid currency or locale values
Prohibited personal information
Unsupported schema versions
Excessively long values
High-cardinality free text
Run different checks at different layers:
Unit tests: Confirm that domain actions produce the intended event.
Schema tests: Validate event shape and allowed values.
Integration tests: Confirm the analytics adapter receives and queues the event.
UI tests: Perform a user flow and assert the recorded event sequence.
Pipeline tests: Confirm the event reaches a staging collector or warehouse.
Production monitors: Detect volume changes and schema drift.
Appium supports UI automation across mobile platforms and can be combined with a test collector or recording analytics sink. Platform-native alternatives include Espresso for Android and XCUITest for Apple platforms.
Schema-governance systems can also enforce tracking plans. Segment Protocols supports validation and handling of events that violate a tracking plan, while Amplitude Data provides taxonomy planning and incoming-data governance.
Reason: Automated contract checks prevent analytics regressions from depending entirely on manual review.
Expected result: A pull request or release build fails when a critical event no longer conforms to its contract.
Common error: Automating only the UI flow without asserting the analytics output.
8. Test lifecycle, network, and failure conditions
Action: Repeat critical scenarios under adverse conditions. Resilience testing is essential in mobile app analytics testing.
Include:
Airplane mode
Intermittent connectivity
Wi-Fi-to-cellular transitions
Backgrounding immediately after an event
Force-closing the app
Operating-system process termination
Device restart
Slow API responses
API errors
Repeated button taps
Deep-link launches
Push-notification launches
Payment-app redirects
Clock or timezone changes
Verify whether queued events are retried, dropped, duplicated, or delivered out of order.
Reason: Mobile events are often created immediately before the operating system suspends or terminates the application.
Expected result: Delivery behavior matches the documented reliability model, and duplicate handling protects critical metrics.
Common error: Assuming a successful SDK method call means the event has reached the analytics backend.
9. Validate downstream data and reporting
Action: Follow a sample event from the application to its final analytical use. Downstream validation is a critical step in mobile app analytics testing.
Check:
The vendor’s debug or live-event stream
The staging analytics project
The raw event export
Transformation jobs
Curated analytics tables
Dashboards and funnels
Experiment assignment or audience logic
Alerts and anomaly detection
Google Analytics can export raw event data to BigQuery, where teams can query individual events and parameters rather than depending exclusively on predefined reports.
A useful reconciliation query checks event counts by date, app version, platform, and transaction identifier:
SELECT
    event_date,
    platform,
    app_info.version AS app_version,
    COUNT(*) AS purchase_events,
    COUNT(DISTINCT (
        SELECT value.string_value
        FROM UNNEST(event_params)
        WHERE key = 'transaction_id'
    )) AS unique_transactions
FROM 'project.analytics_dataset.events_*'
WHERE event_name = 'purchase'
GROUP BY event_date, platform, app_version
ORDER BY event_date DESC;
Adapt the query to the actual export schema and approved event names.
Reason: An event can pass device validation but fail during routing, transformation, registration, or report configuration.
Expected result: Raw and curated data agree within documented processing and deduplication rules.
Common error: Treating a debug view as proof that the event is usable in production reports.
10. Establish release gates and production monitoring
Action: Identify a small group of release-critical events. Release gates are the final step in mobile app analytics testing.
Typical candidates include:
Registration completed
Login succeeded
Onboarding completed
Checkout started
Purchase completed
Subscription activated
Entitlement granted
Critical error displayed
For each release candidate:
Run automated event-contract tests.
Execute a smoke flow on representative Android and iOS devices.
Validate staging ingestion.
Compare the event payload with the current tracking plan.
Confirm privacy disclosures remain accurate.
Approve the analytics checklist before rollout.
After deployment, monitor:
Event count per active user
Missing required properties
Unknown event names
Duplicate transaction identifiers
Platform or version discrepancies
Sudden volume changes
Consent-state distribution
Data-processing latency
Reason: Analytics can break independently of the visible product experience.
Expected result: Instrumentation regressions are detected before they affect a full release or business decision.
Common error: Assigning no owner for post-release analytics health.
Practical Example: Testing an Ecommerce Purchase Flow
Business scenario
A retail app allows a signed-in customer to purchase one item for $25.99.
Preconditions
A staging app build is installed.
The device is connected to a staging analytics project.
A test user and test payment method are available.
Product-analytics consent is enabled.
The app and backend clocks are synchronized closely enough for sequence analysis.
The transaction identifier is visible to authorized testers.
This example demonstrates proper mobile app analytics testing validation.
Validation checklist
Confirm that:
purchase_completed occurs only after backend confirmation.
Exactly one event exists for txn-42.
value_minor is 2599, not 25, 259900, or a formatted string.
currency is USD.
item_count is numeric.
The event belongs to the signed-in test user.
No card number, security code, address, email, or payment token is present.
The event reaches the raw staging dataset.
The transaction appears once in the purchase report.
Error condition
Repeat the test with a declined payment.
The expected result is:
checkout_started → purchase_failed
purchase_completed must not occur. The failure event should contain a controlled category such as payment_declined, not an unrestricted provider message that could include sensitive information.
Duplicate-risk condition
Repeat the successful purchase while:
Tapping the payment button twice
Backgrounding the app during the payment redirect
Returning to the app through a deep link
Restarting the app after confirmation
The same transaction should not produce multiple counted purchases. Use one authoritative emitter or an agreed deduplication key. Google specifically cautions against sending a duplicate in-app purchase through both the Firebase SDK and Measurement Protocol.
For revenue and entitlement events, backend-confirmed data is generally more trustworthy than a client-only signal. The client can still record funnel events such as checkout_started, but financial reporting should use the confirmed transaction source.
Comparison of Analytics Testing Methods
S no
Method
Best use
What it catches
Speed
Main limitation
1
Unit and contract tests
Event construction and trigger logic
Wrong names, fields, types, and duplicate calls
Fast
Does not prove SDK delivery
2
Manual debug testing
New instrumentation and lifecycle behavior
Timing, device configuration, consent, SDK issues
Moderate
Requires disciplined inspection
3
Automated UI/device tests
Critical user journeys
End-to-end trigger sequences and regressions
Moderate to slow
Can be brittle and costly to maintain
4
Network or collector inspection
Transport verification
Payload, endpoint, retry, and routing problems
Moderate
Encryption or certificate pinning can limit visibility
No single method provides sufficient coverage. A practical release process uses fast unit and schema tests on every change, device-level checks for critical flows, and downstream reconciliation before or immediately after rollout. This layered approach is the hallmark of mature mobile app analytics testing.
Best Practices for Mobile Analytics and Event Testing
Track outcomes rather than interface details
Name an event after the action’s business meaning. search_submitted is more durable than search_button_tapped, because the same action may later be triggered by a keyboard command, voice input, or redesigned interface. This principle is fundamental to mobile app analytics testing.
Assign one clear semantic meaning to each event
Do not reuse checkout_completed for payment submission in one platform and confirmed order creation in another. Cross-platform events should have equivalent definitions.
Add an event identifier
A stable event_id allows collectors and pipelines to identify retries and duplicates. For transactions, also use the confirmed transaction identifier as a business-level deduplication key.
Version breaking schema changes
Adding a truly optional property may be backward compatible. Changing the meaning or type of an existing property is not. Use a schema version or create a migration plan when semantics change.
Restrict free-text properties
Free text creates unbounded cardinality, makes analysis difficult, and increases the risk of collecting personal information. Prefer controlled values such as network_timeout, payment_declined, and inventory_unavailable.
Keep analytics calls out of rendering code
Trigger events from domain actions or explicit lifecycle transitions. Declarative UI frameworks may render a component multiple times without a new user action.
Test anonymous and authenticated identities separately
Verify how events are associated when a user signs in, signs out, switches accounts, or reinstalls the app. Document whether historical anonymous activity is merged and which system performs the merge.
Test consent revocation
A consent toggle is incomplete unless it affects future collection and, where required, triggers the appropriate deletion or processing workflow.
Maintain a privacy inventory for every SDK
Record each SDK’s data categories, destinations, purposes, retention, consent requirements, and app-store disclosures. Reassess the inventory when an SDK or configuration changes.
Monitor analytics as a production dependency
Create alerts for missing critical events, sharp platform differences, invalid schemas, and duplicate transactions. Instrumentation should have an operational owner just like an API or database.
Common Mobile Analytics Testing Mistakes
S no
Mistake
Why it happens
Impact
Recommended fix
1
Testing only that an event appears
Appearance is easy to check
Wrong values and identity remain undetected
Validate the complete payload
2
Tracking every tap
Teams equate more data with better data
Noise, cost, and unclear semantics
Start from business questions
3
Calling SDKs from UI rendering code
Instrumentation is placed near the visible control
Duplicate events
Trigger from domain actions
4
Using inconsistent names across platforms
Android and iOS teams work independently
Fragmented reports
Use one canonical tracking plan
5
Sending free-form error messages
Raw exceptions are convenient
High cardinality and possible data leakage
Map errors to controlled categories
6
Ignoring offline behavior
Tests use stable office Wi-Fi
Lost, delayed, or reordered events
Test queueing and retry scenarios
7
Using production analytics during QA
Environment setup is incomplete
Polluted funnels and revenue metrics
Use isolated non-production destinations
8
Treating client purchase events as authoritative
Client instrumentation is faster to implement
Fraud, tampering, and duplication risk
Confirm financial outcomes server-side
9
Renaming events without migration
A naming cleanup appears harmless
Broken dashboards and historical comparisons
Version and deprecate deliberately
10
Forgetting store disclosures
Analytics is treated only as an engineering concern
Inaccurate privacy declarations
Include privacy review in release gates
Avoiding these pitfalls is essential for effective mobile app analytics testing.
Troubleshooting Mobile Analytics Events
Why does the event not appear in the analytics dashboard?
Likely cause: The event is batched, the wrong environment is configured, consent prevents collection, the device lacks connectivity, or the destination rejected the payload.
How to verify: Check the build configuration, device logs, SDK debug stream, network status, project identifier, event naming rules, and raw staging data.
Solution: Enable the vendor’s development mode, reproduce one event, and trace it through each pipeline stage.
Related risk: Repeatedly triggering the action during diagnosis can create duplicate test records and hide the original issue.
Why is an event sent twice?
Likely cause: The event is attached to a repeated lifecycle callback, UI render, retry handler, deep-link return, or both client and server implementations.
How to verify: Compare event identifiers, timestamps, stack traces, transaction identifiers, and emitting sources.
Solution: Move the trigger to a single confirmed state transition and apply deduplication at the collector or warehouse.
Related risk: Removing a retry without understanding delivery semantics can replace duplication with data loss.
Why are event properties missing from reports?
Likely cause: The properties reached the collector but were not registered, indexed, mapped, or retained by the destination.
How to verify: Compare the raw debug payload, exported event record, transformation output, and report configuration.
Solution: Register the required custom definitions, correct destination mappings, and verify that the property complies with type and length restrictions.
Related risk: Reusing an existing property name with a different meaning can corrupt historical analysis.
Why are events attributed to the wrong user?
Likely cause: The app sets the user identifier too early, fails to clear it on logout, or merges anonymous and authenticated identities unexpectedly.
How to verify: Run clean-install tests for login, logout, account switching, and reinstall behavior. Record each identifier transition.
Solution: Define identity state explicitly and update or clear identifiers at controlled authentication boundaries.
Related risk: Identity errors can become privacy incidents when one person’s behavior is associated with another person’s account.
Why does the event work on Android but not iOS?
Likely cause: Platform implementations use different names, lifecycle triggers, consent behavior, configuration files, or SDK versions.
How to verify: Compare the canonical tracking plan and raw payloads side by side rather than comparing dashboard totals.
Solution: Add shared contract tests and platform-specific integration tests generated from the same specification.
Related risk: Platform inconsistency can make a product change appear more successful on one operating system than the other.
Why do offline events arrive in the wrong order?
Likely cause: Events were queued locally and uploaded later, or different collectors processed them at different speeds.
How to verify: Compare event occurrence timestamps with ingestion timestamps and sequence identifiers.
Solution: Preserve both timestamps, add a session sequence number where ordering matters, and sort analytical flows by occurrence time.
Related risk: Device-clock changes can still make client timestamps unreliable for security-sensitive or financial decisions.
Reconcile raw events with reports and transactions
8
Monitoring
Data-quality alerts and schema-drift checks
Detect production regressions
Tool selection should follow the testing layer. A debug stream is useful for immediate instrumentation work, but a warehouse is better for checking deduplication and report logic. A UI automation framework can reproduce a purchase flow, but a contract test provides faster feedback about payload structure. The right toolset enhances your mobile app analytics testing capabilities.
Amplitude’s Event Explorer provides a real-time event stream, while Firebase DebugView is designed for near-real-time inspection from development devices.
Limitations and Risks
Client-side events are not guaranteed records
A mobile process can be terminated before transmission. Devices can be offline, users can block collection, and hostile clients can alter or fabricate events. Do not use an unverified client event as the sole source for revenue, entitlement, fraud, or security decisions. This is a key limitation to understand in mobile app analytics testing.
Debug and production behavior may differ
Debug modes often reduce batching and expose additional logs. Successful development-mode delivery does not prove that background uploads, production consent, or release configuration will behave identically.
Dashboards are not raw truth
Analytics platforms may aggregate, transform, filter, deduplicate, or delay data. Some parameters may require explicit registration before they are available in reports.
Privacy controls reduce observability by design
Aggregated platform analytics may apply privacy thresholds or include only users who have agreed to share certain diagnostics. Apple states that some App Store Connect Analytics sources require a minimum data threshold, and some app-usage metrics include only participating users.
Cross-device identity remains imperfect
A user may browse anonymously, authenticate later, use several devices, reinstall the app, or share a device. Identity rules must therefore be documented rather than inferred from dashboard totals.
Privacy compliance cannot be proved by technical tests alone
Automated tests can confirm whether data is transmitted under known conditions. They cannot independently determine every legal purpose, retention obligation, regional requirement, or contractual responsibility. Privacy and legal stakeholders should review the actual implementation and disclosures.
Conclusion
Reliable mobile analytics requires more than inserting an SDK and checking a dashboard. Teams need a clear measurement plan, a governed event contract, centralized instrumentation, isolated test environments, privacy-aware identity rules, and multiple layers of verification. This is the essence of effective mobile app analytics testing. Begin by selecting a small set of business-critical events. Define their exact triggers and required properties, add contract tests, validate them on real devices, and trace them into the final reporting layer. This approach produces analytics that engineering teams can maintain and decision-makers can use with greater confidence.
Ready to implement comprehensive mobile app analytics testing? Codoid’s mobile app testing services cover analytics validation, event testing, and data quality assurance for iOS and Android.
Need Help Testing Your
Mobile App Analytics? Let's Talk.
Mobile app analytics testing is the process of defining meaningful user-behavior events, implementing them in an app, and verifying that each event is triggered at the correct time with accurate properties, identity, consent, and delivery behavior. It checks the entire analytics pipeline not just whether an event appears in a dashboard. Effective mobile app analytics testing validates the app code, event schema, local queue, network delivery, analytics platform, data warehouse, and final reports to ensure data accuracy and reliability.
Why is mobile app analytics testing important?
Mobile app analytics testing is critical because product, engineering, marketing, finance, and support teams make decisions from analytics data. Incorrect instrumentation can produce technically valid dashboards that describe the wrong behavior. A missing event can understate feature adoption, a duplicate purchase event can overstate revenue, and incorrect identity handling can merge separate users or split one user into several profiles. Mobile app analytics testing also serves as a privacy control, helping ensure accurate App Store and Google Play data collection disclosures.
What should a mobile app analytics tracking plan include?
A mobile app analytics tracking plan should include the canonical event name, business definition, trigger conditions, owner, source, required properties, optional properties, identity state, consent category, schema version, expected volume, and data retention policy. It serves as the contract among product managers, developers, QA engineers, analysts, and data engineers. A well-defined tracking plan is the foundation of effective mobile app analytics testing.
What is the difference between event testing and functional testing?
Functional testing asks whether the application completed the intended operation. Event testing asks whether the analytics record accurately described that operation. A checkout can pass its functional test while failing analytics testing the customer may receive the product, but the app might omit the purchase event, report the wrong value, attribute the purchase to the wrong user, send the event twice, or expose sensitive information in event properties. Both forms of testing are necessary for comprehensive mobile app analytics testing.
How do you test mobile app analytics events?
Mobile app analytics testing involves multiple layers: unit tests to confirm domain actions produce the intended event, schema tests to validate event shape and allowed values, integration tests to confirm the analytics adapter receives and queues the event, UI tests to perform user flows and assert recorded event sequences, pipeline tests to confirm events reach staging collectors, and production monitoring to detect volume changes and schema drift. Manual debug testing on real devices is also essential for validating lifecycle, consent, and device-specific behavior.
What tools are used for mobile app analytics testing?
Common tools for mobile app analytics testing include Firebase DebugView and Amplitude Event Explorer for real-time event inspection, Segment Protocols and Amplitude Data for tracking-plan governance, Android Logcat and Xcode console for device logging, Appium, Espresso, and XCUITest for UI automation, JSON Schema and custom validators for contract validation, BigQuery for warehouse reconciliation, and data-quality monitoring tools for production regression detection.
Should mobile apps track every button tap?
No. Track an interaction when it answers a defined product, operational, or business question. Outcome-oriented events such as search_submitted or subscription_activated are generally more useful than visual-control events such as green_button_clicked. Unnecessary events increase noise, maintenance, cardinality, privacy exposure, and analysis cost. Mobile app analytics testing should focus on meaningful user behaviors rather than every UI interaction.
The mobile app testing companies market is under pressure from every direction. Apps are more complex, release cycles are faster, and user tolerance for bugs has dropped to near zero. A single crash on launch day can translate directly into one-star reviews, app store penalties, and churned users who never come back.That pressure is reflected in the market’s trajectory. The global mobile app testing services industry was valued at approximately USD 7.7 billion in 2025 and is projected to reach USD 9.0 billion in 2026, according to industry analysts. The longer-term compound annual growth rate sits at roughly 19.5% from 2016 to 2026, a signal that this is not a discretionary spend. For growth-stage teams in SaaS, fintech, and eCommerce, outsourced mobile QA has shifted from optional to essential infrastructure.
The real problem: Most QA managers don’t struggle to find a mobile testing vendor. They struggle to evaluate them. Every provider claims real-device coverage, automation expertise, and fast turnaround. The differentiators only surface when you know what to look for.
This guide ranks the best mobile app testing companies in 2026 using a buyer-first framework built around three criteria that actually predict delivery outcomes: enterprise-fit, technical depth, and delivery reliability. Each provider is assessed on those dimensions, with honest notes on where they excel and where they fall short.
What this guide covers:
The evaluation criteria QA managers should apply before shortlisting any vendor
Deep write-ups on 7 top providers, ranked by enterprise-fit
A comparison table for quick reference
Guidance on matching provider strengths to your specific use case
How to Evaluate Mobile App Testing Companies: The Three-Criteria Framework
Before looking at any individual provider, it helps to have a consistent lens. The three criteria below are the ones that separate vendors who deliver results from those who deliver reports.
1. Enterprise-Fit
This covers how well a provider operates within the constraints of a real enterprise engagement: security protocols, NDAs, compliance requirements (HIPAA, PCI-DSS, SOC 2), governance documentation, and the ability to integrate with existing CI/CD pipelines and project management tools. A vendor that excels at startup-speed testing but lacks formal QA governance will create friction at scale.
Key signals to look for:
Formal test planning and traceability documentation
Experience in regulated industries (fintech, healthcare, insurance)
Dedicated account management and escalation paths
Contractual SLAs for defect turnaround and reporting cadence
2. Technical Depth
This is where most vendor comparisons fall short. “We use Appium” is not a differentiator. Technical depth means the ability to write maintainable, framework-level automation; configure real-device cloud infrastructure; handle native, hybrid, and cross-platform apps; and integrate test execution into CI/CD pipelines without manual intervention.
Integration with BrowserStack, Kobiton, Perfecto, or Sauce Labs for real-device coverage
AI-assisted test generation and self-healing capabilities
3. Delivery Reliability
This is the hardest criterion to assess from a vendor’s website and the most important one in practice. It covers whether the team actually delivers on time, maintains test suite quality over multiple sprints, and provides actionable reporting rather than raw defect counts.
Key signals to look for:
Client retention rates and verifiable Clutch/G2 reviews
Root-cause reporting (not just defect logs)
Regression cycle performance data
Evidence of long-term client relationships, not just project engagements
Top Mobile App Testing Companies in 2026: Ranked
The seven providers below were evaluated against the three-criteria framework. Rankings reflect overall enterprise-fit, not just brand recognition or marketing volume.
Rank
Provider
Best For
Enterprise-Fit
Technical Depth
Delivery Reliability
1
Codoid
Full-lifecycle QA, automation-first
High
High
High
2
TestDevLab
AI-augmented testing, complex apps
High
High
High
3
Testlio
Global real-device scale
High
Medium-High
High
4
A1QA
Pure-play QA outsourcing
High
Medium
High
5
TestingXperts
End-to-end enterprise QA
Medium-High
Medium-High
Medium-High
6
QA Madness
Senior-led boutique testing
Medium
High
Medium-High
7
KMS Technology
Consultancy-led QA
Medium
Medium-High
Medium
1. Codoid – Best Mobile App Testing Company for Full-Lifecycle QA
Codoid is a specialized software testing and quality assurance agency serving a global client base from startups to Fortune 500 companies. Its mobile app testing practice is built around a clear principle: real devices, real scenarios, and automation that actually reduces regression burden rather than adding maintenance overhead.
The firm’s mobile app testing services cover the full lifecycle, including functional testing, compatibility testing, usability, performance, security, accessibility (WCAG 2.1 and ADA), and interruption testing. That last category is a meaningful differentiator: testing apps under real-world interruptions like push notifications, app-switching, and network drops is where many mobile app testing companies cut corners, and where real-world failures originate.
What sets Codoid apart technically:
Proprietary mobile automation framework built on Appium, with multi-platform scripts that run seamlessly across iOS and Android without separate codebases
Real-device cloud integration with BrowserStack, Kobiton, and Perfecto rather than emulator-only coverage
Regression automation that reduces testing time by up to 90%, freeing engineers for exploratory testing on new functionality
CI/CD pipeline integration with Jenkins, Zephyr, and JIRA for shift-left test execution
Support for native, hybrid, and progressive web apps across the full device matrix
Enterprise-Fit Assessment
Codoid operates with the governance structure that enterprise QA engagements require. Test planning is formal and traceable, reporting is designed for both QA managers and business stakeholders, and the team has demonstrated experience across regulated verticals. The combination of dedicated account management and round-the-clock availability across time zones makes it a viable partner for organizations running continuous delivery pipelines.
The firm’s mobile app testing services are particularly well-suited to teams that want to hand off the framework build and ongoing maintenance, not just test execution. The distinction matters: many mobile app testing companies execute tests against a client-owned framework; Codoid builds and owns the framework architecture, which means quality compounds over time rather than degrading as the app evolves.
Best for: QA managers at growth-stage and enterprise companies who need a long-term testing partner with automation depth, not just a body shop for test execution.
Watch out for: Organizations that need a purely on-demand, per-test-run pricing model may find a structured engagement model requires more upfront scoping. That investment pays dividends in framework quality but requires alignment on scope at the start.
2. TestDevLab – Best for AI-Augmented Testing on Complex Applications
TestDevLab is a Latvia-based QA firm that has built a strong reputation for technically intensive mobile testing engagements, particularly on complex, multi-platform applications. Its positioning centers on AI-augmented QA: the firm combines human expertise with machine learning-driven test generation and defect prediction to close coverage gaps that traditional scripted automation misses.
The headline number from TestDevLab’s own case data is a 50 to 70% reduction in regression cycles for clients who move from manual-heavy testing to their automated framework. That figure is specific enough to be credible and significant enough to matter for teams running weekly or bi-weekly release cycles.
Core technical capabilities:
Access to 5,000+ real devices for cross-platform coverage
AI-assisted test case generation and self-healing test scripts
Native expertise in Appium, Espresso, and XCUITest
Shift-left testing integrated into CI/CD pipelines
Where TestDevLab Fits in an Enterprise Stack
TestDevLab’s “human + AI” framing is more than marketing. The firm uses AI to auto-generate test cases from user stories, predict defect-prone code areas, and optimize test suite execution order for faster feedback loops. For QA managers running complex apps with large device matrices, this approach meaningfully reduces the time between code commit and test result.
The firm’s enterprise-fit is solid, with formal delivery structures and documented QA governance. The primary limitation is geographic: with operations centered in Eastern Europe, time-zone alignment may require structured async communication protocols for North American teams with real-time escalation needs.
Best for: Teams with technically complex apps (multi-platform, heavy API dependencies, large regression suites) where AI-assisted coverage optimization would have a measurable impact.
Watch out for: The AI tooling adds genuine value but also adds complexity to the engagement model. Teams that want simple, predictable test execution may find the AI-augmented approach over-engineered for their needs.
3. Testlio – Best for Global Real-Device Coverage at Scale
Testlio operates a hybrid model that blends professional testers with a vetted global network, giving it a unique advantage in real-device coverage at scale. G2 reviewers consistently praise the firm for its automation expertise, reliability, and adaptability as product needs evolve. For teams shipping to diverse global markets where device fragmentation is a real problem, Testlio’s coverage breadth is genuinely hard to match among mobile app testing companies.
The firm’s model works particularly well for organizations that need to scale testing capacity quickly without proportionally scaling internal headcount. Testlio can spin up coverage across hundreds of device-OS combinations faster than most in-house teams could procure the hardware.
Testlio’s key differentiators:
Hybrid professional/community tester model for rapid scale-up
Broad real-device coverage spanning emerging market devices often missed by lab-only providers
Strong automation integration capabilities with major CI/CD platforms
Adaptable engagement model that adjusts to sprint cadence and release velocity
The Honest Trade-Off
Testlio’s hybrid model is its strength and its risk. The community-based testing layer introduces variability in tester experience that a purely staffed model avoids. For exploratory testing on complex enterprise apps, the depth of engagement from a dedicated senior tester at a specialist firm will generally exceed what a community model delivers. Testlio manages this through a professional tester layer, but QA managers should ask directly how engagement quality is maintained across the community tier before committing.
Best for: Product teams shipping to global markets who need rapid real-device coverage across a wide device matrix and can tolerate some variability in tester seniority.
Watch out for: Complex, domain-specific applications (fintech compliance workflows, healthcare data flows) where tester domain knowledge matters as much as device coverage.
4. A1QA – Best for Pure-Play QA Outsourcing with Enterprise Governance
A1QA is one of the most established pure-play QA outsourcing firms in the market, with a delivery model built around formal QA governance, structured test management, and a dedicated focus on testing as a discipline rather than a development add-on. The firm’s mobile testing practice covers real-device testing across iOS and Android, with a full-cycle approach that spans functional, performance, security, and compatibility testing.
Where A1QA earns its enterprise-fit rating is in process maturity. The firm operates with ISO-aligned quality management practices, formal test strategy documentation, and structured reporting that maps to enterprise stakeholder expectations. For organizations that need to demonstrate QA rigor to auditors, compliance teams, or executive stakeholders, A1QA’s documentation depth is a genuine asset — and one of the reasons it stands out among mobile app testing companies targeting regulated industries.
A1QA’s core strengths:
Formal QA governance aligned to enterprise compliance requirements
Full-cycle mobile testing with structured test management
Strong track record in regulated industries
Transparent reporting with traceability from requirements to test results
Where A1QA Falls Short
The firm’s strength in process rigor can work against it in fast-moving environments. Teams running continuous delivery with daily deployments may find A1QA’s structured engagement model adds overhead that slows the feedback loop. The firm is better suited to organizations with defined release cycles than to those operating in continuous deployment mode.
Best for: Enterprise organizations in regulated industries that need demonstrable QA governance, formal documentation, and structured test management over raw testing velocity.
Watch out for: Agile teams with high deployment frequency who need fast, iterative feedback rather than comprehensive test documentation at each release.
5. TestingXperts – Best for End-to-End Enterprise QA with AI Automation
TestingXperts positions itself as an end-to-end enterprise QA partner with a strong emphasis on AI-driven automation and digital transformation testing. The firm’s mobile testing practice integrates with its broader service portfolio, which covers performance, security, accessibility, and API testing alongside mobile functional validation.
The firm’s differentiator in the mobile space is its AI automation layer, which it applies to test case generation, test optimization, and defect prediction. For enterprises running large, complex mobile applications with significant regression burdens, this automation approach can meaningfully reduce the manual testing overhead that slows release cycles.
TestingXperts’ notable capabilities:
AI-powered test automation with self-healing scripts
End-to-end testing coverage spanning mobile, API, and performance layers
Strong integration with enterprise DevOps toolchains
Experience across large-scale digital transformation programs
The Gap in the Narrative
TestingXperts’ marketing does a good job of describing what it does but a weaker job of demonstrating outcomes. Unlike TestDevLab (which publishes specific regression cycle reduction figures) or Codoid (which documents its framework architecture in detail), TestingXperts relies more heavily on service breadth as a differentiator than on specific, verifiable delivery metrics. QA managers should push for reference clients and outcome data during the evaluation process.
Best for: Large enterprises running digital transformation programs who need a single vendor for multi-layer QA coverage across mobile, web, API, and performance testing.
Watch out for: Teams that need deep mobile-specific expertise rather than broad QA coverage.
6. QA Madness – Best for Senior-Led Boutique Mobile Testing
QA Madness is a boutique QA firm that has built a strong reputation for senior-level engagement and structured, traceable test delivery. The firm holds a 4.9 rating on G2 and a 4.8 on Clutch from 37 verified reviews, which is a credible signal of consistent client satisfaction. Its positioning as “Best Overall” in several 2026 expert rankings of mobile app testing companies reflects genuine delivery quality rather than marketing volume.
The firm’s mobile testing approach emphasizes root-cause reporting, a meaningful distinction from vendors that deliver defect counts without analysis. Root-cause reports give engineering teams actionable context: not just “this broke” but “this broke because of this interaction under these conditions.” That level of analysis reduces re-test cycles and improves fix quality.
QA Madness’s core strengths:
Senior engineers on every engagement (no junior-heavy delivery model)
Strong Appium, XCTest, and Espresso automation capabilities
Root-cause reporting that goes beyond defect logging
High scores on governance fit and delivery quality in independent reviews
The Scale Limitation
QA Madness’s boutique model is its quality signal and its capacity constraint. The firm’s senior-only engagement approach means it cannot scale as rapidly as larger providers when project scope expands. For enterprise programs that need to ramp from 2 testers to 20 within a sprint cycle, QA Madness will struggle to match the capacity flexibility of Testlio or Codoid.
Best for: Mid-market product teams that prioritize testing depth and senior expertise over scale, particularly for apps where defect analysis quality matters as much as defect count.
Watch out for: Enterprise programs requiring rapid capacity scaling or formal compliance documentation for auditors and regulators.
7. KMS Technology – Best for Consultancy-Led QA Strategy
KMS Technology takes a consultancy-first approach to mobile app testing, combining QA delivery with strategic advisory on testing architecture, toolchain selection, and quality process design. For organizations that are building or rebuilding their QA capability from the ground up, this consultancy layer adds genuine value beyond test execution.
The firm’s mobile testing practice covers the standard functional, performance, and compatibility dimensions, but its differentiator is the strategic framing it brings to engagements. KMS Technology engineers help clients understand not just what broke, but how their testing architecture should evolve to prevent similar issues at scale.
KMS Technology’s positioning:
Consultancy-led engagements with QA strategy as a core deliverable
Technical depth in automation framework design and toolchain optimization
Strong advisory capabilities for teams building internal QA maturity
Integration of testing into broader engineering transformation programs
The Delivery Trade-Off
The consultancy model that makes KMS Technology valuable for strategy-building makes it a less efficient choice for pure test execution. Organizations that have a clear testing strategy and simply need reliable, scalable execution will pay a consultancy premium for capabilities they do not need.
Best for: Organizations early in their QA maturity journey that need strategic guidance on testing architecture alongside hands-on delivery, particularly during digital transformation programs.
Watch out for: Teams with a mature QA strategy who need execution capacity. The consultancy overhead adds cost without proportional value for organizations that already know what they need tested and how.
What the Market Gets Wrong About Mobile App Testing Companies
Most vendor comparisons stop at capabilities. This one won’t, because the most common failure mode in outsourced mobile testing is not a capability gap. It is an objective misalignment.
As one contrarian analysis of outsourced QA noted: “You can have excellent outsourced testing metrics and a mediocre product, because the vendor is optimizing the wrong objective function.” That observation deserves to sit in every QA manager’s evaluation checklist. A vendor optimizing for defect counts and test case throughput is not the same as a vendor optimizing for product quality and user retention.
Three misalignments to screen for before signing a contract with any of the mobile app testing companies on your shortlist:
Throughput vs. depth. A vendor that runs 5,000 test cases per sprint sounds impressive until you realize 4,200 of them are redundant regression checks that any CI pipeline could handle. Ask for the breakdown between exploratory, regression, and new-feature coverage.
Defect count vs. root-cause analysis. Defect counts are an output metric. Root-cause analysis is an outcome metric. The former tells you how many bugs were found; the latter tells you why they exist and how to prevent them.
Short-term speed vs. long-term framework quality. Outsourcing QA often creates a false choice between speed and quality. The real question is whether the vendor is building a test suite that gets more valuable over time or one that requires increasing maintenance overhead as the app evolves.
Key takeaway: The best mobile app testing companies partner is not the one with the longest capability list. It is the one whose incentive structure aligns with your product outcomes, not their own delivery metrics.
How to Match Your Needs to the Right Provider
The ranking above reflects overall enterprise-fit, but no single provider is the right answer for every organization. Use this decision matrix to shortlist based on your specific situation.
Sno
Your Situation
Recommended Provider(s)
1
Need full-lifecycle QA with automation framework ownership
Codoid
2
Complex app with large regression suite needing AI-assisted coverage
TestDevLab, Codoid
3
Shipping to global markets with diverse device matrix
Testlio
4
Regulated industry requiring formal QA governance documentation
A1QA, Codoid
5
Large enterprise running digital transformation, needs multi-layer coverage
TestingXperts
6
Mid-market team prioritizing senior tester depth over scale
QA Madness
7
Building QA capability from scratch, need strategy + execution
KMS Technology
8
Need CI/CD-integrated mobile automation with 90%+ regression time reduction
Codoid
The Questions That Actually Differentiate Mobile App Testing Companies
Most vendor evaluation processes ask the wrong questions. “What tools do you use?” is not a differentiator. Every serious provider uses Appium. The questions that surface real differences between mobile app testing companies:
“Can you show us a test suite you built six months ago? How has maintenance overhead changed?” This reveals whether the vendor builds durable automation or high-maintenance scripts.
“What does your root-cause report look like? Can we see a sample?” This separates defect loggers from quality analysts.
“How do you handle scope creep in regression suites as the app grows?” This reveals whether the vendor has a framework strategy or just adds tests indefinitely.
“Who specifically will be assigned to our account? What is their seniority level?” This is the question boutique firms like QA Madness answer well and larger firms sometimes deflect.
“What happens when a critical defect is found at 11 PM before a launch?” Delivery reliability is revealed in escalation protocols, not capability lists.
The mobile app testing companies market has matured past the point where “real devices” and “Appium expertise” are meaningful differentiators. Every credible provider on this list offers both. What separates the top performers is the combination of framework ownership, governance depth, and the ability to align testing outcomes with product quality rather than just delivery metrics.
For QA managers building or rebuilding their outsourced testing program in 2026, the most important evaluation decision is not which provider has the longest capability list. It is which provider is structured to improve your product over time, not just report on it.
Codoid’s mobile app testing services are built around exactly that principle: automation frameworks that compound in value, real-device coverage that reflects how users actually interact with apps, and delivery governance that holds up under enterprise scrutiny. If you are evaluating mobile app testing companies for a long-term QA partnership, it is a logical starting point for comparison.
Your app deserves more than a defect count.
It deserves a partner built for the long term.
What are the best mobile app testing companies in 2026?
The top mobile app testing companies in 2026 include Codoid, TestDevLab, Testlio, A1QA, TestingXperts, QA Madness, and KMS Technology. Each is ranked by enterprise-fit, technical depth, and delivery reliability the three criteria that actually predict outcomes rather than just capabilities.
How do I choose the right mobile app testing company?
Evaluate mobile app testing companies on three criteria: enterprise-fit (governance, compliance, SLAs), technical depth (framework architecture, real-device coverage, automation tooling), and delivery reliability (root-cause reporting, long-term client retention, regression cycle performance). Capability lists alone are not sufficient to differentiate vendors.
What is the difference between a mobile app testing company and a device cloud platform?
Mobile app testing companies provide engineers who design test scenarios, execute testing, and deliver analysis. Device cloud platforms like BrowserStack and Sauce Labs provide infrastructure real devices accessible via API with no testing program attached. Many testing companies integrate with device cloud platforms as part of their service.
How much do mobile app testing companies charge?
Pricing varies significantly by engagement model, scope, and team seniority. Most mobile app testing companies offer either retainer-based engagements for ongoing QA, project-based pricing for defined release cycles, or time-and-materials models for flexible coverage. Request a scope-based quote rather than comparing day rates, since framework quality and automation depth determine long-term cost efficiency.
Do mobile app testing companies test on real devices?
Leading mobile app testing companies use real-device cloud platforms such as BrowserStack, Kobiton, and Perfecto rather than emulators alone. Real-device testing is essential for catching memory pressure, thermal throttling, OEM-specific behavior, and network handoff issues that simulators cannot reproduce.
Which mobile app testing companies are best for regulated industries?
Codoid and A1QA are the strongest choices for regulated industries including fintech, healthcare, and insurance. Both operate with formal QA governance, compliance documentation (HIPAA, PCI-DSS, SOC 2), and structured reporting that maps to enterprise and auditor requirements.
Mobile app upgrade testing is the practice of installing a new build on top of a previously installed version to confirm the app launches, functions, and retains user data after the update. It answers a question functional testing never asks: does the app survive the transition between versions?. The distinction matters because your existing users never experience a clean install. They carry saved sessions, preferences, cached data, and history from the old version into the new one. A build that behaves perfectly when installed fresh can crash immediately when it inherits that state. Functional testing proves the new version works. Mobile app upgrade testing proves your users can get to it.
Why Mobile App Upgrade Testing Deserves a Permanent Slot in Regression
Three failure modes make the upgrade path uniquely risky:
Data migration breaks silently. If developers rename an internal storage key or change a database schema without migration code, the new build finds nothing where the old data lived. The app may run fine, just with the user’s history, points, or saved content gone.
A clean install masks the bug. Migration defects are invisible in fresh-install testing by definition. The buggy build passes QA, ships, and fails only on devices carrying old data.
The blast radius is your most loyal users. The people affected by a broken upgrade are, by definition, existing users, often your most frequent ones.
Consider an e-commerce app. Users accumulate payment methods, delivery addresses, order history, and loyalty points across versions. Losing any of that in an update is not a minor defect. It is a support ticket, a one-star review, and possibly a churned customer.
Because mobile teams ship updates frequently, mobile app upgrade testing belongs inside the standing regression suite, executed for every release, not run as a one-off before major versions.
When and What to Test: A Risk-Based Scoping Model
You cannot test every version-to-version path. Scope with production data instead of guesswork.
Step 1: Pick Source App Versions by Usage Share
Pull analytics on which app versions are live in production. If your last release shipped months ago, most active users sit on the latest version and the scope is small. If you release weekly, users are spread across several recent versions and the upgrade matrix widens. Start with the version holding the largest usage share, since auto-update users cluster there and a defect on that path hits the biggest audience.
Step 2: Layer in OS Versions
Repeat the same analytics exercise for operating system versions. The intersection of your most-used app version and most-used OS version is the highest-priority mobile app upgrade testing scenario, and the one worth running across multiple device states.
Step 3: Always Cover the OS Extremes
Two OS versions carry outsized risk regardless of usage share:
The minimum supported OS. New features in your build may lean on APIs the oldest supported OS lacks, producing a crash that appears only after upgrade.
The newest OS, including betas. A just-released OS has had little public exposure and is still receiving fixes. Run a sanity pass on each app update against the beta as soon as one is available, and increase depth as public release approaches. Its user base can grow fast, so a defect found late becomes urgent quickly.
Step 4: Verify State-Dependent Behavior
Prioritize the states most apps must preserve across a mobile app upgrade testing cycle:
Sno
State to verify
What “pass” looks like after upgrade
1
Authentication
User remains logged in; no forced re-authentication unless security policy requires it
2
User data
Messages, order history, points, membership tier, and saved content all intact
3
Customization
Favorites, themes, and UI preferences carried over
4
Notifications
Push still delivered; notification settings unchanged
5
New and changed features
New screens open without crashing, especially those built on updated third-party SDKs
Screens using an upgraded third-party SDK deserve special attention. A recurring pattern in mobile app upgrade testing: the screen works on clean install but crashes only after an upgrade.
Common Defects Upgrade Testing Catches
Install failure over the old version. The update refuses to install on top of the existing build, often due to a library mismatch or a version numbering error.
Crash on first launch post-upgrade. The new build carries missing or incorrect configuration that only surfaces when old state is present.
Lost user data. History, saved content, or account standing disappears because migration code was never written.
Reset settings. Users are logged out, default addresses revert, notification preferences clear, or customizations vanish.
Broken functionality. An existing feature stops working, or a new feature fails, typically tied to SDK or dependency changes between versions.
Automating Mobile App Upgrade Testing with Appium
Manual mobile app upgrade testing does not scale when the release cadence is weekly. On Android, Appium makes automation straightforward with two driver commands: installApp, which replaces the running app with a new build and stops the old process, and startActivity, which relaunches the app by package and activity name.
The canonical automated flow has four steps:
Launch the old version of the app.
Create user state, for example save a message or preference, and assert it displays.
Call installApp with the new build, then relaunch via startActivity.
Assert the state created in step 2 is still present.
A condensed Java example:
Script
// Session starts with the old build as the 'app' capability
wait.until(presenceOfElementLocated(inputField)).sendKeys(TEST_VALUE);
wait.until(presenceOfElementLocated(saveButton)).click();
Assert.assertEquals(TEST_VALUE,
wait.until(presenceOfElementLocated(savedValue)).getText());

// Upgrade in place
driver.installApp(NEW_BUILD_PATH);
driver.startActivity(new Activity(APP_PACKAGE, MAIN_ACTIVITY));

// Prove the data survived the migration
Assert.assertEquals(TEST_VALUE,
wait.until(presenceOfElementLocated(savedValue)).getText());
Why this test earns its place: it directly encodes the classic migration bug. A developer changes an internal storage key, forgets the code that moves data from the old key to the new one, and ships. Functionally, the build is flawless. Behaviorally, every upgrading user loses their saved data. This four-step test fails on exactly that build and passes once migration code lands, turning a production incident into a red build.
At Codoid, we recommend teams parameterize the source build so the same script can validate multiple mobile app upgrade testing paths. We used this exact approach on a trading mobile app, where a single parameterized suite ran the save-upgrade-verify flow across multiple builds without any script duplication.
Device and OS coverage gaps. Users span many OS versions, and labs rarely hold matching hardware for all of them. Prioritize by usage share, then fill gaps deliberately. One caution: Android and iOS devices generally cannot be downgraded once the OS is updated. Upgrading a lab device to a new OS is a one-way door, so keep dedicated devices on older OS versions and consider a separate device for beta OS testing. Budget for hardware refresh when old devices can no longer receive supported OS versions.
Version sprawl from frequent releases. Weekly release trains leave meaningful user populations on several versions at once. Test the highest-usage path thoroughly and run lighter passes on the rest, rather than attempting exhaustive coverage.
Late defect discovery. Defects found near release cost far more to fix than defects found early. Starting sanity checks on OS betas, and automating the core mobile app upgrade testing path so it runs on every build, both pull discovery earlier.
Key Takeaways
Mobile app upgrade testing verifies install-over-existing behavior and data retention. It is distinct from, and not replaceable by, functional testing of the new build.
Scope by production analytics: highest-usage app version first, then highest-usage OS, then always the minimum and newest OS versions.
Authentication, data, customization, notifications, and SDK-dependent screens are the states most likely to break.
Automate the save-upgrade-verify loop with Appium’s installApp and startActivity so every build validates the upgrade path.
Treat OS upgrades on lab devices as irreversible and plan device inventory accordingly.
Not sure your app survives the upgrade?
Let us test it before your next release.
Mobile app upgrade testing installs a new app build over an existing installed version to verify the app works correctly and retains user data, settings, and session state after the update.
How is upgrade testing different from regression testing?
Regression testing checks that existing features still work in the new build. Mobile app upgrade testing checks the transition itself: installation over an old version and migration of existing user state. Upgrade tests should run as part of every regression cycle.
Which upgrade paths should QA teams test first?
The path from the production version with the highest usage share, on the OS version with the highest usage share. Then cover the minimum supported OS and the newest OS, including betas when available.
Can app upgrade testing be automated?
Yes. On Android, Appium's installApp command replaces the running app with a new build, and startActivity relaunches it, allowing a single script to create data in the old version, upgrade, and verify the data survived.
What defects does mobile app upgrade testing typically find?
Failed installations over old versions, crashes on first launch after update, lost user data from missing migration code, reset settings and forced logouts, and features broken by third-party SDK changes.
In Mobile App Testing, battery drain testing for mobile apps is the practice of measuring how much power an application consumes on real devices across foreground, background, and idle states, then comparing that consumption against a baseline to catch regressions before release. Most QA teams either skip it entirely or stop at crude percentage checks. This article lays out a four-level maturity model for battery drain testing for mobile apps, from manual battery sampling to hardware-level power measurement, so QA leaders can decide exactly how far their team needs to climb and in what order.
Your regression suite can pass at 100% while your app quietly burns through a user’s battery in the background. Nothing fails. No defect gets logged. The first signal arrives weeks later as a one-star review and an uninstall. That gap exists because power consumption is a behavioral quality attribute, not a functional one, and functional test suites are structurally blind to it. That’s why battery drain testing for mobile apps deserves dedicated attention in every QA strategy.
Battery drain testing for mobile apps is a quality engineering discipline that quantifies an app’s energy consumption under realistic usage conditions on physical hardware. It covers three states that functional testing rarely isolates:
Active foreground use: scrolling, playback, navigation, transactions
Idle presence: what the app costs the device when the user does nothing at all
The discipline exists because efficiency and correctness are independent properties. A feature can behave exactly as specified while holding a wake lock it never releases, polling an endpoint too frequently, or keeping the GPS radio active long after navigation ends. None of these are visible from a functional test.
Why Power Bugs Escape Functional Test Suites
Four structural reasons explain why battery issues sail through otherwise strong QA processes:
1. They accumulate over time. A typical automated test runs for seconds or minutes. Background drain reveals itself over hours. Short runs mathematically cannot observe
it.
2. They produce no assertion failure. No exception is thrown, no element goes missing, no response code changes. The app is doing exactly what the code says, and the code is wrong.
3. They vary by hardware. A chipset-efficient flagship can mask consumption that cripples a three-year-old mid-range device. Single-device testing hides the problem.
4. They live outside the app boundary. Wake locks, radio state, sensor subscriptions, and OS scheduling are system-level behaviors that UI-driven test frameworks never
inspect.
There is also a compliance angle. Apple’s App Store review guidelines allow rejection for apps that drain battery excessively, which turns power efficiency from a nice-to-have into a release gate for iOS teams.
The Four Maturity Levels
Each level answers a different question. Teams do not need to reach Level 4; they need to know which level their risk profile demands. Here is a framework for battery drain testing for mobile apps maturity.
Level 1: Manual Percentage Sampling
The question it answers: “Is something obviously wrong?”
The method is simple. Charge a real device, note the charge percentage, exercise the app through a defined scenario for a fixed window, and note the percentage again. Subtract the device’s idle baseline drain over the same window and the remainder is roughly what your app cost. This is the most basic form of battery drain testing for mobile apps.
This works as a smoke test and nothing more. Battery percentage is a coarse, lagging indicator with a meaningful error margin; it tells you nothing about root cause, and results are not reproducible across devices or even across runs on the same device. Use Level 1 to decide whether deeper investigation is warranted, never to sign off a release. For teams new to battery drain testing for mobile apps, Level 1 is a reasonable starting point.
Level 2: Platform Profilers
The question it answers: “Which behavior in my code is wasting power?”
This is where diagnosis happens, and the tooling splits by platform. Effective battery drain testing for mobile apps at this level requires platform-native tools.
On iOS, Xcode’s energy diagnostics and the Instruments Energy Log profile a physically connected iPhone in real time. They surface CPU spikes, network request frequency, background execution violations, and location accuracy misconfiguration. Simulators are excluded by design: they cannot model real radio, sensor, or thermal behavior. So any battery drain testing for mobile apps on iOS must use real devices.
On Android, the Android Studio profiler exposes per-thread CPU, network activity, sensor access, and wake lock acquisition as the app runs. For longer windows, teams have historically exported a bug report into Battery Historian, an open-source Google visualization tool, to study wake lock timelines and Doze-mode behavior across hours of device history. This is a critical technique for battery drain testing for mobile apps on Android.
An important currency note: Google’s own documentation now flags Battery Historian as unmaintained and points developers toward system tracing, Macrobenchmark’s power metric, and the Power Profiler in Android Studio instead. QA teams standardizing their battery drain testing for mobile apps in 2026 should build on the maintained tools, not the one most older tutorials still recommend.
Level 2’s limitation is scale. Profilers are single-device, manual, and interpretation-heavy. They are superb for root-cause analysis and useless for answering “did this build regress?” That requires a different approach to battery drain testing for mobile apps.
Level 3: Automated Regression Tracking
The question it answers: “Did battery consumption change between builds?”
This is the level most product teams actually need and most never reach. The pattern for automated battery drain testing for mobile apps:
Script a realistic user journey with your existing automation stack (Appium, Espresso, XCUITest)
Capture battery metrics before, during, and after the run. On Android, ADB’s dumpsys commands expose battery level, temperature, voltage, CPU, and per-package memory without any extra tooling
Sample at fixed intervals so you get a consumption curve, not just two endpoints
Write results to a structured report and push them to a dashboard such as Grafana
Compare against the previous build’s baseline and fail the pipeline when drain exceeds an agreed variance
The consumption curve is the underrated asset in battery drain testing for mobile apps. A steep drop in one interval lets you correlate drain with a specific app action a media render, a sync burst, a location fix which converts a vague complaint into a targeted engineering ticket. Curves also make cross-build and cross-device comparison trivial: run the same journey on the same devices for every release candidate and regressions become visible the day they are introduced. This is the gold standard for battery drain testing for mobile apps in CI/CD.
Real-device cloud platforms extend this level across dozens of device and OS combinations without maintaining an in-house lab, and some now capture milliamphour consumption while tests execute instead of inferring it from percentage. The principle matters more than the vendor: battery drain testing for mobile apps must become a per-build signal inside CI/CD, not a quarterly investigation.
Level 4: Hardware-Level Power Measurement
The question it answers: “What is the app’s true energy cost, measured electrically?”
At the top of the model, specialist labs bypass software reporting entirely. The device’s battery terminals are wired to an external power monitor that supplies a fixed voltage and measures current draw directly, at sampling rates in the thousands of readings per second. Because voltage is held constant, every fluctuation in amperage maps precisely to workload, and even a test lasting a few seconds yields statistically usable data. This is the most precise form of battery drain testing for mobile apps.
Rigor at this level extends beyond the hardware. Labs that do this well factory-reset devices before each run, load a standardized data set, capture a clean-device baseline first, and repeat every test several times, discarding interrupted runs. That protocol is what separates a measurement from an anecdote. For mission-critical battery drain testing for mobile apps, this is the definitive approach.
Level 4 is expensive, low-throughput, and unnecessary for most product teams. It earns its cost when energy is the product: SDK vendors proving efficiency claims, communications apps competing on call-time battery life, device manufacturers, and competitive benchmarking studies. For most teams, Level 3 provides sufficient battery drain testing for mobile apps coverage.
Comparing the Four Levels
Level
Method
Precision
Root Cause
Scales in CI/CD
Best For
1
Manual percentage sampling
Low
No
No
Smoke checks
2
Platform profilers
High
Yes
No
Developer diagnosis
3
Automated regression tracking
Medium
Partial
Yes
Per-build release gating
4
Hardware power measurement
Very high
With analysis
No
Benchmarks, energy-critical products
The levels are complementary, not sequential replacements. A mature battery drain testing for mobile apps workflow uses Level 3 to detect a regression, Level 2 to diagnose it, and Level 1 to sanity-check the fix.
What Actually Causes Battery Drain
Across all five levels, investigations converge on a short list of culprits, and most of them live in the background. Effective battery drain testing for mobile apps must target these patterns:
Wake locks left unreleased (Android’s most common offender): the device simply cannot sleep
Timer-driven polling where push would do: waking the radio on a schedule instead of letting FCM or APNs deliver events
Location services at maximum accuracy when coarse accuracy would serve the feature
Services and timers that outlive their purpose, continuing after the user backgrounds the app
Sensor listeners without cleanup: GPS, accelerometer, or gyroscope subscriptions left running
Poor caching, forcing repeated downloads of identical content
Inefficient code paths that keep CPU utilization high for routine work
Environmental factors compound all of the above. Weak or unstable network signal forces the radio to work harder, and elevated device temperature both signals and accelerates drain, which is why controlled test environments and temperature logging belong in any serious battery drain testing for mobile apps protocol.
How Long Should Battery Tests Run?
Duration should match the state under test, not the convenience of the pipeline. For structured battery drain testing for mobile apps, consider these guidelines: roughly 15 to 30 minutes for foreground scenarios and per-build regression checks, one to three hours for background behavior, and six to eight hours of overnight running to expose slow background leaks. The consistent principle across sources is that short runs systematically miss cumulative and scheduled drain. A comprehensive battery drain testing for mobile apps strategy includes all three durations.
On thresholds, published figures vary and methodologies are rarely stated. One practitioner writeup on Medium treats consumption above 15% of charge per hour of active use as a sign of a poorly optimized app, while Pcloudy’s guide suggests category-based ranges for active use and flags idle drain above roughly 2% per hour as worth investigating. Treat all such numbers as starting points. The defensible practice is to establish your own per-app, per-device baselines and gate releases on deviation from them, because a regression against your own baseline is meaningful in a way that a violated generic threshold is not. This is the foundation of effective battery drain testing for mobile apps.
Track trends, not trophies. A number without a baseline is a screenshot; a curve across builds is evidence. That is the ultimate goal of battery drain testing for mobile apps.
Android and iOS Fail Differently
The two platforms create opposite risk profiles, and test design should reflect that. Platform-aware battery drain testing for mobile apps is essential.
Android’s risk is freedom. Mismanaged services may run without end, wake locks can hold the device awake arbitrarily, and Doze-mode compliance is the app’s responsibility. Android battery drain testing for mobile apps therefore concentrates on wake lock hygiene, service lifecycle, and scheduler usage, and benefits from a device matrix spanning chipsets and price tiers, since power behavior differs across silicon.
iOS’s risk is the edges of its constraints. The OS tightly limits background execution, so drain tends to hide in lifecycle transitions, background refresh behavior, location accuracy configuration, and launch-time network bursts. iOS battery drain testing for mobile apps should focus on these edge cases. Testing on a small-battery model alongside a current flagship exposes issues the flagship’s capacity would absorb.
Where Codoid Fits
At Codoid, battery drain testing for mobile apps is folded into our mobile performance testing engagements rather than treated as a separate service: the same automated journeys that validate function on real devices also capture consumption curves per build, so power regressions surface in the same report as functional results. [PLACEHOLDER: Codoid client case study with measured before/after battery figures, to be supplied by Asiq before publication.] Our AI Accelerator can generate and maintain the scripted user journeys these tests depend on, which removes the usual excuse that battery drain testing for mobile apps is too expensive to automate. [PLACEHOLDER: confirm AI Accelerator positioning and CTA link before publish.]
Not sure if your app is draining batteries? Let's talk.
It is the measurement of an app's power consumption on real devices across active, background, and idle states, compared against baselines to detect regressions. In other words, battery drain testing for mobile apps validates efficiency, which functional testing does not cover.
Which tools should QA teams use for battery testing in 2026?
On iOS: Xcode energy diagnostics and Instruments. On Android: the Android Studio profiler, system tracing, Macrobenchmark's power metric, and the Power Profiler; note that Google now flags Battery Historian as unmaintained. For regression at scale: ADB-based metric capture inside your automation framework, or a real-device cloud that reports consumption during execution. These tools make battery drain testing for mobile apps accessible to any QA team.
Can I test battery drain on an emulator or simulator?
No. Emulators cannot reproduce radio, GPS, sensor, or thermal behavior, so their energy figures are not representative of real hardware. Every credible methodology for battery drain testing for mobile apps, from Apple's and Google's profilers to hardware measurement labs, requires physical devices.
Should battery testing run in CI/CD?
Yes, at the regression level. A short scripted journey with battery capture on each release candidate, compared against the prior build's baseline, catches most power regressions before users do. This automated battery drain testing for mobile apps catches regressions early. Deep profiling and long-duration runs can remain scheduled activities rather than per-commit gates.
What is an acceptable battery drain rate?
There is no universal number, and published thresholds disagree with each other. Establish a per-app baseline on a fixed device set, then define acceptable variance from that baseline. Deviation from your own history is the reliable signal in battery drain testing for mobile apps.
Why does my app drain battery when nobody is using it?
Almost always a background behavior: an unreleased wake lock, a polling loop, an orphaned service, or a sensor listener that was never removed. Long-duration idle testing (six hours or more) combined with platform profiling will usually isolate the cause. This is exactly what comprehensive battery drain testing for mobile apps is designed to catch.