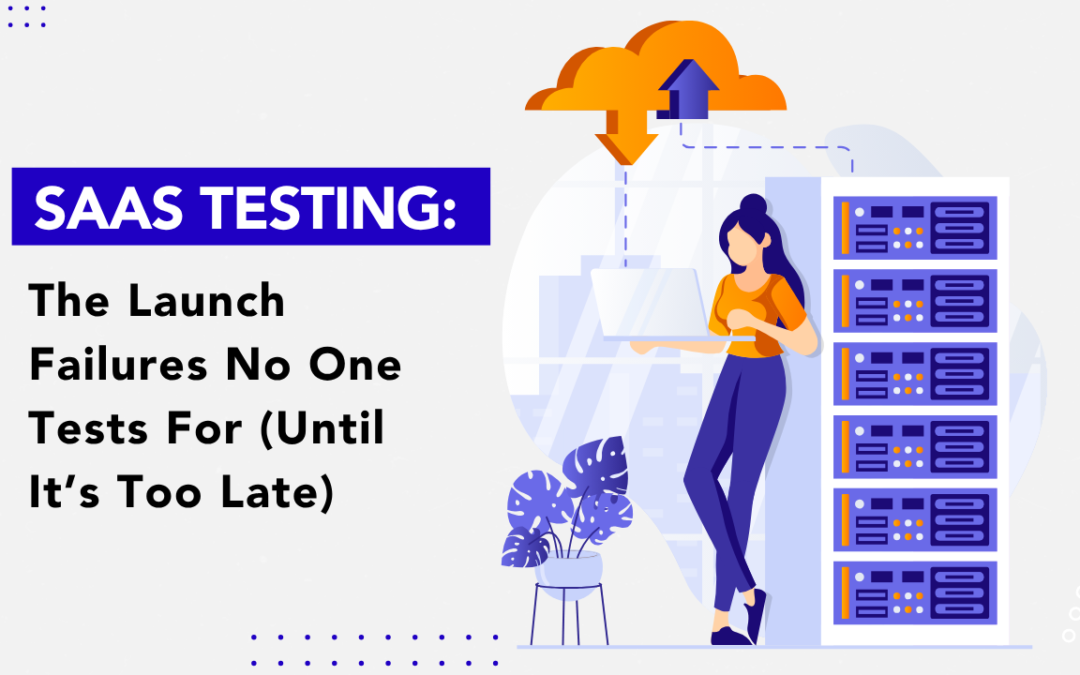
Pre-launch QA for SaaS, a critical component of SaaS Testing, is the discipline of validating that a multi-tenant, continuously deployed product behaves correctly under concurrent real-world usage before paying customers arrive. It tests failure modes that single-user functional checks never trigger: data bleeding between tenants, subscription events arriving out of order, and infrastructure buckling under burst traffic.
The defects that sink a SaaS launch are rarely “feature doesn’t work.” They are “feature works perfectly with one user, and catastrophically with two thousand.” Generic QA processes catch the first. They miss the second entirely.
This guide covers the checks that actually move the needle in week one, ordered by how badly they hurt when skipped.
Why does SaaS break in ways other software doesn’t?
A desktop app serves one user on one machine. A SaaS product serves hundreds of strangers on shared infrastructure, charges them on recurring schedules, ships updates daily, and promises near-perfect uptime. Each of those four traits introduces a class of bug that traditional QA was never built to find.
Four structural realities create the difference:
Shared infrastructure turns one tenant’s mistake into everyone’s outage. A single customer running an aggressive load test on shared compute can starve every other tenant. One company saw exactly this: hundreds of accounts went dark because no resource cap and no abuse monitoring stood in the way.
Daily deployment kills the old QA gate. You cannot run a three-week regression cycle when you ship Tuesday and again Thursday. The only question that matters per release is whether the new code broke something that already worked, and answering it manually does not scale.
Uptime is a contract, not an aspiration. A 99.9% availability promise leaves roughly 8.76 hours of permitted downtime across an entire year. One bad rollback can spend a meaningful chunk of that budget in an afternoon.
Compliance is a gate, not a chore. GDPR data rights and SOC2 controls block a launch when core protections are absent. They are not items you bolt on after the fact.
SaaS QA is less about proving features work and more about proving the system holds when reality stops being polite.
The one test you cannot launch without
If you do nothing else, do this: run a production-like, end-to-end validation of the core customer journey.
Customers judge a product on four outcomes in their first session. Can they sign up? Can they use the thing they came for? Is their data safe? Did they get a clear result? Break any of these in week one and you lose users who never come back.
Teams skip this validation for predictable reasons, and every one of them is a bad reason:
It is slow to set up.
It crosses team boundaries, frontend through database through third-party integrations.
It surfaces uncomfortable gaps between how the product was designed and how it actually runs.
The price of skipping is churn you can measure, a support queue you cannot drain, and reputation damage that quietly cancels out your marketing spend.
The full journey test breaks into four supporting checks:
Sno
Check
What it validates
A failure it catches
1
Persona-based functional testing
Admins, standard users, guests, and trial users each see correct behavior
Admin-only controls reachable by standard users; trial users skipping the paywall
2
Third-party integration testing
SSO, payment, and email dependencies behave under failure
What your app does when a Stripe webhook fails or Auth0 times out
Corrupted or lost records from a platform migration
Data migration deserves a special note. It is a one-way door. A user whose history vanishes during import almost never returns, so this has to be right before launch, not patched after.
How do you actually test multi-tenant data isolation?
You break it on purpose. Tenant isolation bugs do not appear during passive, click-through testing. They only surface when someone deliberately tries to reach across the boundary.
Run these adversarial attempts against your own product:
Swap another tenant’s ID into API request parameters.
Forge or replay a JWT from a different tenant’s session.
Inject SQL aimed at the tenant filter in your queries.
Replay an authenticated session belonging to another tenant.
If any of these returns data it shouldn’t, you have a launch blocker, not a backlog item.
Here is why this matters more than feature coverage. A banking application once exposed one customer’s balance and transaction history to a different user. The cause was mundane: an API that trusted mobile authentication and never confirmed the requesting user ID matched the authenticated account. No clever attacker was involved. It was a basic isolation gap that single-user test scenarios could never have revealed, and it appeared the moment two real accounts hit the system at once.
For multi-tenant products, isolation testing sits above everything else in priority order, ahead of features and ahead of performance.
Subscription billing is where good QA goes to die
Billing flows read as simple boxes in a design doc. In production they become a swarm of overlapping events: trials, upgrades, downgrades, failed charges, retries, cancellations, and webhooks that refuse to arrive in order. The bugs that escape QA are almost always the collisions, where two events fire close enough together to contradict each other.
Three collisions that QA teams reliably miss:
The double charge. Trial begins, the first payment fails, the user upgrades to an annual plan, and then a retry succeeds against the stale monthly invoice. The customer pays twice and support spends an afternoon reconstructing the timeline.
The ghost reactivation. A user schedules a downgrade for period end, a payment fails, the user cancels, and then a webhook quietly reactivates the subscription. The account the customer meant to close comes back to life.
Access lost after a valid payment. A user cancels at period end, resubscribes immediately, and days later the old cancellation webhook finally lands and revokes access despite an active, paid account
These slip through because test scenarios assume tidy billing timelines, webhooks get tested in isolation rather than racing against user actions, and manual testers rarely simulate the passage of time, retries, and clicks happening all at once.
The single rule that prevents most billing incidents
There is one governing principle that, in practice, prevents the large majority of subscription incidents: a webhook may update billing facts, but it must never override newer user intent.
If a user cancels at 2:00 PM and a webhook arrives at 2:05 PM insisting the subscription is active, the cancellation wins. Newer human intent beats older machine state.
To test this properly:
Decide your source of truth first. Does webhook state win, or does user intent win? Write it down.
Build one deliberately horrible scenario that combines a failed payment, a retry, a user action, and webhooks fired out of order.
Assert on access and entitlements, not just the value in a subscription status field.
While you are in this territory, two adjacent checks belong on the list. Onboarding testing confirms a new user can activate and reach core value before the trial expires; if activation takes longer than a few minutes or demands documentation, that is a product problem, not a docs problem. And GDPR testing confirms that data export returns everything and that account deletion genuinely erases personal data across databases, logs, backups, and analytics, not just the primary table.
Building QA into a daily-deploy pipeline
The trade-off to internalize: automation scales confidence, manual testing scales understanding. You need both, for different jobs.
“Enough” automation at the start means covering revenue, data, and core workflows on every deploy. Not more, not less. Layer it in like this:
Run tests on every commit or pull request. Aim to finish the regression suite in under 15 minutes. Developers need feedback before they context-switch to the next task.
Keep the daily regression suite focused. Authentication, core workflows, payment processing, and data integrity. These tests must be trustworthy, because when even one in five failures is a false alarm, teams learn to ignore all of them.
Smoke-test immediately after each release. App boots, key pages render, APIs respond, database connects. Two to three minutes, maximum. A failure means roll back now, not investigate later.
Pair this with observability from day one. Logging, metrics, tracing, and error tracking close the gap between what your tests assert and what production actually does. Testing and monitoring are two halves of the same discipline, not sequential phases.
When to reach for manual testing instead
Automate the boring certainties. Explore the dangerous unknowns by hand.
Choose manual testing when requirements are new or still shifting, when product decisions landed late in the sprint, when usability or edge behavior matters more than pure logic, or when the goal is to discover the failures you did not yet know to look for. Reserve automation for the stable, repetitive regression paths that run identically on every deploy.
How does QA strategy change as you scale?
What works at 100 users falls apart at 10,000. The failure modes shift in a predictable sequence, and your QA investment should track that sequence rather than running ahead of it.
Sno
Stage
Users
QA focus
What to avoid
1
Early (MVP)
0 to 100
Manual exploratory testing, basic smoke tests, security fundamentals, the end-to-end journey test
Over-automating features that may not survive the next pivot
2
Growth
100 to 5,000
Automated regression on all critical paths, performance testing under realistic load, expanded security, first dedicated QA capacity
Relying on ad-hoc testing as release velocity climbs
The order of collapse is consistent. Database connection pools exhaust under concurrent load first. Then API rate limits get hit, both yours and your providers’. Race conditions and orphaned records surface next. Then monitoring gaps mean you hear about outages from users instead of alerts. Then third-party connection limits at services like Stripe and Auth0 turn into hard constraints. Finally, manual QA simply cannot keep up with how often you ship.
The fix is to act before you feel the pain. Starting at 100 users, simulate 10x your current concurrency with load tools, stand up observability infrastructure, establish performance regression monitoring, decouple deployment from release with feature flags, and automate the revenue-critical paths before they become bottlenecks.
The mistakes that show up again and again
Launching with no load testing. Functional tests run one user at a time; production runs hundreds at once. Load is what exposes resource contention, deadlocks, cache invalidation bugs, and rate-limit violations.
Trusting a clean load test. Steady-state load proves little. Test burst patterns, mixed user profiles, and deliberate cache failures. A load test that breaks nothing tested the wrong scenario. A good one reveals a bottleneck.
Treating subscriptions as happy paths. Real users churn, fail payments, and resubscribe unpredictably. The chaos scenarios are where the support nightmares hide.
Migrating data on toy datasets. Validate with production-scale volumes. Corrupted history drives churn that no amount of feature polish recovers.
Skipping the short security list. Minimum viable security is small enough to finish before launch, and teams skip it anyway, assuming it can wait. It cannot.
What security testing is actually required before launch?
The pre-launch security list is shorter than most teams fear, which is exactly why there is no excuse for skipping it. In priority order:
Authentication — password reset flows, session management, and MFA if you offer it.
Authorization — cross-tenant access attempts and trial-to-paid bypass attempts.
OWASP Top 10 — the common web vulnerabilities like SQL injection and XSS.
Dependency scanning — known vulnerabilities in third-party libraries.
Add one item teams consistently drop: a human-driven abuse test. Sit down and try to break access controls by hand, not with a scanner. Automated tools miss logic-level authorization flaws that a motivated human finds in minutes. This is one focused session against your most sensitive data flows, not a full engagement.
What to leave for after launch: full penetration tests (costly, and more useful once you are live), full compliance programs like SOC2 or ISO 27001 (six to twelve months of work), and any custom cryptography (use proven libraries instead). Security debt is real, but the launch-blocking subset is genuinely a short list.
Owning the automation framework, integrating into sprint cadence, accumulating product knowledge
For early teams still finding their shape, on-demand QA gives you expert coverage without a full-time hire. Once the product stabilizes and users climb, managed QA services provide the sustained capacity and automation infrastructure that ad-hoc resources cannot. Both build on the same foundation of QA services for SaaS, where test automation becomes core infrastructure rather than an optional optimization.
How to build a QA process that scales
Start with the non-negotiable end-to-end journey test: signup, core feature, data safety, clear result. That single validation prevents most week-one disasters. If your product is multi-tenant, layer isolation testing on top immediately, because data leakage and resource cannibalization are trust-destroying events, not post-launch bugs. From there, build automation incrementally starting with revenue-critical paths, and expand coverage only as features stabilize. Underneath all of it, invest in observability from day one so your tests and your production telemetry reinforce each other.
AI and automation should accelerate your testing decisions. They do not replace testing judgment, and the strongest quality programs stay human-guided rather than fully autonomous.
Conclusion
SaaS Testing is about validating how your product behaves under real-world conditions, not just confirming that features work. By testing tenant isolation, billing workflows, performance, security, and core customer journeys before launch, teams can prevent costly failures that impact user trust and growth. Investing in the right pre-launch QA strategy helps ensure your SaaS product launches stable, secure, and ready to scale.
Ensure your SaaS product is ready for real users, real traffic, and real-world failures before launch.
What is the single most important QA test before a SaaS launch?
A production-like, end-to-end validation of the core customer journey: signup, core feature usage, data safety, and a clear result. If this fails in week one, you lose customers permanently. Everything else is secondary to it.
How do you test multi-tenant data isolation?
Adversarially. Attempt cross-tenant access through modified API parameters, forged JWTs, SQL injection against tenant filters, and replayed sessions from another tenant. Passive functional testing never finds isolation bugs; only deliberate attack attempts surface them before users do.
Which subscription edge cases do QA teams most commonly miss?
The collisions, where events overlap: an upgrade during an active payment retry, a cancellation immediately followed by resubscription with stale webhooks firing, and downgrade webhooks landing after the user already upgraded. None appear in happy-path testing; they require simulating out-of-order events.
How do you stop webhooks from corrupting subscription state?
Apply one rule that prevents roughly 70% of subscription incidents: webhooks update billing facts but never override newer user intent. A 2:00 PM cancellation beats a 2:05 PM "active" webhook. Define the rule explicitly and test it with deliberately disordered webhook sequences.
What load testing belongs in a pre-launch plan?
Test burst traffic rather than average load, simulate roughly 10x your expected concurrency, model mixed user profiles instead of identical synthetic users, and inject deliberate cache failures. A good load test breaks something and reveals a bottleneck. If it passes cleanly, the scenario or the data was unrealistic.
What is the minimum security testing before launch?
Authentication flows, authorization including cross-tenant and trial-to-paid bypass attempts, OWASP Top 10 validation, dependency scanning, and one human-driven abuse test against your most sensitive data flows. Full penetration tests and compliance programs such as SOC2 or ISO are post-launch investments.
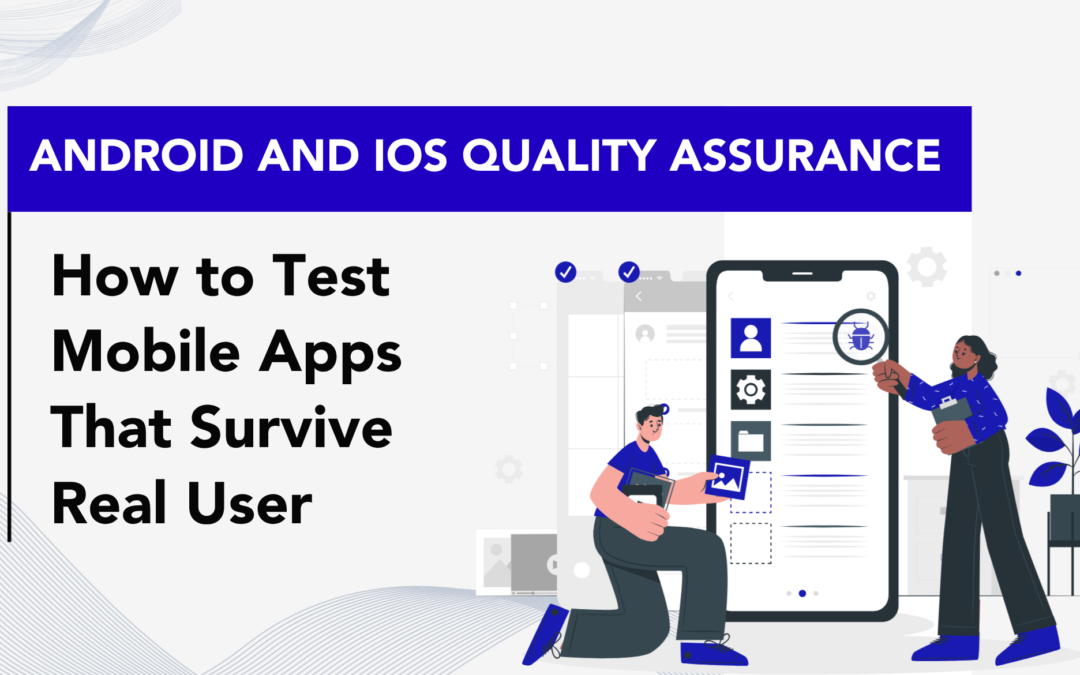
Mobile app testing is the discipline of verifying that an application works correctly, performs well, stays secure, and feels usable across the range of devices, operating systems, screen sizes, and network conditions its users will actually have. It runs throughout development and continues after release, through every update and feature. The job is harder than web testing for one reason: the environment refuses to cooperate. An app has to hold up against varied hardware, multiple OS versions, fluctuating connection speeds, background interruptions, and device-level permission rules. One weak point, a layout that collapses on a small screen or a crash triggered by a new OS build, is enough to sink your ratings.
Testing covers every build type: native Android and iOS apps, cross-platform apps on shared frameworks, WebView and hybrid apps, and apps built on no-code platforms. The core question never changes: will this app give every user a reliable, consistent, secure experience regardless of their device?
Mobile users are unforgiving. Most abandon an app after one or two bad sessions, and the triggers are predictable: a crash during onboarding, a slow loading screen, a checkout that breaks, a login that fails, a push notification that never arrives. Testing exists to catch these before a real person ever does.
The stakes break down into five areas:
Store approval. Both Apple and Google enforce strict review. Crashes, broken navigation, misleading permissions, and shaky performance are common grounds for rejection, and a rejection can derail a launch timeline and the marketing built around it.
Retention and ratings. Friction in the first session is the fastest route to an uninstall and a one-star review.
Device and OS fragmentation. An app that runs flawlessly on one device can break on another due to resolution, memory limits, or OS-specific behavior.
Real-world performance. Flaky networks, low-power mode, near-full storage, and background interruptions are the normal operating conditions, not the exceptions.
Security and reputation. Apps handle personal data, payments, and credentials. Weak validation exposes insecure API endpoints, fragile authentication, and improper storage, which damages trust and creates compliance risk.
Quality is not something you inspect into an app at the end. It is something you engineer into it from the first commit.
The Core Types of Mobile App Testing
Testing is a stack of layers, not a single pass. Skip a layer and you create a blind spot that surfaces after launch, usually at the worst time.
Functional testing confirms every feature works to spec: registration, navigation, search, forms, payments, push notifications, and API integrations. For an ecommerce app, that means a user can add to cart, apply a coupon, and complete checkout without error.
Usability testing measures how intuitive the app feels. A feature can work perfectly and still confuse people. This layer covers navigation, label clarity, readability, onboarding, and accessibility.
Performance testing checks launch time, screen load speed, API response, memory use, battery drain, and behavior under heavy traffic. A news app should load articles fast even when thousands open it at once.
Compatibility testing verifies the app across devices, screen sizes, OS versions, and hardware. This matters most on Android, where fragmentation is severe.
Security testing evaluates encryption, authentication and authorization, secure API communication, data-leak protection, and privacy compliance.
Installation and update testing confirms clean installs, upgrades from older versions, behavior after an OS update, and data retention through updates.
Localization testing checks that translations fit the UI and that currency, date, and region-specific content display correctly.
Beta and user acceptance testing (UAT) put the app in front of real users before full launch to surface edge-case bugs and confirm it meets the business goals it was built for.
Android vs iOS: Where the Real Differences Are
The principles carry across both platforms, but the ecosystems are not the same. Knowing where they diverge tells you where to spend effort.
Sno
Factor
Android
iOS
1
Device fragmentation
Thousands of models across many makers; intensive compatibility testing
Apple hardware only; far less device variation
2
OS adoption
Users linger on older versions; support several at once
Users update fast; test new releases early
3
Store review
Faster, increasingly firm on data safety and security
Strict on stability, UI consistency, privacy, design compliance
4
Permissions
Flexible but needs careful runtime handling across versions
Stricter transparency for location, camera, mic, tracking
The practical takeaway: prioritize broad device coverage on Android, emphasize compliance and UI precision on iOS, and run performance and security validation everywhere. Most teams land on a hybrid model, using emulators and simulators for early iteration and real devices for final sign-off.
The Step-by-Step Testing Process
A structured workflow keeps issues from slipping through. The same seven steps apply whether you ship native or cross-platform.
Step 1: Define scope and requirements. Identify core features, business-critical flows, supported devices and OS versions, store and regulatory requirements, and performance benchmarks for load time, crash rate, and API response. Priorities shift by app type: ecommerce leans on cart and payment reliability; news leans on fast loads, offline reading, and notification delivery.
Step 2: Build test cases and scenarios. Each case needs an objective, preconditions, steps, expected result, and pass/fail status. Beyond the happy path, write scenario tests for interrupted payments, a WiFi-to-mobile-data switch, low-power mode, the app minimized mid-checkout, and invalid inputs. Documented cases make later regression cycles far easier.
Step 3: Set up test environments. Combine emulators and simulators for early work with real physical devices for final validation, across multiple OS versions, screen sizes, and network conditions from strong WiFi to fully offline. Emulators cannot reproduce battery drain, hardware-specific performance, or manufacturer-specific Android customizations, which is why real-device testing is non-negotiable before submission.
Step 4: Run manual and automated tests. Manual testing puts a person in the app to judge UI, navigation feel, exploratory cases, and visual consistency. Automated testing handles regression, repetitive functional flows, API validation, and broad coverage at speed. The best practice is a hybrid: manual for experience and edge cases, automation for the repetitive validations that grow with the app.
Step 5: Log, prioritize, and fix bugs. Every report needs a clear title, reproduction steps, expected versus actual result, device and OS version, screenshots or recordings, and a severity level. Prioritize ruthlessly: crashes, payment failures, login errors, and security holes are high severity and must be fixed before submission. Always re-test the fix.
Step 6: Run regression testing. Small changes ripple. A new payment gateway can affect checkout validation; an SDK update can knock out push notifications. Re-run core flows (login, signup, checkout, booking), previously fixed high-severity bugs, critical integrations, and install/update stability after every change.
Step 7: Validate pre-release and clear store compliance. Run a functional checklist, review performance and stability, and validate installation behavior. Then confirm an accessible privacy policy, clear permission descriptions, accurate screenshots and metadata, no placeholder or test data, and properly configured in-app purchases. Finish with a smoke test on at least one real Android and one real iOS device under real conditions: network switches, an incoming call, lock and unlock, low-power mode.
Automation tells you whether the app still works. A human tells you whether it still makes sense.
Testing Priorities by App Type
A good strategy mirrors how people actually use the app.
Ecommerce: browsing and filter accuracy, cart persistence, coupon logic, payment gateway reliability, order confirmation, refund flows. Hammer payment failure mid-transaction and network drops during checkout. Regression matters most ahead of peak sales.
Content and news: article load time, image and video rendering, offline access, notification routing, infinite scroll. Compatibility testing across screen sizes keeps layouts readable.
On-demand service (rides, bookings, delivery): location permissions and GPS accuracy, real-time updates, background tracking, booking confirmation. Real-device testing is essential because these apps depend on background processes that platforms throttle.
Membership and community: login and session persistence, subscription validation, role-based content visibility, in-app purchases, and cross-device sync. Security testing carries extra weight.
Common Mistakes and How to Avoid Them
Testing only on emulators. They miss battery drain, background restrictions, and manufacturer UI layers. Validate final builds on real devices.
Ignoring low-end devices. Apps that fly on flagships crawl on older hardware. Keep at least one low-to-mid-range Android in your matrix.
Skipping network condition testing. Many bugs appear only under poor connectivity. Test weak WiFi, mobile data, and brief disconnections.
Not testing updates. Teams obsess over fresh installs and forget upgrades, risking data loss and broken sessions. Test upgrades from at least one prior version.
Overlooking permission handling. Test every scenario including denial, especially for location, camera, and notifications.
Skipping regression. Fixing one issue without re-testing core flows quietly introduces new ones.
Rushing pre-submission review. Use a structured compliance checklist for performance, metadata, privacy links, and UI consistency.
Best Practices for Lasting Quality
Shift left. Test alongside development so problems surface while they are cheap to fix.
Prioritize real devices. Maintain a minimum matrix: low-end Android, mid-range Android, latest Android, current iOS, and one older iOS.
Automate core regression flows. Login, checkout or booking, profile updates, and core navigation, so frequent updates ship with confidence.
Monitor after launch. Watch crash reports, ANR rates, API performance, and user feedback.
Test under real interruptions. Incoming calls, backgrounding, network switches, low-power mode, storage limits.
Keep documentation and version control for test cases, bug reports, and device coverage.
Align testing with business goals. Payment stability for ecommerce, load speed for media, real-time reliability for service apps.
Conclusion
Mobile app testing is not a checkpoint at the end of a build. It is a continuous quality strategy that shapes retention, store approval, and long-term cost. Device fragmentation, real-world interruptions, and constant OS updates make it inherently complex, but a disciplined process, clear documentation, and a balanced mix of manual and automated testing cut launch risk dramatically.
If you would rather hand that complexity to a team that does it daily, Codoid’s mobile app testing services cover the full lifecycle: functional and compatibility testing across real Android and iOS devices, plus performance, security, and pre-submission store compliance. Talk to us about a strategy that gets your app to launch stable and keeps it that way.
Need reliable mobile app testing for Android and iOS? Our experts can help.
Mobile app testing is the process of verifying an app's functionality, performance, usability, security, and compatibility across devices, operating systems, and network conditions, both before and after release.
How is Android testing different from iOS testing?
Android requires far broader device and OS-version coverage because of fragmentation, while iOS emphasizes strict store compliance, UI precision, and early testing against fast-adopted OS updates.
Should I use manual or automated testing?
Both. Use manual testing for usability, visual consistency, and exploratory work, and automation for regression, repetitive flows, and broad coverage across versions.
Why is real-device testing necessary if I already use emulators?
Emulators cannot reproduce battery drain, hardware performance limits, background restrictions, or manufacturer- specific Android customizations, so real devices are required before submission.
When should I run regression testing?
After every change that touches core functionality, integrations, or shared components, and always as a final safeguard before release.
The landscape of software quality assurance is undergoing a radical transformation. In 2026, the emergence of agentic AI tools like Claude Code has shifted the primary responsibility of a QA engineer from manual scripting to orchestrating sophisticated AI agents. However, simply having access to an AI model is not enough. To truly excel, test engineers must master specific Claude Skills for QA to ensure that the generated tests are reliable, maintainable, and production-grade. This comprehensive guide serves as a roadmap for beginners to understand the Claude Skills list, explore practical Claude Skills examples, and learn how to integrate these into a modern automation testing pipeline.
Before diving into the technical details, it is essential to define what we mean by “skills” in the context of Claude. A Claude skill is not just a general ability of the AI, it is a structured knowledge file or specialized instruction set installed into an AI agent.
These skills contain expert-level testing patterns, framework-specific idioms, project structure recommendations, and lists of anti-patterns to avoid. Essentially, they bridge the gap between “generic AI code” and “senior-level QA architecture”. Without these specialized skills, Claude might default to brittle CSS selectors or hard-coded wait mistakes that lead to flaky and unmaintainable test suites.
Why You Need a Specific Claude Skills List
Consistency: Skills ensure that every test follows the same organizational patterns across different projects.
Expertise Injection: They teach Claude to use advanced features like auto-waiting, role-based locators, and fixture isolation that it might otherwise ignore.
Speed: Instead of writing long, repetitive prompts, you can trigger complex workflows with simple slash commands.
Reduced Test Debt: By following proven patterns, you avoid creating a “bloated” test suite that requires constant manual fixing.
The Top 5 Claude Skills for QA Engineers
To transform Claude into a professional-grade testing assistant, five core skills stand out as the foundation of the 2026 testing pyramid.
1. Playwright E2E Testing (The Foundation)
Playwright has become the dominant end-to-end (E2E) framework due to its native support for auto-waiting and cross-browser execution. However, Claude requires a specific Playwright E2E skill to implement these features correctly.
Claude Skills Example (E2E): When this skill is active, Claude doesn’t just write a script; it implements the Page Object Model (POM). It creates separate classes for every page, encapsulating selectors and actions. Furthermore, it follows a strict locator priority:
getByRole (Primary choice for accessibility and resilience)
getByLabel
getByPlaceholder
Last Resort: CSS or XPath selectors
2. Pytest Patterns for Python
For backend and data pipeline testing, Python’s pytest is the industry standard. The Pytest Patterns skill teaches Claude to move away from outdated class-based setUp methods and instead utilize a modern fixture system.
To illustrate, this skill enables Claude to handle:
Fixture Scoping: Managing setup/teardown at the function, class, or session level.
Parameterization: Running the same test logic with multiple datasets to increase coverage without duplicating code.
Marker Logic: Tagging tests as @pytest.mark.smoke or @pytest.mark.slow for selective execution.
3. API Testing with REST Assured
API tests provide the fastest feedback loop in a testing pyramid. The REST Assured skill ensures Claude generates tests using a BDD-style given().when().then() structure.
A significant advantage of this skill is its focus on negative testing. Instead of only testing “happy paths,” Claude learns to validate:
Unauthorized access attempts.
Missing required fields.
Invalid data formats and JSON schema violations.
4. k6 Performance Testing
Performance testing is often neglected until a system fails under pressure. The k6 Performance skill allows beginners to generate sophisticated load tests without being a performance specialist.
Claude uses this skill to distinguish between five critical test types:
Smoke Test: Verifying the script works with minimal load.
Load Test: Validating performance under expected traffic.
Stress Test: Finding the system’s breaking point.
Spike Test: Handling sudden bursts of traffic.
Soak Test: Detecting memory leaks over long periods.
5. Accessibility Testing with Axe
With increasing legal requirements like the ADA and EAA, accessibility is no longer optional. The Axe Accessibility skill allows Claude to integrate WCAG 2.1 Level AA scans directly into your E2E suite. This covers keyboard navigation, color contrast verification, and form labels, ensuring your application is usable by everyone.
Advanced Claude Skills Examples: Specialized Agents
Beyond standard framework support, the QA ecosystem utilizes “Specialized Agents” that act as autonomous members of your team.
Sno
Agent Name
Mindset
Primary Function
1
Smoke-Tester
Optimistic
Follows happy paths to catch broken links or 500 errors.
2
UX-Auditor
Obsessive
Inspects spacing, typography, and missing states.
3
Adversarial-Breaker
Hostile
Tries to bypass authentication and corrupt state.
4
Security-Auditor
Systematic
Measures OWASP compliance and session security.
5
Bug Explorer
Analytical
Traces reported bugs directly to the source code.
Practical Example: The Bug Explorer
Imagine a user reports that they cannot remove the last item from their shopping cart. Instead of a QA engineer spending an hour digging through the codebase, they can use the Bug Explorer skill.
The engineer simply types a command like /bug-explorer followed by the description. Claude then:
Analyzes the source code.
Identifies the root cause (e.g., a logic error in cartContext.js).
Suggests a specific code fix.
Allows the QA engineer to submit a Merge Request (MR) with the fix, rather than just a bug report.
To start using these Claude Skills for QA, you need to set up a specific project structure. This ensures the AI has the necessary context to be effective.
Step 1: The .claude Folder
At the root of your project, you must create a folder named .claude, with a subfolder called commands. This is where your custom skill markdown files (like api-test-generator.md) will live.
Step 2: The claude.md Project File
This is perhaps the most important file for a beginner to master. The claude.md file acts as the “heart” of your project context. It should be a concise markdown file (ideally under 30 lines) that tells Claude:
What testing frameworks you are using (e.g., Playwright + TypeScript).
Naming conventions for your test files.
Specific project patterns, such as authentication flows or shared fixtures.
Step 3: Installing Skills via CLI
Using a tool like the QASkills CLI, you can install these skills in seconds. For example, running npx @qaskills/cli add playwright-e2e automatically injects the necessary expertise into your agent.
npx @qaskills/cli add playwright-e2e
Limitations and the “Human-in-the-Loop”
While the Claude Skills list provided here is powerful, it is vital to remember that AI is an assistant, not a replacement for human judgment.
Key Risks to Monitor:
False Confidence: Claude’s output often looks perfect superficially but may miss subtle business logic or edge cases.
Test Debt: Over-reliance on AI can lead to hundreds of redundant, low-value tests that become a nightmare to maintain.
Context Gaps: If you don’t provide a high-quality claude.md or clear requirements, Claude may make incorrect assumptions about system dependencies.
Expert Advice: Always keep a “Human-in-the-Loop” (HITL). A senior QA engineer should always handle strategy, security-critical validations, and final release approvals.
Conclusion: Becoming a Pro-Automation Tester
The transition from manual tester to AI-powered automation expert is now faster than ever. By leveraging tools like Claude Code and the specialized Claude Skills for QA, you can automate the repetitive “boring parts” of testing like writing boilerplate code and focus on the complex scenarios that truly require human intelligence.
Whether you are using the $20/month pro plan or running free local models via Ollama, the secret to success lies in the skills you provide your agent. Start by installing the Playwright and API skills this week, and watch your productivity as a QA engineer reach new heights.
Frequently Asked Questions
Is Claude Code free for QA engineers?
While the official Claude Code agent requires a paid subscription ($20/month for Pro), there are free alternatives like Open Code or running local models (e.g., GPT-OSS 20B) via Ollama.
Can I create my own Claude skills?
Yes. A skill is essentially a well-optimized, large prompt stored in a markdown file. You can customize existing skills to match your team's specific coding standards and tech stack.
Does Claude work with legacy frameworks like Selenium?
Absolutely. While Playwright is popular, you can install or write skills for Selenium, Cypress, or Appium to give Claude the necessary expertise for those frameworks.
Why are Claude Skills important for automation testers?
Claude Skills help maintain consistency, improve code quality, reduce test maintenance, and ensure that AI-generated tests follow industry best practices and framework-specific standards.
Can beginners use Claude Skills for QA?
Yes. Claude Skills are designed to help both beginners and experienced testers by providing structured guidance, testing patterns, and automation best practices.
What is the purpose of the claude.md file?
The claude.md file provides project-specific instructions to Claude, including framework details, coding standards, naming conventions, and testing practices.
AI-powered software testing is evolving rapidly. QA teams are now using AI for automated test generation, self-healing scripts, intelligent debugging, CI/CD analysis, and autonomous testing workflows. While these innovations improve productivity, they also introduce a new engineering challenge that many organizations are still learning to manage: AI tokens.
Every interaction with an AI model consumes tokens. A token may be a word, part of a word, a punctuation mark, or even a fragment of code. At first glance, token usage may seem insignificant. However, in enterprise testing environments where AI tools continuously process logs, screenshots, repository files, browser traces, and conversations, token consumption can grow very quickly.
For example, a simple request like
Fix the failing checkout test.
can trigger an AI system to analyze thousands of lines of code, CI logs, framework instructions, stack traces, and previous debugging attempts before generating a response. The result is a workflow that may consume tens of thousands of tokens in a single debugging session.
This matters because token usage directly impacts the following:
AI infrastructure costs
Response speed
Workflow scalability
Automation efficiency
As AI adoption grows, token optimization is becoming just as important as test stability or automation coverage. Teams that manage AI Tokens efficiently can scale intelligent testing workflows without allowing operational costs to spiral out of control.
In this blog, we’ll explain what AI Tokens are, why they matter in software testing, and the practical strategies QA teams can use to reduce AI costs while maintaining high-quality automation workflows.
AI Tokens are the small units of data that AI models process when reading prompts or generating responses. Instead of reading text exactly as humans do, large language models break content into smaller chunks called tokens.
These tokens may include:
Full words
Partial words
Code snippets
Spaces
Symbols
Numbers
For QA teams, token usage becomes important because AI models rarely process only the visible prompt. They also consume supporting context such as logs, framework rules, repository files, screenshots, and generated outputs.
Consider the difference below:
Sno
Input Type
Approximate Token Usage
1
“Run login test”
Very low
2
Playwright test file
Medium
3
Full CI execution log
High
4
Entire repository scan
Extremely high
In AI-powered testing environments, context grows rapidly. The more information an AI system receives, the more tokens it consumes.
Why AI Tokens Matter in Software Testing
Software testing workflows are naturally data-heavy. Unlike simple chatbot interactions, QA automation often requires AI systems to understand large amounts of technical context before making decisions.
A modern AI testing workflow may involve:
Reading automation scripts
Inspecting stack traces
Analyzing screenshots
Reviewing browser traces
Understanding framework conventions
Comparing historical failures
Generating fixes
Each of these actions increases token consumption.
This becomes especially important for teams using:
AI-generated test cases
Autonomous debugging agents
Self-healing automation frameworks
Intelligent regression testing
AI-assisted root cause analysis
CI/CD failure analysis
Without optimization, token costs can increase rapidly across enterprise-scale testing pipelines.
At the same time, larger token usage often means slower response times. Long prompts require more processing, which can delay debugging and reduce overall testing efficiency.
That’s why AI Token optimization is not just a financial concern. It is also a performance and scalability concern.
How Token Costs Grow So Quickly
Many teams underestimate how fast token consumption increases during testing workflows.
Imagine a QA engineer asks an AI assistant:
Fix the failing checkout test.
Although the request is short, the AI system may process:
The failing Playwright script
Checkout page objects
Browser traces
CI logs
Framework instructions
Historical chat context
Screenshots
Repository structure
The original request may contain only a few tokens, but the actual workflow may involve thousands or even tens of thousands of tokens.
Now imagine the first fix fails and the engineer replies:
Try another solution.
The AI may reprocess much of the same context again. Over time, repeated retries create a token expansion loop where costs increase with every interaction.
This is one reason AI-assisted debugging can become expensive when workflows are not carefully structured.
The Hidden Token Problem in QA Automation
One of the biggest challenges in enterprise AI testing is hidden token usage. Many organizations focus only on prompt size while ignoring the additional context automatically included in workflows.
Common hidden token sources include:
Sno
Hidden Token Source
Why It Increases Cost
1
Long framework instructions
Repeated in every session
2
Large CI logs
Mostly irrelevant data
3
Repository-wide scans
Duplicate context
4
Browser traces
Very detailed payloads
5
Long conversations
Growing context memory
6
Verbose AI responses
Expensive output tokens
In many cases, QA teams spend more tokens processing unnecessary information than solving the actual testing issue.
For example, sharing a full CI log when only the final error matters can dramatically increase token usage without improving debugging accuracy.
AI Tokens and Agentic AI Testing
Agentic AI systems are becoming increasingly common in software testing. These systems can independently perform tasks such as:
Running tests
Inspecting failures
Reading files
Generating fixes
Re-running workflows
Validating outputs
While powerful, agentic workflows are highly token-intensive because they involve multiple sequential AI actions.
A typical AI debugging workflow may look like this:
Understand the issue
Scan the repository
Read test files
Analyze logs
Generate a fix
Re-run tests
Explain the outcome
Every step adds more token consumption.
Without proper limits, AI agents may read unnecessary files, generate oversized explanations, or repeatedly analyze the same context. This significantly increases operational cost.
The key is not reducing AI capability. The goal is reducing unnecessary AI processing.
Why Larger Context Windows Are Not Always Better
Modern AI models support very large context windows, which allows users to upload more information than ever before. While this sounds useful, larger context does not automatically improve results.
In fact, oversized prompts can create several problems:
Higher AI costs
Slower response times
Reduced focus on important details
Increased hallucination risk
Lower debugging precision
A focused prompt often performs better than uploading an entire repository.
For example, this approach is inefficient:
Analyze the entire automation framework.
A better approach is:
Analyze the failing checkout workflow and related Playwright files.
Smaller, more targeted prompts improve both accuracy and efficiency.
The best AI testing teams treat token optimization as an engineering discipline rather than an afterthought.
One effective strategy is the “Plan Big, Act Small” model. Use advanced reasoning models for architecture-level decisions while assigning smaller models to repetitive execution tasks.
S no
Task
Recommended Model Type
1
Test generation
Smaller model
2
Log summarization
Smaller model
3
Locator fixes
Medium model
4
Root cause analysis
Advanced reasoning model
5
Architecture reviews
Premium model
This approach reduces cost without sacrificing quality.
Another important practice is limiting unnecessary context. Instead of asking AI tools to scan entire repositories, provide specific file paths and clear instructions.
For example:
Use only checkout.spec.ts and CheckoutPage.ts.
This prevents the model from processing unrelated files.
Teams should also filter logs before sharing them with AI systems. Most CI logs contain thousands of irrelevant lines. Extracting only stack traces, failed assertions, and relevant errors dramatically reduces token usage.
Prompt engineering also plays a major role in optimization. Weak prompts usually create larger outputs and more retries.
Instead of saying:
Review everything related to testing.
Use:
Analyze the login Playwright test and identify the selector timeout issue.
The second prompt is smaller, clearer, and more efficient.
Semantic Caching: A Major Cost Saver
Semantic caching is one of the most effective strategies for reducing AI token costs in enterprise testing environments.
Instead of repeatedly sending similar requests to the AI model, semantic caching checks whether a comparable request has already been answered.
For example, developers may ask:
“Why is login failing in CI?”
“What caused the authentication regression?”
“Why does the auth workflow break?”
Although phrased differently, these questions may represent the same underlying issue.
A semantic cache can return an existing response instead of triggering a new AI request.
This creates several benefits:
Lower infrastructure costs
Faster response times
Reduced compute usage
More consistent troubleshooting guidance
For large QA organizations, semantic caching can significantly reduce repeated AI processing.
AI Tokens in CI/CD Pipelines
CI/CD systems are quickly becoming one of the largest consumers of AI Tokens.
Modern pipelines now use AI for:
Failure classification
Root cause analysis
Pull request reviews
Regression optimization
Release risk analysis
Automated debugging
The problem is that CI environments generate massive amounts of machine-readable data.
A single failed pipeline may include:
Build logs
Stack traces
Browser traces
Screenshots
Test reports
Git diffs
When multiplied across hundreds of daily builds, token usage increases rapidly.
Without optimization, AI-assisted CI workflows can become extremely expensive to maintain at scale.
Many teams assume more context always improves AI quality. In reality, overloaded prompts often increase hallucinations because the AI struggles to identify the most relevant information.
Large noisy prompts may cause the model to:
Reference outdated code
Suggest irrelevant fixes
Mix unrelated workflows
Miss the actual root cause
Smaller and cleaner prompts generally produce more reliable debugging results.
This is why token optimization often improves both cost efficiency and AI accuracy at the same time.
Practical Token-Saving Tips for QA Teams
1. Clear context between tasks
Use a new session when moving from one test failure to another.
2. Compact long sessions
Summarize only the decisions, files changed, and current blockers.
3. Limit global instructions
Keep files like CLAUDE.md short. Large instruction files are reloaded often and create recurring overhead.
4. Use path-scoped rules
Place framework-specific rules near the relevant folder.
5. Avoid broad repository scans
Say:
Read tests/checkout.spec.ts and pages/CheckoutPage.ts.
Do not say:
Read the whole repo.
6. Filter logs before sharing
Use CLI commands to extract only failing lines, stack traces, and relevant assertions.
7. Cap terminal output
Large logs can flood the context window.
8. Use cheaper models for routine work
Reserve expensive models for architecture, complex debugging, and high-risk changes.
9. Disable extended thinking for simple edits
Reasoning tokens can increase cost when the task does not require deep analysis.
10. Provide exact verification targets
Tell the model which test must pass and what output is expected.
Conclusion
AI Tokens are becoming one of the most important operational metrics in AI-powered software testing. As organizations adopt autonomous debugging systems, AI-generated tests, and intelligent CI/CD workflows, token consumption will continue to grow. The goal is not reducing AI adoption. The goal is building efficient AI systems that scale sustainably.
Teams that optimize prompts, reduce unnecessary context, implement semantic caching, and use the right AI models for the right tasks will gain a major competitive advantage. They will reduce infrastructure costs, improve debugging speed, and build more scalable automation pipelines.
In the near future, token efficiency may become just as important as test coverage, automation reliability, and pipeline stability. The QA teams that start optimizing AI Tokens today will be far better prepared for the next generation of intelligent software testing.
Frequently Asked Questions
What are AI Tokens?
AI Tokens are the units of data that AI models use to process information. A token can be a word, part of a word, a number, punctuation, or a piece of code. AI systems count tokens when reading inputs and generating responses, and most AI providers use token consumption to calculate usage costs.
What is the difference between Input Tokens and Output Tokens?
Input Tokens are the data sent to an AI model, such as prompts, test scripts, execution logs, source code, and documentation. Output Tokens are the responses generated by the AI model, including test cases, debugging suggestions, code fixes, and reports.
Both contribute to overall AI costs, making it important to optimize the information sent to the model as well as the responses generated.
Why are AI Tokens important in software testing?
AI-powered testing tools rely on tokens to analyze code, generate test cases, troubleshoot failures, and review CI/CD results. As testing workflows become more complex, token consumption increases. Understanding token usage helps QA teams manage costs, improve efficiency, and scale AI adoption more effectively.
How do AI Tokens affect AI costs?
Most AI providers charge based on the number of tokens processed during a request. The more context, logs, source code, or generated responses involved, the more tokens are consumed. Large testing workflows that repeatedly analyze extensive datasets can significantly increase AI spending if token usage is not optimized.
Why do CI/CD pipelines consume so many AI Tokens?
CI/CD pipelines generate large amounts of information, including build logs, stack traces, test reports, screenshots, and browser traces. When AI tools analyze this data for failure triage or root cause analysis, token consumption can increase rapidly, especially across hundreds of daily pipeline executions.
Git is powerful, but development teams often lose time on repetitive tasks like writing commit messages, reviewing diffs, creating pull requests, and checking CI logs. This is where Claude Code Git Integration helps. Claude Code can understand your repository, inspect changes, work with branches, suggest commit messages, resolve merge conflicts, and support pull request workflows. It does not replace Git. Instead, it works alongside your existing process of branches, commits, pull requests, reviews, CI checks, and human approvals. As a result, teams can reduce manual effort while keeping their workflow secure and reviewable. For QA engineers, automation testers, tech leads, and product teams, this means faster reviews, clearer documentation, fewer missed tests, and better release quality.
Claude Code Git integration refers to using Claude Code with Git and GitHub workflows so developers can ask Claude to understand repository context and perform or assist with common version control tasks.
In a terminal workflow, Claude Code can help with actions such as:
Reviewing uncommitted changes
Writing commit messages based on actual diffs
Creating feature branches
Helping resolve merge conflicts
Explaining why the code changed by looking at Git history
Drafting pull request descriptions
Generating release notes
Summarizing recent repository changes
In a GitHub workflow, Claude can also be connected to repositories for contextual support. Anthropic’s GitHub integration lets users add repositories from GitHub into Claude chats or projects, select files and folders, and sync selected project content when the repository changes.
However, it is important to separate two related ideas:
Area
What It Does
Best For
Claude Code in the terminal
Runs or assists with Git commands in your local development environment
Uses GitHub Actions so Claude can respond to issues or PR comments
Automated PR help, code review, CI debugging
Together, these workflows create a practical AI-assisted development system.
Why Teams Use Claude Code with Git
Git workflows involve many small but important steps. For example, before merging a feature, a developer may need to:
Create a feature branch
Make code changes
Review the diff
Run tests
Stage files
Write a clear commit message
Push the branch
Draft a pull request
Respond to review comments
Generate release notes later
Individually, these steps are manageable. Nevertheless, across a busy engineering team, they create constant context switching.
Claude Code helps by acting like a repository-aware assistant. Instead of asking a generic chatbot, “Write a commit message,” you can ask Claude to inspect the actual staged diff and create a message that describes what changed.
For example:
git add .
claude "write a commit message for my staged changes"
Claude can then produce a specific message such as:
feat(auth): replace sessions with JWT refresh tokens
This is much better than a vague commit like:
update files
As a result, your Git history becomes easier to read, debug, and audit.
Common Claude Code Git Integration Use Cases
1. Write Better Commit Messages Automatically
A strong commit message explains both what changed and, when useful, why it changed. Claude Code can inspect the staged diff and create a message that matches your team’s format.
For instance:
claude "write a commit message for my staged changes"
You can also guide it:
claude "write a conventional commit message for the staged changes"
If your team uses Conventional Commits, you can define that in CLAUDE.md:
## Git Conventions

- Use conventional commits: feat:, fix:, docs:, refactor:
- Keep subject lines under 72 characters
- Always run tests before committing
- Create feature branches for new work
This matters because Claude Code can follow project-level instructions when they are clearly documented. A third-party Claude Code guide also recommends using CLAUDE.md to define commit conventions rather than relying on fake configuration commands.
2. Review Your Diff Before Committing
Before committing, you can ask Claude to summarize your changes:
claude "review my changes before I commit"
This is useful because developers often miss small issues in their own diffs. Claude can point out:
Files changed
Risky logic changes
Missing tests
Formatting inconsistencies
Possible edge cases
Unrelated changes that should be separated
Therefore, Claude becomes a pre-review assistant. It does not replace peer review, but it can reduce the number of avoidable comments before your PR reaches another engineer.
3. Untangle Merge Conflicts
Merge conflicts can be frustrating, especially when both sides of the change look valid. Claude Code can help by reading both versions and suggesting a clean resolution.
Example prompt:
claude "there are merge conflicts in auth.js - resolve them keeping our new changes"
A Claude Code Git guide notes that Claude can help resolve conflicts by reading both versions and merging intelligently.
Still, developers should review every conflict resolution before committing. Merge conflicts often involve product intent, not just syntax. Therefore, Claude should assist, while humans approve.
4. Draft Pull Request Descriptions
Pull request descriptions are often rushed, yet they are essential for reviewers and QA teams. Claude Code can summarize the branch and create a PR description covering:
What changed
Why it changed
How to test it
Risk areas
Related tickets
Screenshots or logs needed
Example:
claude "write a pull request description for this branch"
This is especially useful for QA engineers because a better PR description makes test planning easier. In addition, product managers can understand the impact without reading every commit.
5. Understand Old Code Faster
Legacy code often contains decisions that are not obvious. Claude Code can inspect history and explain why a function changed.
Example:
claude "why does this function skip null values?"
A helpful answer may look like:
Commit from Aug 2024 added this after a bug report where null values
crashed the export pipeline.
This type of explanation helps new developers and testers understand intent faster. Consequently, onboarding becomes easier and fewer assumptions are made during refactoring.
6. Generate Release Notes
Once a branch or release is ready, Claude can summarize completed work:
claude "write release notes for everything in this branch."
Release notes are valuable for:
QA sign-off
Product updates
Customer-facing changelogs
Internal release communication
Support team readiness
Instead of manually reading every commit, teams can ask Claude for a first draft and then refine it.
Practical Walkthrough: Claude Code Git Integration in a Demo Repository
Here is a simple workflow based on the attached draft.
Step 1: Clone and Open the Repository
git clone https://github.com/yourteam/DemoRepo
cd demo-repo
claude
At this point, Claude Code can work in the repository context.
Step 2: Understand the Codebase
> what does this repo do and what are the recent changes?
Claude can inspect the project structure and summarize recent activity. This is a useful first step before making changes, especially in unfamiliar repositories.
Step 3: Create a Feature Branch
> create a branch for adding user preferences
A good branch name might be:
feature/user-preferences
This keeps work isolated and makes the pull request easier to review.
Step 4: Review the Diff Before Committing
> review my changes before I commit
Claude can summarize what changed and flag possible issues before you create a commit.
Step 5: Commit with a Generated Message
> stage and commit my changes
Claude can stage files and generate a commit message. However, teams should define rules for whether Claude is allowed to stage all files or only selected files.
Step 6: Write the Pull Request Description
> write a pull request description for this branch
A strong PR description should include:
Summary
Motivation
Testing notes
Screenshots, if applicable
Risk areas
Rollback notes, if needed
Step 7: Generate Release Notes
> write release notes for everything
Finally, Claude can convert commit history and branch changes into release notes for stakeholders.
Using Claude Code Inside GitHub Workflows
Beyond local terminal usage, some teams integrate Claude Code directly into GitHub Actions. In one shared workflow example, Claude responds when users mention @claude in issues, PR comments, PR review comments, new issues, or labeled issues.
This workflow can support tasks such as:
Implementing small features from issues
Fixing lint errors
Debugging CI failures
Reviewing pull requests
Creating commits
Opening PRs
For example:
@claude, please implement a new API endpoint for fetching user preferences.
Follow the existing patterns in the codebase.
In a well-configured setup, Claude can inspect similar code, implement the change, run tests, and prepare a PR. However, this should only happen with strict permissions and human review.
Recommended GitHub Workflow Structure
A practical setup uses two workflows.
Workflow 1: General-Purpose Assistant
This workflow can respond to issue or PR comments and perform approved actions.
It may be allowed to:
Read files
Edit files
Write files
Run tests
Run approved Git commands
Commit changes
Open pull requests
However, it should not have unlimited access. A Medium case study emphasizes allowing listing approved commands so Claude can only run tools that the team has explicitly permitted.
Workflow 2: Read-Only Code Reviewer
This workflow should be safer by design. It can review code but not modify it.
It may be allowed to:
Read files
Run git diff
Run git log
Run lint commands
Run test commands
Leave review feedback
It should not be allowed to:
Edit files
Write files
Push commits
Modify workflows
Change secrets
This separation is important because review automation and code-writing automation carry different levels of risk.
The Role of CLAUDE.md
CLAUDE.md is one of the most important parts of Claude Code Git Integration. Think of it as the project handbook Claude reads before helping.
A strong CLAUDE.md can include:
Architecture overview
Technology stack
Folder structure
Naming conventions
Testing rules
Git conventions
Pull request rules
Security restrictions
Commands Claude may run
Commands Claude must never run
For example:
## Code Change Workflow

1. Run formatter
2. Run linter
3. Run unit tests
4. Review git diff
5. Summarize risk areas
6. Only commit after explicit approval

## Restrictions

- Do not modify .env files
- Do not expose secrets
- Do not push directly to main
- Do not modify CI/CD workflows without approval
- Do not install new dependencies without approval
This improves consistency. In fact, the referenced implementation article states that the quality of Claude’s output is closely tied to the quality of project documentation in CLAUDE.md.
Security Best Practices for Claude Code Git Integration
Claude Code Git integration is powerful. Therefore, security must come first.
1. Start with Read-Only Access
Begin with a review-only workflow. This allows your team to evaluate Claude’s suggestions without giving it write access.
2. Use Explicit Tool Allowlisting
Only allow the commands Claude needs. For example:
Avoid broad access, such as unrestricted shell commands.
3. Protect Main Branches
Claude should never push directly to main or develop. Instead, require pull requests and human approval.
4. Keep Secrets Protected
Claude should not modify or print:
.env files
API keys
Tokens
CI secrets
Production credentials
5. Require Human Review
Claude can draft code, but humans should approve architecture, business logic, security-sensitive changes, and production releases.
6. Use Commit Signing and Attribution
Some workflows use signed commits for auditability. The Medium example references commit signing with use_commit_signing: true, which provides a clearer audit trail for AI-generated changes.
Benefits of Claude Code Git Integration
Benefit
How It Helps Teams
Faster commits
Claude writes meaningful messages from real diffs
Better PR descriptions
Reviewers and QA teams get a clearer context
Less context switching
Developers stay in the terminal or GitHub
Faster onboarding
New team members can ask repo-specific questions
Improved review quality
Claude can catch style, test, and consistency issues early
Easier release notes
Claude summarizes the branch or commit history
Safer workflows
Guardrails keep AI actions reviewable and controlled
Example: QA and Engineering Collaboration
Imagine a QA engineer finds that exported reports fail when a field contains null. The engineer creates a GitHub issue:
Export fails when customer_name is null. Expected behavior:
show an empty value instead of crashing.
Then a developer asks Claude:
@claude investigate this issue and suggest a fix. Follow existing export tests.
Claude can inspect the export pipeline, find similar null handling, propose a patch, and add a regression test. Afterward, the developer can ask:
Claude "Review the diff and write a PR description with testing notes."
The PR description may include:
Fixed null handling in the export pipeline
Added regression test for null customer names
Verified export test suite passes
QA should test CSV and XLSX export formats
As a result, QA receives clearer testing instructions, developers save time, and the final change is easier to review.
Conclusion
Claude Code Git Integration helps teams modernize their Git and GitHub workflows without abandoning proven engineering practices. It can write better commit messages, review diffs, explain old code, resolve merge conflicts, draft PR descriptions, generate release notes, and support GitHub-based automation.
However, the best results come from balance. Claude should not have unlimited control over your repository. Instead, teams should start with read-only workflows and define strong CLAUDE.md instructions, allowlist safe commands, protect important branches, and keep humans in the approval loop. Used correctly, Claude Code becomes a practical force multiplier for developers, QA engineers, automation testers, and tech leads.
Frequently Asked Questions
What is Claude Code Git Integration?
Claude Code Git Integration allows developers to use Claude Code alongside Git and GitHub workflows for tasks such as reviewing diffs, generating commit messages, creating pull request summaries, resolving merge conflicts, and understanding repository changes.
How does Claude Code work with GitHub?
Claude can connect to GitHub repositories and use selected files or folders as context. This helps it understand the codebase and provide more accurate suggestions for development, debugging, and review workflows.
Can Claude Code generate commit messages automatically?
Yes. Claude Code can inspect staged changes and generate meaningful commit messages based on the actual code diff. It can also follow formats like Conventional Commits.
Example:
claude "write a commit message for my staged changes"
Can Claude Code help with pull requests?
Yes. Claude Code can draft pull request descriptions, summarize changes, highlight testing requirements, and explain risk areas to improve collaboration between developers and QA teams.
Does Claude Code replace human code reviews?
No. Claude Code helps speed up reviews and catch common issues, but human reviewers should still approve architecture decisions, security-sensitive changes, and production-ready code.
Can Claude Code resolve merge conflicts?
Claude Code can analyze conflicting code changes and suggest possible resolutions. However, developers should always review the final merged result before committing.
Automation testing helps teams release faster, but unreliable test scripts can quickly reduce its effectiveness. When tests rely on fixed waits, weak assertions, or unstable selectors, they become difficult to trust and maintain. This is where Code Review with Claude Code becomes useful. Instead of relying only on manual reviews, teams can use AI-assisted analysis to identify issues early and improve test quality consistently. More importantly, Claude Code focuses on how tests behave, not just whether they run.
In this guide, you’ll learn how to use Code Review with Claude Code to improve automation testing quality, reduce flaky tests, and build a more reliable QA workflow.
Code Review with Claude Code is the process of using Claude Code to review and improve automation testing scripts. Rather than simply checking if tests execute successfully, it evaluates whether they are reliable, maintainable, and aligned with testing best practices.
For example, it can identify the following:
Flaky wait patterns
Weak or missing assertions
Hardcoded test data
Brittle selectors
Poor test structure
In practice, this means Claude Code acts as an AI-assisted reviewer that helps QA engineers improve test quality before issues reach production.
Why Code Review with Claude Code Matters in Automation Testing
Automation testing is only valuable when results are consistent and trustworthy. However, as test suites grow, maintaining that reliability becomes harder.
This is where Code Review with Claude Code adds practical value. Instead of depending entirely on manual reviews, which may vary in depth and consistency, Claude Code provides a structured way to analyze test scripts.
It helps teams catch issues earlier, maintain coding standards, and reduce long-term maintenance effort. As a result, automation testing becomes more dependable and easier to scale.
Where Code Review with Claude Code Adds the Most Value
Once Claude Code is integrated into your workflow, its real impact becomes visible during day-to-day code reviews. Instead of repeating general benefits, it focuses on specific issues that directly affect test reliability and maintainability.
1. Flaky Wait Detection
Fixed waits like sleep() or waitForTimeout() are one of the main causes of unstable tests. Claude Code identifies these patterns and suggests condition-based waits.
As a result, tests become more stable across environments, especially in CI/CD pipelines.
2. Assertion Quality Review
Some tests perform actions but fail to verify meaningful outcomes. Claude Code highlights these gaps and encourages stronger assertions.
Because of this, tests validate real user behavior instead of passing by accident.
3. Selector Stability Checks
Selectors tied to UI structure tend to break easily. Claude Code reviews locators and suggests more stable options such as data-testid, roles, or labels.
This improves test resilience even when the UI changes.
4. Test Data Cleanup
Hardcoded values like emails or URLs make tests harder to maintain. Claude Code detects these patterns and recommends using fixtures or configuration-based data.
Therefore, tests become easier to update and reuse.
5. Refactoring Opportunities
As test suites grow, duplication becomes common. Claude Code identifies repeated steps and suggests reusable patterns such as Page Object Model or helper functions.
This keeps test code clean and maintainable.
Why This Matters in Practice
Individually, these improvements may seem small. However, together they significantly reduce flaky failures, improve clarity, and make automation testing more reliable.
Instead of spending time debugging unstable tests, teams can focus on building better features.
Step-by-Step Tutorial: Using Claude Code for Automation Testing Code Review
Now, let’s walk through how to apply this in practice.
Step 1: Open Your Project
cd your-project
claude.
This allows Claude Code to analyze your test suite.
Step 2: Provide Context
Example prompt:
“This is a Playwright automation testing project. Review test files for flaky tests, weak assertions, and selector issues.”
Providing context improves the accuracy of suggestions.
Review this automation testing file for code quality, reliability, maintainability, and testing best practices. Highlight issues and suggest improvements with examples.
2
Flaky Test Detection
Identify flaky test patterns in this file, including fixed waits, timing issues, race conditions, and unstable dependencies. Suggest more reliable alternatives.
3
Assertion Review
Review all assertions in this test file. Identify missing, weak, or unclear assertions and suggest stronger validations that confirm real user outcomes.
4
Selector Strategy
Review the selectors used in this test file. Identify brittle CSS or XPath selectors and suggest more stable alternatives using data-testid, roles, labels, or accessible locators.
5
Test Data Review
Find hardcoded test data such as URLs, emails, credentials, product IDs, or payment details. Suggest how to move them into fixtures, config files, or environment variables.
6
Page Object Model Refactor
Review this test file and identify repeated steps that can be refactored using the Page Object Model. Suggest a cleaner structure with reusable page methods.
7
CI/CD Stability Review
Review this automation test for CI/CD stability. Identify issues that may cause failures in parallel execution, headless mode, slower environments, or shared test data.
8
Pull Request Review
Act as a senior QA automation reviewer. Review this pull request for flaky tests, missing assertions, selector stability, test isolation, and maintainability. Provide clear review comments.
9
Framework-Specific Review
This is a Playwright automation testing project. Review the test code using Playwright best practices, including locator strategy, auto-waiting, assertions, fixtures, and test isolation.
10
Security & Sensitive Data Check
Review this test code for sensitive data exposure. Identify hardcoded credentials, API keys, tokens, or personal data, and suggest safer alternatives.
Limitations of Claude Code
While Claude Code is powerful, it still needs human oversight. It may miss business-specific logic or suggest changes that don’t fully match your framework. Additionally, its output depends on the context you provide. Therefore, use it as a smart assistant, not a replacement for QA expertise.
Conclusion
Code Review with Claude Code helps automation testing teams improve test quality before issues reach the pipeline. Detecting weak assertions, flaky waits, brittle selectors, and hardcoded data early, it makes test suites more reliable and easier to maintain. However, it works best when combined with human QA expertise. Ultimately, it helps teams move from reactive debugging to proactive quality improvement so they can ship faster with greater confidence.
Improve test stability and reduce maintenance effort.
Code Review with Claude Code is an AI-assisted process for reviewing automation testing scripts. It helps identify flaky waits, weak assertions, brittle selectors, hardcoded data, and maintainability issues.
Can Claude Code replace manual code reviews?
No. Claude Code should support manual reviews, not replace them. QA engineers still need to validate business logic, edge cases, and final implementation decisions.
Is Claude Code useful for Playwright and Selenium tests?
Yes. Claude Code can help review Playwright, Selenium, Cypress, and other automation testing scripts when you provide framework-specific context.
How does Claude Code help in automation testing?
Claude Code helps automation testing teams improve test quality by reviewing scripts for reliability, selector stability, assertion strength, test data usage, and reusable code patterns.
Can Claude Code reduce flaky tests?
Yes. Claude Code can detect common causes of flaky tests, such as fixed waits, timing issues, unstable selectors, and test dependency problems, then suggest more reliable alternatives.