Playwright is an incredibly popular and powerful tool for end-to-end automation testing of modern web applications. It offers great advantages such as faster execution speed, great documentation, and a slew of built-in features for reporting, debugging, parallel execution, and so on. If you are thinking about building your test automation framework with Playwright or migrating from a different tool, our comprehensive Playwright Cheatsheet will help you get started with the tool quickly. As an experienced automation testing service provider, we have used Playwright in our projects for different needs and we have covered some of Playwright’s most unique and advanced methods, designed to make your testing and automation processes more efficient and effective.
Playwright Cheatsheet
We have structured our Playwright Cheatsheet in a way that it is easy for both beginners to learn and experts to quickly refer to some important snippets they might be looking for.
First up in our Playwright Cheatsheet, we’re going to start with the basics to see how to launch a browser instance in regular mode, incognito mode, and so on.
1. Launching a Browser Instance
chromium.launch(): Initiates a new instance of the Chromium browser.
browser.newContext(): Establishes a fresh browser context, which represents an incognito mode profile.
context.newPage(): Generates a new browser tab (page) within the context for interaction.
// Step 1: Initiate a new instance of the Chromium browser
  const browser = await chromium.launch({ headless: false });
  // Step 2: Establish a fresh browser context
  const context = await browser.newContext();
  // Step 3: Generate a new browser tab within the context
  const page = await context.newPage();
2. Creating a Persistent Context
You can use persistent contexts to maintain session continuity and reuse authentication states across tests. It allows for testing scenarios where user sessions need to be preserved.
// Launch a persistent context using the specified user data dir
const context = await chromium.launchPersistentContext(userDataDir, {headless: false });
Selectors & Mouse Interactions
Once the browser instance has been launched, the next steps in the automation will involve keyboard and mouse interactions which we will be seeing now in our Playwright Cheatsheet.
1. Using Selectors for Element Interaction
page.goto(): Directs the browser tab to a specified URL.
page.click(): Locates and triggers a button with the identifier Example: ‘submit’.
page.fill(): Finds an input field with the name ‘username’ and inputs the value.
page.selectOption(): Identifies a dropdown menu and chooses the option.
Checkboxes and Radio Buttons: Easily toggle checkboxes and radio buttons using locator.setChecked() in Playwright. This method simplifies the process of both selecting and deselecting options.
// Step 3: Locate a checkbox using its label
const checkbox = page.getByLabel('Terms and Conditions');
// Ensure the checkbox is checked
await checkbox.setChecked(true);
// Step 4: Assert that the checkbox is checked
await expect(checkbox).toBeChecked();
type() : The type method in Playwright is used to simulate keyboard input into a text input field, text area, or any other element that accepts text input.
await page.getByPlaceholder('Enter your name').type('John Doe');
press(): The press method in Playwright is used to simulate pressing a key on the keyboard. This method allows you to automate keyboard interactions with web pages.
await page.keyboard.press("Enter");
title(): The title method in Playwright is used to retrieve the title of the current web page. You can use this method to extract the title of the web page you are interacting with during your automation or testing scripts.
const pageTitle = await page.title();
console.log(`page title is : ${pageTitle});
check(): The check method in Playwright is used to interact with checkboxes and radio buttons on a web page.
await page.check('input#myCheckbox');
               Or
await page.locator('input#myCheckbox').check();
unCheck(): The uncheck method in Playwright is used to uncheck (deselect) checkboxes or radio buttons on a web page.
await page.uncheck('input#myCheckbox');
                Or
await page.locator('input#myCheckbox').uncheck();
focus(): This method can be particularly useful when you want to simulate user interactions like keyboard input or navigating through a web application using keyboard shortcuts.
await page.locator('input#username').focus();
hover(): The hover method in Playwright is used to simulate a mouse hover action over a web page element. When you hover over an element, it can trigger various interactions or reveal hidden content.
await page.locator('button#myButton').hover();
                or
await page.hover('button#myButton');
textContent(): Although the textContent method is not a built-in method in Playwright, it is a standard JavaScript method used to retrieve the text content of a DOM element.
allTextContents(): In Playwright, the allTextContent method is used to find array of multiple elements in the DOM. which returns an array of textContent values for all matching nodes.
const element = page.locator('div#Element');
const textContents = await element.allTextContents();
console.log(`All Text Contents : ${textContents}`);
inputValue(): The inputValue method in Playwright is used to retrieve the current value of an input element, such as a text input, textarea, or password field.
 // Using inputValue to retrieve the current value of the input field
 const inputValue = await page.inputValue('input#username');
 console.log('Current input value:', inputValue);
close(): The close method is the last selector we’re going to see in our Playwright cheatsheet and it is used to close a browser, browser context, or page. You can use this method to gracefully shut down browser instances or specific pages. Here’s how you can use the close method in Playwright.
 // Close the page when done
     await page.close();
 // Close the browser context
      await context.close();
 // Close the browser instance
      await browser.close();
2. Mouse Interactions
Clicks and Double Clicks: Playwright can simulate both single clicks and double clicks on elements.
 // Single click
await page.click('selector');
// Double click
await page.dblclick('selector');
Hover and Tooltips: You can use Playwright to hover over elements and reveal tooltips or activate dropdown menus.
await page.hover('selector');
const tooltip = await page.waitForSelector('tooltip-selector');
const tooltipText = await tooltip.innerText(); // Get text from the tooltip
console.log(tooltipText);
Drag and Drop: Here are the Playwright techniques for simulating drag-and-drop interactions between elements on a webpage.
// Locate the source and target elements
const source = await page.$('source-selector');
const target = await page.$('target-selector');
// Perform drag-and-drop
await source.dragAndDrop(target);
move(): mouse.move(x, y) in Playwright is used to move the mouse to a specific position on the page. This can be useful for simulating mouse movements during automated testing. The x and y parameters represent the coordinates where you want the mouse to move, with (0, 0) being the top-left corner of the page.
await page.mouse.move(100, 100);
dragTo(): This method is useful for automating drag-and-drop interactions in your web application. Let’s see how to use the dragTo() method with a sample snippet in our Playwright cheatsheet.
//Locate the source and target elements you want to drag & drop
const sourceElement = await page.locator('source-element-selector')
const targetElement = await page.locator('target-element-selector')
// Perform the drag-and-drop action
await sourceElement.dragTo(targetElement)
Pressing and Releasing Mouse Buttons: In Playwright, you can simulate pressing and releasing mouse buttons using the mouse.down() and mouse.up() methods.
const myElement = page.locator('.my-element')
await myElement.mouse.down()  // Press the left mouse button
await myElement.mouse.up()   // Release the left mouse button
Context Menu: See how Playwright interacts with context menus by right-clicking elements and selecting options.
// Right-click on an element to open the context menu
await page.click('element-selector', { button: 'right' });
// Wait for the context menu to appear
await page.waitForSelector('context-menu-selector', { state: 'visible' });
// Click on an option within the context menu
await page.click('context-menu-option-selector');
Scrolling: Discover how to simulate scrolling actions in Playwright using mouse interactions. Demonstrate scrolling through a long webpage to ensure all content loads correctly or to capture elements that only appear when scrolled into view.
// Click on an option within the context menu
await page.click('context-menu-option-selector');
await page.evaluate((x, y) => { window.scrollBy(x, y); });
Note: Use stable selectors like IDs or data attributes to ensure robust tests; validate mouse interactions by asserting resulting UI changes.
Locators
As we all know, a locator is a tool for locating elements on a webpage and Playwright has a lot of available locators. Now in our Playwright cheatsheet, we’re going to see the several available methods for finding elements, and the chosen parameters are sent to the methods for finding elements.
1. getByRole(): getByRole is used to query and retrieve elements on a web page based on their accessibility roles, such as “button,” “link,” “textbox,” “menu,” and so on. This is particularly useful for writing tests that focus on the accessibility and user experience of a web application.
// Click on an option within the context menu
await page.getByRole('textbox', {name:'Username'}).fill(‘vijay’);
2. getByText(): Although getByText() is not a built-in method in Playwright, it is a method that is often used in testing libraries like Testing Library (e.g., React Testing Library or DOM Testing Library) to query and interact with elements based on their text content.
await page.getByText('Forgot your password? ').click();
3. getByPlaceholder(): The getByPlaceholderText method is used to select a DOM element based on its placeholder attribute in an input element.
4. getByAltText(): getByAltText() is not a method associated with Playwright; it’s actually a method commonly used in testing libraries like React Testing Library and Testing Library (for various JavaScript frameworks) to select an element by its alt attribute. If you are writing tests using one of these testing libraries, here’s how you can use getByAltText().
5. getByTitle() :getByTitle() method in Playwright is for interacting with an HTML element that has a specific title attribute.If you are writing tests using one of the testing libraries mentioned above, here’s how you can use it
await page.getByTitle('Become a Seller').click();
File and Frame Handling
As we have seen how to launch the browser instance, use selectors, and handle mouse interactions in our Playwright cheatsheet, the next step would be to see how we can handle files, frames, and windows. Let’s start with files and frames now.
1. Handling File Uploads
Easily handle file uploads during testing to ensure the functionality works as expected in your application by referring to the below code.
 // Navigate to the page with the file upload form
await page.goto('your-page-url');
// Trigger the file input dialog
const [fileChooser] = await Promise.all([page.waitForEvent('filechooser'),
page.click('button-to-trigger-file chooser')]);
// Set the files to upload
await fileChooser.setFiles('path/to/your/file.txt');
2. Interacting with Frames
Playwright allows you to interact with frames on a web page using methods like frame(), frames(), and waitForLoadState(). Here’s how you can do it.
Use the frame() method to access a specific frame by its name, URL, or element handle.
Get Frame using Name FrameSelector :
const allFrames = page.frames();
Get Frame using Name Option :
const myFrame = page.frame({name: "frame1"});
              or
const myFrame = page.frame("frame1");
Navigate within a specific frame using the goto() method.
await frame.goto('https://codoid.com');
Go back and forward within a frame using the goBack() and goForward() methods
await frame.goBack();
await frame.goForward();
Wait for a frame to load or reach a specific load state using the waitForLoadState() method.
await frame.waitForLoadState('domcontentloaded');
Best Practices:
Automate file uploads and downloads to streamline file-related workflows. You can switch between frames using IDs or names for seamless interaction.
Windows Handling
Windows handling is an important aspect of web automation and testing, especially when dealing with scenarios where you need to interact with multiple browser windows or tabs. And that is why we have covered it in our Playwright Cheatsheet.
Playwright provides methods for handling multiple browser windows and tabs within a single browser instance. Here’s how you can work with windows handling in Playwright.
Close a specific window/tab when you are done with it:
await secondPage.close();
Best Practices:
Manage multiple windows or tabs by tracking handles and switching context as necessary. Make sure to close windows or tabs after tests to maintain a clean testing environment.
Special Capabilities
As stated earlier in our Playwright Cheatsheet, we have also covered advanced interactions in addition to the basic commands. The first of the many advanced interactions we’re going to see special capabilities such as device emulation and record and playback capabilities.
1. Emulating Devices:
You can emulate a device for responsive testing to ensure your app looks good on various devices. This is crucial for testing mobile responsiveness and user experience.
 const { devices, chromium } = require('playwright');
// Define the device you want to emulate
const iPhone = devices['iPhone 11'];
// Launch a browser and create a new context with device emulation
const browser = await chromium.launch();
const context = await browser.newContext({...iPhone,});
2. Recording and Replaying Actions
You can automatically generate Playwright scripts with ease by recording your actions within a browser. This speeds up the creation of test scripts by capturing real user interactions.
npx playwright codegen
Network Interception and Manipulation
Testing is not just about validating the results with happy paths as users might face numerous challenges in real-world scenarios. One of the common challenges can be with the network and we can manipulate it based on our testing needs. Let’s see how in our Playwright Cheatsheet.
1. Mocking Responses
Intercept and mock network responses to evaluate your app’s handling of different API responses. This is useful for testing error scenarios and verifying API integrations.
// Intercept requests to a specific URL
 await page.route('**/api/data', async (route) => {
// Respond with custom data
  await route.fulfill({
  contentType: 'application/json',
  body: JSON.stringify({ key: 'mockedValue' }) }); });
2. Simulating Offline Mode
Test how your application behaves when offline by simulating network disconnections. This ensures that your app handles offline scenarios seamlessly.
  // Set the page to offline mode
  await page.setOffline(true);
  // Navigate to a page and perform actions
  await page.goto('https://example.com');
  // Restore network connection (optional)
  await page.setOffline(false);
Screenshots and Visual Comparisons
Screenshots play a vital role in terms of reporting and with Playwright, you have the provision of capturing full-page screenshots and also screenshots of a particular element if required.
1. Screenshots
Capturing a Full-Page Screenshot
You can take a screenshot of the entire page to visually verify the UI. This is beneficial for visual regression testing to identify unexpected changes.
 // Take a full-page screenshot
await page.screenshot({ path: 'fullpage-screenshot.png', fullPage: true});
There is also a provision to capture a screenshot of a specific element to focus on individual UI components. It helps in verifying the appearance of particular elements.
// Locate the element
 const element = await page.$('selector-for-element');
 if (element) {
// Take a screenshot of the element
 await element.screenshot({ path: 'element-screenshot.png' });
 console.log('Element screenshot taken'); }
Debugging and Tracing
The next set of advanced interactions we’re going to see in our Playwright cheatsheet is the debugging and tracing features that enable easier debugging and failure analysis/
Enabling Debug Mode(SlowMo)
Using Playwright, you can execute tests in a visible browser with slow motion enabled for easier debugging. This helps you see what’s happening in real time and diagnose the issues.
// Launch the browser with slowMo
  const browser = await chromium.launch({
    headless: false, // Run in headful mode to see the browser
    slowMo: 1000 // Slow down actions by 1000 milliseconds (1 second)
  });
Capturing Traces
You can capture detailed traces to analyze test failures and performance issues. This offers insights into test execution for debugging purposes.
  // Start tracing
  await context.tracing.start({ screenshots: true, snapshots: true });
const page = await context.newPage();
await page.goto('https://example.com');
// Perform actions
 await page.click('selector-for-button');
 await page.fill('selector-for-input', 'some text');
// Stop tracing and save it to a file
 await context.tracing.stop({ path: 'trace.zip' });
Best Practices:
You can also use console logs and debug statements within tests to troubleshoot issues and enable tracing to capture detailed logs for performance analysis.
Additional Methods
In the final section of our Playwright cheatsheet, we are going to see a few additional methods such as retrying actions, using locator assertions, and forcing colors mode.
Retrying Actions
Retrying actions addresses intermittent issues by repeatedly attempting a failed action until it either succeeds or the maximum number of retries is exhausted.
 const retryDelay = 1000; const maxRetries = 3; // 1 second delay between retries
 await new Promise(resolve => setTimeout(resolve, retryDelay)); // Delay before retrying
Using Locator Assertions
You can add assertions to ensure elements are visible, improving test reliability. This verifies that critical elements are present on the page.
 // Check if the element is visible
await expect(page.locator('selector-for-element')).toBeVisible();
There is even an option to simulate the high contrast mode for accessibility testing, ensuring usability for all users. This is crucial for testing the accessibility features of your application.
// Force dark color scheme
await page.emulateMedia({ forcedColors: 'dark' });
await browser.close(); })();
Conclusion
Playwright offers an extensive set of features that go beyond basic browser automation. Whether you’re testing complex user interactions, simulating various devices and network conditions, or capturing detailed traces for debugging, Playwright equips you with the tools you need to create reliable and efficient tests. We hope our Playwright cheatsheet will be helpful for you to use all these features with ease.
Playwright is a popular test automation tool that offers a lot of reporting options for its users such as built-in reporters, custom reporters, and support for integrating third-party reporters. The Playwright’s default in-built reporter is the list reporter. However, when running tests via the CI tool, Playwright will switch to the Dot reporter by default. There is also a good reason why the Dot Reporter is chosen as the default Playwright Reporting option during execution in Continuous Integration tools. We have even made a YouTube video explaining it and recommend you check it out.
Like any tool or feature, there will always be a few drawbacks. Based on our experience of working with Playwright while delivering automation testing services to our clients, we were able to overcome these drawbacks with a few workarounds. So in this blog, we will be sharing how you can customize the Dot reporter to address these drawbacks and enhance your Playwright reporting. But before that, let’s take a look at what the disadvantages are.
Disadvantages of Dot Reporter:
During the execution process, the Dot Reporter will not display the number of tests completed. So you’ll have to manually count if you want to get the total number of tests executed.
In the event of a failure, an ‘F’ will appear in red. But the issue is that it will not indicate which specific test has failed during execution.
Customization of Dot Reporter:
As stated earlier, Playwright reporting has built-in options and customizing capabilities as well. So, let’s delve into the customization aspect to address the disadvantages of Dot Reporter. If you prefer to watch the entire step-by-step tutorial as a video, you can check out our video covering the same. Or you can prefer to continue reading as well.
Step 1: Creating Reporter Listener Class
Create a folder by the name ‘utils’ inside your project directory.
Create a TypeScript file using the name ‘CustomReporter’ with the below code
import type {Reporter, FullConfig, Suite, TestCase, TestResult, FullResult} from '@playwright/test/reporter';
class CustomReporter implements Reporter {
 }
export default CustomReporter;
Step 2: Configure Reporter Listener in Playwright Config file
Open the playwright.config.ts file
Add the reporter listener file that you created in Step 1 in the Playwright config file
import { defineConfig, devices } from '@playwright/test';

export default defineConfig({
 testDir: './tests',
 /* Run tests in files in parallel */
 fullyParallel: true,
 /* Fail the build on CI if you accidentally left test.only in the source code. */
 forbidOnly: !!process.env.CI,
 /* Retry on CI only */
 retries: process.env.CI ? 2 : 0,
 /* Opt out of parallel tests on CI. */
 workers: process.env.CI ? 1 : undefined,
 /* Reporter to use. See https://playwright.dev/docs/test-reporters */
 reporter: './utils/CustomReporter.ts',
 /* Shared settings for all the projects below. See https://playwright.dev/docs/api/class-testoptions. */
 use: {
   /* Base URL to use in actions like `await page.goto('/')`. */
   // baseURL: 'http://127.0.0.1:3000',

   /* Collect trace when retrying the failed test. See https://playwright.dev/docs/trace-viewer */
   trace: 'on-first-retry',
 },

 /* Configure projects for major browsers */
 projects: [
   {
     name: 'chromium',
     use: { ...devices['Desktop Chrome'] },
   },
{
     name: 'firefox',
     use: { ...devices['Desktop Firefox'] },
   },
{
     name: 'webkit',
     use: { ...devices['Desktop Safari'] },
   },
 ],

});
Step 3: Declare & Initialize Properties
In the CustomReporter class, add three class properties
totalTests-To hold total tests in the test suite.
totalTestsExecuted-To count the number of tests that have been executed in the current execution.
noOfTestsPerLine-To count the number of test statuses or results to be shown in a line.
Initialize the properties in the constructor
class CustomReporter implements Reporter {
   totalTests: number;
   noOfTestsPerLine: number
   totalTestsExecuted: number

   constructor() {
      this.totalTests=0
      this.noOfTestsPerLine=0
      this.totalTestsExecuted=0
   }
}
Step 4: Add the onBegin method
Add the onBegin method.
Save the total tests to be executed in the totalTests variable.
class CustomReporter implements Reporter {
   totalTests: number;
   noOfTestsPerLine: number
   totalTestsExecuted: number

   constructor() {
       this.totalTests=0
       this.noOfTestsPerLine=0
       this.totalTestsExecuted=0
   }
 onBegin(config: FullConfig, suite: Suite) {
       this.totalTests = suite.allTests().length;
       console.log(`Executing ${this.totalTests} test(s)`);
   }

}
Step 5: Add the printTotalExecuted method
This method will be called to print how many tests have been executed against the total tests.
It is possible to print the skipped status in ANSI Yello color. You can also use different color codes based on your preference. You can check the available color codes here .
onTestEnd(test: TestCase, result: TestResult) {
   if (this.noOfTestsPerLine==50){
       this.printTotalExecuted()
   }

   ++this.totalTestsExecuted
   ++this.noOfTestsPerLine

   //Printing Skipped Status in ANSI yellow
   if (result.status === 'skipped') {
       process.stdout.write('\x1b[33m°\x1b[39m');
       return;
   }
}
Step 10: Printing Retry Status
If a test has Timed out or Failed and Playwright does know what status needs to be marked, then the test will be marked for Retry.
Since the test will be rerun, we need to decrease the totalTestsExecuted variable to ensure accuracy.
onTestEnd(test: TestCase, result: TestResult) {
   if (this.noOfTestsPerLine==50){
       this.printTotalExecuted()
   }

   ++this.totalTestsExecuted
   ++this.noOfTestsPerLine

   //Printing Skipped Status in ANSI yellow
   if (result.status === 'skipped') {
       process.stdout.write('\x1b[33m°\x1b[39m');
       return;
   }

   //Printing the test that marked for retry
   if (test.outcome() === 'unexpected' && result.retry < test.retries) {
       process.stdout.write(`\x1b[33mx\x1b[39m`);
       --this.totalTestsExecuted;
       return;
   }
}
Step 11: Printing Failure Status & Test Title
Concatenating test title with failure status.
After printing the status & title, call the printTotalExecuted method to print Total Tests Executed and Total Tests in the Test Suite.
onTestEnd(test: TestCase, result: TestResult) {
   if (this.noOfTestsPerLine==50){
       this.printTotalExecuted()
   }

   ++this.totalTestsExecuted
   ++this.noOfTestsPerLine

   //Printing Skipped Status in ANSI yellow
   if (result.status === 'skipped') {
       process.stdout.write('\x1b[33m°\x1b[39m');
       return;
   }

   //Printing the test that marked for retry
   if (test.outcome() === 'unexpected' && result.retry < test.retries) {
       process.stdout.write(`\x1b[33mx\x1b[39m`);
       --this.totalTestsExecuted;
       return;
   }

   //Printing failure status and test name
   if (test.outcome() === 'unexpected' && result.status === 'failed') {
       process.stdout.write('\x1b[31m'+"F("+test.title+")"+'\x1b[39m');
       this.printTotalExecuted()
       return;
   }

}
Step 12: Other Statuses (Flaky, TimedOut, & Passed)
onTestEnd(test: TestCase, result: TestResult) {
   if (this.noOfTestsPerLine==50){
       this.printTotalExecuted()
   }

   ++this.totalTestsExecuted
   ++this.noOfTestsPerLine

   //Printing Skipped Status in ANSI yellow
   if (result.status === 'skipped') {
       process.stdout.write('\x1b[33m°\x1b[39m');
       return;
   }

   //Printing the test that marked for retry
   if (test.outcome() === 'unexpected' && result.retry < test.retries) {
       process.stdout.write(`\x1b[33mx\x1b[39m`);
       --this.totalTestsExecuted;
       return;
   }

   //Printing failure status and test name
   if (test.outcome() === 'unexpected' && result.status === 'failed') {
       process.stdout.write('\x1b[31m'+"F("+test.title+")"+'\x1b[39m');
       this.printTotalExecuted()
       return;
   }

   if (test.outcome() === 'unexpected' && result.status === 'timedOut') {
       process.stdout.write('\x1b[31mT\x1b[39m');
       return;
   }

   if (test.outcome() === 'expected' && result.status === 'passed') {
       process.stdout.write('\x1b[32m.\x1b[39m');
       return;
   }

   if (test.outcome() === 'flaky') {
       process.stdout.write('\x1b[33m±\x1b[39m');
       return;
   }

}
Step 13: Finally, Add onEnd Method
Print total tests executed just in case it is missed before the end of the execution.
Print the status of the entire execution.
onEnd(result: FullResult) {
   if (this.noOfTestsPerLine !== 0) this.printTotalExecuted();
   console.log(`\nFinished the run: ${result.status}`);
}
Full Code:
import { FullConfig } from '@playwright/test';
import { FullResult, Reporter, Suite, TestCase, TestResult } from '@playwright/test/reporter';

class CustomReporter implements Reporter {
   totalTests: number;
   noOfTestsPerLine: number
   totalTestsExecuted: number

   constructor() {
       this.totalTests=0
       this.noOfTestsPerLine=0
       this.totalTestsExecuted=0
   }

   onBegin(config: FullConfig, suite: Suite) {
       this.totalTests = suite.allTests().length;
       console.log(`Executing ${this.totalTests} test(s)`);
   }

   printTotalExecuted(){
       process.stdout.write(`[${this.totalTestsExecuted}/${this.totalTests}]\n`);
       this.noOfTestsPerLine=0
   }

   onTestEnd(test: TestCase, result: TestResult) {
       if (this.noOfTestsPerLine==50){
           this.printTotalExecuted()
       }

       ++this.totalTestsExecuted
       ++this.noOfTestsPerLine

       //Printing Skipped Status in ANSI yellow
       if (result.status === 'skipped') {
           process.stdout.write('\x1b[33m°\x1b[39m');
           return;
       }

       //Printing the test that marked for retry
       if (test.outcome() === 'unexpected' && result.retry < test.retries) {
           process.stdout.write(`\x1b[33mx\x1b[39m`);
           --this.totalTestsExecuted;
           return;
       }

       //Printing failure status and test name
       if (test.outcome() === 'unexpected' && result.status === 'failed') {
           process.stdout.write('\x1b[31m'+"F("+test.title+")"+'\x1b[39m');
           this.printTotalExecuted()
           return;
       }

       if (test.outcome() === 'unexpected' && result.status === 'timedOut') {
           process.stdout.write('\x1b[31mT\x1b[39m');
           return;
       }

       if (test.outcome() === 'expected' && result.status === 'passed') {
           process.stdout.write('\x1b[32m.\x1b[39m');
           return;
       }

       if (test.outcome() === 'flaky') {
           process.stdout.write('\x1b[33m±\x1b[39m');
           return;
       }

   }

   onEnd(result: FullResult) {
       if (this.noOfTestsPerLine !== 0) this.printTotalExecuted();
       console.log(`\nFinished the run: ${result.status}`);
   }
}
export default CustomReporter;
Conclusion:
In this blog, we have shown how to overcome the Playwright reporting issues usually seen with the Dot Reporter. In addition, you can use the onEnd method to print a summary of the entire execution, including Total Passed, Total Failed, Total Skipped, and Total Flaky.
The customization of Playwright Dot Reporter is a valuable tool for developers and testers looking to enhance their automated testing processes. Through the use of custom reporters, users have the ability to tailor their test reports to fit their specific needs and preferences.
One of the main benefits of using custom reporters is the flexibility it offers. With Playwright Dot Reporter, users can choose which information they want to include in their reports and how they want it displayed. This allows for more targeted and organized reporting, making it easier to interpret test results and identify any issues that may arise.
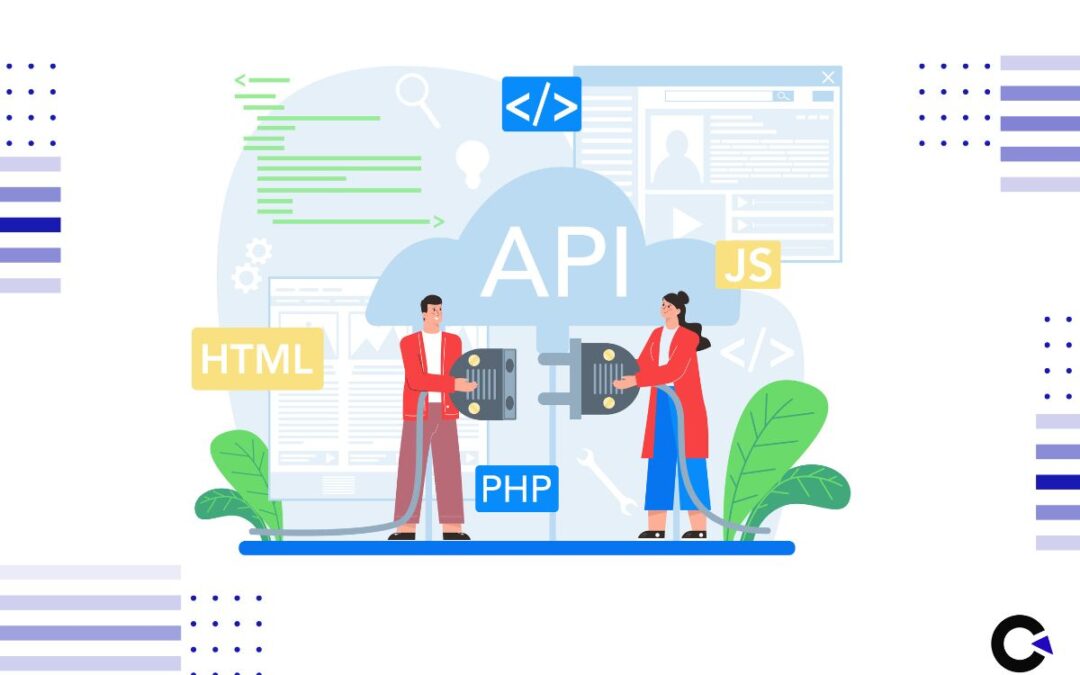
API testing is a critical aspect of software testing as APIs serve as the communication channels between different software components, allowing them to interact and exchange data. API testing not only involves validating the functionality, but also the performance, security, and reliability of APIs to ensure they meet the intended requirements and perform as expected. Ensuring that you’ve got complete coverage can be a challenge and that is why we have prepared this comprehensive API Testing Checklist based on our experience in delivering software testing services to our clients. Before we head to the checklist, let’s understand the criticality of API testing and the prerequisites you’ll need to follow the checks as well.
What Makes API Testing Crucial?
Although we gave you a brief overview of the API testing’s importance in the introduction, it would be better if you understand it in detail to ensure you can modify our API Testing checklist as per your varying requirements.
Functionality Validation:
API testing ensures that APIs function correctly and perform the intended operations. It verifies that the API endpoints return the expected responses, handle different scenarios, and adhere to the defined specifications and requirements.
Integration Testing:
APIs serve as the interfaces between different software components. API testing helps validate the integration of these components, ensuring smooth communication and data exchange between them. It helps identify any issues or inconsistencies in the integration process.
Performance and Scalability:
APIs often handle a significant volume of requests and need to perform efficiently and scale seamlessly. So you’ll have to assess the API’s response time, addition, and resource utilization under different payload conditions. It helps identify bottlenecks, optimize performance, and ensure scalability.
Security and Reliability:
APIs are also potential entry points for security vulnerabilities and attacks. That is why it is critical to maintain their security by identifying vulnerabilities like injection attacks, cross-site scripting (XSS), and authentication/authorization flaws. It helps ensure that APIs are secure, protect sensitive data, and follow industry best practices.
Version Compatibility:
APIs evolve in time with new versions introducing changes and improvements. So it is important to validate the compatibility between different API versions and ensures backward compatibility. It ensures that existing integrations and applications continue to function correctly when API versions are updated.
Error Handling and Exception Management:
APIs should handle errors and exceptions gracefully, returning meaningful error messages and appropriate status codes. API testing verifies that error handling mechanisms are in place and that the API responds appropriately to different error scenarios.
Pre-requisites for API Testing
Even with the API testing checklist in hand, you will not be able to perform the testing directly as there are a few prerequisites that have to be done from your end. So let’s see what those prerequisites are,
Understanding API Documentation:
Familiarize yourself with the API documentation available such as Swagger to understand the details about endpoints, parameters, expected responses, etc. This will play a crucial role in making changes to our API Testing checklist to align with your needs.
Setting Up the Test Environment:
Next up, you’ll need to ensure you have the test environment to do the tests. If a test environment isn’t available, make sure to set it up or reach out to the concerned team to get it done.
Identifying Test Data:
The next part is having test data to cover valid and invalid scenarios, edge cases, and boundary values. Establish a systematic approach for efficient test data management, encompassing the storage and organization of test data sets for reuse and maintenance.
Test Automation:
Test the APIs manually to conduct exploratory and feature testing. But to speed up the process, you can focus on implementing test automation to execute the repetitive tests and save time. You can use tools such as Postman, Rest Assured, or other tools mentioned below based on your preference.
Since both manual and automation testing is required, choose the right API testing tools for your needs. Here’s a list of tools commonly used for API testing in both:
Manual API Testing Tools
Postman
Swagger UI
cURL
Insomnia
SoapUI
Automation Testing Tools
Postman (Automation)
RestAssured in Java
Requests In Python
Karate DSL
Fiddler
By addressing these prerequisites, you lay a foundation for a well-prepared environment with the right resources to execute the API testing checklist effectively.
Key Definitions
If you’ve already worked with APIs, you’ll be familiar with these terms. But if you’re just getting started, it is important that you are aware of these definitions to understand the checklist with ease.
Endpoints: It is a specified location within an API that accepts requests and returns responses.
Payload: The term “payload” denotes the information or data transmitted by the client in a request to the server, or the information provided by the server in response to a request.
Request: It is a question or a demand made by the user to a computer, asking for specific information or action.
Response: The answer or action taken by the receiving computer in response to the request.
Query parameters: They are provided at the end of the URL and are used to filter, and sort the data given by the API.
Key-value pairs: In key-value pairs, you’ll find a colon separating them, for example, “key”: “value” and the key remains static, serving as a consistent identifier.
API Testing Checklist
Now that we have seen the fundamentals, let’s head directly to the API testing checklist. We have categorized the checklist to help you understand and perform these checks with ease.
API Version
We start our API testing checklist with API version validation and it is the process of ensuring that an API behaves appropriately and consistently across different versions. APIs are frequently updated, with new versions being published to add features, repair issues, or enhance performance. However, these upgrades can occasionally introduce changes that alter the API’s behavior.
In API version validation, testers typically perform the following tasks:
Testing forward compatibility: Check if older clients can still work with newer versions of the API. This ensures that new features added in the newer version do not break existing clients.
Regression testing: Re-run existing test cases against the new version of the API to ensure that the core functionality remains intact and that new changes have not introduced any regressions.
Response Status code
The status code is an essential part of API responses as it indicates the success or failure of a request. Verifying the expected status code ensures that the API is functioning correctly and returning the appropriate status codes for different scenarios.
Example: If we expect a successful response, we will verify that the API returns a status code of 200 (Success). On the other hand, if we expect an error response, we would check for status codes like 400 (Bad Request) or 500 (Internal Server Error). Let’s take a deeper look at these responses in our API testing checklist now.
2xx Success Responses:
These codes confirm that the client’s request was successfully received.
200 OK: Signifying a successful request, the server returns the requested data.
201 Created: The server successfully processed the request, resulting in the creation of a new resource.
204 No Content: Although the request succeeded, the server does not provide any data in response.
4xx Client Error Responses:
These codes signify issues with the client’s request, such as mistyped URLs or invalid credentials. Prominent examples are:
400 Bad Request: The request is incorrect or invalid.
401 Unauthorized: The client lacks authorization to access the requested resource.
403 Forbidden: Although authenticated, the client lacks authorization to access the requested resource.
404 Not Found: The requested resource is not present on the server.
5xx Server Error Responses:
These codes reveal that the server encountered an error while attempting to fulfill the client’s request. Examples include:
500 Internal Server Error: A generic code indicating an unexpected condition preventing the server from fulfilling the request.
502 Bad Gateway error: It occurs when a gateway or proxy server receives an incorrect answer from an upstream server.
503 Service Unavailable: Issued when the server is temporarily unable to handle the request, often during high-traffic periods or maintenance.
Presence of JSON Elements
Next point in our API testing checklist is about JSON elements as API responses often include JSON data, which consists of key-value pairs. It is important to ensure that all the required JSON elements, or keys, are present in the response. This helps validate the response’s completeness and ensures that the expected data is returned.
Example: Suppose we expect an API response to include the following JSON elements: “name”, “age”, and “email”. We would verify that these elements are present in the response and contain the expected values.
Data Types for Response Values
API responses can contain data of different types, such as strings, numbers, booleans, or arrays. Validating the data types for response values ensures that the API returns the expected data types, which helps in maintaining data integrity and consistency.
Example: If we expect a response value to be a number, we will verify that the API returns a numeric value and not a string or any other data type.
Value Formats
Similar to the data type we saw previously in our API testing checklist, some API responses may include specific value formats, such as dates in the format MM/DD/YYYY. Validating value formats ensures that the API returns data in the expected format, which is important for compatibility and consistency with other systems or processes.
Example: If we expect a date value in the format MM/DD/YYYY, we have to verify that the API response follows this format and does not return dates in any other format such as DD/MM/YYYY or DD/MM/YY, etc.
Invalid Request Headers
When testing an API, it is important to verify how it handles invalid requests. Let’s start this part of our API testing checklist with invalid request headers by checking whether the API returns appropriate error messages when invalid or incorrect headers are provided.
Example: Suppose the API expects a valid access token in the “Authorization” header like this:
Authorization: Bearer <valid_access_token>
Now, during testing, you might intentionally introduce an invalid header, such as:
Authorization: Bearer <invalid_access_token>
Testing with this invalid header helps ensure that the API responds appropriately to unauthorized requests. The API should return a specific HTTP status code (e.g., 401 Unauthorized) and provide a clear error message, indicating that the provided access token is invalid or missing.
Invalid Request Body
Now that we have seen how invalid request headers should be managed, let’s check how invalid request bodies should be handled in our API testing checklist. When you send a request to an API, the request body often contains data in a specific format (e.g., JSON or XML). If the data in the request body is not well-formed or does not contain the mandatory fields, the API should respond with an appropriate error message.
Example: Consider an API that expects a JSON request body for creating a new user. The expected format might look like this:
In this example, the “invalid_field” is not expected in the API’s request body. The API should detect this issue and respond with an appropriate error message.
Header Parameter Limit
APIs often have certain limits or restrictions on header parameters, such as maximum character limits. To ensure that the API handles such scenarios correctly, we can test by hitting the API with more than the expected limit for a header parameter and verify the response.
Example: Suppose you have an API that expects a “Content-Length” header indicating the size of the request payload. The API may have a specified limit on the size of the payload it can accept, and exceeding this limit could lead to issues or security vulnerabilities.
The expected header might look like this:
Content-Length: 1000.
Now, during testing, you intentionally send a request with a “Content-Length” header exceeding the expected limit:
Content-Length: 2000
In this case, you are testing the API’s ability to handle oversized headers. The API should detect that the request header exceeds the defined limit and respond appropriately.
Invalid Header Parameter
Similar to sending header parameters beyond the defined limited, we have also included a check in our API testing checklist to see how an API handles invalid header parameters. It is important for maintaining security and data integrity. By sending invalid header parameters, we can ensure that the API rejects or handles them appropriately.
Example: If an API expects a header parameter called “X-API-Key”, we can test by sending an invalid or non-existent header parameter, such as “X-Invalid-Header: value”, and check if the API returns an error or handles it correctly.
Invalid Authorization Header Value
Authorization headers are often used to authenticate and authorize API requests. Testing with invalid authorization header values helps in verifying that the API rejects unauthorized requests and returns appropriate error messages.
Example: If an API expects an authorization header with a valid token, we can test by sending an invalid or expired token and check if the API returns an error indicating invalid authorization.
Valid Content-type values in the Request Header
Verifying an API request with valid Content-Type values in the request header involves testing how the API correctly processes different content types. The Content-Type header informs the server about the media type of the resource being sent or requested.
Example: Suppose you have an API endpoint for creating a new resource, and it accepts data in JSON or XML format. The valid Content-Type values might include:
JSON Content-Type:
POST /api/resources
Headers:
Content-Type: application/json
Request payload:
{
  "name": "New Resource",
  "description": "A description of the new resource"
}
XML Content-Type:
POST /api/resources
Headers:
Content-Type: application/xml
Request payload:
<resource>
  <name>New Resource</name>
  <description>A description of the new resource</description>
</resource>
Without Authorization Header Parameter
Similar to checking invalid header parameters previously in our API testing checklist, it is important to test how an API handles requests without the required authorization header parameter. This helps ensure that the API enforces proper authentication and authorization.
Example: If an API requires an authorization header parameter, we can test by sending a request without the authorization header and check if the API returns an error indicating the missing authorization.
Expired Authorization Token
When dealing with authorization tokens, it is important to test how the API handles expired tokens. By sending an expired token and hitting the API endpoint, we can verify that the API rejects the request and returns an appropriate error message.
Example: Consider an API that requires an “Authorization” header with a valid and non-expired access token for authentication. A valid authorization header might look like this.
Authorization: Bearer valid_access_token
Now, during testing, you intentionally send a request with an expired access token:
Authorization: Bearer expired_access_token
In this example, the API should detect the expired authorization token and respond with an appropriate error message. The expected behavior might include an HTTP status code, such as 401 Unauthorized, and a response body with a clear error message
Pagination
As pagination is a common technique used in APIs to retrieve data in chunks or pages, we have included a check for them in our API testing checklist. When testing pagination, it is important to verify whether the API returns the expected amount of data based on the specified data count limit for pagination.
Example: Suppose we want to retrieve 10 items per page using pagination. We would hit the API with the appropriate parameters and verify that the response contains exactly 10 items.
Valid Query Path Parameters
When verifying the response for an API endpoint with all the valid query path parameters, you are essentially checking how the API processes and responds to correctly formatted query parameters. We will also check for invalid query path parameters next in our API testing checklist. Let’s consider an example now:
Example: Suppose you have an API endpoint for retrieving information about a user, and it accepts several query parameters:
Endpoint: GET /api/users
Query parameters:
userId (required): The ID of the user.
includeDetails (optional): A boolean parameter to include additional details.
A valid API request with all the valid query path parameters might look like this:
GET /api/users?userId=123&includeDetails=true
In this example:
userId is a required parameter, and it is set to 123.
includeDetails is an optional parameter, and it is set to true.
The expected response from the API should include the relevant information based on the provided parameters i.e. userId: 123.
{
  "userId": 123,
  "username": "john_doe",
  "email": "[email protected]",
  "details": {
    // Additional details based on the includeDetails parameter
    "age": 30,
    "location": "City"
  }
}
Invalid Query Path Parameter
Testing with invalid query path parameters helps in ensuring that the API handles such scenarios correctly and returns meaningful error messages.
Example: If an API endpoint expects a query path parameter called “id”, we can test by providing an invalid or non-existent value for this parameter and check if the API returns an error indicating the invalid parameter.
Special Characters in Query Path Parameter
The next check with regard to query path parameters in our API testing checklist is with special characters as it can sometimes cause issues or unexpected behavior in APIs. By testing with special characters in query path parameters, we can ensure that the API handles them correctly and returns the expected response.
Example: If an API expects a query path parameter called “name”, we can test by providing a value with special characters, such as “John&Doe”, and check if the API handles it properly.
Request Payload
Request payloads often contain data that is required for the API to process the request correctly. By verifying that all the required fields are present in the request payload, we can ensure that the API receives the necessary data.
Example: Suppose an API requires a request payload with fields like “name”, “email”, and “password”. We would verify that all these fields are present in the request payload before sending the API request.
Without a Request Payload
Similar to other checks in our API testing checklist, we should also test an API request without a request payload involves testing how the API handles scenarios where no data is provided in the request body.
Example: Suppose you have an API endpoint for creating a new user, and it requires certain fields in the request payload. But you didn’t provide any request body, the API should handle this scenario gracefully and respond appropriately. The expected response might include an HTTP status code, such as 400 Bad Request, and a response body with an error message indicating that the request payload is missing or malformed.
Without a Required Field in the Request Payload
To ensure data integrity and completeness, APIs often require certain fields in the request payload. By testing without a required field in the request payload, we can verify that the API returns the expected error message or response.
Example: If an API requires a request payload with a field called “email”, we can test by sending a request without the “email” field and check if the API returns an error indicating the missing field.
Invalid Data Types in the Request Payload
Next up in the set of request payload checks in our API testing checklist is to test with invalid data types in the request payload. APIs often have specific data type requirements for request payloads and so we have to ensure that the API handles them correctly and returns meaningful error messages even with invalid inputs.
Example: If an API expects a numeric field in the request payload, we can test by sending a string value instead and check if the API returns an error indicating the invalid data type.
Request Payload Length
Similar to other limitations seen in our API testing checklist, APIs also have limitations on the number of characters or the maximum length allowed for certain fields in the request payload. By testing with values exceeding these limits, we can ensure that the API handles them correctly and returns the expected response.
Example: If an API expects a field called “description” with a maximum limit of 100 characters, we can test by sending a value with more than 100 characters and check if the API returns an error indicating the exceeded limit.
Null Value in the Request Payload
Some APIs may allow certain fields to have null values in the request payload. By testing with null values for these fields, we can ensure that the API handles them correctly and returns the expected response.
Example: If an API expects a field called “address” in the request payload, we can test by sending a null value for this field and check if the API handles it properly.
Special Character in the Request Payload
Special characters can sometimes cause issues or unexpected behavior in APIs. By testing with special characters in fields of the request payload, we can ensure that the API handles them correctly and returns the expected response.
Example: If an API expects a field called “Contact” in the request payload, we can test by sending a value with special characters, such as “998877665$”, and check if the API handles it properly.
Valid Key-value Pair in the Query String Parameter
Next in our API testing checklist, we’re going to see a sequence of checks with the Query string parameters that are used to provide additional information to the API endpoint. By testing with valid key-value pairs in the query string parameters, we can ensure that the API correctly processes and returns the expected response based on the provided parameters.
Example: Suppose we have an API endpoint that expects query string parameters like “category” and “sort”. We can test by providing valid values for these parameters, such as “category=books” and “sort=price”, and verify that the API returns the appropriate response.
Invalid Key-value Pair in the Query String Parameter
Testing with invalid key-value pairs in the query string parameters helps ensure that the API handles such scenarios correctly and returns meaningful error messages.
Example: If an API endpoint expects a query string parameter called “page”, we can test by providing an invalid or non-existent key-value pair, such as “invalidKey=value”, and check if the API returns an error indicating the invalid parameter.
Different Data Types in the Query String Parameter
APIs may have specific data type requirements for query string parameters. By testing with different data types in the query string parameters, we can ensure that the API handles them correctly and returns meaningful error messages.
Example: If an API expects a query string parameter called “count” with a numeric data type, we can test by providing values of different data types as shown below,
It should return the appropriate error code or message when it is an invalid parameter.
Valid Date Format Key-value pair in the Query String Parameter
The final check with the query string parameters in our API testing checklist is with the valid date format. Some APIs may require specific date formats in the query string parameters. By testing with valid date formats, we can ensure that the API correctly processes and returns the expected response based on the provided date.
Example: If an API expects a query string parameter called “date” in the format “YYYY-MM-DD”, we can test by providing a value like
"GET /api/products?date=2024-02-16"
We can ensure it returns the appropriate response message or code.
Server Request Per Second Configuration
We’re now moving towards the performance part of our API testing checklist. To test the performance and rate-limiting capabilities of an API, we can hit the API multiple times within a short period to exceed the configured request per second limit. This helps verify that the API enforces the rate limit and returns the expected response or error message.
Example: If an API has a rate limit of 10 requests per second, we can test by sending more than 10 requests within a second and check if the API returns an error indicating the exceeded limit. It could respond with an error code, such as 429 Too Many Requests, indicating that the rate limit has been exceeded.
Concurrent Rate Limit
Similar to testing the rate limit per second, we can also test the allowed concurrent rate limit of an API by sending multiple concurrent requests. This helps in verifying that the API handles concurrent requests correctly and returns the expected response or error message.
Example: If an API allows a maximum of 100 concurrent requests, we can test by sending 100 or more concurrent requests and check if the API handles them properly.
Expected Responses:
If the concurrent rate limit is not exceeded, all requests ( more than 100) should receive successful responses.
If the concurrent rate limit is exceeded, the API should respond in a controlled manner, possibly by returning an error response indicating that the concurrent rate limit has been surpassed.
Uploads and Downloads
If an API supports file uploads and downloads, it is important to test this functionality to ensure that the API handles the file transfer correctly. By uploading and downloading files, we can verify that the API correctly processes and returns the expected files. We will further break this point in our API testing checklist.
File Uploads
Check File Type and Size:
Verify that the API checks the file type and size during the upload process.
Test with various file types, including both allowed and disallowed types, and files exceeding the maximum size.
Validate File Name and Content:
Verify that the API sanitizes and validates the file name to prevent any potential security issues.
Check if the API validates the content of the uploaded file to ensure it matches the expected format (e.g., for image uploads).
Handle Concurrent Uploads:
Test the API’s behavior when multiple users attempt to upload files simultaneously.
Check if the API maintains proper concurrency control and prevents race conditions during file uploads.
Test Timeout and Large Files:
Verify that the API gracefully handles long upload times and does not time out prematurely.
Test the API’s behavior with very large files to ensure it can handle the load without crashing.
Authentication and Authorization:
Make sure that file uploads are only done by authorized users.
Verify that the API enforces proper authentication and authorization checks before processing file uploads.
File Downloads:
Check Access Controls:
Test if the API correctly enforces access controls for file downloads. Unauthorized users should not be able to access sensitive files.
Verify that the API checks user permissions before allowing file downloads.
Test Download Speed and Efficiency:
Assess the download speed and efficiency by downloading various file sizes.
Ensure that the API efficiently streams large files and does not consume excessive resources.
Secure File Transmission:
Ensure that file downloads are conducted over secure connections (HTTPS) to prevent man-in-the-middle attacks.
Verify that the API supports secure protocols for file transmission.
Specific Time Zone in the Request Payload
The Accept-Timezone header allows the client to specify the desired timezone for the API response. By testing with specific timezone values in the Accept-Timezone header, we can ensure that the API correctly processes and returns the response in the specified timezone.
Example: If an API supports the Accept-Timezone header, we can test by setting the header value to a specific timezone, such as “Accept-Timezone: America/New_York”, and verify that the API returns the response in the specified timezone.
Managing SSL/TLS Certificates
SSL/TLS certificates are essential for securing API communications over HTTPS and that is why we have added it to our API testing checklist. By testing the API with different SSL/TLS certificates, including valid, expired, or self-signed certificates, we can ensure that the API handles them correctly and returns the expected HTTP status codes.
Example: If an API requires a valid SSL/TLS certificate, we can test by accessing the API with a self-signed or expired certificate and verify that the API returns an appropriate error indicating the certificate issue.
Server log Information
The final point of our API testing checklist is to monitor server logs as it is crucial for debugging and troubleshooting API issues. By testing the API and checking the server logs, we can ensure that the API requests are logged correctly and provide valuable information for diagnosing any errors or unexpected behavior.
Example: After making API requests, we can access the server logs and verify that the relevant information, such as the request method, path, and response status, is logged correctly.
Conclusion
We hope our comprehensive API testing checklist will ease your API testing process to give great coverage. By following this checklist and testing each item, we can ensure that the API functions correctly, handles various scenarios, and returns the expected responses. Testing systematically and thoroughly helps in identifying and fixing any issues, ensuring the reliability and quality of the API. Remember to adapt the checklist based on the specific requirements and functionalities of the API you would like to test.
Although web and mobile applications are more widely used now, desktop applications still play an integral role for many organizations. So the need to automate desktop applications for testing purposes is still prevalent and we have many test automation tools in the market as well. Being an expert desktop application automation testing company, we have even developed our very own tool for Desktop App Automation called Gyra. Additionally, we also have strong expertise in the other tools from the market. So we wanted to list the best desktop application automation testing tools available as of 2024 and highlight their features so that you can choose the best tool suitable for your needs.
Types of Desktop Applications & Frameworks
But before heading straight to that, we must understand the different types of Desktop Applications and frameworks. So kindly find the list below
Win32 Apps – Applications that are created using WinAPI. These applications are typically native Windows GUI apps.
Windows Forms (WinForms) Apps – Applications that are created using frameworks like .NET, Delphi, or MFC instead of calling the Win32 API. WinForms was introduced more than 2 decades ago in the year 2001 with .NET 1.0 framework. As WinForms apps perform well in low-configured machines, it is still being used for its performance and lightweight UI.
WPF (Windows Presentation Foundation) Apps – It was released in the year 2006 to modernize Desktop App development as it enables you to create visually rich UI applications. WPF supports cross-platform application development using Avalonia UI. However, WinForms and WPF are still Windows-centric and there is no official statement from Microsoft yet.
Universal Windows Platform (UWP) Apps – UWP was introduced with Windows 10. You can run the Desktop apps developed using UWP on Windows Desktop PCs, Windows Mobile, Xbox, and mixed reality headsets.
Java AWT (Abstract Window Toolkit) – It is a heavy-weight platform-dependent API used to create Desktop Applications.
Java Swing – Swing is a legacy toolkit used to create Desktop Applications using Java.
JFX – JFX was introduced along with Java 8 and it can be used to create rich Java-based client applications. JFX supports FXML & CSS.
macOS Apps – Used to create Desktop Applications for macOS using Xcode & Swift programming
Electron – Electron is a framework that can be used to develop desktop applications using JavaScript, HTML, & CSS.
QT – QT is a C++ framework. You can build cross-platform desktop applications with native user interfaces.
Best Desktop Application Automation Testing Tools
Now that we have seen what types of desktop applications and frameworks are out there, let’s take a look at the highlights of all the tools one after another to help you choose the best desktop application automation testing tool in 2024. We’re starting the list with FlaUI.
FLAUI
FlaUI is a .NET library.
Supported Apps: You can automate Win32, WinForms, WPF, & UWP applications.
Programming Language: C#
It uses Microsoft’s UI Automation framework to access the UI elements programmatically.
It supports XPath locators for some properties.
It has automation support for the QT framework type.
It requires a steep learning curve.
It does not support Swing & JFX applications.
You can’t perform remote execution like how you do it using Selenium RemoteWebDriver
Latest version: v4.0.0
WinAppDriver (Windows Application Driver)
It is a popular freeware library used for Desktop Application Automation Testing.
Supported Platforms – Windows 10 and Windows Server 2016.
Supported Application Types – UWP, WPF, WinForms, and legacy Win32.
Prerequisite – You need to enable Developer Mode in Windows Settings before performing execution.
You can run scripts on a remote machine.
It has its own UI recorder which can generate scripts in C#.
You can also attach the already launched application and perform action on it.
You can create test scripts in two ways – Keyword Tests and Script Tests.
Keyword Tests helps you to create Test Scripts in Table format instead of writing coding. When you record the user actions, Test Complete populates Test Scripts in the Keyword Tests table.
Keyword Test is helpful if you are doing POC. But if you are looking to create a robust test suite, go for Script Tests.
Another notable feature of Test Complete is you can create BDD tests. If you have your Gherkin feature files in Cucumber Studio, you can easily import them into Test Complete.
Latest version 15.65
Gyra
Gyra is Codoid’s Home-grown Desktop Application Automation Testing Tool that is available as a freeware.
Supported Programming Language – Java.
It is easy to set up as it requires no additional configurations.
Execution is fast compared with other tools.
Ranorex
Supported Apps – WinForms, WPF, Qt, Java, Delphi, SAP, UWP, MSAA/UIA, CEF, .NET Core, Office and many more.
As an automation testing service provider, we understand that desktop app automation is more challenging when compared to web and mobile app automation. Given the additional complexity, choosing the right tool for your automation needs is very important. If you choose the right tool and are able to see success in a Proof of Concept, then you are halfway through. We hope the overview we provided for each desktop application automation testing tool will help you in your decision-making process.
Various companies outsource their QA needs due to various reasons specific to their needs. But the primary reason why QA should be outsourced is that QA is extremely important to your product’s success. A well-equipped QA team can make a huge difference in how successful your app is. You might have the most innovative idea or concept that seems like a sure shot success on paper. But execution matters and that is where QA enters the picture as it ensures that your product stays on track to success every step of the way.
A Model QA Outsourcing Company
There are numerous factors that one must consider before choosing the right QA outsourcing company, and we will be discussing those factors in the latter part of this blog. Before that, we will illustrate how a QA Outsourcing company performs various types of testing to help you understand the impact they could have on your project. Though not all QA companies will offer the options we generally provide, we wanted to use our approach as an example to establish the standards you should be looking for.
We’ll be starting with the onboarding process as it is the first stage that happens before the partnership begins and also cover different approaches for different types of testing so that you will be in a position to foresee the possibilities of a partnership with regards to your specific needs.
The Onboarding Process
Once you have found the team for your needs, the onboarding process will be carried out to reassure you that you have made the right decision.
The initial call is when the QA team will be introduced to your project. Once you have expressed your interest through any medium, our sales team will understand your basic expectations and schedule a call with our highly talented technical team for the initial call.
Free POC & Demo
Once we have clearly understood your need from the initial call, we will start prepping for a no-cost Proof of Concept and Demo that will help us assure you of our expertise. Though not all QA companies provide a free POC, we do it because we have the utmost confidence in our capabilities. So here’s how it works.
Tailored to Your Needs
Being one of the top QA companies in the market, we have a wide range of clients from different domains and industries. Our vast experience enables us to focus on your needs and create demos with the appropriate device and platform combinations. Let’s look into the various Proof of concepts we offer as an outsourcing QA company.
Automation Testing POC
We automate 3 test cases with complete JENKINS integration.
Our POCs are equipped with a fully functional ReportPortal integration.
Upon receiving special requests, we even create specific test cases based on our client’s needs.
Known for having quick turnaround times, we don’t take forever to work our magic as we will have your demo up and running in just 10 to 14 days from the date of the first call.
Such an approach gives you an idea of the level of control you will have on the automation tests during the partnership as the JENKINS integration enables you to run them anytime and anywhere as per your needs. You will also be able to witness how effortless bug tracking can be with our ReportPortal integration. So by the end of our demo, you will have a clear picture of how effective this partnership with us can be and help you make the right decision.
Manual Testing POC
We create both positive and negative test cases for 3 scenarios.
We also make sure to show a demo on both web and mobile platforms.
Proposal Submission
We do not follow one size fits all approach as we are focused on delivering tailor-made services that satisfy all our client needs. Primarily we understand our client’s needs and suggest an engagement model that we believe will match their needs or even proceed as per the client’s preference. Thanks to our years of experience in servicing clients on a global scale, we can assure you that we will deliver no matter what the engagement model is. So you can count on us to be a part of your product’s success.
Turnkey
A cost-conservative working model with defined work plans, timeframes, and deliverables based on the scope of the project. So there is no need for you to be worried that your requirements are small or if the budget will go overboard, fear not as this model ensures that the work will be completed as expected.
Time & Material
Our highly flexible working model is great if the entire scope of the project is unknown or for long-term partnerships. Our 100% transparency throughout every step of the way ensures that you create a winning product.
B.O.T Model
If you are looking to fulfill both your current and future needs, B.O.T is the way to go as we will build a team that fits your needs, operate for a period of time to ensure that your expectations are met, and then transfer the team to you.
We have performed automation testing for numerous needs across various industries and can assure you that the approach has not been the same for every single scenario. But there is a basic outline we lay before we start optimizing the process to meet our client’s needs.
Feasibility analysis
It is a well-known fact that 100% automation is not possible. But it is also important to keep in mind that not all test cases that can be automated should be automated as well. So we use certain guidelines when it comes to choosing which test cases have to be automated. So after effective analysis of all the test cases, we identify
High Risk or Business Critical test cases.
Test cases that require repeated execution.
Tedious test cases that will require a lot of manual effort or is subject to human error.
Test cases that are time-consuming.
Scenarios that require a significant amount of data.
Consistent test cases that do not undergo constant changes.
Functionalities that are shared across applications.
Test cases that have a lot of downtime between steps.
If cross-browser testing using the same test scenarios is possible.
Likewise, we also prefer not to automate test cases based on the below criteria
Test cases that require exploratory or ad-hoc testing.
Newly designed test cases that haven’t been executed at least once manually.
Test cases that require subjective validation.
Test cases that have low ROI.
Automation Test Tool Selection
Selecting the right automation testing tool for your project needs can be a tricky task. Though the automation tool selection largely depends on the technology the Application Under Test (AUT) is built on, the following criterion will help you select the best tool for your requirement.
Environment Support
Ease of use
Testing of Database
Object Identification Capabilities
Image Testing Provision
Error Recovery Testing
Object Mapping
The Required Scripting Language
Support for the different types of tests, test management features, and so on.
Support for multiple testing frameworks
Ease of debugging the automation software scripts
Ability to recognize objects in any environment
The comprehensiveness of test reports & results
Training cost to use the tool
Licensing & maintenance cost of the tool
The tool’s performance and stability
The tool’s compatibility with the different devices and operating systems. (Windows, web, mobile, and native mobile apps).
The features of the tool you will benefit from.
Planning, Design, and Development
Planning, Design, and Development are all important aspects of any project.
You establish an Automation strategy and plan during this phase, which includes the following details:
1. Tools for automation have been chosen.
2. The design of the framework and its features
3. Automation things that are in-scope and out-of-scope Automation
4. Scripting and execution schedules and timelines
5. Automation Testing Deliverables
Test Execution
Automation During this phase, scripts are run. Before they may be set to run, the scripts require input test data. They generate extensive test reports once they’ve been run.
The automation tool can be used directly or through the Test Management tool, which will invoke the automation tool.
Note: The execution can be done during the night, to save time.
Maintenance
Test Automated Maintenance Approach The Test Automation Maintenance Approach is an automation testing phase that is used to see if the new features added to the software are functioning properly. When new automation scripts are added, they must be reviewed and maintained in order to improve the effectiveness of automation scripts with each release cycle.
How we develop our Framework
Define Goals
Identify Tool
Framework Design
Framework Development
Best Automation Testing Tools
Choosing the right tool for your automation testing is very crucial as there are so many tools available in the market. In order to select the tools that best fit your needs, you should understand the requirements clearly and shortlist the tools that satisfy your needs. Since automation is possible for different types of testing, we have specific tools that we use based on the need.
Not all QA companies that claim to do automated testing will be able to attain all the benefits it has to offer. But by being experts in the field, we ensure that we follow all the standards and the best practices to attain the best results.
1. Use a Proper Framework structure
2. We Avoid Flaky Tests by
Tracking Failures
Using Appropriate Object Locators
Limiting Execution Duration
Quarantining the Flaky Tests
3. Follow Naming Standards
4. Coding Standards
5. Environment Standards
6. Bug identification
7. Proper report
We don’t just stop once we have successfully automated various test cases as we understand that automated testing is not a replacement for manual testing. So now with the time available in our hands, we expand the test coverage by performing exploratory testing to unearth the various bugs that would usually go unnoticed.
Forbes reported that there are a whopping 8.9 million mobile applications in the global market. But an average user is reported to use just 10 applications every day and a total of 30 apps every month. Calculating the odds of your app’s success in such a highly competitive market might be startling. But expecting low competition in an industry that is projected to reach $900 Billion by 2023 is not fair. Even if you are targeting a niche market, a low-quality mobile app with poor user experience has no chance of becoming a success. But with the right idea and the right people on board, you could definitely be successful. With our comprehensive mobile testing solutions, we ensure that your app doesn’t get lost in the shuffle.
The Different Types of Mobile App Testing We Do
Our approach is all about testing the mobile app in different real-world scenarios because if we fail to do that, the chances of the end-user having a good user experience while using the app becomes slim. So we have identified the focus points that directly impact the user experience and prioritize the tests that can help prevent such issues.
The Compatability Issue
An application might work fine in a few devices but still struggle in other devices due to the various hardware and software changes. Back in the day, we used to have mobile phones within fixed price slabs. There were either the basic phones or the flagship smartphones, and the number of smartphone manufacturers wasn’t this high. But now the competition is higher, the number of smartphones under each price bracket has rapidly increased, and the number of smartphones that get released every year is also reaching record highs. So here is the list of tests one has to cover.
Version Testing
Hardware Testing
Software Testing
Network Testing
Operating System Testing
Device Testing
Owning and maintaining all the real devices to perform such tests is an impossible task. But there is a workaround.
The Real Device Solution
We don’t prefer testing on emulators as it is not reliable as testing on real devices is the best way to go about mobile app testing. So we employ cloud-based mobile app testing solutions like BrowserStack to get access to the large variety of real devices that are available in the market. Getting access to real devices solves only a part of the problem as we still will not be able to test the app on every device manually. So we have to automate the process and perform product analysis to identify the critical device combinations that the target audience uses and test them manually.
Beating the competition with Performance
Though the flagship phones are the most talked-about models, the mid-range and budget devices are the models majorly used by the public. So ensuring that your mobile app performs in the most efficient way is an important step in mobile app testing. Even if your target audience uses the flagship phones, it doesn’t mean your app can chew up the mobile’s resources. It will lead to eventual uninstallation as users neither like an app that is slow nor an app that makes their device slow. That is why we will test your mobile app against the following KPIs.
Load Time
Render Time
Frame Dropping
Latency & Jitter
CPU Choking
Battery Utilization
Identifying Usability Issues
Even a small misstep in usability testing can prove to be costly as usability issues are one of the biggest contributors to negative reviews. Any mobile app with negative reviews will face a lot of business problems as the way the users perceive the app and the app is impacted heavily. So to avoid such issues that have lasting effects, we perform our usability tests after obtaining a lot of relevant granular data. Most importantly, our mobile app testers will test from an end-user’s point of view to get accurate results.
Knowing Your Audience
Understanding your target audience plays a big role in making the app usable. So we add a lot of context to our testing process by identifying the age demographic, geography, and needs of your target audience. We then take it a notch further by analyzing the possible usage frequency, load levels, competitors, and so on. With such data, we develop effective test cases that will definitely identify bugs prior to deployment.
Shift-Right Testing
But usability testing doesn’t end with deployment as we have to identify the features that are most-used and least-used by the end-user. By doing so, we will be able to identify if the user faces any hardship in the most widely used features and prioritize that. Though we can predict the usage scenarios and levels prior to release, it will not be enough to satisfy all the needs.
The Mobile App Testing Tools We Use
As we use Selenium and Java for our Web Application automation testing, we have chosen Appium as our primary mobile app automation framework. But we do not limit ourselves with just one tool or combination as the needs of our clients vary on a one-to-one basis. So our R&D team is always on the lookout for emerging technologies in the field to help us stay on top of all the trends. We have also used all the popular tools due to the wide range of our clients.
We are all aware that there are three separate layers in a typical app: the user interface layer that the user interacts with, the database layer for modeling and manipulating data, and the business layer where the logical processing happens to enable all transactions between the UI and the DB. API testing is performed at the most critical layer (i.e) the business layer. So a malfunctioning API could invalidate both the UI and DB even though they are working properly. That is why API testing is very crucial when it comes to making your product successful. So let’s take a look at the different types of API testing we perform to ensure maximum quality.
The Different Types of API Testing Services we Perform
Validation Testing
Before we start testing the functionalities of the API, we prefer to validate the product by performing validation testing during the final stages of the development process. It plays a crucial role as it helps us validate if the product has been developed as expected, behaves or performs the required actions in the expected fashion, and also validates the efficiency of the product. Once we have verified the product’s ability to deliver the expected results by adhering to the defined standards within the expected conditions, we go ahead and perform functional testing.
Functional testing
Functional testing is very different from validation testing as the latter only verifies if the product was developed properly. Whereas functional testing involves testing specific functions in the codebase. So we will check if the product functions properly within the expected parameters and also check how it handles issues when functioning beyond the expected parameters. We get the best results here by making sure that the edge test cases are also implemented.
Load testing
Since we have tested how functional the product is in the previous stage, we will test to see if the product performs as expected in different load conditions as well. It is usually performed after a specific unit or the entire codebase has been tested. We first establish a baseline with the number of requests to expect on a typical day and then the product with that traffic. We then take it to the next level by testing with both maximum expected traffic and also overload traffic to ensure the functionality is not affected. It will also help in monitoring the product’s performance at both normal and peak conditions.
Runtime and error detection
The previous tests were mainly focused on the results, whereas we would test the execution of the API at this stage.
We would monitor the runtime of the compiled code for different errors and failures.
The code will be tested with known failure scenarios to check if the errors are detected, handed, and routed correctly.
In addition to that, we would also look for resource leaks by providing invalid requests, or dumping an overload of commands.
Security testing
Since APIs are prone to eminent external threats, security testing is an unavoidable phase of testing that has to be done effectively. But we don’t just stop there as we also test the validation of encryption methodologies, user rights management, and authorization validation. We would also follow it up with penetration and fuzz testing to eliminate the possibility of having any kind of security vulnerability in the product.
UI testing
Though the above-mentioned covers the primary focus points of API testing, we always feel that the UI that ties into the API can help us have an overview of the usability and efficiency of the front and back ends. By doing so, we make our API testing approach a holistic process that covers every factor that would contribute to the product’s overall quality.
The API Testing Tools:
Now that we have seen the various tests we would conduct to ensure maximum quality, let’s take a look at our API testing toolkit.
Postman – A Google chrome app used for verifying and automating API testing.
It eases the process of creating, sharing, testing, and documenting APIs for developers by allowing the users to create and save simple & complex HTTP/s requests, and read their responses as well.
It reduces the amount of tedious work as it is extremely efficient.
REST Assured – An open-source, Java-specific language that facilitates and eases the testing of REST APIs.
It is open-source, Java-based, and supports both the XML & JSON formats.
The support for Given/When/Then notations makes the tests more readable.
No separate code is needed for basic steps such as HTTP method, sending a request, receiving & analyzing the response, and so on.
It can be easily integrated with CI/CD frameworks like JUnit & TestNG as it has a Java Library.
SoapUI – The tool focuses on testing an API’s functionality in SOAP and REST APIs and web services.
Apache JMeter – An open-source tool for performing load and functional API testing.
Apigee – A cloud API testing tool from Google that can be used to perform API performance testing.
Swagger UI – An open-source tool that can be used to create a webpage that documents the defined APIs.
Katalon – An open-source application that helps with automated UI Open Source, Java Based and supports both XML & JSON format.
Data warehouses are data management systems that generally contain large amounts of historical data that are centralized and consolidated from various sources such as applications’ log files and transactions. They even perform different queries and analyses to enable and support business intelligence activities and analytics. Since major business decisions are made based on the data from a data warehouse, data warehouse testing is of paramount importance when it comes to ensuring that the data is reliable, consistent, and accurate. According to a report by Gartner, 60% of the respondents weren’t aware of the financial loss their business faces due to bad data as they don’t even measure it. The size of the loss could be unimaginable as back in 2016, IBM reported that bad data quality is responsible for cutting $3.1 Trillion from America’s GDP.
But the process of data warehouse testing is a much more intricate process than simply testing the data that land inside the warehouse from multiple sources. That is why we ensure that our data warehouse testing process addresses the complete data pipeline when the data is in flight during extract, transform, and load (ETL) operations. So instead of searching for a needle in a haystack, we validate the data at intermediate stages and identify, isolate, & resolve problem areas quickly. Our data warehouse testing also covers the equally important business intelligence (BI) reports and dashboards that run using the consolidated data as its source.
OLTP – Online Transactional Processing (e.g: application like ATM)
The Different Types of Data Warehouse Testing we do:
As a leading QA company, we have years of experience delivering comprehensive solutions to all our clients without compromising on efficiency. So let’s take a look at the most common challenges that a QA company would have to overcome with their testing process and then move forward to see the different types of testing techniques we employ.
Challenges:
Loss of data during the ETL process.
Incorrect, incomplete, or duplicate data may occur while transferring data.
Since the data warehouse system contains historical data, the data volume is generally very large and extremely complex making it hard to perform ETL testing in the target system.
It is also difficult to generate and build test cases.
It is tricky to perform data completeness checks for the transformed columns.
The sample data used in production is not a true representation of all the possible business processes.
So apart from the specific data warehouse tests we will be exploring, we would also perform the standard testing that almost every product will be in need. It includes
Smoke testing can be used to determine whether the deployed build is stable or not.
Integration testing for upstream & downstream processes that includes Datavault, Datamart, and Data Lake testing at each stage.
Regression testing to see if the ETL is providing the same output for a defined input,
Finally, we employ automation to speed things up.
Duplication Issues – As the name suggests, duplicate data is any record that accidentally shares the same data with another record in a database. The most common type of duplicate data is a complete carbon copy of another record. They are usually created while moving data between systems. Since a large number of files have to be checked, we employ automation scripts to perform the duplicate check.
Null values check – A null value will be assigned when a value in a column might be unknown or missing. It is important to keep in mind that a null value is not an empty string or a non-zero mobile. So by using a non-null constraint in a table, we can ensure that some value is present and can be verified using a null check.
Pattern validation – We then test if the data in a specific column is in the defined format. For example, if the column is supposed to hold an email address, we test if the data has an ‘@’ followed by a domain name to ensure it is a valid input.
Length validation – Similar to the above process, we also test if the length of the data in a particular column is as expected. For example, if the data is supposed to be a US mobile number, then we will test if it has 11 digits. It should neither be lesser nor greater than that for the data to be valid.
Data completeness check – As mentioned earlier, making crucial business decisions with incomplete data can prove to be very costly. So with our data warehouse testing, we ensure that the data is complete without any gaps or missing information. We can identify such missing data by comparing the source and target tables.
Table & Column availability check – We also validate if tables and columns are present and available after any changes have been made in the build.
Fill Rate check – Fill Rate can be calculated by dividing the total number of filled entries at each column level by the total number of rows in a table. It will be instrumental in determining the completion level as if there is a form that requires 10 different data for it to be complete, then we will know how much of it has been completed.
Referential integrity check – Referential integrity is primarily about the relationship between tables as each table in a database will have a primary key, and this primary key can appear in other tables because of its relationship to the data within those tables. When a primary key from one table appears in another table, it is called a foreign key. Primarily, we test if the data in the child are present in the parent table and vice versa. In addition to that, we check for deviations and if there are any, we identify how much data is missing.
Our Data warehouse Testing Tools:
We primarily use Python for creating our automation scripts that perform the above-mentioned checks as its built-in data structures, dynamic typing, and binding make it a great choice. We use Behave and Lemon CheeseCake (LCC) frameworks for our testing. There are numerous tools in the market to perform testing, we use some among them,
Data Build Tool(DBT) – An automation tool that is very effective when it comes to reducing dependencies. It is our trusted choice when it comes to transforming data in the warehouse.
Jenkins – An open-source tool that is instrumental in helping us achieve true automation by scheduling test execution and report generation.
Lookers – It aids in creating customized applications that help us with our workflow optimization.
Snowflake – An SaaS option that enables data storage and processing to create faster, flexible, and easy-to-use analytical solutions.
JIRA – Since we follow Agile methodology, JIRA is our go-to project management tool.
Airflow – A platform that helps us create and run workflows to identify dependencies.
AWS services (S3 bucket, Lamda) – We use AWS to run our code, manage data, and integrate applications by avoiding the hassle of managing servers.
GCP (Google Cloud Platform) – We use BigQuery, Google Tag Manager, and Google Analytics to manage data, determine measurement codes, and identify the latest data trends.
Git Stash – It is used to locally version files that can help us revert back to the prior commit state if needed. It is also helpful in having those versions not be seen by the other developers who share the same git repository.
Before we proceed to see how, let’s first focus on the why. Accessibility Testing is a commonly overlooked type of testing that has a lot of importance. According to a recent report from WHO, about 15% of the entire world population has at least one form of disability. That adds up to more than 1 billion people. So if your product isn’t accessible, you’re not just alienating such a large group of people, you are also denying their right to information. All this makes Accessibility testing the need of the hour.
The Guidelines we Follow
Apart from the various advantages it has to offer, did you know that lack of accessibility compliance can result in you getting sued? Though WCAG is the universally recognized guideline, there are certain variations depending on the region you are from or the region your website is accessed from.
Our conclusive accessibility testing services ensure that our client’s products are safe across the globe as we are experts in the various web accessibility guidelines such as
WCAG (Web Content Accessibility Guidelines) – Published by the W3C Consortium and globally recognized.
Section 508 – Followed in the United States of America for federal government agencies and services.
The Web Accessibility Directive – Created by the European Union based on WCAG 2.0 with a few additional provisions as well.
The Different WCAG Compliance Levels
The level of compliance you target to achieve will also be an important factor as it determines the impact it will have on your product’s design and structure. Since partial compliance is not accepted by WCAG, it will also be helpful in planning out the work that has to be done.
A – This is the most basic level of compliances and has a total of 30 success criteria in it. The primary objective of this level of compliance is to help people with disabilities understand and access the content. If this level of compliance is met, the screen readers will have enough information to function at a minimal level, help people with seizures, and so on. It is worth mentioning that it will also enhance the user experience of people without any disabilities as well. We have listed a few focus points from this level of compliance to help you get a better understanding.
Alternative text for the image
No Keyboard Traps
Keyboard Navigations
Captions and Audio Descriptions for videos
AA – Since the lower level of compliance is a subset of its higher compliance level, the product would have to meet 20 additional criteria once the first 30 success criteria of the Level A compliance are met. This is the level of compliance that most businesses tend to target as it would make the product compliant with most of the assistive technology that will help people with disabilities access your content. Though this level of compliance would not make much impact for regular users it will be very helpful for the disabled users as the basic level of user experience provided in the previous level will be enhanced. It goes beyond complete blindness to make the product accessible to people with other disabilities such as partial blindness. Here are a few focus points from this level that will help you get a clear picture.
Heading order
Color contrast
Resize and Reflow
AAA – If you have the time and resources to make your product the best it can be, AAA level of compliance will be the way to go. The product would have to meet 28 additional success criteria after the first 50 criteria have been successfully met. For example, AAA compliance will be a great choice if you are looking to develop a specialist-level website. A few focus points for this level of compliance are as follows:
Sign language Implementation
Abbreviation explanations
Pronunciation of words.
Accessibility Testing with ARIA
Being true to its name, ARIA (Accessible Rich Internet Applications) plays a very important role in making web pages accessible. One can say that it is almost impossible to make your web page accessible without ARIA as it adds vital additional information to elements that a screen reader will need to function smoothly. But the presence of ARIA alone will not guarantee accessibility as the correct roles should be assigned for the respective web elements.
For example, if you take a look at the above screenshot of a sample document in Google Docs, it is clear that it is the ARIA label that provides critical information to the screenreader beyond just the share button’s functionality. It even includes the information of who can access it. In this case, it is a document shared only with the user. So if you decide to share the document with only a specific set of people, then that information will be listed in the ARIA label to give a better user experience for people with disabilities. That is why we have made sure our accessibility testers are highly knowledgeable in all the concepts of ARIA.
Accessibility Testing Using Appropriate Personas
Our accessibility testers have been trained with different disability personas so that they will be able to effectively understand the difficulties and pain points a person with any form of disability might face. We achieved this by having our accessibility testers create different personas for different disabilities. Once we had about 50 different personas, we made them exchange personas with each other and had them use the application or web page we wanted to test by using that persona. Here’s a sample persona we created during one of our projects.
Sample Persona
Riya is a visually impaired child studying 4th grade. Despite the disability, she is highly motivated and eager to learn mathematical calculations. Since Riya can hear well, she utilizes screen readers to access the information on the web in audio form. So her teacher has provided an online that Riya can use to learn mathematical calculations with the aid of a screen reader. In this situation, if we were to test the online learning portal, we would follow the below checklist.
Keyboard Accessibility
Visually challenged people such as Riya can only navigate the page using the keyboard as using the mouse requires visual feedback. So we ensure that the pages with interactive elements are accessible using tab, and plain text & image contents are accessible using the down arrow key.
Labels
The links should have descriptive anchor text or labels as a user who employs a screen reader will not have enough context to click on a link when the indecisive anchor text such as ‘Click Here’ is used.
Alt text
We test if all the images have descriptive alternative texts. If the alt text isn’t sufficient to convey the entire context of the image, we check if long descriptions have been used properly. When terms like ‘Apple’ that might be understood as the tech company or the fruit, it is vital to check if the context has been made clear to avoid any misconceptions.
Headings
The page should have proper headings in the correct order as people like Riya will generally navigate through the webpage using headings. Apart from navigational issues, improper headings might even confuse her when being read out by the screen reader.
Titles for every page
The title of each module will be tested as it will be helpful for Riya to bookmark them, and navigate across modules in different tabs.
Audio description for Video
Like alt text for images, videos can use closed captions to convey the verbal context of the video. But what about the non-verbal visual aspects of the video that might play a vital role? That is why we ensure the audio description covers every action, activity, silence, animation, expression, and facial expression. While the audio description is read out, the paused screen should be clearly visible and no text, image, or element should appear blurred.
Though there are automation options for accessibility testing, we find that its cons outweigh the pros when we compare automated accessibility testing with manual accessibility testing. So let’s take a look at the various tools that our teams employ for various accessibility testing purposes.
Tools for Accessibility Testing
The tools we select to perform accessibility testing differ from the regular tool selection process as a set of these tools will also be used by disabled people to access the content. For example, screen readers are used by visually challenged people. So we have trained employees with the prominent screen readers used across different platforms to deliver conclusive solutions.
NVDA and JAWS for Windows.
Voiceover for macOS and iOS.
Talkback for Android.
Orca for Linux.
There are also other tools that we use to ensure that all guidelines are met during accessibility testing.
Color Contrast Analyzer – One of the most widely recognized color contrast analyzing tools that can be used to check the contrast level between the used color schemes for elements such as background and foreground.
ARC Tool Kit – An browser extension tool used to identify the accessibility issues such as heading order, forms, ARIA, links, and so on that come under WCAG 2.0, WCAG 2.1, EN 301 549, and Section 508.
axe Dev Tool – An extension tool that is similar to the ARC Tool Kit that can be used to identify the above-mentioned accessibility issues. But it is usually more fast & accurate in comparison.
Wave – A highly reputable web accessibility evaluation tool developed by WebAIM to provide visual feedback about the accessibility issues of your web content with the help of indicators.
Bookmarklets – We also use various JavaScript-based Bookmarklets if we wish to highlight any specific roles, states, or properties of the accessibility elements on the page. They are also visual feedback tools like WAVE, but we can use different options based on our needs.
Our Case Study
We were tasked with a mammoth job of testing over 25,000 pages across 150+ assessments in an LMS for one of our Accessibility testing projects. Since we had a very short deadline to meet, the conventional accessibility testing approach wouldn’t have been enough. So we came up with the solution of testing the LMS platform features to identify the bugs that will be common in all the 25,000 pages of the assessment and have them fixed before starting our one-by-one approach. By doing so, we saved a lot of time by avoiding redundancy in the testing and bug reporting processes.
For example, if one radio button in one assessment did not meet the accessibility guidelines we were testing it against, then it is obvious that the other radio buttons in the other tests will also fail. But we wouldn’t have to raise the repeating issue over and over again as the initial phase of platform testing would have helped identify such issues. Fixing those issues was also easy as there was an existing template for the radio button component that was used throughout the assessment. So once the template was fixed, all its instances were also fixed. That is how we won the race against time and impressed our clients.
Having a dedicated team for Quality Assurance enables you to focus more on the core business needs and lets the quality assurance team ensure that your product meets the defined expectations without any deviations.
A Wider Talent Pool
You will be able to surpass boundaries and truly find the best of the best to test your product. So with that much expertise at your disposal, you can ensure that your app reaches the market in no time.
Fast and Successful Rollout
Yes, it is important to reach the market as early as possible. But it is also vital to have a winning product in your hands as a bad first impression can severely impact the perception of your product.
Reduced Costs and Better ROI
Offshore outsourcing can offer great Returns on Investments as the labor costs are significantly lower in the popular outsourcing countries in comparison to countries like the USA. Apart from the better ROI in the long run, you can reduce costs in terms of infrastructure, resources, and talent that you will need to have to perform software testing.
Hassle-free
You can hire teams based on your needs without having to maintain your own in-house team and all the resources that they will need to ensure optimum quality. Be it a one-time requirement or a long-term partnership, you can get what you want without any hassle or risk.
As of 2024, the internet has a whopping 5.5 billion users on a global level (i.e) 68% of the entire global population is on the internet. There are various reasons for us to believe that the internet is one of the best innovations of this century as it has reshaped the course of our lives by providing us with access to information at our fingertips. But the question to be asked here is if this access is universal to all of us. Truth be told, no. There are about 1 Billion people with at least one form of disability. Web accessibility is the way to ensure that the basic right to information is fulfilled for the 1 billion people, and accessibility testing is the key to ensuring it.
Accessibility testing is definitely very different from regular testing types. Its unique nature might even instill fear in various testers to even try to learn about accessibility testing. Being a leading web-accessibility testing service provider, we have years of experience in this domain. Our dedicated team of testers has mastered the accessibility testing process to not only comply with the various guidelines but to also ensure access and a great user experience for people with disabilities. So in this blog, we will be extensively covering the concepts you will need to know to perform accessibility testing, how web accessibility is measured, the various steps involved in accessibility testing, and much more. Before we head to all that, let’s first clear the air from any and all misconceptions by debunking the myths surrounding accessibility testing.
Debunking the Popular Accessibility Myths
The most common accessibility myth is that web accessibility testing is expensive, time-consuming, hard to implement, and that it is not necessary as only a few people suffer from disabilities. But the reality is very different from these assumptions. So let’s take a look at other such accessibility myths and debunk them.
Accessibility is beneficial only to a very few people
15% of the entire world population suffers from at least one form of disability. So assuming that millions of people need not access your website or app is definitely not a logical decision even when thinking from a business perspective.
Accessibility is time-consuming & hard to implement
Talking about the business perspective, we can say without any doubt that accessibility testing is not time-consuming or hard to implement. If you have a capable accessibility testing team such as us, you will be able to ensure that your product can reach and be used by a wider audience.
Accessibility makes sites ugly
This is a factor that started out to be a real challenge during the early days of the internet. It is now an accessibility myth as many of the limitations of the past are no longer a problem now. So this should no longer be an excuse to have your site inaccessible as no WCAG guideline prevents us from using multimedia options such as images and videos. Moreover, there are different compliance levels that one can target to achieve. So attaining the least level of compliance will at least ensure most users get access to your content.
Accessibility is only optional
Technically accessibility is not optional for a website or app in different parts of the world. Since we primarily build our products to work on a global scale, it will be highly recommended to keep your product accessible so you can stay out of legal trouble.
Accessibility provides no other added value
This accessibility myth is so far away from reality as the efforts we take to make the site accessible can greatly enhance the overall user experience for all users and even improve your SEO performance as using descriptive anchor text, alt text, and titles make it easier for Google to crawl your site.
Accessibility Laws Around the World
S. No
COUNTRY / REGION
LAW NAME
YEAR OF IMPLEMENTATION
SCOPE
WCAG VERSION
1
AUSTRALIA
Disability Discrimination Act 1992
1992
Public Sector, Private Sector
WCAG 2.0
2
CANADA
Canadian Human Rights Act
1985
Public Sector, Private Sector
WCAG 2.0
3
CHINA
Law On The Protection Of Persons With Disabilities 1990
2008
Public Sector, Private Sector
None
4
DENMARK
Agreement On The Use Of Open Standards For Software In The Public Sector, October 2007 (Danish)
2007
Public Sector
WCAG 2.0
5
EUROPEAN
Web And Mobile Accessibility Directive
2016
Public Sector
WCAG 2.0
6
FINLAND
Act On Electronic Services And Communication In The Public Sector
2003
Government
None
7
FRANCE
” Law N° 2005-102 Of February 11, 2005 For Equal Rights And Opportunities, Participation And Citizenship Of People With Disabilities (French)”
2005
Public Sector
None
8
GERMANY
Act On Equal Opportunities For Persons With Disabilities (Disability Equality Act – BGG) (German
2002
Public Sector, Private Sector
None
9
HONG KONG(HKSAR)
Guidelines On Dissemination Of Information Through Government Websites
1999
Government
WCAG 2.0
10
INDIA
Rights Of Persons With Disabilities Act, 2016 (RPD)
2016
Public Sector, Private Sector
None
11
IRELAND
The Disability Act, 2005
2005
Public Sector
WCAG 2.0
12
ISRAEL
Equal Rights Of Persons With Disabilities Act, As Amended
1998
Public Sector, Private Sector
WCAG 2.0
13
ITALY
Law 9 January 2004, N. 4 “Provisions To Facilitate The Access Of Disabled People To IT Tools” (Stanca Law) (Italian)
2004
Public Sector, Government
WCAG 2.0
14
JAPAN
Basic Act On The Formation Of An Advanced Information And Telecommunications Network Society
2000
Public Sector, Private Sector
None
15
NETHERLANDS
Procurement Act 2012 (Dutch)
2016
Government
WCAG 2.0
16
NORWAY
“Regulations On Universal Design Of Information And Communication Technology (ICT) Solutions (Norwegian)”
2013
Public Sector, Private Sector
WCAG 2.0
17
REPUBLIC OF KOREA
Act On Prohibition Of Discrimination Against Persons With Disabilities And Remedy For Rights, Etc. (Korean)
2008
Public Sector, Private Sector
WCAG 2.0
18
SWEDEN
Discrimination Act (2008:567)
2008
Public Sector, Private Sector
None
19
SWITERZLAND
Federal Law On The Elimination Of Inequalities Affecting People With Disabilities (French)
2002
Public Sector, Private Sector
WCAG 2.0
20
TAIWAN
Website Accessibility Guidelines Version 2.0 (Chinese (Zhōngwén), Chinese, Chinese)
2017
Public Sector
WCAG 2.0
21
UNITED KINGDOM
Equality Act 2010
2010
Public Sector, Private Sector
WCAG 2.0
22
UNITED STATES
Section 508 Of The US Rehabilitation Act Of 1973, As Amended
Accessibility Metrics: How is Web Accessibility Measured?
Though there are different laws that are followed around the world, a majority of them are based on WCAG (Web Content Accessibility Guidelines). W3C (World Wide Web Consortium) developed WCAG and published it for the first time in 1999 in an effort to ensure accessibility on the internet. When it comes to accessibility metrics, web accessibility can be measured using three conformance levels, namely Level A, Level AA, and Level AAA. These 3 WCAG Compliance Levels have numerous success criteria that ensure accessibility to people with various disabilities.
WCAG has developed these compliance levels with 4 primary guiding principles in mind. These 4 aspects are commonly referred to with the acronym POUR.
Perceivable
Operable
Understandable
Robust
The perceivable, operable, and understandable principles are pretty self-explanatory as every user should be able to perceive the content, operate or navigate through it, and understand it as well. Robust is focused on ensuring that they can do all the 3 in various devices to decrease numerous limitations. WCAG was first introduced in 1999 and has been going through constant upgrades by adding success criteria to meet the various accessibility needs. The most recent version of WCAG is WCAG 2.2 which was officially released in October 2023.
The 3 WCAG compliance levels are built around these guiding principles. Each level of compliance is built around the previous level. To put it in simple terms, If you have to attain level AAA compliance, you should satisfy all the success criteria from the AA compliance level. Likewise, if you wish to comply with AA level compliance, you should have satisfied all the success criteria of level A. So level A compliance is the most basic of the 3 available WCAG compliance levels. Since there are also no partial WCAG compliance levels, even if your website doesn’t satisfy one of the required success criteria, it will be termed non-compliant.
Level A Compliance: Minimum Level
Level A is the most basic level of accessibility that every website should aim to comply with. It solves the primal problem of people with disabilities finding your website unusable. Since each compliance level is built around its preceding levels, level A compliance lays the foundation for everything. Now let’s take a look at the 30 success criteria at this level.
If you are very new to accessibility, you may not be able to comprehend everything mentioned in the list. But this level of compliance ensures that people with visual impairments will be able to use screen readers effectively with the help of proper page structure and media alternatives such as alt-text for images, subtitles for videos, and so on. But it definitely doesn’t solve all the problems. So let’s see what level AA compliance has to offer.
Level AA Compliance: Acceptable Level
If level A is the bare basics, then Level AA is the Acceptance level of compliance a website can look to achieve to enhance the user experience for disabled people. In addition to the 32 success criteria that have to be met in level A compliance, an additional 23 success criteria also have to be satisfied. Of the 55 total success criteria at level AA, let’s take a look at the success criteria exclusive to this level in a categorized way.
We can see the additional focus on notable aspects like color contrast levels, well-defined roles and labels in form labels, status messages, and so on.
Level AAA Compliance: Optimal Level
Level AAA is the highest level of accessibility compliance that has an additional 30 success criteria that have to be satisfied. So the grand total of success criteria to be met for this level of compliance is 85 as of writing this blog. It is also the most difficult level of compliance to attain. Though achieving this level of compliance is hard, it has to be done if you are looking to build a specialist site for accessibility. Here is a list of the 30 success criteria that are exclusive to level AAA.
The level of difficulty in each of these success criteria is definitely high. For example, if you have a pre-recorded audio or video on your site, it definitely has to have sign language support. Since live videos are very uncommon on websites, the amount of work needed to achieve this is high. There are also focus areas such as mentioning the expanded form of abbreviations, providing context-sensitive help, and so on.
Which Disabilities Are Supported by WCAG?
Though there are numerous types of disabilities, not all disabilities are covered under the Web Content Accessibility Guidelines. Though there are new guidelines being added over time, as of now WCAG supports visual impairments, auditory disabilities, cognitive disabilities, and motor disabilities. The support is provided due to assistive technologies such as
Screenreaders
Braille Displays
Text-to-speech systems
Magnifiers
Talking Devices
Captioning
ARIA
Out of these assistive technologies, screen readers are the most used and so understanding what ARIA is and how it is used is an integral part of accessibility testing.
What is ARIA?
ARIA expanded as Accessible Rich Internet Applications, is a set of attributes that can be added to the HTML for developing more accessible web content applications. It is a W3C specification that fills in the gaps and makes up for the accessibility voids in regular HTML. It can be used to
Help Screen readers and other assistive technologies perform better by improving the accessibility of interactive web elements.
Enhances the Page Structure by defining helpful landmarks.
Improves keyboard accessibility & interactivity.
Now let’s find out how ARIA improves accessibility by taking a look at the most commonly used ARIA attributes with the help of an example.
The most commonly used aria attributes:-
1. aria-checked.
2. Aria-disabled.
3. aria-expanded.
4. aria-haspopup.
5. Aria-hidden
6. Aria-labelledby
7. Aria-describedby
ARIA Attribute Example: Aria-checked
The aria-checked attribute can be used to denote the current state of checkboxes and radio buttons. So it will be able to indicate whether an element is checked or unchecked by using true and false statements. You can use JavaScript to ensure that the ARIA’s state changes when it is checked or unchecked.
aria-checked=”true” indicates the element is checked.
aria-checked=”false” indicates the element is in an unchecked state.
aria-checked=”mixed” indicates partial check for elements that have tri-states
As the name of all the other commonly used attributes suggests, they can be used to indicate if a list is expanded, if there is a pop-up, and so on.
Ensure your digital platforms are accessible to everyone. Start accessibility testing today to improve compliance and user experience.
Accessibility testing is very much different from the regular types of software testing and might seem daunting to many. As seen in the ‘How Accessibility is Measured’ section, there are 3 different WCAG compliance levels. So we will now be focusing on the various success criteria from the A-level compliance. To make it even easier for you to perform these tests, we have broken down the entire accessibility testing process based on the different web elements and content types we will generally add to a website. Once we have covered all that, we will then explore how to ensure general accessibility.
The page title is one of the most basic properties of a web page that helps us differentiate the numerous webpages that appear in the search results on Google or when multiple webpages are opened in a browser. We will easily be able to see and identify the difference. But if you’re using a screen reader, it will not read out the domain name. And if the Page Titles are similar, it’ll become hard for the user to know the difference. So make sure to test if the titles clearly convey what the webpage is about.
Best Practice:
<html>
<head>
<title>How to do accessibility testing</title>
</head>
</html>
Bad Practice:
<html>
<head>...</head>
	<body>...</body>
</html>
Places to Check:
Browser Tab.
Search Engine results page.
Bookmarks.
Title of other pages within the same website. (Eg. Blog Articles)
Structure check
Now that we have seen how the title can impact a disabled person’s usability, let’s shift to the structure of the webpage. A complicated structure can confuse even a regular end-user. So using a well-planned and clean structure will make it easier for regular users to scan through and read your content while making it accessible for people with cognitive and visual disabilities.
Checklist:
1. Check if the page has a defined header and footer.
2. Validate the main landmark and the complementary landmarks by navigating to specific sections.
3. Test the flow of the Heading structure.
4. If there are numbered lists, bullet lists, or tables, check if they are read properly by the screenreader.
5. Test if the bypass blocks work using a screen reader.
6. Check if the webpage is coded with human-readable language that can be programmatically determined by assistive technologies.
7. Check if the basic structural elements like sections, paragraphs, quotes(blackquotes), etc. have been defined properly.
8. Check for hyperlinks on the page and ensure that the anchor text is descriptive enough to convey the change of context to the user.
Headings
Headings in a webpage are very crucial as it outlines the main content of the page and helps convey which parts are important. So if your webpage has more than 1 Heading 1, doesn’t have any headings, or doesn’t follow a proper hierarchy, it will definitely cause confusion. That is why the heading structure flow is recommended to go from H1 to H6 even though it is not mandatory.
Tables are used to present the data in an organized way and in logical order. The table should have a table header, the table header should be marked up with ‘th’. And the data inside the cells should be marked up with ‘td’. If there are any highly complex tables, check if the scope header and id have been provided.
Good Practice:
<table>
	<tr>
		<th>Types of Disabilities</th>
		<th>Description</th>
</tr>
<tr>
<td>Vision</td>
<td>People who have low vision, complete blindness and partial blindness</td>
</tr>
</table>
Bad Practice:
<table>
	<tr>
<td>Vision</td>
<td>People who have low vision, complete blindness and partial blindness</td>
</tr>
</table>
Checklist:
Verify if all the column or row data are read out along with the respective column or row headers.
Ensure that the number of total rows and columns are properly readout.
Check if the row and column numbers are correctly readout when the focus shifts to them.
Lists
Typing out over-long paragraphs and not using lists in pages can greatly reduce the readability for even regular users. The right usage of lists can make it very easy for people with visual impairments using screen readers or for even people suffering from disabilities like Dyslexia. But if the proper HTML coding isn’t used in the lists, screen readers might just read all the words together like a sentence and confuse the user. Since there are 3 types of lists (Unordered list, Ordered list, and Descriptive list), we have shown what the proper code structure will look like.
Other common components seen in various websites are text boxes, buttons, dropdowns, and so on. Since the user should be able to interact with these web elements, it is important for them to have accessible names and proper ARIA labels for the screen reader to read them properly.
Checklist:
1. Check if proper attributes are used for all required fields as the screen reader should be able to announce to the user that it is a required field.
2. If there are any radio buttons, check if they are grouped together.
3. Check if all elements should receive focus when navigating using the tab key.
4. If there are any errors in an input field, check if the error is mentioned and read out by the screen reader.
5. Check if all the dropdown options have aria attributes like “aria-expanded” and “aria-collapsed”.
6. Verify that the pop-up content has an ARIA attribute as “aria-haspopup”.
7. Check if all buttons have proper ARIA labels that help the user understand their usage.
8. Verify that the aria attributes for alert contents are implemented correctly.
Multimedia Content
Multimedia content such as images, audio, and videos will not be accessible to people with various disabilities. But there are steps developers can take to make them accessible to all by
Adding alt text or long descriptions to images.
Adding Closed Captions, transcripts, and audio descriptions for videos and audios.
Images – Alt text
Alt-text is nothing but the alternative text that explains the purpose or content of images, charts, and flowcharts for the people who will not be able to see them. So when an image is bought to focus, the screen reader will be able to read out the provided alternative text. If it is a very complex visual that requires more than 140 characters, then we could opt to use long descriptions over alt text.
The job doesn’t end by checking if the alt text is present or not, we should ensure that the alt text fulfills its purpose by carrying out the checks from the below checklist.
Checklist
1. Check if the alt text is descriptive enough to convey the intent or info from the image.
2. Be clear when using terms prone to misconception like ‘Apple’. Users might get confused if we are talking about the company named Apple or the fruit named Apple.
3. Make sure the alt text is not used as a holder of keywords for the various SEO needs.
4. Text alternatives are not needed for decorative images as they will not affect the user in understanding the main content of the page. For example, consider a tick mark near the text that says “Checkpoint”. Here it is not mandatory to mention the tick mark.
Videos & Audios
Things get a little more complicated when other multimedia contents such as videos and audio have to be added. We would have to verify if these multimedia contents are supported by closed captions, audio descriptions, or transcripts. Let’s take a look at each of these assistive technologies.
Closed captions & Transcripts
A visually impaired person will be able to understand the context of videos with dialogues or conversations. But what if a person with a hearing disability watches the same video? Though there are auto-generated captions, they are not that reliable. That is why it is important to include closed captions or transcripts for all the videos/audio you add. Though transcripts are not mandatory, they will be effective when used for podcasts, interviews, or conversations. So a person with hearing impairment can read the transcript if they wish to.
Checklist:
1. Check if the closed captions are in sync with the video.
2. Validate if the subtitles have been mapped word-by-word.
3. Make sure the closed captions are visible within the player.
4. If it is a conversational video, make sure the name of the speaker is also mentioned.
5. Check if all the numeric values are mentioned properly.
6. Make sure the closed captions mention important background audio elements such as applause, silence, background score, footsteps, and so on.
Audio Description
But what if the video doesn’t have any or much dialogues or conversations? What if the visuals are a key to understanding the video? Then employing subtitles alone will never be enough. That is where audio descriptions come into play as they will describe all the actions that are happening in the visual and help users understand it clearly.
Checklist
1. Ensure the description makes it possible for visually impaired users to create a clear mental image in their minds.
2. Make sure the audio description covers every action, activity, silence, animation, expression, facial expression, and so on.
3. The paused screen when the audio description is playing should be clearly visible and no text, image, or element should be blurred or misaligned.
4. Check if all the on-screen text is available correctly in the audio description.
5. Validate if all the activities and on-screen elements are in sync with the Audio description.
6. The screen should be paused at the same instance which is being described in the audio description.
Animations, Moving and blinking Contents
Animations, scroll effects, and such dynamic content are being widely used on various websites. As debunked earlier, accessibility guidelines don’t prevent us from doing so. Rather, it just guides us in implementing it in the right and usable way.
Checklist
1. Ensure all animations that are over 5 seconds in length have the provision to play, pause, or stop them.
2. If there are any blinking or flashing contents, ensure that it doesn’t flash more than 3 times in one second as it might affect people prone to seizures.
Color Contrast
A general rule to keep in mind when developing or adding such content is to ensure there is proper color contrast between the background color and foreground elements such as text, buttons, graphs, and so on. Be it a table, image, video, form, or any content type we have seen, a lack of proper color usage can make it hard for even regular users to view the content without any difficulty. So it is needless to say that people with low vision or color blindness will find it impossible to access the content. The preferred color of the background is white and the foreground is black.
Now that we have covered all the aspects of adding different types and categories of content, let’s progress to the usage aspects that you must know when it comes to accessibility testing.
People with visual impairments and motor disabilities will not be able to use a mouse in the same way a regular user can. So using braille keyboards or regular will be the only option they have. The most important key on the keyboard will be the ‘Tab’ key as it will help navigate to all the interactive web elements. You can use the ‘Shift+Tab’ keys combination to move in the backward direction.
Test if all the web elements receive focus when you hit the tab key. Also, check if the focus shifts from that element when the tab key is pressed again.
The element in focus will be highlighted with a gray outline. So, test if it is visible as it will be helpful for people with motor disabilities.
Ensure that the focus order is from left to right or right to left based on the language in use.
For web elements such as drop-down lists, ensure that all the options are read out by the screen reader when navigating using the arrow keys.
If there is any video or a carousel, the user must be able to control (Pause/Play/Volume Control) it using the keyboard actions alone.
Likewise, if there are any auto-play functionalities, check if the playback stops in 3 seconds or provides an option to control the playback.
If an interactive element does not receive the tab focus, then the element should be coded with “tab index=0”.
Ensures keyboard focus is at least partially visible, preventing it from being hidden behind elements like sticky headers.
Ensure focus indicator meets minimum ratio size 3:1
Ensure that alternative single-pointer interactions for drag-and-drop functionalities.
Validate interactive elements should meet a minimum target size of 24×24 CSS pixels.
Input Modalities
To make it easier for the users to access the web page with different input options such as the touchscreen on mobiles, and tablets without using the keyboard. While thinking about checking the web page without keyboard keys, we can use pointer cancellation, pointer gestures, and motion actuation.
Zooming
Since there are various types of visual impairments, people with low vision might be able to access the content on the webpage without the use of a screen reader. So we have to zoom in and view the page at 200 and 400% zoom levels and check for
Text Overlaps
Truncating issues
Other Checks
From all the points we have discussed above, it is obvious that any instructions or key elements that are crucial for understanding and operating the content should not rely only on sensory characteristics. For example, if there is a form to be completed, then the completion of the form shouldn’t be denoted with a bell sound alone as people who have hearing impairments will not be able to access it. Likewise, showing just a visual or color change to denote completion will also not be accessible to all.
If there are any defined time limits, make sure that people with disabilities will be able to use them correctly. So if we take a session expiration as an example.
Check if the user is able to turn off or adjust the time limit before it starts.
The adjusting limit should be at least 10 times more than the default setting.
Make sure there are accessible warning messages before expiration and that there is at least a 20-second time gap for the user to extend the session with a simple action such as typing the space key.
It is important to keep in mind that there are exceptions for expirations such as an online test as the ability to extend the provided time limit would invalidate the existence of a time limit. Likewise, these criteria can be exempted if the time limit is more than 20 hours or if a real-time event such as an auction is being conducted.
Most common Accessibility issues
So what kind of issues can you expect when following the above-mentioned checklist? Here’s a list of the most common accessibility issues that will give you a heads up about the various issues you will encounter when performing accessibility testing. Please note that this is not a comprehensive list and that you have to keep your eyes open for any unexpected accessibility issues that might come your way.
1. Heading level issues
2. Incorrect implementation of list tags
3. Missing alt-text for images
4. Incorrect focus order
5. Missing tab focus for interactive web elements
6. Poor Color Contrast
7. Incorrect reading order
8. Missing ARIA labels
9. State not announced.
10. Improper table implementation
11. Inability to access the contents using keyboard keys
12. Content is not visible at 400 % and 200% zoom levels
13. Screen reader not notifying alert messages
14. Screen reader not reading the dropdown list
15. Lack of expanded and collapsed state implementation
16. Missing closed captions, audio descriptions, or video transcripts for videos
Challenges of Accessibility Testing
There is no task without any challenges and Accessibility Testing also does come with its own share of challenges.
Dynamic Websites
Dynamic websites tend to have 100 or 1000’s changes every minute or every hour. So implementing web accessibility for dynamic content inside such web pages is considered to be very hard due to the presence of third-party content like ads and other such factors.
Large Websites
Though it would be easier to work with static content in comparison, it would still be a mammoth challenge if it has to be implemented for over 1000 pages in retrospect. So the next major challenge in implementing accessibility is the scale of the website as the more the number of pages, the higher the variety of content that will be available.
Limited Automation Scope
The scope for automating web accessibility tests is very low as even if we write scripts to detect the images with or without alt-text, it only solves half the problem. What if the alt-text is present but not descriptive enough or relevant to that image? We would once again need a manual tester to validate it. Lack of conformance verification is what makes scaling web accessibility tests with automation a challenge.
Test Artifacts over the User Experience
The focus of WCAG and its success criteria are primarily on technical artifacts and not on the user’s journey and goals. To put it in simple terms, their guidelines are only focused on the webpage as seen earlier, and not on the user experience. The clear gap between accessibility and the user experience can be bridged if the accessibility testing team focused on the user experience while performing testing. And that is why we ensure to train our accessibility testers to test by keeping the user experience in mind.
Web Accessibility Testing Tools
Since disabled people use various assistive technologies, as a tester you should know how to use those technologies too. That’s just the first step, as you should also use the assistive technology in a way that a real person with disabilities will use it. Putting yourself in their perspective is the key to maximizing the scope of usage. There are dedicated screen readers that come with built-in various devices and platforms. Though there will be various similarities when it comes to the usage of these screen readers, you should know how to use them individually.
Apart from these assistive technologies, we also employ a set of tools to ease the accessibility testing process. While no tool will work without human validation, it is still handy to have such options to speed up the evaluation process. In order to speed things up, even more, we also use various browser extensions and bookmarklets such as,
Wave
Color Contrast Analyzer
arc & axe
Conclusion
So that pretty much sums everything up you will need to know to get started with accessibility testing. We hope you found our guide easier to understand when compared to the other conventional options as we have broken down the checks based on the different web elements as they are more tangible. Make sure to subscribe to our newsletter as we will be posting such highly useful content on a weekly basis. Have any doubts? Ask them in the comments section and we will try our best to answer them.