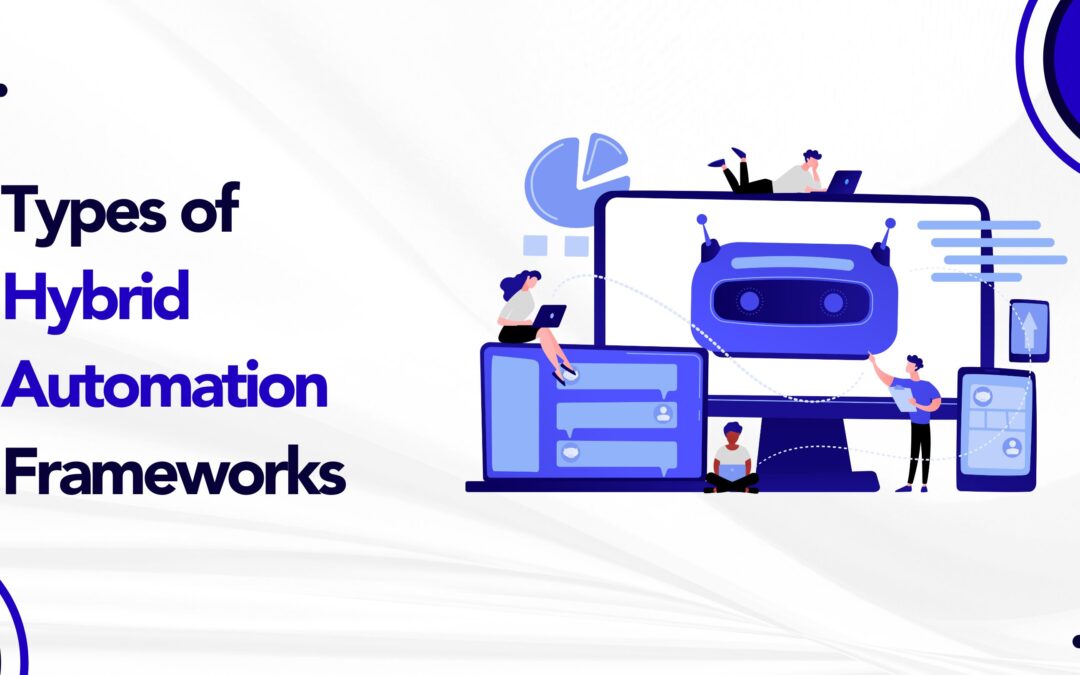
In today’s rapidly evolving software development landscape, delivering high-quality applications quickly has become a top priority for every engineering team. As release cycles grow shorter and user expectations rise, test automation now plays a critical role in ensuring stability and reducing risk. However, many organisations still face a familiar challenge: their test automation setups simply do not keep pace with the increasing complexity of modern applications. As software systems expand across web, mobile, API, microservices, and cloud environments, traditional automation frameworks often fall short. They may work well during the early stages, but over time, they become difficult to scale, maintain, and adapt, especially when different teams use different testing styles, tools, or levels of technical skill. Additionally, as more team members contribute to automation, maintaining consistency becomes increasingly difficult highlighting the need for a more flexible and scalable Hybrid Automation Frameworks that can support diverse testing needs and long-term growth.
Because these demands continue to grow, QA leaders are now searching for more flexible solutions that support multiple testing techniques, integrate seamlessly with CI/CD pipelines, and remain stable even as applications change. Hybrid automation frameworks address these needs by blending the strengths of several framework types. Consequently, teams gain a more adaptable structure that improves collaboration, reduces maintenance, and increases test coverage. In this complete 2025 guide, you’ll explore the different types of hybrid automation frameworks, learn how each one works, understand where they fit best, and see real-world examples of how organisations are benefiting from them. You will also discover implementation steps, tool recommendations, common pitfalls, and best practices to help you choose and build the right hybrid framework for your team.
A Hybrid Automation Framework is a flexible test automation architecture that integrates two or more testing methodologies into a single, unified system. Unlike traditional unilateral frameworks such as purely data-driven, keyword-driven, or modular frameworks, a hybrid approach allows teams to combine the best parts of each method.
As a result, teams can adapt test automation to the project’s requirements, release speed, and team skill set. Hybrid frameworks typically blend:
Modular components for reusability
Data-driven techniques for coverage
Keyword-driven structures for readability
BDD (Behaviour-Driven Development) for collaboration
Page Object Models (POM) for maintainability
This combination creates a system that is easier to scale as applications grow and evolve.
Why Hybrid Frameworks Are Becoming Essential
As modern applications increase in complexity, hybrid automation frameworks are quickly becoming the standard across QA organisations. Here’s why:
Application Complexity Is Increasing Most applications now span multiple technologies: web, mobile, APIs, microservices, third-party integrations, and cloud platforms. A flexible framework is essential to support such diversity.
Teams Are Becoming More Cross-Functional Today’s QA ecosystem includes automation engineers, developers, cloud specialists, product managers, and even business analysts. Therefore, frameworks must support varied skill levels.
Test Suites Are Growing Rapidly As test coverage expands, maintainability becomes a top priority. Hybrid frameworks reduce duplication and centralise logic.
CI/CD Demands Higher Stability Continuous integration requires fast, stable, and reliable test execution. Hybrid frameworks help minimise flaky tests and support parallel runs more effectively.
Types of Hybrid Automation Frameworks
1. Modular + Data-Driven Hybrid Framework
What It Combines
This widely adopted hybrid framework merges:
Modular structure: Logical workflows broken into reusable components
Data-driven approach: External test data controlling inputs and variations
This separation of logic and data makes test suites highly maintainable.
Real-World Example
Consider a banking application where the login must be tested with 500 credential sets:
Create one reusable login module
Store all credentials in an external data file (CSV, Excel, JSON, DB)
Execute the same module repeatedly with different inputs
Recommended Tools
Selenium + TestNG + Apache POI
Playwright + JSON/YAML
Pytest + Pandas
Best For
Medium-complexity applications
Projects with frequently changing test data
Teams with existing modular scripts want better coverage
2. Keyword-Driven + Data-Driven Hybrid Framework
Why Teams Choose This Approach
This hybrid is especially useful when both technical and non-technical members need to contribute to automation. Test cases are written in a keyword format that resembles natural language.
Example Structure
S. No
Keyword
Element
Value
1
OpenURL
–
https://example.com
2
InputText
usernameField
user123
3
InputText
passwordField
pass456
4
ClickButton
loginButton
–
5
VerifyElement
dashboard
–
The data-driven layer then allows multiple datasets to run through the same keyword-based flow.
This full hybrid framework combines all major approaches:
Modular components
Keyword-driven readability
Data-driven execution
How It Works
Test engine reads keywords from Excel/JSON
Keywords map to modular functions
Functions use external test data
Framework executes tests and aggregates reports
This structure maximises reusability and simplifies updates.
Popular Tools
Selenium + TestNG + Custom Keyword Engine
Cypress + JSON mapping + page model
Perfect For
Large enterprise applications
Distributed teams
Highly complex business workflows
4. Hybrid Automation Framework with BDD Integration
Why BDD Matters
BDD strengthens collaboration between developers, testers, and business teams by using human-readable Gherkin syntax.
Gherkin Example
Feature: User login

  Scenario: Successful login

    Given I am on the login page

    When I enter username "testuser" and password "pass123"

    Then I should see the dashboard
Step Definition Example
@When("I enter username {string} and password {string}")
public void enterCredentials(String username, String password) {
    loginPage.enterUsername(username);
    loginPage.enterPassword(password);
    loginPage.clickLogin();
}
Ideal For
Agile organizations
Projects with evolving requirements
Teams that want living documentation
Comparison Table: Which Hybrid Approach Should You Choose?
Sno
Framework Type
Team Size
Complexity
Learning Curve
Maintenance
1
Modular + Data-Driven
Small–Medium
Medium
Moderate
Low
2
Keyword + Data-Driven
Medium–Large
Low–Medium
Low
Medium
3
Full Hybrid
Large
High
High
Low
4
BDD Hybrid
Any
Medium–High
Medium
Low–Medium
How to Implement a Hybrid Automation Framework Successfully
Step 1: Assess Your Requirements
Before building anything, answer:
How many team members will contribute to automation?
How often does your application change?
What’s your current CI/CD setup?
What skill levels are available internally?
What’s your biggest pain point: speed, stability, or coverage?
A clear assessment prevents over-engineering.
Step 2: Build a Solid Foundation
Here’s how to choose the right starting point:
Choose Modular + Data-Driven if your team is technical and workflows are stable
Choose Keyword-Driven Hybrid if manual testers or business analysts contribute
Choose Full Hybrid if your application has highly complex logic
Choose BDD Hybrid when communication and requirement clarity are crucial
Step 3: Select Tools Strategically
Web Apps
Selenium WebDriver
Playwright
Cypress
Mobile Apps
Appium + POM
API Testing
RestAssured
Playwright API
Cross-Browser Cloud Execution
BrowserStack
LambdaTest
Common Pitfalls to Avoid
Even the most well-designed hybrid automation framework can fail if certain foundational elements are overlooked. Below are the five major pitfalls teams encounter most often, along with practical solutions to prevent them.
1. Over-Engineering the Framework
Why It Happens
Attempting to support every feature from day one
Adding tools or plugins without clear use cases
Too many architectural layers that complicate debugging
Impact
Longer onboarding time
Hard-to-maintain codebase
Slower delivery cycles
Solution: Start Simple and Scale Gradually
Focus only on essential components such as modular structure, reusable functions, and basic reporting. Add advanced features like keyword engines or AI-based healing only when they solve real problems.
2. Inconsistent Naming Conventions
Why It Happens
No established naming guidelines
Contributors using personal styles
Scripts merged from multiple projects
Impact
Duplicate methods or classes
Confusing directory structures
Slow debugging and maintenance
Solution: Define Clear Naming Standards
Create conventions for page objects, functions, locators, test files, and datasets. Document these rules and enforce them through code reviews to ensure long-term consistency.
3. Weak or Outdated Documentation
Why It Happens
Rapid development without documentation updates
No designated documentation owner
Teams relying on tribal knowledge
Impact
Slow onboarding
Inconsistent test implementation
High dependency on senior engineers
Solution: Maintain Living Documentation
Use a shared wiki or markdown repository, and update it regularly. Include:
Code examples
Naming standards
Folder structures
Reusable function libraries
You can also use tools that auto-generate documentation from comments or annotations.
4. Poor Test Data Management
Why It Happens
Test data hardcoded inside scripts
No centralised structure for datasets
Missing version control for test data
Impact
Frequent failures due to stale or incorrect data
Duplicate datasets across folders
Difficulty testing multiple environments
Solution: Centralise and Version-Control All Data
Organise test data by:
Environment (dev, QA, staging)
Module (login, checkout, API tests)
Format (CSV, JSON, Excel)
Use a single repository for all datasets and ensure each file is version-controlled.
5. Not Designing for Parallel and CI/CD Execution
Why It Happens
Hard-coded values inside scripts
WebDriver or API clients are not thread-safe
No configuration separation by environment or browser
Impact
Flaky tests in CI/CD
Slow pipelines
Inconsistent results
Solution: Make the Framework CI/CD and Parallel-Ready
Use thread-safe driver factories
Avoid global variables
Parameterise environment settings
Prepare command-line execution options
Test parallel execution early
This ensures your hybrid framework scales as your testing needs grow.
Hybrid automation frameworks will continue to evolve as a core component of enterprise testing strategies.
Conclusion
Choosing the right hybrid automation framework is not about selecting the most advanced option; it’s about finding the approach that aligns best with your team’s skills, your application’s complexity, and your long-term goals. Modular + data-driven frameworks provide technical strength, keyword-driven approaches encourage collaboration, full hybrids maximise scalability, and BDD hybrids bridge communication gaps. When implemented correctly, a hybrid automation framework reduces maintenance, improves efficiency, and supports faster, more reliable releases. If you’re ready to modernise your automation strategy for 2025, the right hybrid framework can transform how your team delivers quality.
Frequently Asked Questions
What is a hybrid automation framework?
It is a testing architecture that combines multiple methodologies such as modular, data-driven, keyword-driven, and BDD to create a flexible and scalable automation system.
Why should teams use hybrid automation frameworks?
They reduce maintenance effort, support collaboration, improve test coverage, and adapt easily to application changes.
Which hybrid framework is best for beginners?
A Modular + Data-Driven hybrid is easiest to start with because it separates logic and data clearly.
Can hybrid frameworks integrate with CI/CD?
Yes. They work efficiently with Jenkins, GitHub Actions, Azure DevOps, and other DevOps tools.
Do hybrid frameworks support mobile and API testing?
Absolutely. They support web, mobile, API, microservices, and cloud test automation.
Is BDD part of a hybrid framework?
Yes. BDD can be integrated with modular and data-driven components to form a powerful hybrid model.
Discuss your challenges, evaluate tools, and get guidance on building the right hybrid framework for your team.
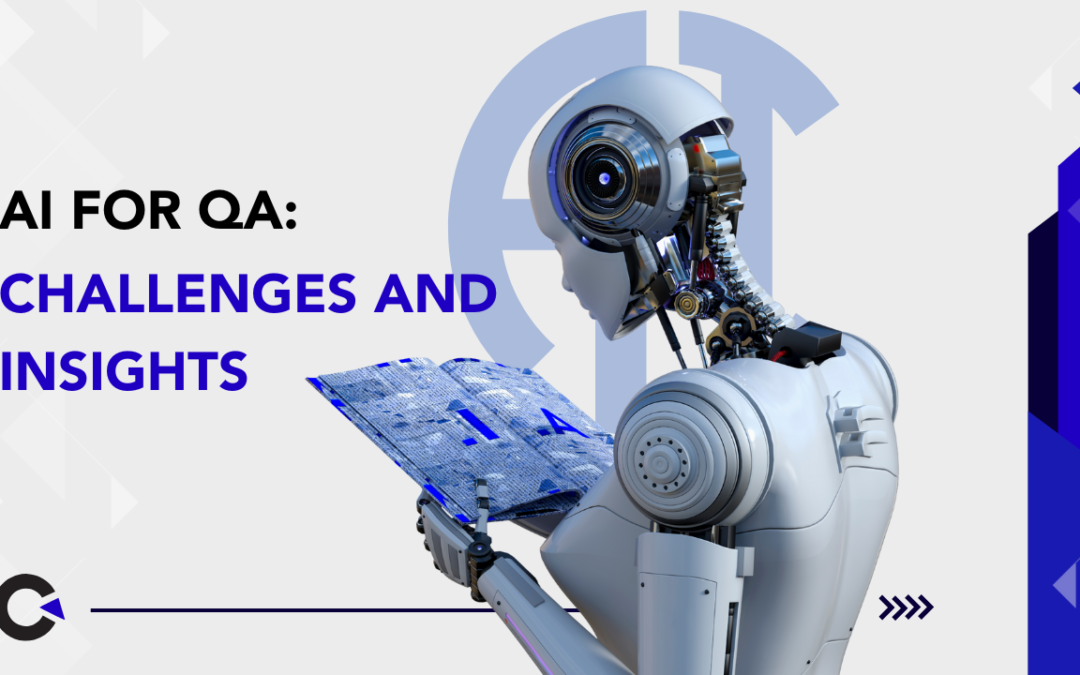
Software development has entered a remarkable new phase, one driven by speed, intelligence, and automation. Agile and DevOps have already transformed how teams build and deliver products, but today, AI for QA is redefining how we test them. In the past, QA relied heavily on human testers and static automation frameworks. Testers manually created and executed test cases, analyzed logs, and documented results, an approach that worked well when applications were simpler. However, as software ecosystems have expanded into multi-platform environments with frequent releases, this traditional QA model has struggled to keep pace. The pressure to deliver faster while maintaining top-tier quality has never been higher. This is where AI-powered QA steps in as a transformative force. AI doesn’t just automate tests; it adds intelligence to the process. It can learn from historical data, adapt to interface changes, and even predict failures before they occur. It shifts QA from being reactive to proactive, helping teams focus their time and energy on strategic quality improvements rather than repetitive tasks.
Still, implementing AI for QA comes with its own set of challenges. Data scarcity, integration complexity, and trust issues often stand in the way. To understand both the promise and pitfalls, we’ll explore how AI truly impacts QA from data readiness to real-world applications.
Unlike traditional automation tools that rely solely on predefined instructions, AI for QA introduces a new dimension of adaptability and learning. Instead of hard-coded test scripts that fail when elements move or names change, AI-powered testing learns and evolves. This adaptability allows QA teams to move beyond rigid regression cycles and toward intelligent, data-driven validation.
AI tools can quickly identify risky areas in your codebase by analyzing patterns from past defects, user logs, and deployment histories. They can even suggest which tests to prioritize based on user behavior, release frequency, or application usage. With AI, QA becomes less about covering every possible test and more about focusing on the most impactful ones.
Key Advantages of AI for QA
Learn from data: analysis test results, bug trends, and performance metrics to identify weak spots.
Predict risks: anticipate modules that are most likely to fail.
Generate tests automatically: derive new test cases from requirements or user stories using NLP.
Adapt dynamically: self-heal broken scripts when UI elements change.
Process massive datasets: evaluate logs, screenshots, and telemetry data far faster than humans.
Example: Imagine you’re testing an enterprise-level e-commerce application. There are thousands of user flows, from product browsing to checkout, across different browsers, devices, and regions. AI-driven testing analyzes actual user traffic to identify the most-used pathways, then automatically prioritizes testing those. This not only reduces redundant tests but also improves coverage of critical features.
Result: Faster testing cycles, higher accuracy, and a more customer-centric testing focus.
Challenge 1: The Data Dilemma: The Fuel Behind AI
Every AI model’s success depends on one thing: data quality. Unfortunately, most QA teams lack the structured, clean, and labeled data required for effective AI learning.
The Problem
Lack of historical data: Many QA teams haven’t centralized or stored years of test results and bug logs.
Inconsistent labeling: Defect severity and priority labels differ across teams (e.g., “Critical” vs. “High Priority”), confusing AI.
Privacy and compliance concerns: Sensitive industries like finance or healthcare restrict the use of certain data types for AI training.
Unbalanced datasets: Test results often include too many “pass” entries but very few “fail” samples, limiting AI learning.
Example: A fintech startup trained an AI model to predict test case failure rates based on historical bug data. However, the dataset contained duplicates and incomplete entries. The result? The model made inaccurate predictions, leading to misplaced testing efforts.
Insight: The saying “garbage in, garbage out” couldn’t be truer in AI. Quality, not quantity, determines performance. A small but consistent and well-labeled dataset will outperform a massive but chaotic one.
How to Mitigate
Standardize bug reports — create uniform templates for severity, priority, and environment.
Leverage synthetic data generation — simulate realistic data for AI model training.
Anonymize sensitive data — apply hashing or masking to comply with regulations.
Create feedback loops — continuously feed new test results into your AI models for retraining.
Challenge 2: Model Training, Drift, and Trust
AI in QA is not a one-time investment—it’s a continuous process. Once deployed, models must evolve alongside your application. Otherwise, they become stale, producing inaccurate results or excessive false positives.
The Problem
Model drift over time: As your software changes, the AI model may lose relevance and accuracy.
Black box behavior: AI decisions are often opaque, leaving testers unsure of the reasoning behind predictions.
Overfitting or underfitting: Poorly tuned models may perform well in test environments but fail in real-world scenarios.
Loss of confidence: Repeated false positives or unexplained behavior reduce tester trust in the tool.
Example: An AI-driven visual testing tool flagged multiple valid UI screens as “defects” after a redesign because its model hadn’t been retrained. The QA team spent hours triaging non-issues instead of focusing on actual bugs.
Insight: Transparency fosters trust. When testers understand how an AI model operates, its limits, strengths, and confidence levels, they can make informed decisions instead of blindly accepting results.
How to Mitigate
Version and retrain models regularly, especially after UI or API changes.
Combine rule-based logic with AI for more predictable outcomes.
Monitor key metrics such as precision, recall, and false alarm rates.
Keep humans in the loop — final validation should always involve human review.
Challenge 3: Integration with Existing QA Ecosystems
Even the best AI tool fails if it doesn’t integrate well with your existing ecosystem. Successful adoption of AI in QA depends on how smoothly it connects with CI/CD pipelines, test management tools, and issue trackers.
The Problem
Legacy tools without APIs: Many QA systems can’t share data directly with AI-driven platforms.
Siloed operations: AI solutions often store insights separately, causing data fragmentation.
Complex DevOps alignment: AI workflows may not fit seamlessly into existing CI/CD processes.
Scalability concerns: AI tools may work well on small datasets but struggle with enterprise-level testing.
Example: A retail software team deployed an AI-based defect predictor but had to manually export data between Jenkins and Jira. The duplication of effort created inefficiency and reduced visibility across teams.
Insight: AI must work with your ecosystem, not around it. If it complicates workflows instead of enhancing them, it’s not ready for production.
How to Mitigate
Opt for AI tools offering open APIs and native integrations.
Run pilot projects before scaling.
Collaborate with DevOps teams for seamless CI/CD inclusion.
Ensure data synchronization between all QA tools.
Challenge 4: The Human Factor – Skills and Mindset
Adopting AI in QA is not just a technical challenge; it’s a cultural one. Teams must shift from traditional testing mindsets to collaborative human-AI interaction.
The Problem
Fear of job loss: Testers may worry that AI will automate their roles.
Lack of AI knowledge: Many QA engineers lack experience with data analysis, machine learning, or prompt engineering.
Resistance to change: Human bias and comfort with manual testing can slow adoption.
Low confidence in AI outputs: Inconsistent or unexplainable results erode trust.
Example: A QA team introduced a ChatGPT-based test case generator. While the results were impressive, testers distrusted the tool’s logic and stopped using it, not because it was inaccurate, but because they weren’t confident in its reasoning.
Insight: AI in QA demands a mindset shift from “execution” to “training.” Testers become supervisors, refining AI’s decisions, validating outputs, and continuously improving accuracy.
How to Mitigate
Host AI literacy workshops for QA professionals.
Encourage experimentation in controlled environments.
Pair experienced testers with AI specialists for knowledge sharing.
Create a feedback culture where humans and AI learn from each other.
Challenge 5: Ethics, Bias, and Transparency
AI systems, if unchecked, can reinforce bias and make unethical decisions even in QA. When testing applications involving user data or behavior analytics, fairness and transparency are critical.
The Problem
Inherited bias: AI can unknowingly amplify bias from its training data.
Opaque decision-making: Test results may be influenced by hidden model logic.
Compliance risks: Using production or user data may violate data protection laws.
Unclear accountability: Without documentation, it’s difficult to trace AI-driven decisions.
Example: A recruitment software company used AI to validate its candidate scoring model. Unfortunately, both the product AI and QA AI were trained on biased historical data, resulting in skewed outcomes.
Insight: Bias doesn’t disappear just because you add AI; it can amplify if ignored. Ethical QA teams must ensure transparency in how AI models are trained, tested, and deployed.
How to Mitigate
Implement Explainable AI (XAI) frameworks.
Conduct bias audits periodically.
Ensure compliance with data privacy laws like GDPR and HIPAA.
Document training sources and logic to maintain accountability.
Start small, scale smart. Begin with a single use case, like defect prediction or test case generation, before expanding organization-wide.
Prioritize data readiness. Clean, structured data accelerates ROI.
Combine human + machine intelligence. Empower testers to guide and audit AI outputs.
Track measurable metrics. Evaluate time saved, test coverage, and bug detection efficiency.
Invest in upskilling. AI literacy will soon be a mandatory QA skill.
Foster transparency. Document AI decisions and communicate model limitations.
The Road Ahead: Human + Machine Collaboration
The future of QA will be built on human-AI collaboration. Testers won’t disappear; they’ll evolve into orchestrators of intelligent systems. While AI excels at pattern recognition and speed, humans bring empathy, context, and creativity elements essential for meaningful quality assurance.
Within a few years, AI-driven testing will be the norm, featuring models that self-learn, self-heal, and even self-report. These tools will run continuously, offering real-time risk assessment while humans focus on innovation and user satisfaction.
“AI won’t replace testers. But testers who use AI will replace those who don’t.”
Conclusion
As we advance further into the era of intelligent automation, one truth stands firm: AI for QA is not merely an option; it’s an evolution. It is reshaping how companies define quality, efficiency, and innovation. While old QA paradigms focused solely on defect detection, AI empowers proactive quality assurance, identifying potential issues before they affect end users. However, success with AI requires more than tools. It requires a mindset that views AI as a partner rather than a threat. QA engineers must transition from task executors to AI trainers, curating clean data, designing learning loops, and interpreting analytics to drive better software quality.
The true potential of AI for QA lies in its ability to grow smarter with time. As products evolve, so do models, continuously refining their predictions and improving test efficiency. Yet, human oversight remains irreplaceable, ensuring fairness, ethics, and user empathy. The future of QA will blend the strengths of humans and machines: insight and intuition paired with automation and accuracy. Organizations that embrace this symbiosis will lead the next generation of software reliability. Moreover, AI’s influence won’t stop at QA. It will ripple across development, operations, and customer experience, creating interconnected ecosystems of intelligent automation. So, take the first step. Clean your data, empower your team, and experiment boldly. Every iteration brings you closer to smarter, faster, and more reliable testing.
Frequently Asked Questions
What is AI for QA?
AI for QA refers to the use of artificial intelligence and machine learning to automate, optimize, and improve software testing processes. It helps teams predict defects, prioritize tests, self-heal automation, and accelerate release cycles.
Can AI fully replace manual testing?
No. AI enhances testing but cannot fully replace human judgment. Exploratory testing, usability validation, ethical evaluations, and contextual decision‑making still require human expertise.
What types of tests can AI automate?
AI can automate functional tests, regression tests, visual UI validation, API testing, test data creation, and risk-based test prioritization. It can also help generate test cases from requirements using NLP.
What skills do QA teams need to work with AI?
QA teams should understand basic data concepts, model behavior, prompt engineering, and how AI integrates with CI/CD pipelines. Upskilling in analytics and automation frameworks is highly recommended.
What are the biggest challenges in adopting AI for QA?
Key challenges include poor data quality, model drift, integration issues, skills gaps, ethical concerns, and lack of transparency in AI decisions.
Which industries benefit most from AI in QA?
Industries with large-scale applications or strict reliability needs such as fintech, healthcare, e-commerce, SaaS, and telecommunications benefit significantly from AI‑driven testing.
Unlock the full potential of AI-driven testing and accelerate your QA maturity with expert guidance tailored to your workflows.
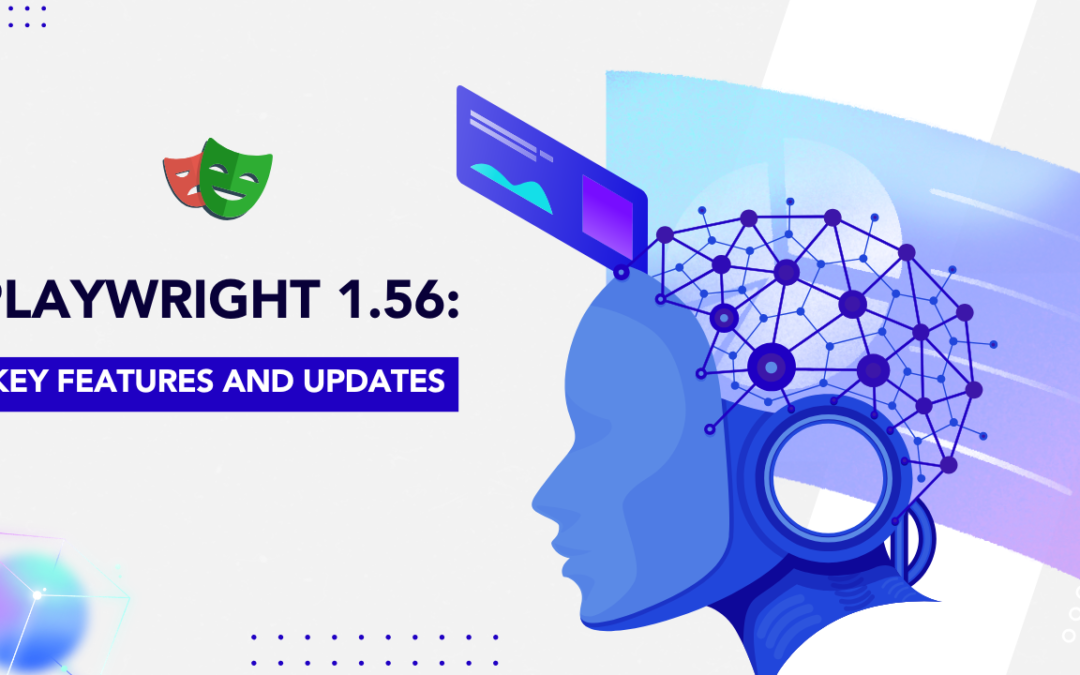
The automation landscape is shifting rapidly. Teams no longer want tools that simply execute tests; they want solutions that think, adapt, and evolve alongside their applications. That’s exactly what Playwright 1.56 delivers. Playwright, Microsoft’s open-source end-to-end testing framework, has long been praised for its reliability, browser coverage, and developer-friendly design. But with version 1.56, it’s moving into a new dimension, one powered by artificial intelligence and autonomous test maintenance. The latest release isn’t just an incremental upgrade; it’s a bold step toward AI-assisted testing. By introducing Playwright Agents, enhancing debugging APIs, and refining its CLI tools, Playwright 1.56 offers testers, QA engineers, and developers a platform that’s more intuitive, resilient, and efficient than ever before.
Let’s dive deeper into what makes Playwright 1.56 such a breakthrough release and why it’s a must-have for any modern testing team.
In today’s fast-paced CI/CD pipelines, test stability and speed are crucial. Teams are expected to deploy updates multiple times a day, but flaky tests, outdated selectors, and time-consuming maintenance can slow releases dramatically.
That’s where Playwright 1.56 changes the game. Its built-in AI agents automate the planning, generation, and healing of tests, allowing teams to focus on innovation instead of firefighting broken test cases.
Less manual work
Fewer flaky tests
Smarter automation that adapts to your app
By combining AI intelligence with Playwright’s already robust capabilities, version 1.56 empowers QA teams to achieve more in less time with greater confidence in every test run.
Introducing Playwright Agents: AI That Tests with You
At the heart of Playwright 1.56 lies the Playwright Agents, a trio of AI-powered assistants designed to streamline your automation workflow from start to finish. These agents, the Planner, Generator, and Healer, work in harmony to deliver a truly intelligent testing experience.
Planner Agent – Your Smart Test Architect
The Planner Agent is where it all begins. It automatically explores your application and generates a structured, Markdown-based test plan.
This isn’t just a script generator; it’s a logical thinker that maps your app’s navigation, identifies key actions, and documents them in human-readable form.
Scans pages, buttons, forms, and workflows
Generates a detailed, structured test plan
Acts as a blueprint for automated test creation
Example Output:
# Checkout Flow Test Plan
Navigate to /cart
Verify cart items
Click “Proceed to Checkout”
Enter delivery details
Complete payment
Validate order confirmation message
This gives you full visibility into what’s being tested in plain English before a single line of code is written.
Generator Agent – From Plan to Playwright Code
Next comes the Generator Agent, which converts the Planner’s Markdown test plan into runnable Playwright test files.
Reads Markdown test plans
Generates Playwright test code with correct locators and actions
Produces fully executable test scripts
In other words, it eliminates repetitive manual coding and enforces consistent standards across your test suite.
Example Use Case:
You can generate a test that logs into your web app and verifies user access in just seconds, no need to manually locate selectors or write commands.
Healer Agent – The Auto-Fixer for Broken Tests
Even the best automation scripts break, buttons get renamed, elements move, or workflows change. The Healer Agent automatically identifies and repairs these issues, ensuring that your tests remain stable and up-to-date.
Detects failing tests and root causes
Updates locators, selectors, or steps
Reduces manual maintenance dramatically
Example Scenario:
If a “Submit” button becomes “Confirm,” the Healer Agent detects the UI change and fixes the test automatically, keeping your CI pipelines green.
This self-healing behavior saves countless engineering hours and boosts trust in your test suite’s reliability.
How Playwright Agents Work Together
The three agents work in a loop using the Playwright Model Context Protocol (MCP).
This creates a continuous, AI-driven cycle where your tests adapt dynamically, much like a living system that grows with your product.
Getting Started: Initializing Playwright Agents
Getting started with these AI assistants is easy. Depending on your environment, you can initialize the agents using a single CLI command.
npx playwright init-agents --loop=vscode
Other environments:
npx playwright init-agents --loop=claude
npx playwright init-agents --loop=opencode
These commands automatically create configuration files:
This setup allows developers to plug into AI-assisted testing seamlessly, whether they’re using VS Code, Claude, or OpenCode.
New APIs That Empower Debugging and Monitoring
Debugging has long been one of the most time-consuming aspects of test automation. Playwright 1.56 makes it easier with new APIs that offer deeper visibility into browser behavior and app performance.
S. No
API Method
What It Does
1
page.consoleMessages()
Captures browser console logs
2
page.pageErrors()
Lists JavaScript runtime errors
3
page.requests()
Returns all network requests
These additions give QA engineers powerful insights without needing to leave their test environment, bridging the gap between frontend and backend debugging.
The CLI in Playwright 1.56 is more flexible and efficient than ever before.
New CLI Flags:
--test-list: Run only specific tests listed in a file
--test-list-invert: Exclude tests listed in a file
This saves time when you only need to run a subset of tests, perfect for large enterprise suites or quick CI runs.
Enhanced UI Mode and HTML Reporting
Playwright’s new UI mode isn’t just prettier, it’s more practical.
Key Enhancements:
Unified test and describe blocks in reports
“Update snapshots” option added directly in UI
Single-worker debugging for isolating flaky tests
Removed “Copy prompt” button for cleaner HTML output
With these updates, debugging and reviewing reports feel more natural and focused.
Breaking and Compatibility Changes
Every major upgrade comes with changes, and Playwright 1.56 is no exception:
browserContext.on('backgroundpage') → Deprecated
browserContext.backgroundPages() → Now returns empty list
If your project relies on background pages, update your tests accordingly to ensure compatibility.
Other Enhancements and Fixes
Beyond the major AI and API updates, Playwright 1.56 also includes important performance and compatibility improvements:
Improved CORS handling for better cross-origin test reliability
ARIA snapshots now render input placeholders
Introduced PLAYWRIGHT_TEST environment variable for worker processes
Dependency conflict resolution for projects with multiple Playwright versions
Bug fixes, improving integration with VS Code, and test execution stability
These refinements ensure your testing experience remains smooth and predictable, even in large-scale, multi-framework environments.
Playwright 1.56 vs. Competitors: Why It Stands Out
Sno
Feature
Playwright 1.56
Cypress
Selenium
1
AI Agents
Yes (Planner, Generator, Healer)
No
No
2
Self-Healing Tests
Yes
No
No
3
Network Inspection
Yes page.requests() API
Partial
Manual setup
4
Cross-Browser Testing
Yes (Chromium, Firefox, WebKit)
Yes (Electron, Chrome)
Yes
5
Parallel Execution
Yes Native
Yes
Yes
6
Test Isolation
Yes
Limited
Moderate
7
Maintenance Effort
Very Low
High
High
Verdict:
Playwright 1.56 offers the smartest balance between speed, intelligence, and reliability, making it the most future-ready framework for teams aiming for true continuous testing.
Pro Tips for Getting the Most Out of Playwright 1.56
Start with AI Agents Early – Let the Planner and Generator create your foundational suite before manual edits.
Use page.requests() for API validation – Monitor backend traffic without external tools.
Leverage the Healer Agent – Enable auto-healing for dynamic applications that change frequently.
Run isolated tests in single-worker mode – Ideal for debugging flaky behavior.
Integrate with CI/CD tools – Playwright works great with GitHub Actions, Jenkins, and Azure DevOps.
Benefits Overview: Why Upgrade
Sno
Benefit
Impact
1
AI-assisted testing
3x faster test authoring
2
Auto-healing
60% less maintenance time
3
Smarter debugging
Rapid issue triage
4
CI-ready commands
Seamless pipeline integration
5
Multi-platform support
Works across VS Code, Docker, Conda, Maven
Conclusion
Playwright 1.56 is not just another update; it’s a reimagination of test automation. With its AI-driven Playwright Agents, enhanced APIs, and modernized tooling, it empowers QA and DevOps teams to move faster and smarter. By automating planning, code generation, and healing, Playwright has taken a bold leap toward autonomous testing where machines don’t just execute tests but understand and evolve with your application.
Frequently Asked Questions
How does Playwright 1.56 use AI differently from other frameworks?
Unlike other tools that rely on static locators, Playwright 1.56 uses AI-driven agents to understand your app’s structure and behavior allowing it to plan, generate, and heal tests automatically.
Can Playwright 1.56 help reduce flaky tests?
Absolutely. With auto-healing via the Healer Agent and single-worker debugging mode, Playwright 1.56 drastically cuts down on flaky test failures.
Does Playwright 1.56 support visual or accessibility testing?
Yes. ARIA snapshot improvements and cross-browser capabilities make accessibility and visual regression testing easier.
What environments support Playwright 1.56?
It’s compatible with npm, Docker, Maven, Conda, and integrates seamlessly with CI/CD tools like Jenkins and GitHub Actions.
Can I use Playwright 1.56 with my existing test suite?
Yes. You can upgrade incrementally start by installing version 1.56, then gradually enable agents and new APIs.
Take your end-to-end testing to the next level with Playwright. Build faster, test smarter, and deliver flawless web experiences across browsers and devices.
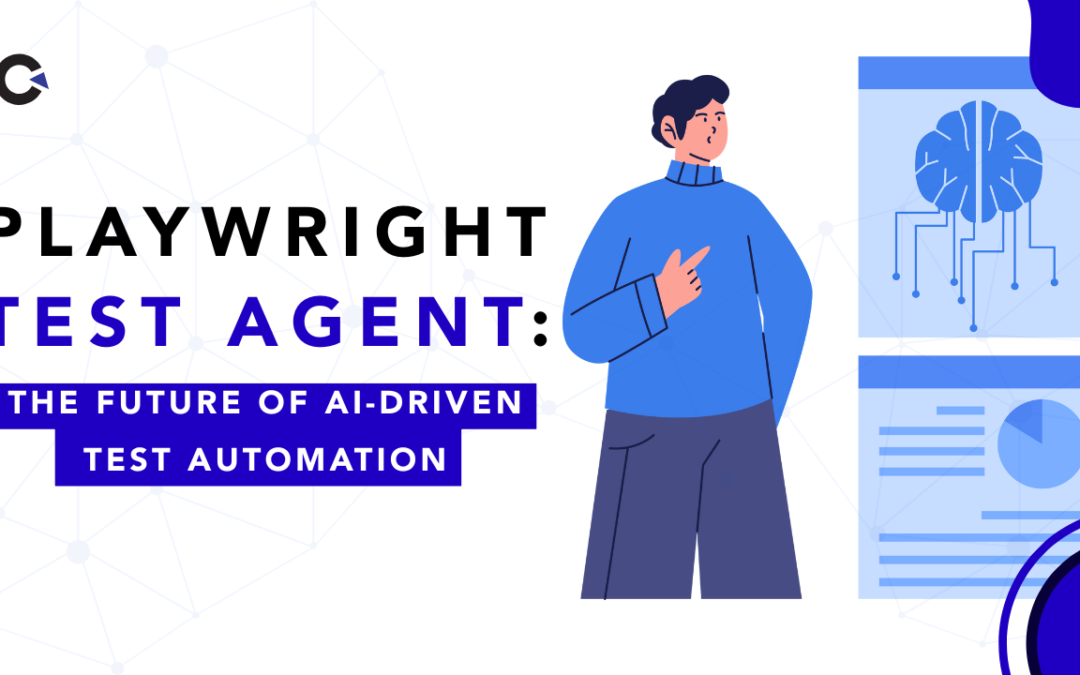
The test automation landscape is changing faster than ever. With AI now integrated into major testing frameworks, software teams can automate test discovery, generation, and maintenance in ways once unimaginable. Enter Playwright Test Agents, Microsoft’s groundbreaking addition to the Playwright ecosystem. These AI-powered agents bring automation intelligence to your quality assurance process, allowing your test suite to explore, write, and even fix itself. In traditional test automation, QA engineers spend hours writing test scripts, maintaining broken locators, and documenting user flows. But with Playwright Test Agents, much of this heavy lifting is handled by AI. The agents can:
Explore your application automatically
Generate test cases and Playwright scripts
Heal failing or flaky tests intelligently
In other words, Playwright Test Agents act as AI assistants for your test suite, transforming the way teams approach software testing.
Playwright Test Agents are specialized AI components designed to assist at every stage of the test lifecycle, from discovery to maintenance.
Here’s an overview of the three agents and their unique roles:
Sno
Agent
Role
Description
1
Planner
Test Discovery
Explores your web application, identifies user flows, and produces a detailed test plan (Markdown format).
2
Generator
Test Creation
Converts Markdown plans into executable Playwright test scripts using JavaScript or TypeScript.
3
Healer
Test Maintenance
Detects broken or flaky tests and automatically repairs them during execution.
Together, they bring AI-assisted automation directly into your Playwright workflow—reducing manual effort, expanding test coverage, and keeping your test suite healthy and up to date.
1. The Planner Agent, Exploring and Documenting User Flows
The Planner Agent acts like an intelligent QA engineer exploring your web app for the first time.
Launches your application
Interacts with the UI elements
Identifies navigational paths and form actions
Generates a structured Markdown test plan
Example Output
# Login Page Test Plan

  1.Navigate to the login page
  2.Verify the presence of username and password fields
  3.Enter valid credentials and submit
  4.Validate successful navigation to the dashboard
  5.Test with invalid credentials and verify the error message
This auto-generated document serves as living documentation for your test scope, ideal for collaboration between QA and development teams before automation even begins.
2. The Generator Agent, Converting Plans into Playwright Tests
Once your Planner has produced a test plan, the Generator Agent takes over.
It reads the plan and automatically writes executable Playwright test code following Playwright’s best practices.
This ensures your automation suite remains stable, resilient, and self-healing, even as the app evolves.
How Playwright Test Agents Work Together
The three agents form a continuous AI-assisted testing cycle:
Planner explores and documents what to test
Generator creates the actual Playwright tests
Healer maintains and updates them over time
This continuous testing loop ensures that your automation suite evolves alongside your product, reducing manual rework and improving long-term reliability.
Getting Started with Playwright Test Agents
Playwright Test Agents are part of the Model Context Protocol (MCP) experimental feature by Microsoft.
You can use them locally via VS Code or any MCP-compatible IDE.
Step-by-Step Setup Guide
Step 1: Install or Update Playwright
npm init playwright@latest
This installs the latest Playwright framework and initializes your test environment.
Step 2: Initialize Playwright Agents
npx playwright init-agents --loop=vscode
This command configures the agent loop—a local MCP connection that allows Planner, Generator, and Healer agents to work together.
You’ll find the generated .md file under the .github folder.
Step 3: Use the Chat Interface in VS Code
Open the MCP Chat interface in VS Code (similar to ChatGPT) and start interacting with the agents using natural language prompts.
Sample Prompts for Each Agent
Planner Agent Prompt
Goal: Explore the web app and generate a manual test plan.
Generator Agent Prompt
Goal: Convert test plan sections into Playwright tests.
Use the Playwright Generator agent to create Playwright automation code for:
### 1. Navigation and Menu Testing
Generate a Playwright test in TypeScript and save it in tests/Menu.spec.ts.
Healer Agent Prompt
Goal: Auto-fix failing or flaky tests.
Run the Playwright Healer agent on the test suite in /tests.
Identify failing tests, fix selectors/timeouts, and regenerate updated test files.
These natural-language prompts demonstrate how easily AI can be integrated into your development workflow.
Example: From Exploration to Execution
Let’s say you’re testing a new e-commerce platform that includes product listings, a shopping cart, and a payment gateway.
Run the Planner Agent – It automatically explores your web application, navigating through product pages, the cart, and the checkout process. As it moves through each flow, it documents every critical user action from adding items to the cart to completing a purchase and produces a clear, Markdown-based test plan.
Run the Generator Agent – Using the Planner’s output, this agent instantly converts those user journeys into ready-to-run Playwright test scripts. Within minutes, you have automated tests for product search, cart operations, and payment validation, with no manual scripting required.
Run the Healer Agent – Weeks later, your developers push a UI update that changes button selectors and layout structure. Instead of causing widespread test failures, the Healer Agent detects these changes, automatically updates the locators, and revalidates the affected tests.
The Result:
You now have a continuously reliable, AI-assisted testing pipeline that evolves alongside your product. With minimal human intervention, your test coverage stays current, your automation remains stable, and your QA team can focus on optimizing performance and user experience, not chasing broken locators.
Benefits of Using Playwright Test Agents
Benefit
Description
Faster Test Creation
Save hours of manual scripting.
Automatic Test Discovery
Identify user flows without human input.
Self-Healing Tests
Maintain test stability even when UI changes.
Readable Documentation
Auto-generated Markdown test plans improve visibility.
AI-Assisted QA
Integrates machine learning into your testing lifecycle.
Best Practices for Using Playwright Test Agents
Review AI-generated tests before merging to ensure correctness and value.
Store Markdown test plans in version control for auditing.
Use semantic locators like getByRole or getByText for better healing accuracy.
Combine agents with Playwright Test Reports for enhanced visibility.
Run agents periodically to rediscover new flows or maintain old ones.
The Future of Playwright Test Agents
The evolution of Playwright Test Agents is only just beginning. Built on Microsoft’s Model Context Protocol (MCP), these AI-driven tools are setting the stage for a new era of autonomous testing where test suites not only execute but also learn, adapt, and optimize themselves over time.
In the near future, we can expect several exciting advancements:
Custom Agent Configurations – Teams will be able to fine-tune agents for specific domains, apps, or compliance needs, allowing greater control over test generation and maintenance logic.
Enterprise AI Model Integrations – Organizations may integrate their own private or fine-tuned LLMs to ensure data security, domain-specific intelligence, and alignment with internal QA policies.
API and Mobile Automation Support – Playwright Agents are expected to extend beyond web applications to mobile and backend API testing, creating a unified AI-driven testing ecosystem.
Advanced Self-Healing Analytics – Future versions could include dashboards that track healing frequency, failure causes, and predictive maintenance patterns, turning reactive fixes into proactive stability insights.
These innovations signal a shift from traditional automation to autonomous quality engineering, where AI doesn’t just write or fix your tests, it continuously improves them. Playwright Test Agents are paving the way for a future where intelligent automation becomes a core part of every software delivery pipeline, enabling faster releases, greater reliability, and truly self-sustaining QA systems.
Conclusion
The rise of Playwright Test Agents marks a defining moment in the evolution of software testing. For years, automation engineers have dreamed of a future where test suites could understand applications, adapt to UI changes, and maintain themselves. That future has arrived, and it’s powered by AI.
With the Planner, Generator, and Healer Agents, Playwright has transformed testing from a reactive task into a proactive, intelligent process. Instead of writing thousands of lines of code, testers now collaborate with AI that can:
Map user journeys automatically
Translate them into executable scripts
Continuously fix and evolve those scripts as the application changes
Playwright Test Agents don’t replace human testers; they amplify them. By automating repetitive maintenance tasks, these AI-powered assistants free QA professionals to focus on strategy, risk analysis, and innovation. Acting as true AI co-engineers, Playwright’s Planner, Generator, and Healer Agents bring intelligence and reliability to modern testing, aligning perfectly with the pace of DevOps and continuous delivery. Adopting them isn’t just a technical upgrade; it’s a way to future-proof your quality process, enabling teams to test smarter, deliver faster, and set new standards for intelligent, continuous quality.
In modern software development, test automation is not just a luxury. It’s a vital component for enhancing efficiency, reusability, and maintainability. However, as any experienced test automation engineer knows, simply writing scripts is not enough. To build a truly scalable and effective automation framework, you must design it smartly. This is where test automation design patterns come into play. These are not abstract theories; they are proven, repeatable solutions to the common problems we face daily. This guide, built directly from core principles, will explore the most commonly used test automation design patterns in Java. We will break down what they are, why they are critical for your success, and how they help you build robust, professional frameworks that stand the test of time and make your job easier. By the end, you will have the blueprint to transform your automation efforts from a collection of scripts into a powerful engineering asset.
Why Use Design Patterns in Automation? A Deeper Look
Before we dive into specific patterns, let’s solidify why they are a non-negotiable part of a professional automation engineer’s toolkit. The document highlights four key benefits, and each one directly addresses a major pain point in our field.
Improving Code Reusability: How many times have you copied and pasted a login sequence, a data setup block, or a set of verification steps? This leads to code duplication, where a single change requires updates in multiple places. Design patterns encourage you to write reusable components (like a login method in a Page Object), so you define a piece of logic once and use it everywhere. This is the DRY (Don’t Repeat Yourself) principle in action, and it’s a cornerstone of efficient coding.
Enhancing Maintainability: This is perhaps the biggest win. A well-designed framework is easy to maintain. When a developer changes an element’s ID or a user flow is updated, you want to fix it in one place, not fifty. Patterns like the Page Object Model create a clear separation between your test logic and the application’s UI details. Consequently, maintenance becomes a quick, targeted task instead of a frustrating, time-consuming hunt.
Reducing Code Duplication: This is a direct result of improved reusability. By centralizing common actions and objects, you drastically cut down on the amount of code you write. Less code means fewer places for bugs to hide, a smaller codebase to understand, and a faster onboarding process for new team members.
Making Tests Scalable and Easy to Manage: A small project can survive messy code. A large project with thousands of tests cannot. Design patterns provide the structure needed to scale. They allow you to organize your framework logically, making it easy to find, update, and add new tests without bringing the whole system down. This structured approach is what separates a fragile script collection from a resilient automation framework.
1. Page Object Model (POM): The Structural Foundation
The Page Object Model is a structural pattern and the most fundamental pattern for any UI test automation engineer. It provides the essential structure for keeping your framework organized and maintainable.
What is it?
As outlined in the source, the Page Object Model is a pattern where each web page (or major screen) of your application is represented as a Java class. Within this class, the UI elements are defined as variables (locators), and the user actions on those elements are represented as methods. This creates a clean API for your page, hiding the implementation details from your tests.
Benefits:
Separation of Test Code and UI Locators: Your tests should read like a business process, not a technical document. POM makes this possible by moving all findElement calls and locator definitions out of the test logic and into the page class.
Easy Maintenance and Updates: If the login button’s ID changes, you only update it in the LoginPage.java class. All tests that use this page are instantly protected. This is the single biggest argument for POM.
Enhances Readability: A test that reads loginPage.login(“user”, “pass”) is infinitely more understandable to anyone on the team than a series of sendKeys and click commands.
Structure of POM:
The structure is straightforward and logical:
Each page (or screen) of your application is represented by a class. For example: LoginPage.java, DashboardPage.java, SettingsPage.java.
Each class contains:
Locators: Variables that identify the UI elements, typically using @FindBy or driver.findElement().
Methods/Actions: Functions that perform operations on those locators, like login(), clickSave(), or getDashboardTitle().
2. Factory Design Pattern: Creating Objects with Flexibility
The Factory Design Pattern is a creational pattern that provides a smart way to create objects. For a test automation engineer, this is the perfect solution for managing different browser types and enabling seamless cross-browser testing.
What is it?
The Factory pattern provides an interface for creating objects but allows subclasses to alter the type of objects that will be created. In simpler terms, you create a special “Factory” class whose job is to create other objects (like WebDriver instances). Your test code then asks the factory for an object, passing in a parameter (like “chrome” or “firefox”) to specify which one it needs.
Supporting cross-browser testing by reading the browser type from a config file or a command-line argument.
Structure of Factory Design Pattern:
The pattern consists of four key components that work together:
Product (Interface / Abstract Class): Defines a common interface that all concrete products must implement. In our case, the WebDriver interface is the Product.
Concrete Product: Implements the Product interface; these are the actual objects created by the factory. ChromeDriver, FirefoxDriver, and EdgeDriver are our Concrete Products.
Factory (Creator): Contains a method that returns an object of type Product. It decides which ConcreteProduct to instantiate. This is our DriverFactory class.
Client: The test class or main program that calls the factory method instead of creating objects directly with new.
Example:
// DriverFactory.java

import org.openqa.selenium.WebDriver;
import org.openqa.selenium.chrome.ChromeDriver;
import org.openqa.selenium.firefox.FirefoxDriver;

public class DriverFactory {

  public static WebDriver getDriver(String browser) {
    if (browser.equalsIgnoreCase("chrome")) {
      return new ChromeDriver();
    } else if (browser.equalsIgnoreCase("firefox")) {
      return new FirefoxDriver();
    } else {
      throw new RuntimeException("Unsupported browser");
    }
  }
}
3. Singleton Design Pattern: One Instance to Rule Them All
The Singleton pattern is a creational pattern that ensures a class has only one instance and provides a global point of access to it. For test automation engineers, this is the ideal pattern for managing shared resources like a WebDriver session.
What is it?
It’s implemented by making the class’s constructor private, which prevents anyone from creating an instance using the new keyword. The class then creates its own single, private, static instance and provides a public, static method (like getInstance()) that returns this single instance.
Use in Automation:
This pattern is perfect for WebDriver initialization to avoid multiple driver instances, which would consume excessive memory and resources.
Structure of Singleton Pattern:
The implementation relies on four key components:
Singleton Class: The class that restricts object creation (e.g., DriverManager).
Private Constructor: Prevents direct object creation using new.
Private Static Instance: Holds the single instance of the class.
Public Static Method (getInstance): Provides global access to the instance; it creates the instance if it doesn’t already exist.
Example:
// DriverManager.java

import org.openqa.selenium.WebDriver;
import org.openqa.selenium.chrome.ChromeDriver;

public class DriverManager {

  private static WebDriver driver;

  private DriverManager() { }

  public static WebDriver getDriver() {
    if (driver == null) {
      driver = new ChromeDriver();
    }
    return driver;
  }

  public static void quitDriver() {
    if (driver != null) {
      driver.quit();
      driver = null;
    }
  }
}
4. Data-Driven Design Pattern: Separating Logic from Data
The Data-Driven pattern is a powerful approach that enables running the same test case with multiple sets of data. It is essential for achieving comprehensive test coverage without duplicating your test code.
What is it?
This pattern enables you to run the same test with multiple sets of data using external sources like Excel, CSV, JSON, or databases. The test logic remains in the test script, while the data lives externally. A utility reads the data and supplies it to the test, which then runs once for each data set.
Benefits:
Test Reusability: Write the test once, run it with hundreds of data variations.
Easy to Extend with More Data: Need to add more test cases? Just add more rows to your Excel file. No code changes are needed.
Structure of Data-Driven Design Pattern:
This pattern involves several components working together to flow data from an external source into your test execution:
Test Script / Test Class: Contains the test logic (steps, assertions, etc.), using parameters for data.
Data Source: The external file or database containing test data (e.g., Excel, CSV, JSON).
Data Provider / Reader Utility: A class (e.g., ExcelUtils.java) that reads the data from the external source and supplies it to the tests.
Data Loader / Provider Annotation: In TestNG, the @DataProvider annotation supplies data to test methods dynamically.
Framework / Test Runner: Integrates the test logic with data and executes iterations (e.g., TestNG, JUnit).
Example with TestNG:
@DataProvider(name = "loginData")
public Object[][] getData() {
  return new Object[][] {
    {"user1", "pass1"},
    {"user2", "pass2"}
  };
}

@Test(dataProvider = "loginData")
public void loginTest(String user, String pass) {
  new LoginPage(driver).login(user, pass);
}
The Fluent Design Pattern is an elegant way to improve the readability and flow of your code. It helps create method chaining for a more fluid and intuitive workflow.
What is it?
In a fluent design, each method in a class performs an action and then returns the instance of the class itself (return this;). This allows you to chain multiple method calls together in a single, flowing statement. This pattern is often used on top of the Page Object Model to make tests even more readable.
Structure of Fluent Design Pattern:
The pattern is built on three simple components:
Class (Fluent Class): The class (e.g., LoginPage.java) that contains the chainable methods.
Methods: Perform actions and return the same class instance (e.g., enterUsername(), enterPassword()).
Client Code: The test class, which calls methods in a chained, fluent manner (e.g., loginPage.enterUsername().enterPassword().clickLogin()).
Example:
public class LoginPage {

  public LoginPage enterUsername(String username) {
    this.username.sendKeys(username);
    return this;
  }

  public LoginPage enterPassword(String password) {
    this.password.sendKeys(password);
    return this;
  }

  public HomePage clickLogin() {
    loginButton.click();
    return new HomePage(driver);
  }
}

// Usage
loginPage.enterUsername("admin").enterPassword("admin123").clickLogin();
The Strategy pattern is a behavioral pattern that defines a family of algorithms and allows them to be interchangeable. This is incredibly useful when you have multiple ways to perform a specific action.
What is it?
Instead of having a complex if-else or switch block to decide on an action, you define a common interface (the “Strategy”). Each possible action is a separate class that implements this interface (a “Concrete Strategy”). Your main code then uses the interface, and you can “inject” whichever concrete strategy you need at runtime.
Use Case:
Switching between different logging mechanisms (file, console, database).
Strategy (Interface): Defines a common interface for all supported algorithms (e.g., PaymentStrategy).
Concrete Strategies: Implement different versions of the algorithm (e.g., CreditCardPayment, UpiPayment).
Context (Executor Class): Uses a Strategy reference to call the algorithm. It doesn’t know which concrete class it’s using (e.g., PaymentContext).
Client (Test Class): Chooses the desired strategy and passes it to the context.
Example:
public interface PaymentStrategy {
  void pay();
}

public class CreditCardPayment implements PaymentStrategy {
  public void pay() {
    System.out.println("Paid using Credit Card");
  }
}

public class UpiPayment implements PaymentStrategy {
  public void pay() {
    System.out.println("Paid using UPI");
  }
}

public class PaymentContext {

  private PaymentStrategy strategy;

  public PaymentContext(PaymentStrategy strategy) {
    this.strategy = strategy;
  }

  public void executePayment() {
    strategy.pay();
  }
}
Conclusion
Using test automation design patterns is a definitive step toward writing clean, scalable, and maintainable automation frameworks. They are the distilled wisdom of countless engineers who have faced the same challenges you do. Whether you are building frameworks with Selenium, Appium, or Rest Assured, these patterns provide the structural integrity to streamline your work and enhance your productivity. By adopting them, you are not just writing code; you are engineering a quality solution.
Frequently Asked Questions
Why are test automation design patterns essential for a stable framework?
Test automation design patterns are essential because they provide proven solutions to common problems that lead to unstable and unmanageable code. They are the blueprint for building a framework that is:
Maintainable: Changes in the application's UI require updates in only one place, not hundreds.
Scalable: The framework can grow with your application and test suite without becoming a tangled mess.
Reusable: You can write a piece of logic once (like a login function) and use it across your entire suite, following the DRY (Don't Repeat Yourself) principle.
Readable: Tests become easier to understand for anyone on the team, improving collaboration and onboarding.
Which test automation design pattern should I learn first?
You should start with the Page Object Model (POM). It is the foundational structural pattern for any UI automation. POM introduces the critical concept of separating your test logic from your page interactions, which is the first step toward creating a maintainable framework. Once you are comfortable with POM, the next patterns to learn are the Factory (for cross-browser testing) and the Singleton (for managing your driver session).
Can I use these design patterns with tools like Cypress or Playwright?
Yes, absolutely. These are fundamental software design principles, not Selenium-specific features. While tools like Cypress and Playwright have modern APIs that may make some patterns feel different, the underlying principles remain crucial. The Page Object Model is just as important in Cypress to keep your tests clean, and the Factory pattern can be used to manage different browser configurations or test environments in any tool.
How do design patterns specifically help reduce flaky tests?
Test automation design patterns combat flakiness by addressing its root causes. For example:
The Page Object Model centralizes locators, preventing "stale element" or "no such element" errors caused by missed updates after a UI change.
The Singleton pattern ensures a single, stable browser session, preventing issues that arise from multiple, conflicting driver instances.
The Fluent pattern encourages a more predictable and sequential flow of actions, which can reduce timing-related issues.
Is it overkill to use all these design patterns in a small project?
It can be. The key is to use the right pattern for the problem you're trying to solve. For any non-trivial UI project, the Page Object Model is non-negotiable. Beyond that, introduce patterns as you need them. Need to run tests on multiple browsers? Add a Factory. Need to run the same test with lots of data? Implement a Data-Driven approach. Start with POM and let your framework's needs guide your implementation of other patterns.
What is the main difference between the Page Object Model and the Fluent design pattern?
They solve different problems and are often used together. The Page Object Model (POM) is about structure—it separates the what (your test logic) from the how (the UI locators and interactions). The Fluent design pattern is about API design—it makes the methods in your Page Object chainable to create more readable and intuitive test code. A Fluent Page Object is simply a Page Object that has been designed with a fluent interface for better readability.
Ready to transform your automation framework? Let's discuss how to apply these design patterns to your specific project and challenges.
Appium 3 is finally here and while it may not be a revolutionary leap like the upgrade from Appium 1 to 2, it introduces significant refinements that every QA engineer, automation tester, and mobile developer should understand. This release brings substantial improvements for mobile app testing, making it more efficient, secure, and compatible with modern testing frameworks. The update focuses on modernization, cleaner architecture, and stronger W3C compliance, ensuring that Appium remains the go-to framework for cross-platform mobile automation in 2025 and beyond. In today’s rapidly evolving test automation ecosystem, frameworks must keep pace with modern Node.js environments, updated web standards, and tighter security expectations. Appium 3 accomplishes all three goals with precision. It streamlines deprecated behaviors, removes old endpoints, and enhances both stability and developer experience. In short, it’s a major maintenance release that makes your automation setup leaner, faster, and more future-proof.
In this blog, we’ll dive into everything new in Appium 3, including:
Key highlights and breaking changes
Updated Node.js requirements
Deprecated endpoints and W3C compliance
New feature flag rules
The newly built-in Appium Inspector plugin
Migration steps from Appium 2
Why upgrading matters for your QA team
Let’s unpack each update in detail and explore why Appium 3 is an essential step forward for mobile test automation.
Appium 3 introduces a leaner core by removing outdated and redundant code paths. The framework now runs on Express 5, the latest version of the Node.js web framework, which supports async/await, improved middleware handling, and better performance overall.
This shift not only reduces startup time but also improves request handling efficiency, particularly in large-scale CI/CD pipelines.
Why it matters:
Reduced server overhead during startup
Cleaner request lifecycle management
Smoother parallel execution in CI systems
2. Updated Node.js and npm Requirements
Appium 3 enforces modern Node.js standards by increasing the minimum supported versions:
Node.js: v20.19.0 or higher
npm: v10 or higher
Older environments will no longer launch Appium 3. This change ensures compatibility with new JavaScript language features and secure dependency management.
Action Step:
Before installing, make sure your environment is ready:
By aligning Appium with current Node.js versions, the ecosystem becomes more predictable, minimizing dependency conflicts and setup errors.
3. Removal of Deprecated Endpoints (Goodbye JSONWP)
Appium 3 fully drops the JSON Wire Protocol (JSONWP) that was partially supported in previous versions. All communication between clients and servers now follows W3C WebDriver standards exclusively.
Key changes:
Legacy JSONWP endpoints have been completely removed.
Certain endpoints are now driver-specific (e.g., UiAutomator2, XCUITest).
The rest are consolidated under new /appium/ endpoint paths.
Action Step:
If you’re using client libraries (Java, Python, JavaScript, etc.), verify that they’re updated to the latest version supporting W3C-only mode.
Pro Tip: Use your test logs to identify deprecated endpoints before upgrading. Fixing them early will save debugging time later.
4. Feature Flag Prefix is Now Mandatory
In Appium 2, testers could enable insecure features globally using simple flags like:
F
appium --allow-insecure=adb_shell
However, this global approach is no longer supported. In Appium 3, you must specify a driver prefix for each flag:
# For specific drivers
appium --allow-insecure=uiautomator2:adb_shell

# For all drivers (wildcard)
appium --allow-insecure=*:adb_shell
Why it matters:
This helps ensure secure configurations in multi-driver or shared testing environments.
5. Session Discovery Now Requires a Feature Flag
In earlier versions, testers could retrieve session details using:
GET /sessions
Appium 3 replaces this with:
GET /appium/sessions
This endpoint is now protected by a feature flag and requires explicit permission:
appium --allow-insecure=*:session_discovery
Additionally, the response includes a newly created field that shows the session’s creation timestamp, a useful addition for debugging and audit trails.
Pro Tip: Ensure your Appium Inspector is version 2025.3.1+ to support this endpoint.
6. Built-In Appium Inspector Plugin
The most user-friendly enhancement in Appium 3 is the built-in Inspector plugin. You can now host Appium Inspector directly from your Appium server without needing a separate desktop app.
Setup is simple:
appium plugin install inspector
Then, launch the Appium server and access the Inspector directly via your browser.
Benefits:
Simplifies setup across teams
Reduces dependency on local environments
Makes remote debugging easier
For QA teams working in distributed setups or CI environments, this built-in feature is a game-changer.
7. Sensitive Data Masking for Security
Security takes a big leap forward in Appium 3. When sending sensitive data such as passwords or API keys, clients can now use the HTTP header:
X-appium-Is-Sensitive: true
Why it matters:
This simple header greatly enhances security and is especially useful when logs are shared or stored in cloud CI tools.
8. Removal of Unzip Logic from Core
Appium 3 removes its internal unzip logic used for handling file uploads like .apk or .ipa. That functionality now lives within the respective drivers, reducing duplication and improving maintainability.
Action Step:
appium driver update
This ensures all drivers are upgraded to handle uploads correctly.
Appium 2 vs Appium 3
S. No
Feature/Aspect
Appium 2
Appium 3
1
Node.js Support
Supported Node.js 14, 16, 18.
Requires Node.js 18 or higher. Node.js 16 is end-of-life (EOL).
2
Architecture
Driver-based architecture, where drivers (e.g., XCUITest, Espresso) are installed separately via the CLI.
Builds on the same driver-based architecture but updates core dependencies.
3
Underlying HTTP Library
Used a legacy version of the appium-base-driver with an older HTTP stack.
Upgraded to use @appium/base-driver version 9.x+, which uses a modern Express.js framework and body-parser.
4
Default Port
Default server port was 4723.
Default server port remains 4723.
5
CLI Commands
Uses appium driver and appium plugin commands for extensibility.
Continues to use the same CLI system. Commands are unchanged.
6
Primary Goal
To modularize Appium and move away from the monolithic “all-in-one” structure of Appium 1.
To modernize the core, update dependencies, drop support for EOL technologies (like Node.js 16), and improve stability.
7
Migration Effort
A significant shift from Appium 1.x, requiring new installation and driver management.
Minimal from Appium 2.x. For most users, updating the Appium package and ensuring Node.js >=18 is the main step.
Step 6: Update Client Libraries
Ensure Java, Python, and JS bindings are compatible with W3C-only mode.
Step 7: Implement Sensitive Data Masking
X-appium-Is-Sensitive: true
Step 8: Validate Setup
Run smoke tests on both Android and iOS devices to ensure full compatibility. Validate CI/CD and device farm integrations.
Why Upgrading to Appium 3 Matters
Upgrading isn’t just about staying current; it’s about future-proofing your automation infrastructure.
Key Benefits:
Performance: A leaner core delivers faster server startup and stable execution.
Security: Sensitive data is masked automatically in logs.
Compliance: Full W3C alignment ensures consistent test behavior across drivers.
Simplified Maintenance: The Inspector plugin and modular file handling streamline setup.
Scalability: With Express 5 and Node.js 20+, Appium 3 scales better in cloud or CI environments.
In short, Appium 3 is designed for modern QA teams aiming to stay compliant, efficient, and secure.
Appium 3 in Action
Consider a large QA team managing 100+ mobile devices across Android and iOS. Previously, each tester had to install the Appium Inspector separately, manage local setups, and handle inconsistent configurations. With Appium 3’s Inspector plugin, the entire team can now access a web-hosted Inspector instance running on the Appium server.
This not only saves time but ensures that all testers work with identical configurations. Combined with sensitive data masking, it also strengthens security during CI/CD runs on shared infrastructure.
Conclusion
Appium 3 might not look revolutionary on the surface, but it represents a major step toward a more stable, compliant, and secure testing framework. By cleaning up legacy code, enforcing W3C-only standards, and introducing the Inspector plugin, Appium continues to be the preferred tool for modern mobile automation.If you’re still on Appium 2, now’s the perfect time to upgrade. Follow the migration checklist, verify your flags and endpoints, and start enjoying smoother test execution and better performance.
Frequently Asked Questions
Is Appium 3 backward-compatible with Appium 2 scripts?
Mostly yes, but deprecated JSONWP endpoints and unscoped feature flags must be updated.
Do I need to reinstall all drivers?
Yes, run appium driver update after installation to ensure compatibility
What if I don’t prefix the feature flags?
Appium 3 will throw an error and refuse to start. Always include the driver prefix.
Can I keep using Appium 2 for now?
Yes, but note that future drivers and plugins will focus on Appium 3.
Where can I find official documentation?
Check the Appium 3 Release Notes and Appium Migration Guide.